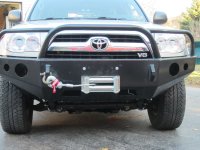
Shrockworks installation on 2007 4th Generation 4Runner with pictures

wanderingandrew

New member
All,

I recently received a Shrockworks bumper and installed it. Due to the lack of detailed installation pictures I decided to take several and post my detailed notes from the installation, they will be posted in this thread. Hopefully this helps someone in the future.

I made lots of mistakes during this install... including:
-initially didn't remove rubber flaps that go from the headlights down to the bumper mounts
-initially didn't remove center bumper cover mounts
-initially tightened down shrockworks brackets on frame. Should be loose to allow for adjustment when maneuvering bumper into place
-didn't remove metal bumper cover supports in center and under headlights

Notes:
-Winch chosen was a Warn VR10000
-this installation was done while keeping in mind a possible return to stock status.
-Warn supplied 1 1/2" long bolts to use with the fairlead if mounting in a bumper like this. they were too short. I got 2" grade 8 bolts from Lowe's, they were slightly too long. Ended up using three flat washers and a lock washer on each side, this fixed the problem. Also used Scotch tape on the nuts in the winch to hold them in place while mouning the winch to the bumper.
-Had to install the hood release extension bracket even though it was listed "for 2006 models only". I think this may be for 2006 through 2009.
 
Last edited:
Register to hide this ad
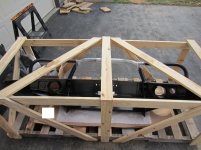
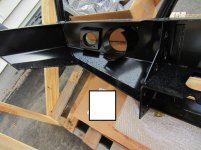
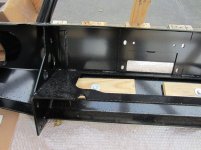
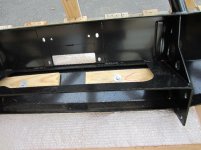
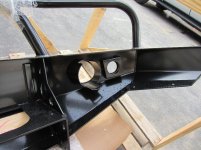
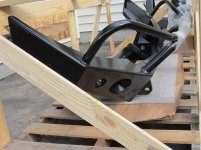
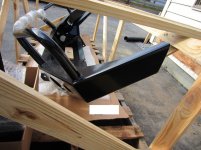
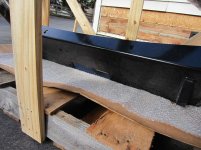
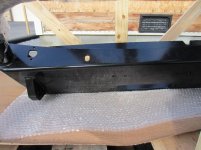
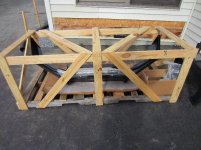
Bumper still bolted to pallet, everything else removed from the crate. This should give a good idea of how the bumper is built.

Note you also get the following:
-bag of hardware
-winch solenoid bracket (big L bracket)
-Hood release helper (looks like a U), packed with:
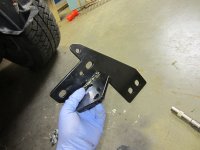
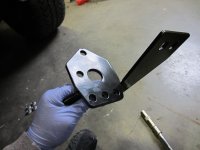
-A/C line elevation bracket (about 3/4" by 1.5", three holes)
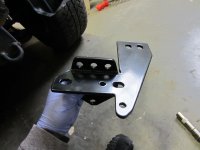
-left and right frame mount brackets
-left and right bottom shields (covers washer bottle,etc)
-replacement turn signals that mount into the small holes. I did not install them as my 2007 has turn signals integrated into the headlight assembly. (Edit: These are Hella units that use GE 2357NA bulbs. I think that the lights are 2BA 008 947-00)
 

Attachments

  • shrockworks_install001.jpg
    shrockworks_install001.jpg
    128.7 KB · Views: 1,934
  • shrockworks_install002.jpg
    shrockworks_install002.jpg
    116.5 KB · Views: 1,980
  • shrockworks_install003.jpg
    shrockworks_install003.jpg
    114.8 KB · Views: 1,930
  • shrockworks_install004.jpg
    shrockworks_install004.jpg
    114.3 KB · Views: 1,907
  • shrockworks_install005.jpg
    shrockworks_install005.jpg
    121.5 KB · Views: 1,915
  • shrockworks_install006.jpg
    shrockworks_install006.jpg
    121.6 KB · Views: 1,963
  • shrockworks_install007.jpg
    shrockworks_install007.jpg
    113.2 KB · Views: 1,950
  • shrockworks_install008.jpg
    shrockworks_install008.jpg
    114.7 KB · Views: 1,933
Last edited:
Two more of the bumper in the crate.
 

Attachments

  • shrockworks_install009.jpg
    shrockworks_install009.jpg
    131.5 KB · Views: 1,864
  • shrockworks_install010.jpg
    shrockworks_install010.jpg
    109.9 KB · Views: 1,844
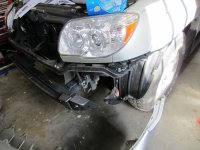
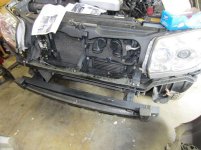
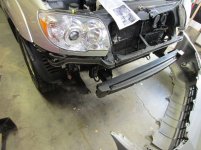
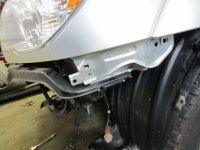
After removing front bumper cover.
 

Attachments

  • shrockworks_install011.jpg
    shrockworks_install011.jpg
    121.6 KB · Views: 2,026
  • shrockworks_install013.jpg
    shrockworks_install013.jpg
    117.4 KB · Views: 1,985
  • shrockworks_install014.jpg
    shrockworks_install014.jpg
    114.7 KB · Views: 1,962
Location of 2x14mm nuts each side to remove bumper and styrofoam. Note these may be rusted and you may have to penetrate w/ WD-40 or equivalent.

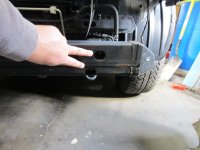
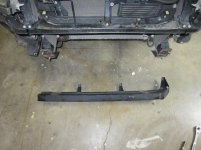
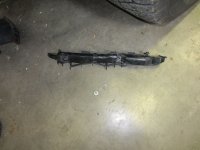
Front bumper beam after removal.

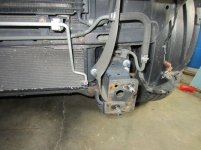
Driver's side bumper beam bracket to remove with 4x14mm nuts.

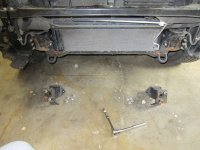
After removing bumper beam brackets.
 

Attachments

  • shrockworks_install015.jpg
    shrockworks_install015.jpg
    102.8 KB · Views: 1,898
  • shrockworks_install017.jpg
    shrockworks_install017.jpg
    87.2 KB · Views: 1,886
  • shrockworks_install018.jpg
    shrockworks_install018.jpg
    108.3 KB · Views: 1,830
  • shrockworks_install021.jpg
    shrockworks_install021.jpg
    128.5 KB · Views: 1,887
After removing black plastic brackets from leading edge of front fenders. 2x10mm each side.
 

Attachments

  • shrockworks_install026.jpg
    shrockworks_install026.jpg
    97.7 KB · Views: 1,868
  • shrockworks_install027.jpg
    shrockworks_install027.jpg
    96 KB · Views: 1,814
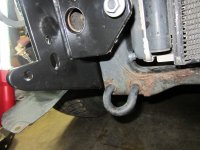
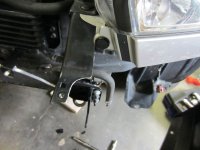
Driver's side bumper to frame bracket. Passenger similar.
 

Attachments

  • shrockworks_install035.jpg
    shrockworks_install035.jpg
    100.7 KB · Views: 1,843
  • shrockworks_install036.jpg
    shrockworks_install036.jpg
    84.5 KB · Views: 1,830
  • shrockworks_install037.jpg
    shrockworks_install037.jpg
    85.5 KB · Views: 1,811
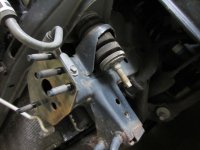
Close up of where you will be installing two bolts for side of Shrockworks brackets (driver/left side)

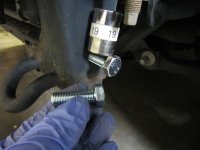
M12 bolt started in the driver/left side bottom side hole. 19mm required. you will likely have rust in these threads, use caution.

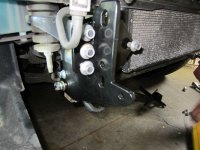
Passenger/right side bracket loosely installed. 4x14mm stock nuts, 1x19mm M12 bolt with 1/2 lock washer and 1/2" flat washer, 1x3/8" 3 1/2" long bolt with 1 lock washer, 2 flat washers, 1 nut. 14mm. LEAVE THESE LOOSE until you actually mount the bumper.

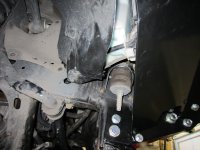
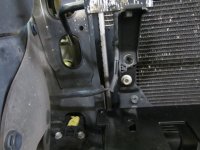
Inside view of passenger/right side. note nut and washer at bottom of radiator, just above factory recovery point.
 

Attachments

  • shrockworks_install039.jpg
    shrockworks_install039.jpg
    95.1 KB · Views: 1,814
  • shrockworks_install040.jpg
    shrockworks_install040.jpg
    83.8 KB · Views: 1,826
  • shrockworks_install041.jpg
    shrockworks_install041.jpg
    126.4 KB · Views: 1,816
  • shrockworks_install042.jpg
    shrockworks_install042.jpg
    124.2 KB · Views: 1,798
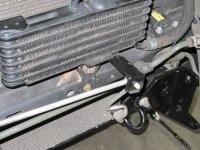
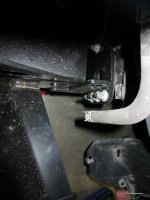
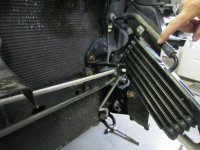
A/C line elevation bracket partially installed. I had to flex the line where it comes through the sheet metal just beside the radiator, so it wouldn't hit the top of the hold. Also note that the bracket on the driver/left side just in front of the transmission cooler was loosened before installing this bracket.

After moving the a/c line to the back of the bracket on drivers/left side. the transmission cooler was loosened and moved outward so the bracket could be unbolted and the bracket easily flipped.

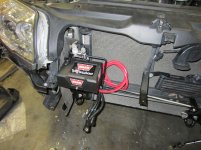
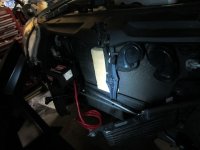
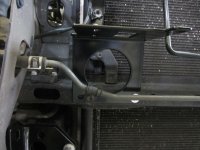
Solenoid bracket installed. i will be using a Warn winch and this fit perfectly

Transmission cooler reinstalled. The clip on the bottom bolt didn't want to stay in place and required additional attention.

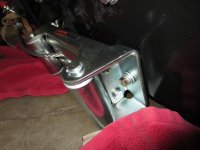
Solenoid box installed.

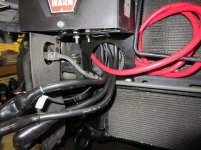
Solenoid wiring run through hole in bracket. I will be wrapping the wires in extra loom and may be re-routing wiring at a later time.
 

Attachments

  • shrockworks_install044.jpg
    shrockworks_install044.jpg
    116.8 KB · Views: 1,850
  • shrockworks_install046.jpg
    shrockworks_install046.jpg
    125.5 KB · Views: 1,851
  • shrockworks_install047.jpg
    shrockworks_install047.jpg
    123.3 KB · Views: 1,843
  • shrockworks_install049.jpg
    shrockworks_install049.jpg
    134.9 KB · Views: 1,816
  • shrockworks_install051.jpg
    shrockworks_install051.jpg
    129.8 KB · Views: 1,889
  • shrockworks_install052.jpg
    shrockworks_install052.jpg
    132.4 KB · Views: 1,809
After removing center upper bumper cover bracket. three spot welds were drilled out, so it can be reattached later if desired. The transmission cooler had to be moved out of the way again to do this. note the piece of scrap wood protecting the A/C condenser.

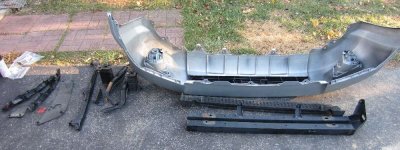
The brackets to mount the bumper cover mounts are hitting the bumper. Plan: cut out the outer nuts on each side. This should allow for restoration to stock if later desired. NOTE: I had to remove the metal bumper cover supports that are under the headlights. 3x10mm per bracket. The ones under the passenger headlight were very rusted on my car and I had to spin one off with a Vice-Grip. Sorry, no picture of the removal, but you can see them in the pile of parts picture at the end.

This is what happens if you don't correctly loosen the frame brackets and try to install the bumper. note the top of the bracket hitting the bumper instead of sliding in next to it.
 

Attachments

  • shrockworks_install053.jpg
    shrockworks_install053.jpg
    86.2 KB · Views: 1,811
  • shrockworks_install054.jpg
    shrockworks_install054.jpg
    124.1 KB · Views: 1,814
  • shrockworks_install058.jpg
    shrockworks_install058.jpg
    109.2 KB · Views: 1,766
Last edited:
Drivers bumper cover mount prior to trimming and cleanup. passenger similarly cut.

Drivers bumper cover mount after trimming and cleanup. passenger similarly cut.

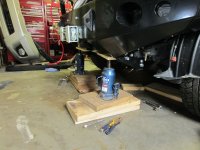
Leveling. This took a long time, I think due to previous (unknown) damage to passenger side before I purchased the car. Also, the bumper was pinched at the top of the frame brackets, they were twisted inward at the top. Resolved this by supporting the bumper with bottle jacks and pressing down on the car so the bumper slid upwards in the brackets, into the correct position.

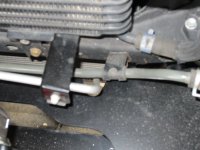
A/C line properly routed through hole in bumper. note you may need to bend the line near the sightglass by the solenoid box area to correctly line up.
 

Attachments

  • shrockworks_install0004.jpg
    shrockworks_install0004.jpg
    109.4 KB · Views: 1,843
  • shrockworks_install0005.jpg
    shrockworks_install0005.jpg
    96.4 KB · Views: 1,813
  • shrockworks_install0011.jpg
    shrockworks_install0011.jpg
    126.8 KB · Views: 1,778
  • shrockworks_install0006.jpg
    shrockworks_install0006.jpg
    96.3 KB · Views: 1,758
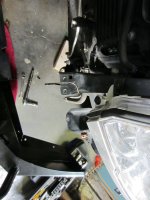
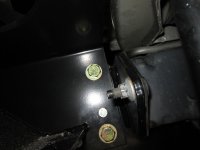
Passenger bumper bracket from inside

Passenger bumper bracket from outside

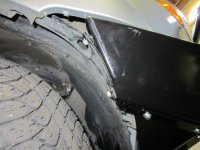
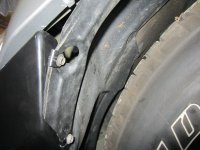
Passenger fender liner after cutting and reattaching with OEM Toyota brackets. I used a zip tie to tie the bottom of the fender liner to the washer bottle bracket. Also note the shield protecting the washer fluid bottle.

Drivers fender liner after cutting and reattaching with OEM Toyota brackets. I used a zip tie to tie the bottom of the fender liner to a bracket in the fender.
 

Attachments

  • shrockworks_install0018.jpg
    shrockworks_install0018.jpg
    76.5 KB · Views: 1,780
  • shrockworks_install0021.jpg
    shrockworks_install0021.jpg
    121.4 KB · Views: 1,761
  • shrockworks_install0020.jpg
    shrockworks_install0020.jpg
    112.1 KB · Views: 1,777
  • shrockworks_install0022.jpg
    shrockworks_install0022.jpg
    119.5 KB · Views: 1,751
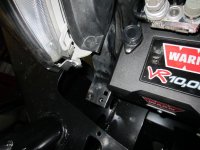
Warn winch fairlead mounted, note extra washers

Note the hood is very close to the bumper, use caution when closing

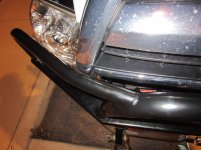
End result. still need to wire winch, purchase and install foglights, and readjust headlights. Still deciding if I want to install the duplicate turn signals.
 

Attachments

  • shrockworks_install0002.jpg
    shrockworks_install0002.jpg
    115.3 KB · Views: 1,751
  • shrockworks_install0001.jpg
    shrockworks_install0001.jpg
    116.5 KB · Views: 1,752
  • shrockworks_install0026.jpg
    shrockworks_install0026.jpg
    131 KB · Views: 1,998
Parts left over.

Also note that Shrockworks didn't ship me the skid plate, so that has not been installed. I should get it in a couple of days.
 

Attachments

  • shrockworks_install1001.jpg
    shrockworks_install1001.jpg
    134.7 KB · Views: 1,762
Just a heads up not trying to be picky but bumper looks a little high on drivers side could hit H/light or fender when frame flexes.

:iagree:, :nicethread:
 
Just a heads up not trying to be picky but bumper looks a little high on drivers side could hit H/light or fender when frame flexes.

:iagree:, :nicethread:

+1 on increasing the bumper to fender gap. Both sides, 3/4" minimum.

+1 on :nicethread: Nice write up, thanks for posting.

There's also extensive SW front bumper installation discussion here: Schrockworks Front Bumper Installation

If I could add to the thread... The SW bumper can also be installed by using a floor jack with a removable saddle and a couple pieces of wood. It took me about an hour of trying to figure out a way to solo this with items I had on hand. Once set up, it took me 5 minutes to raise the bumper and line up the bolt holes. Aligning it however was a little more work and involved a lot of tightening and loosening of bolts.

Items needed:

- A sturdy floor jack with a removable saddle and at least 20" lift
- The 2 lag bolts that were used to lag the bumper to the pallet
- Flat washers in addition to the body washers that were used with the lag bolts
- lumber: 4x4x18, 1x4x18(part of the pallet)

Drill a pilot hole on one side of the 4x4 then another one on the opposite side. Offset the holes so the lag bolts don't hit each other. Remove the jack saddle and bolt the 4x4 to the jack.

P1000260.jpg~original


Lift the bumper onto the 4x4 lining up the center hole at the bottom of the bumper with the hole in the top of the 4x4. Place the 1x4 over the bottom lip of the bumper and bolt it into the top of the 4x4. The bottom lip of the bumper should now be sandwiched between the 2 pieces of wood.

P1000256.jpg~original


Now all you have to do is jack the bumper up and maneuver it into place between the frame rails. This works great for adjusting and solo removal of the bumper too.:D

P1000259.jpg~original


Another suggestion for the fender liner is just tuck it up behind the bumper wings rather then bolting it on the outside of the wings. Then tie wrap the bottom so they don't flap in the wind.

P1020789.jpg~original


P1020788.jpg~original


Grats on the bumper. Looks great! :bigok:
 
Last edited:
Thanks for the compliments.

I agree, the gap still needs some adjustment. Looks like there may have been undisclosed damage from before I bought the car and the bumper wouldn't drop much lower due to how the frame mount brackets lined up. :bash: Not sure how much I'll be able to get out of it.
I will be putting some more miles on the car to see how it settles out, re-torque and re-align. Won't be seeing any off-road for another week or so.
 

Members online

Forum statistics

Threads
278,317
Messages
3,554,129
Members
248,016
Latest member
Advally Service

Trending content

Back
Top