Shrockworks rock slider install instructions

coletrain09

New member
After ordering in January my sliders finally arrived. I opened them this afternoon and they look great; can't wait to get them on. Unfortunately there are no instructions whatsoever. Does anyone have instructions they could post/fwd? I've searched the threads and noted where people have gotten hung up, but would still like to get the overview on this bag of parts before getting started. I also checked my email, and nothing from Shrockworks there.

I'm mounting on a 2011 Trail Edition.

Thanks!
 
Register to hide this ad
Not a whole lot of complexity in installing them. Make sure you secure the bottom bolts first to make sure the slider sits snug to the frame.

Check my build thread and I'll check for the SW instructions when I get home.

Okki
 
I have a '12 Trail and just installed mine. The instructions aren't that complicated. The mounts with 4 holes got toward the front. On the driver side you'll need to pull the 4 bolts holding the fuel tank skid and then pull the the one bolt holding the front fuel tank strap. The fuel tank will then droop, so a jack is helpful to hold it up. The slider mount goes between the frame and the fuel tank strap and you'll re-use the bolt. The passenger side is pretty straight forward. I did have to drill one hole on the front passenger side.

I had to use most of the stick nuts since most of the holes didn't have threaded inserts. My TE doesn't have KDSS so I don't know if there are any differences. Fell free to PM me with questions and I an talk you through it. It took my son and I about an hour to install.
 
Thanks guys for the quick reply. That's really the high level I was looking for. Will let you know how it goes tomorrow!
 
There are instructions. Open second brown envelope ( the one that looks new and empty).

7343.jpg
 
Last edited:
After ordering in January my sliders finally arrived. I opened them this afternoon and they look great; can't wait to get them on. Unfortunately there are no instructions whatsoever. Does anyone have instructions they could post/fwd? I've searched the threads and noted where people have gotten hung up, but would still like to get the overview on this bag of parts before getting started. I also checked my email, and nothing from Shrockworks there.

I'm mounting on a 2011 Trail Edition.

Thanks!

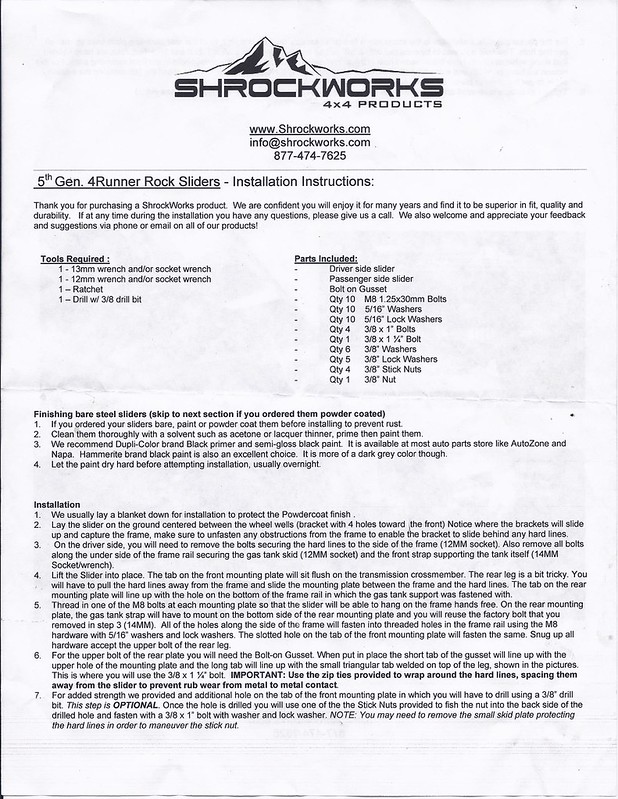
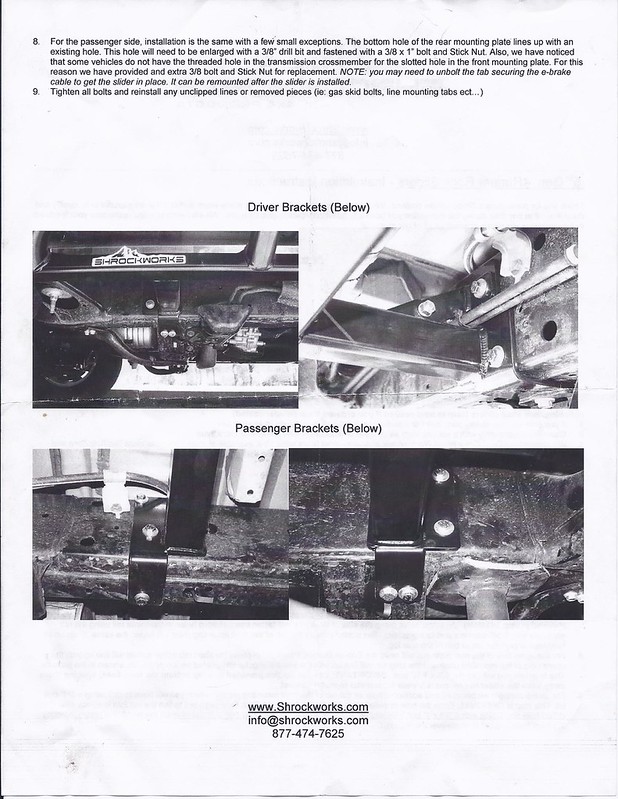
And here are the instructions as promised:

8998616177_7e86d53438_c.jpg

8998616723_3645ef3d0f_c.jpg


Okki
 
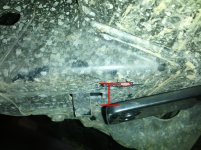
I installed the DS last night. On the DS front bottom bracket the angle did not match up to the frame. There's ~ 0.5 in gap between the bracket and the threaded hole in the frame. Has anyone else experienced this? Would I be fine to leave this un-attached?
 

Attachments

  • DS_Front_bottombracket_gap.jpg
    DS_Front_bottombracket_gap.jpg
    137.7 KB · Views: 9,845
I had the same issue, but on the passenger side. Once you get the bolt in there it will pull up flush as you tighten it down. I had to get buy a bolt 1/4" longer to reach the threads. I don't recommend leaving it un-attached. That's one of the points that will be holding the weight of the vehicle if you drop it on the rocks.
 
got mine shipped to me in UTAH on my way to Alaska

was an easy install, all was simple until I found out I put in the long bolt in the passenger side and needed it for the gas tank. Crap had to go through each bolt to find out which one it was and of course it was the last one I looked at. Might as well done the install twice but was great practice and not once was I mad since I was so happy to get these bad boys on.
 

Attachments

  • SAM_0745.jpg
    SAM_0745.jpg
    132.8 KB · Views: 18,481
Shrockworks changed the design from the 4th Gen. The 4th Gens have a bolt at the top of the bracket that goes across the frame. It is a very tight fit.

There is a clearance issue on those too. Where the front bracket goes the bottom of the frame has a lot of over weld on it. This causes the bracket to not clear the top of the frame. The fix is to grind down the weld enough to allow the bracket to clear the top of the frame. It does not take much and has no impact on the strength of the frame.

The 5th Gen seem to be a easier install. Wonder if they support the frame enough to lift the vehicle with the slider? You can do that with the 4th gens.
 
Shrockworks changed the design from the 4th Gen. The 4th Gens have a bolt at the top of the bracket that goes across the frame. It is a very tight fit.

There is a clearance issue on those too. Where the front bracket goes the bottom of the frame has a lot of over weld on it. This causes the bracket to not clear the top of the frame. The fix is to grind down the weld enough to allow the bracket to clear the top of the frame. It does not take much and has no impact on the strength of the frame.

The 5th Gen seem to be a easier install. Wonder if they support the frame enough to lift the vehicle with the slider? You can do that with the 4th gens.

stewart.swf


Why yes.. you can lift the truck by the slider.

Okki
 
...had to go through each bolt to find out which one it was and of course it was the last one I looked at.

Haha, I have always wondered where this general expression came from.

Of course it was the last one you checked/last place you thought to look—why would anyone keep looking after finding what they were searching for?

That said, did you mean it ended up being the last possibility? I hate when searches end up that way.
 
'Stick nuts' ends up having a double meaning here.....no, not that kind of double meaning. In addition to nut-on-a-stick, there seemed to be a lot of crud on the threads. We found that running a tap through the nut prior to use made making the connections about 75% easier. Clears out the rust and gunk from brazing.
 
Just got my shockworks slider this week and installed them. Question.. How important is the gusset on the drivers side? (step 6: in the instructions) Do we really need it? I don't have any lines that run through there like the illustrations.
 
Last edited:
Just got my shockworks slider this week and installed them. Question.. How important is the gusset on the drivers side? (step 6: in the instructions) Do we really need it? I don't have any lines that run through there like the illustrations.

Not very important as long as you don't land that end of the slider hard on a large rock. Could be pretty important if you ever anticipate possibly doing so. Your choice.
 
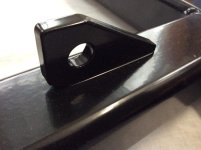
Regarding that drivers' side gusset: - the triangular tab this bolts to, on top of the horizontal leg, is only welded on one side on mine. I would have thought that is a pretty highly stressed joint, and should be welded both sides. Am I, as usual, over-thinking it, and worrying about nothing?

I could weld it myself, but then I lose the advantages of powder coating!

(Just to clarify, I DO realize this tab is only on the drivers' side, but am wondering if that single tab should be double welded?)
 

Attachments

  • image.jpg
    image.jpg
    134.9 KB · Views: 2,898
Last edited:
Fwiw I just looked at my new sliders and that tab is the same on mine. I would guess it is made to prevent compression and not a shear so it is plenty strong.
 
Passenger side has a permanent gusset, with a continuous weld all the way around. Driver's side gusset needs to be "add-on" to allow passage of the KDSS (?) lines.
 

Members online

Forum statistics

Threads
278,312
Messages
3,554,089
Members
248,016
Latest member
Advally Service

Trending content

Back
Top