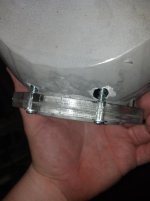
Once you have the holes drilled for the long bolts you will need to set the housing on the desk and possibly tape it down to the desk so it doesn't move, then adjust the projector in the housing, using the bolts and nuts to hold it in place.
Once it is loosely installed with the bolts and nuts holding it together, power on the projector and align it on wall marks you made before starting the project.
What you would have done before dissassembling the factory light is set the housing on the table, use blue tape to mark the position on the table, then the table legs position on the floor, then power up the factory light and mark the wall (15-25 feet) , where the light hits. Do all of this before taking the factory light apart.
If you kept your factory housings and didn't touch them then do this step now and mark everything.
So skipping forward to where the project is loosely sitting in the housing held together by bolts.
Turn it on (with everything in the original positions marked by tape) and align the projector light output on the wall marks. Once you think it is as good as it will get then slightly tighten the bolts so that it won't move. Then take superglue and put a small amount on the bolts so they don't come loose. Use superglue not JB-Weld here. The point is you want to be able to break it off if you messed up. JB-Weld is a point of no return event.
So now that you have it aligned and bolted and slightly glued then you are ready for an on truck test. I DID NOT PUT THE GLASS ON AT THIS POINT.
Now install it on the truck and see how it lines up. You will need a flat parking spot with a wall about 30+ feet away. Use the headlight alignment adjusters to try and align the light. If you can align it and it works then you win. If it is so far off it is WTF then you will need to try again.
All of the above is described in the link at the top of my retrofit thread. I'm referring to the link from TRS where it shows how to do a basic retrofit.
If you haven't checked that out already I would highly suggest it!!!!!!!
Good luck man.
Check this out ---->
http://www.toyota-4runner.org/3rd-g...it-97-4runner-project-toyota-4runner-org.html
And this:
http://www.theretrofitsource.com/diy-installation-guides/fxr-guide.html (note the part about marking the wall)
Also see these links:
Lastly
1. When installing the shroud (Apollo or whatever) - don't JB Weld it onto the projector. You should be able to simply push it on lightly but note that it will come loose after some amount of time if you don't secure it somehow. I suggest still pushing it on but using 3M Mounting Tape to secure it to the projector. This has worked well for me and is removable.
2. Don't forget to install the breathing filter and seal the 2nd hole or you will get dust. I documented this in an update to my thread.