SKRS Projector retrofit , need some help...

SKRS2

New member
Hi guys, after looking that some many of you were doing the retrofit I finally pulled the trigger and decided to make some for my runner.
So far this has been some of the "progress"...

I bake them on the oven at 350 for 7 minutes and everything was going fine until some butyl fell on the glass
ElbrbXU.jpg

after aplying some WD40 I was able to clean it.

This is the starting hole that I did to try and fit the projector in
JOYaaYC.jpg

and after several adjustments this is what I have right now
DrZuJC6.jpg

BWum41x.jpg

nQbXZGs.jpg

C5DtOkv.jpg

is the projector positioned how it should be or is something wrong?
Thanks for any help
 
Register to hide this ad
Looks good so far. Do yourself a huge favor and test fit them on the truck to make sure they point straight ahead on the truck. The big thing is making sure they aren't twisted or rotated in the housings which will cause your nice flat cutoff line to not line up with the other projector. The oem adjustments will take care of up and down and side to side once it's all mounted. But the rotation is a critical one. You just can't tell by looking at it.
 
Looks good so far. Do yourself a huge favor and test fit them on the truck to make sure they point straight ahead on the truck. The big thing is making sure they aren't twisted or rotated in the housings which will cause your nice flat cutoff line to not line up with the other projector. The oem adjustments will take care of up and down and side to side once it's all mounted. But the rotation is a critical one. You just can't tell by looking at it.

I am about to retrofit mine also, so if they are crooked what needs to be done? drill new holes and realign? (don't mean to hijack the thread OP)
 
Yep. Easiest way is to use morimoto mini d2s projectors. They literally sandwich with a large nut over the bulb hole. No cutting rquired. If not you will just have to play with it until you achieve a level cutoff. I have pics on mine in my truck thread I just posted, just look in my history.

Again, put them on the truck, power them up and check against a white wall, play until happy.
 
I made the hole in the housing a bit larger so the projector sits further back. That way it wont be too close to the lens when you put it back together.
 
Once you have the holes drilled for the long bolts you will need to set the housing on the desk and possibly tape it down to the desk so it doesn't move, then adjust the projector in the housing, using the bolts and nuts to hold it in place.

Once it is loosely installed with the bolts and nuts holding it together, power on the projector and align it on wall marks you made before starting the project.

What you would have done before dissassembling the factory light is set the housing on the table, use blue tape to mark the position on the table, then the table legs position on the floor, then power up the factory light and mark the wall (15-25 feet) , where the light hits. Do all of this before taking the factory light apart.

If you kept your factory housings and didn't touch them then do this step now and mark everything.

So skipping forward to where the project is loosely sitting in the housing held together by bolts.

Turn it on (with everything in the original positions marked by tape) and align the projector light output on the wall marks. Once you think it is as good as it will get then slightly tighten the bolts so that it won't move. Then take superglue and put a small amount on the bolts so they don't come loose. Use superglue not JB-Weld here. The point is you want to be able to break it off if you messed up. JB-Weld is a point of no return event.

So now that you have it aligned and bolted and slightly glued then you are ready for an on truck test. I DID NOT PUT THE GLASS ON AT THIS POINT.

Now install it on the truck and see how it lines up. You will need a flat parking spot with a wall about 30+ feet away. Use the headlight alignment adjusters to try and align the light. If you can align it and it works then you win. If it is so far off it is WTF then you will need to try again.

All of the above is described in the link at the top of my retrofit thread. I'm referring to the link from TRS where it shows how to do a basic retrofit.

If you haven't checked that out already I would highly suggest it!!!!!!!

Good luck man.

Check this out ----> http://www.toyota-4runner.org/3rd-g...it-97-4runner-project-toyota-4runner-org.html

And this: http://www.theretrofitsource.com/diy-installation-guides/fxr-guide.html (note the part about marking the wall)


Also see these links:


Lastly

1. When installing the shroud (Apollo or whatever) - don't JB Weld it onto the projector. You should be able to simply push it on lightly but note that it will come loose after some amount of time if you don't secure it somehow. I suggest still pushing it on but using 3M Mounting Tape to secure it to the projector. This has worked well for me and is removable.

2. Don't forget to install the breathing filter and seal the 2nd hole or you will get dust. I documented this in an update to my thread.

 
Last edited:
Sorry to hijack your thread but on the wiring harness do I get the h4 harness or h1? I'm doing the mini h1 retrofit.
 
Sorry to hijack your thread but on the wiring harness do I get the h4 harness or h1? I'm doing the mini h1 retrofit.

I'm not really sure but I think you need the h4 or maybe some adapter?
Ask the guys on the retrofit source that way you will get exactly what you need.:hippie:
 
Your harness will use the h4 plug as an input and outputting to h1. the harness TO the ballasts will be H4. You likely already have the bulb output harness if you bought the kit with the mini h1s
 
Some small updates, yesterday I mounted the projectors on the car and they looked good. They looked even, sadly my tablet was charging so I did not take pictures of the output.:violin:

So here is what I did today...

wc0X0iK.jpg


Thanks to BrianSD for the tip
dNrhn6R.jpg

kGoQowJ.jpg


Here is how the reflectors look right now
XhBZNgf.jpg


Hopefully next update will be the last:hungry:, thank you for the advice.
 
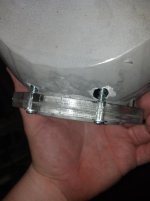
I ended up laser cutting some rings out of acrylic that fit over rear ring of the housing. i put the hole pattern in it and then glued the rings to the housing. I used a small flap wheel to grind the housing to have the correct hole. then using the holes on the acrylic plate as a guide i drilled into the housing. I glued threaded inserts into the projectors mounting holes then used long screws and put them through the holes drilled in the housing, the heads of the screws butted against the outer acrylic plate. a stiff spring was then placed between the projector mounts and the housing over the long screws. then i adjusted the screws until the projectors were both centered and at the same depth. after that i filled the gap between the projector and housing with silicone. I used a solid silicone tube to connect the holes in the back of the housing.

then the other week some jackass i was wheeling with backed into my headlight and refused to pay. @$$hole.

anyways i bought a new housing for $45 and swapped the glass in less than an hour, inlcuding removing it from my truck and putting it back on.
 

Attachments

  • IMG_20140422_035209_076.jpg
    IMG_20140422_035209_076.jpg
    113.1 KB · Views: 143
Last edited:

Members online

Forum statistics

Threads
278,312
Messages
3,554,089
Members
248,016
Latest member
Advally Service

Trending content

Back
Top