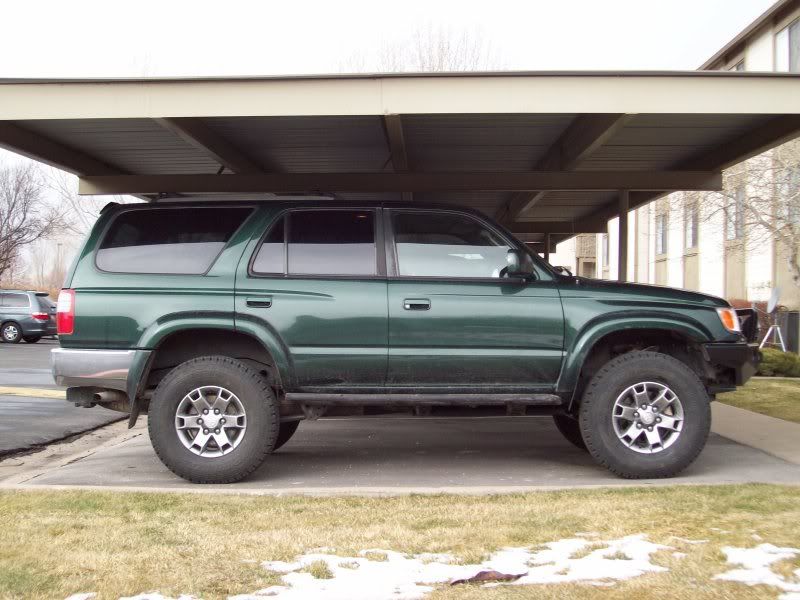
Smallfry's 3rd Gen Build

Bud built belly skid:

101_0070.jpg~original


Painted and ready to install

2 coats of self etching primer on both sides,
Top side 2 coats of rustolem paint
Bottom side 2 coats of truck bed liner.

101_0075.jpg~original


Installed

101_0078.jpg~original


The only bolt I didn't install was the one that is under the cat it's just a little tight in that area.

I'll have to do some touch up to it and the front skid when it warms up some. I still have that plastic skid that's on the driver side and I may just modified it to get it to fit back into place.
 
Last edited:
The only bolt I didn't install was the one that is under the cat it's just a little tight in that area.

Me too. I think it's easier to get to that one on the dual cat models, but yeah, it's ridiculous to try to get that one in on our style. I stared at it for like 2 minutes and just said, yup 6/7 works for me!
 
Me too. I think it's easier to get to that one on the dual cat models, but yeah, it's ridiculous to try to get that one in on our style. I stared at it for like 2 minutes and just said, yup 6/7 works for me!

On my last 4runner I installed that bolt but it was a pain to do so.

Leaving it out gives the skid some sort of drain hole.
 
Update: 2/9/11 - Rims

Made a small change to my 4runner today. Switched out the split 3 spoke wheels for a set of 16x7 rims off a 05 Toyota Tacoma. I'm very happy with end result. :D

Front:
101_0153.jpg~original


Angle:
101_0154.jpg~original


Side:
101_0155.jpg~original


So far I haven't noticed any rubbing. I'll have to see how they do when I get off-road and under flex.
 
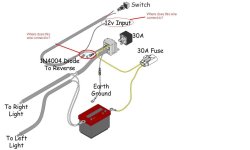
Hey smallfry, I'm in the process of installing my lightforce 170s but have hit a wall. I'm trying to figure out where the brown wire from the switch goes, could you help me out? Thanks
 
Hey smallfry, I'm in the process of installing my lightforce 170s but have hit a wall. I'm trying to figure out where the brown wire from the switch goes, could you help me out? Thanks

Are you talking about the ground for the switch? I just ran mine up to a bolt/screw that was on the firewall behind the brake pedal.

I'd have to go out and look just a little dark right now.
 
The wheels look wicked man. I saw your teaser post and I think there's another guy on the forum working on getting some of those same wheels, but you're the first one I've ever seen with those mounted up.

I think they fit the overall look/design of the 3rd gen very well, the only thing about them that I'd change is that like all taco rims, they don't sit out very far. I'd prob put some spacers behind them to push them out a bit, but other than that they're saaaaaaaaaaaaaaa-weet!
 
Okay, I looked.

The brown wire I tied it in with the yellow wire coming off the fuse that runs to the battery.

The other one that you have circled coming off the relay I don't have that one run to anything.
 
Last edited:
Okay, so after two months of having the rims on I'm starting to see a little bit of wear on the UCA from rims. So it looks like a set of spacers will be in order.

Any recommendations?
 
Okay, so after two months of having the rims on I'm starting to see a little bit of wear on the UCA from rims. So it looks like a set of spacers will be in order.

Any recommendations?

Spidertrax........they are hub centric and are good quality....(so I hear).
 
A sipder made trax to my door today.... :spider:

Teaser/test fit
100_0240.jpg~original


UCA clearance before
100_0238.jpg~original


UCA clearance after
100_0248.jpg~original


I need to pick up a torque wrench and then get them all installed tomorrow.
 
Spent about 1.5 hrs tonight get the spacers put on all 4 corners (front and back). If anyone ever wants to have a good laugh come by my place and watch a 125 lb kid try to put a wheel back on.

Any how here are a few more photos

Drivers side UCA clearance before
100_0253.jpg~original


100_0257.jpg~original


UCA Clearance after
100_0260.jpg~original


Front view before
101_0153.jpg~original


Front view after
100_0262.jpg~original


Rear view before (passenger side, forgot to photo the drivers side before but you get te idead)
100_0269.jpg~original


100_0266.jpg~original


Rear view after
100_0267.jpg~original


Took it out for a test driver after and the rubbing noise is gone and I haven't noticed any weird vibrations. Steering feels a little more normal as well.

I have plenty of lock-tite on the studs and on the nuts.
 

Members online

Forum statistics

Threads
278,307
Messages
3,554,054
Members
248,016
Latest member
Advally Service

Trending content

Back
Top