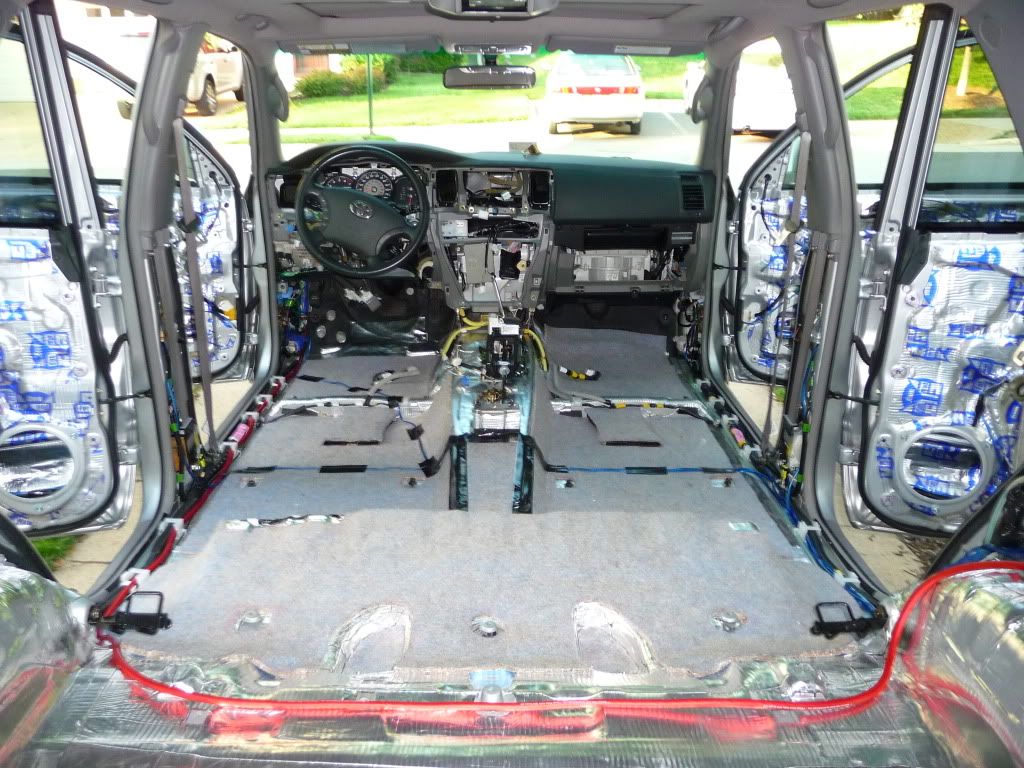
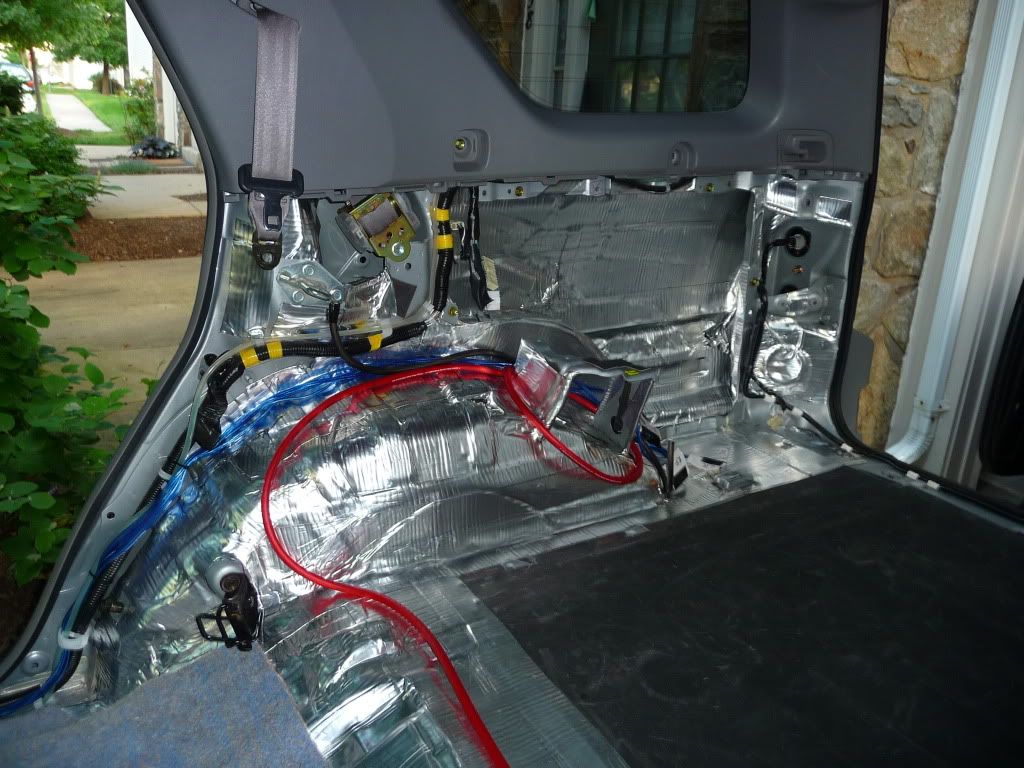
Sound Deadening and New Audio Setup

Awesome write up. Very Detailed. But...

What did you use on the tailgate? I'm assuming FatMat?

I have a sub and the only thing that I ever hear rattle is the rear window, license plate, and rear panel.

Also, DynaMat suggests that their material blocks heat? Does FatMat and/or mastic peel & seal do this? That would be awesome because its about to be a hot ass summer in TX.

I still have yet to deaden the tailgate. I'll be doing that soon and will use the FatMat just like on the doors. I've worked with FatMat and Dynamat and I notice very little difference. You just pay for the name with DynaMat, IMO. The FatMat (any dense material for that matter) should help insulate the vehicle.
 
what speakers did you put in back door if anything? if so, how did wired them stock or pulled new wires?

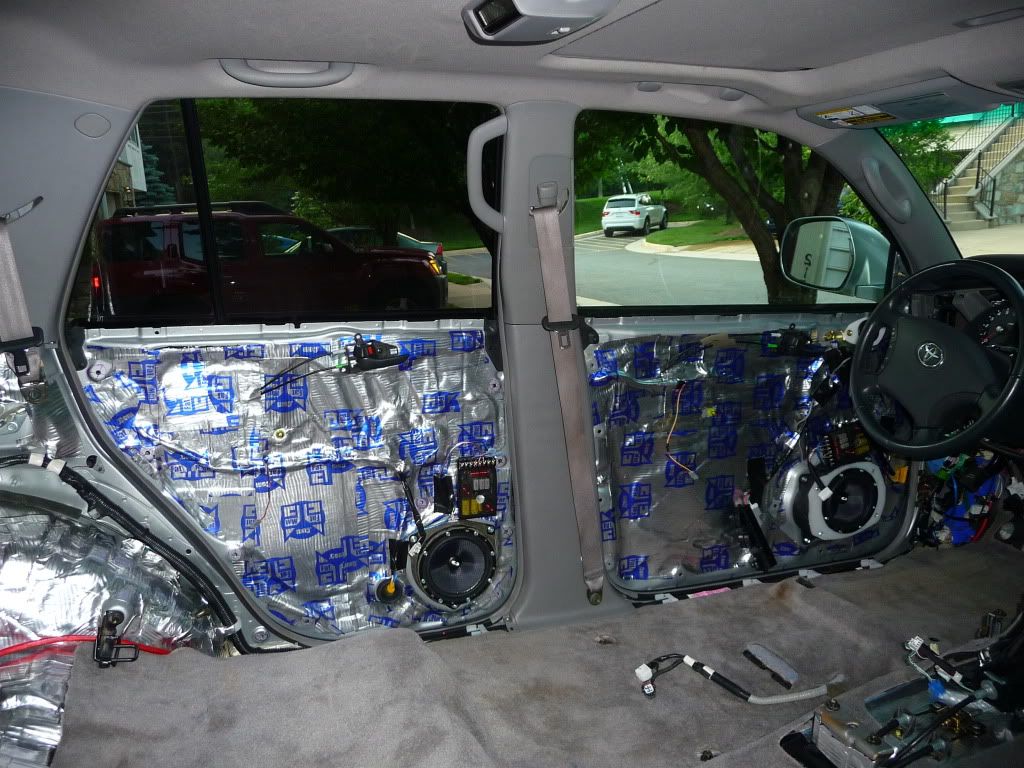
I used the same speakers front and back. Ran new wires everywhere. The entire OEM setup was removed or bypassed.

I used peel and seal on the rubber to seal off the edges. I also bought more sound deadener than I needed so I figured I might as well use it. As someone mentioned above: peel and seal is asphalt and smells like it! Working in 90+ degree weather for 4 days burned off all that smell by the time I got back to re-assembly so it worked out fine. No hint of asphalt smell since then.

As has been addressed - the coverage was definitely overkill but for the price I paid, I have no regrets.
 
Last edited:
I just finished deadening my rear hatchback door. I used FatMat and applied generously, because like someone else mentioned, all I heard rattle with my system was the rear door.
When others get around to doing this on their own vehicles, make sure you disconnect the negative post from the battery before unplugging any wiring harnesses. Otherwise, you'll find that your electronic door handle and automatic closer won't work anymore, until they're reset.

Unlike HokieRunner, I didn't replace the plastic water shield with ABS plastic sheeting...it's just too expensive for the minor purpose it serves. Even Amazon and Ebay were about $10-12 (shipped) for one 12"x12" square of 1/8" ABS plastic sheeting. Could not find any sheets locally either. When I come across some material that I feel will work, I'll replace the water shield and do like HokieRunner did to his 4 passenger doors.

Here's some pictures. I also removed the door handle assembly on the exterior (right above the license plate)...the thing with the logo and the license plate lights...and applied FatMat directly on the body of the car where that plastic assembly goes, but I didn't get a picture.

Before:

DSCN0114.jpg~original


After:

IMG_1103.jpg~original

In the picture above, you can see I removed the black plate on the right side of the "Before" picture, and let it hang by the wires. That allowed me to get behind it and apply FatMat on the inside part of the door. Behind the white box on the left side of the picture (which is where your manual release levers are located, btw), I applied two layers. It's the central area of the overall door.


Before: (and before it was cleaned)

DSCN0115.jpg~original


After:

IMG_1102.jpg~original


I also decided to line the majority of the inside of the plastic trim cover:

IMG_1104.jpg~original


Effects after Installation
After installing, I noticed I was hearing new rattles in other places. Those new ones will be gone as I slowly cover the entire car. From the outside, bass is definitely quieter, and the loudest** thing rattling with the window rolled all the way up is the glass itself hitting vibrating metal. The metal that the window is contacting is in a very tight location which will make it hard to install FatMat.
The trunk feels solid when shutting the door. No more of that hollow shaking sound when closing. I can't wait until the rest of my car gives a nice solid thud.

**I have two Kicker Comp VR 12" powered by a Kenwood 9105D 1800W Mono amp. There is a lot of bass for the rear door to handle, and I'm not going to lie and say all the rattles in the rear door are gone. The window is the loudest source of rattling ONLY when it is rolled all the way up. I have found that rolling the window 1/4 the way down eliminates the glass hitting the metal and the horrible rattle noise that it makes. Even then, with the glass not contacting any metal, the rattling is there, but it is so faint. With the window rolled down, the loudest rattle is probably...the rear window wiper blade. :lmao: Besides the rear wiper blade, there are some rattles coming from both of the rear quarter panels, but I'll get to those at another time.

The rear door has so many objects in the way. It kind of sucked to do, and required several small pieces. Overall, it took me about 9 hours (cleaning, applying, testing).


Awesome write up. Very Detailed. But...

What did you use on the tailgate? I'm assuming FatMat?

I have a sub and the only thing that I ever hear rattle is the rear window, license plate, and rear panel.

Also, DynaMat suggests that their material blocks heat? Does FatMat and/or mastic peel & seal do this? That would be awesome because its about to be a hot ass summer in TX.

As for the license plate, I put a piece of sticky back foam that I bought from Michael's (arts and crafts store). It's cheap, ~ $1 for a 9"x12", perfect to make a license plate cutout from. There is absolutely NO rattling from the license plate, even at times when I can see the plate oscillating. The one piece stuck great for about 6 months, and it's just now starting to peel at the bottom edge. Alternatively, you could apply FatMat, but I think the aluminum backing on the FatMat might cause a small noise. By the way, I don't use any license plate frames. They rattle like crazy.

Like I said above, the rear panel itself doesn't rattle too much. The loudest rattle is the glass itself, but ONLY when it's rolled up. When rolled all the way up, from the outside it sounds like a jackhammer nailing a steel beam. When rolled 1/4 of the way down, the jackhammer (glass on metal) sound is gone, and there's only slight panel vibration now.

Quote from FatMat:
"Our FatMat and RattleTrap products are constructed from premium acoustical sound dampening material and space age heat shielding material. With proper installation dramatic noise reductions as well as tremendous bass gains can be accomplished."

While the panels with FatMat installed themselves may not allow heat to pass through as much as before, it will not make your car cooler when left out in the sun. Even with tint on your windows, the sun's energy passes through your glass and is absorbed by materials inside the car. Theoretically, your seats can't be hotter than the air or any other material inside your car, which means that everything inside the car will try to balance out so it reaches thermal equilibrium. No matter what you do to your car, if left long enough in the sun, it WILL eventually surpass the temperature outside. The only thing any insulating material companies can claim is that they can reduce the time it takes to for temperature to change. I think I'm right there with ya with the heat in Las Vegas, NV, if not worse! :wow2:

 
Last edited:
Tailgate window rattles when its all the way up on mines too, i got 2 15s, sometime u hear like a clap on short bass notes, but on high excursion it produce some rattle, but its not loud and nasty. I need to do my rear panels to complete my dynamat install. Best thing i did, more volume and clearer sounding music.
 
sorry to bring up an old thread, but since this thread is so detailed. I though i would just add more info to it.

To guys that deadened the rear hatch. Did you get rid of the all the rattles, even from the window?

I'm about to deaden my ride and wanted to get more details before I tear everything apart.
 
Bumping this from the dead, finally order some second skin damplifier pro, hopefully I'll get to it in 3 weeks , going to do my rear quarter panels since I have not did it, also I hate my body panel flexing close to my amp rack, very nasty rattles for months now since my temp fix of carpet stuffing behind the rack don't stay put no more.
 
Was planning on having professionals do the install of sound deadening in my 2004 + OEM carpet replacement, and after seeing that this took 70+ hours it might be worth the cost. :faint:
 
My interior doesn't seem to have a ton of road noise and I only have the stock sound system. Is this mod. worth it if I'm not upgrading my sound system?
 
My interior doesn't seem to have a ton of road noise and I only have the stock sound system. Is this mod. worth it if I'm not upgrading my sound system?

even with stock sound, you will gain some volume and sq back if you fully sound deaden the doors, putting some on roof will quiet heavy rain noise. it also do quiet the whole interior.
 
where did all the pictures go

They went to the Photobucket graveyard. PB decided to change their account settings and make you pay a couple hundred bucks a year to host photos. It's all over the internet.

As a temporary work around, in Chrome at least, you can right mouse click on the lost image and click 'open image in new tab'.
 
They went to the Photobucket graveyard. PB decided to change their account settings and make you pay a couple hundred bucks a year to host photos. It's all over the internet.

As a temporary work around, in Chrome at least, you can right mouse click on the lost image and click 'open image in new tab'.

All more the reasons to own a private site and host pics through FTP on the cheap imo
 
Approach for sound deadening install

Question for those that have installed their own sound deadening:

What are the pros or cons of doing the install over several days/weeks in 2 hour blocks?

I'm planning on doing the doors and tailgate, potentially the rear panels in the cargo area. Not likely the roof or floor.

I'm weighing the cost of having a stereo shop do the install or doing it myself. It doesn't seem technically complex (although as this and the threads note, there are a few watch outs). The big downside of DIY seems to be time required to do the job.

This vehicle is my daily driver so, realistically I could work on it for two hours a night. Maybe I could eek out 3-4 hours on a weekend, but with kids it won't likely be more than that. I'm wondering if it's practical to approach it like this or if I'm going to end up taking off a door panel and being cramped for install time. Obviously, the 2 hr time isn't an absolute hard cut off, but that would be ideal.

Any insight or advice the group can give is greatly appreciated.

Thanks!
 
Question for those that have installed their own sound deadening:

What are the pros or cons of doing the install over several days/weeks in 2 hour blocks?

I'm planning on doing the doors and tailgate, potentially the rear panels in the cargo area. Not likely the roof or floor.

I'm weighing the cost of having a stereo shop do the install or doing it myself. It doesn't seem technically complex (although as this and the threads note, there are a few watch outs). The big downside of DIY seems to be time required to do the job.

This vehicle is my daily driver so, realistically I could work on it for two hours a night. Maybe I could eek out 3-4 hours on a weekend, but with kids it won't likely be more than that. I'm wondering if it's practical to approach it like this or if I'm going to end up taking off a door panel and being cramped for install time. Obviously, the 2 hr time isn't an absolute hard cut off, but that would be ideal.

Any insight or advice the group can give is greatly appreciated.

Thanks!

for 2 hours a day, you can complete at least the front doors, must clean the area well. also cut pieces in smaller strips if need to put it in the hard to reach areas.
rear doors and tailgate can be done the same time after you finished the front.
you will hear a decrease in road noise from a sound deadened door.
when you decide to do the cargo area, be sure to vacuum all the old stuff on the mat, then start. might end up just cleaning the whole truck later with all the vacuuming from the installs.
 
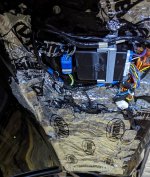
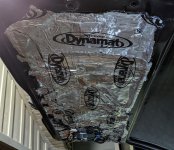
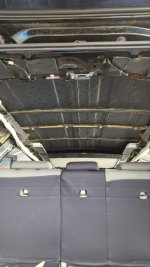
just did mines yesterday. old dynamat still holding strong, decided to add another layer on the cargo floor, exhaust is much quieter now, so much work since i was doing other things at the same time.
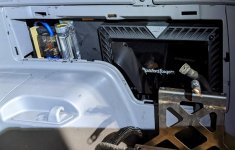
also a view of my rear amp rack, never got an updated picture of it since i changed it last year.
headoff.jpg

panel.jpg

tailgate.jpg

tailgate2.jpg

headcomplete.jpg

ampmountnew.jpg
 

Attachments

  • headoff.jpg
    headoff.jpg
    136.6 KB · Views: 407
  • panel.jpg
    panel.jpg
    152 KB · Views: 396
  • tailgate.jpg
    tailgate.jpg
    139.6 KB · Views: 401
  • tailgate2.jpg
    tailgate2.jpg
    133.1 KB · Views: 386
  • headcomplete.jpg
    headcomplete.jpg
    135.9 KB · Views: 401
  • ampmountnew.jpg
    ampmountnew.jpg
    130.9 KB · Views: 410
That's really amazing! Way way above my pay grade, and I would never find the time to attempt it. I have the upgraded JBL system and I have to say it's a really good setup. I added one of those gizmos that allows Bluetooth streaming and it's really quite a thing.

I'm sure yours is way better though!!!!


Audio System Installation:

• Head unit wiring adapter –after much research there appeared to be 3 options for anyone with a JBL system wanting to go to an aftermarket headunit and NOT integrate the JBL amplifier.

1. Metra TYTO-01 or JAC TATO integration (use the included wiring harness but not the integration unit)
2. Tap into the 4Runner factory harness
3. Cut apart your old JBL headunit, dremel the harness plug off the circuit board, and solder straight onto the pins. :smashputer:(my factory head unit was partially defective anyways and I had a helluva good time sawing into that thing!)
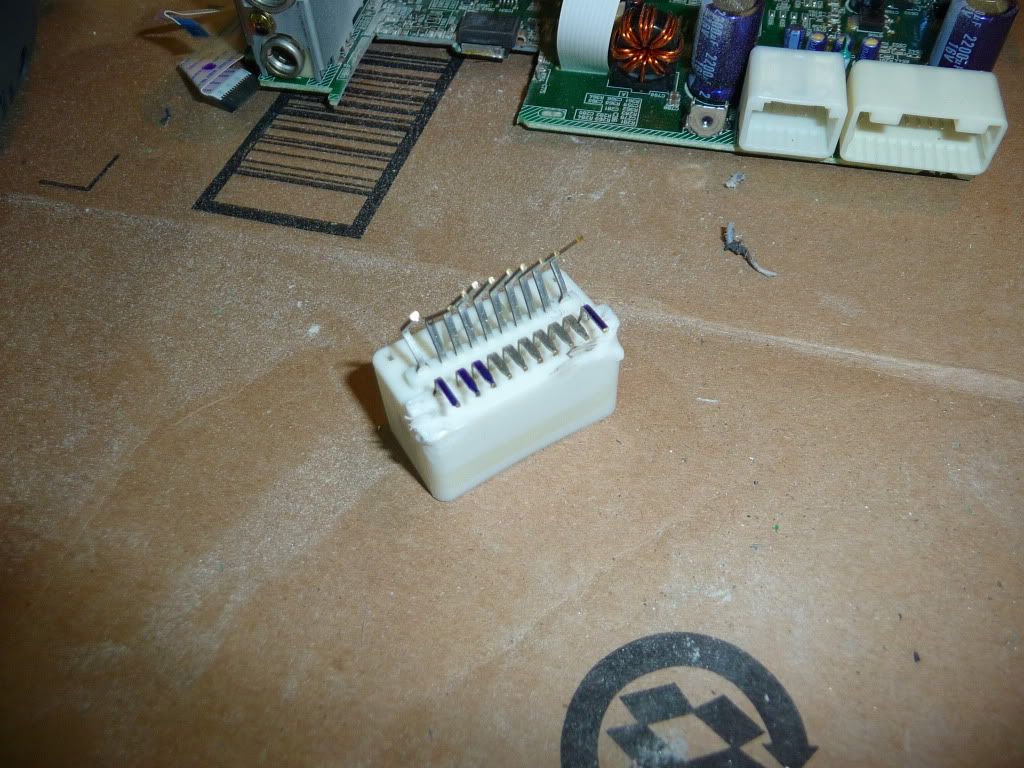
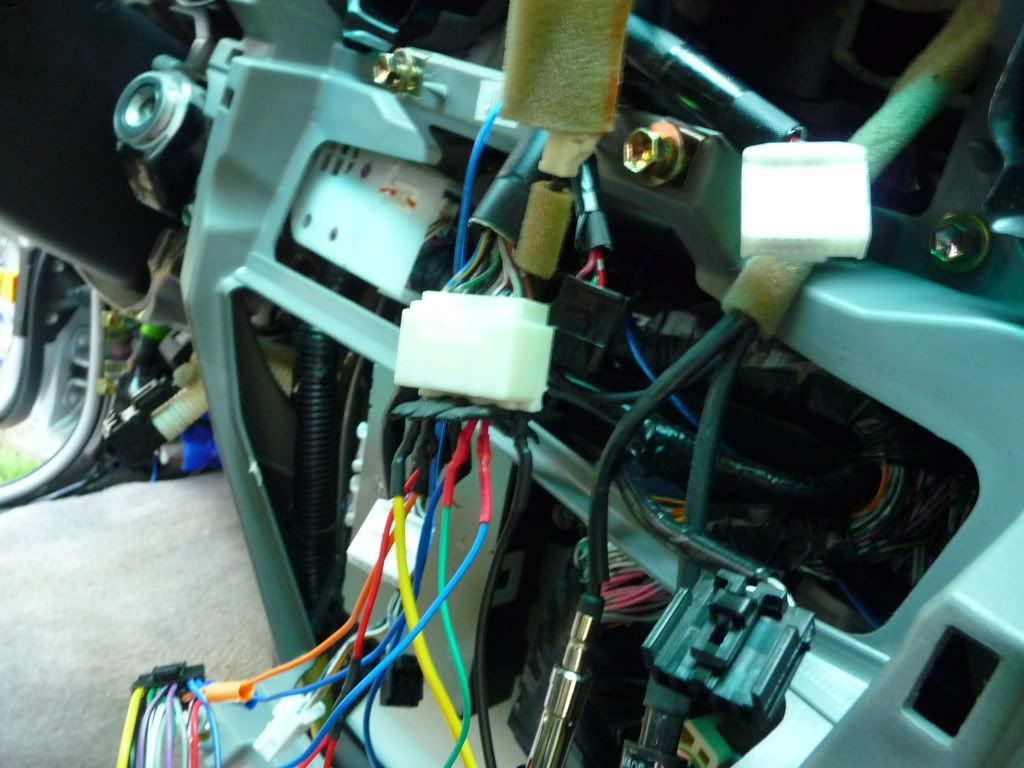
I obviously went with option 3. But the pin chart I provide below should help anyone doing option 2 OR 3. By tearing apart the headunit I also found $2 in change (former owner’s kid’s personal piggy bank??). Certainly could have been the reason why the tape deck was non-functional.

PIN CHART (use 'Sequoia 20 Pin')

Factory adapter!:

P1050855.jpg~original


After a little soldering (I bent the unused pins out of the way and insulated them off with heat shrink tubing)...new wiring harness:


P1050939.jpg~original


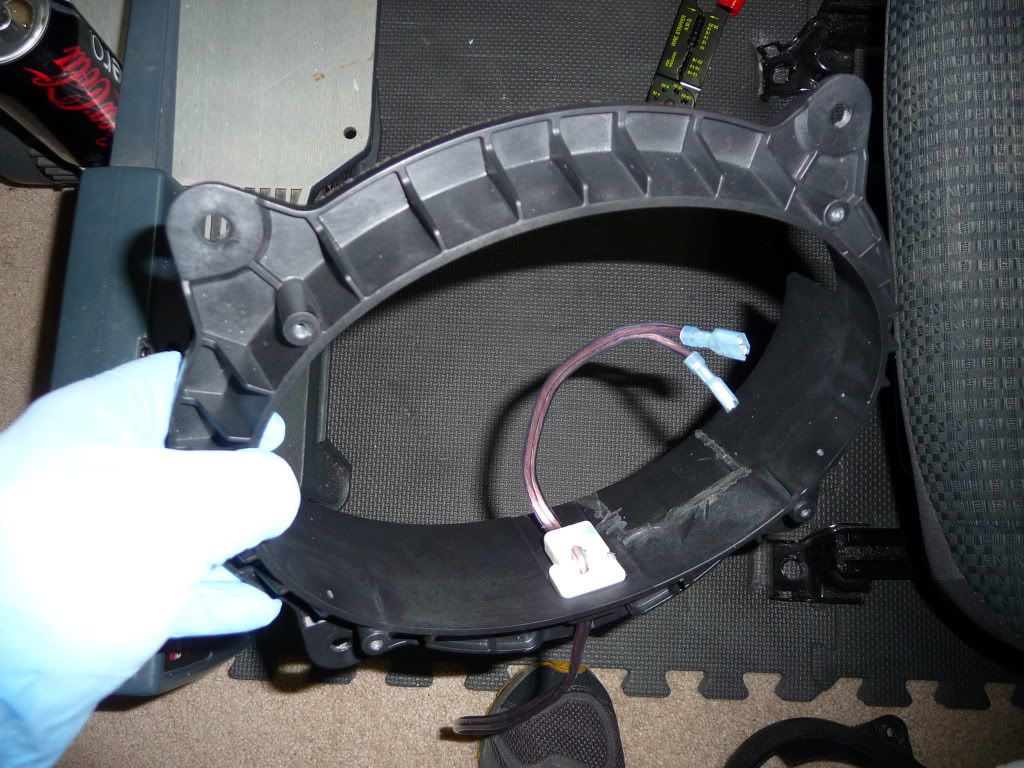
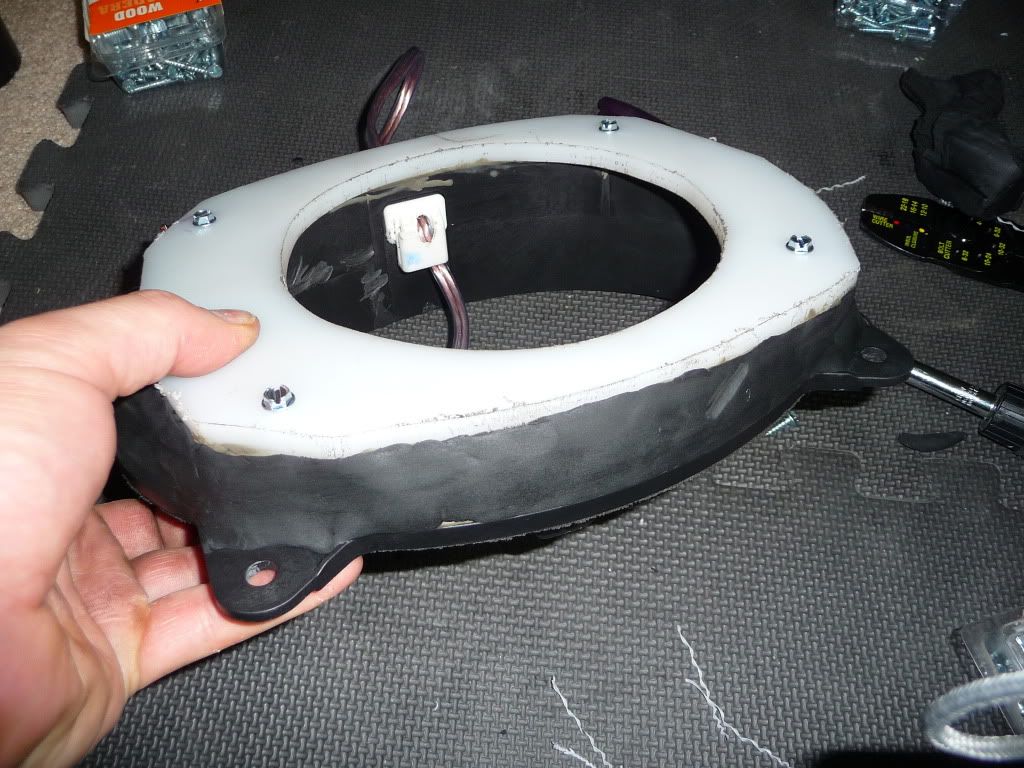
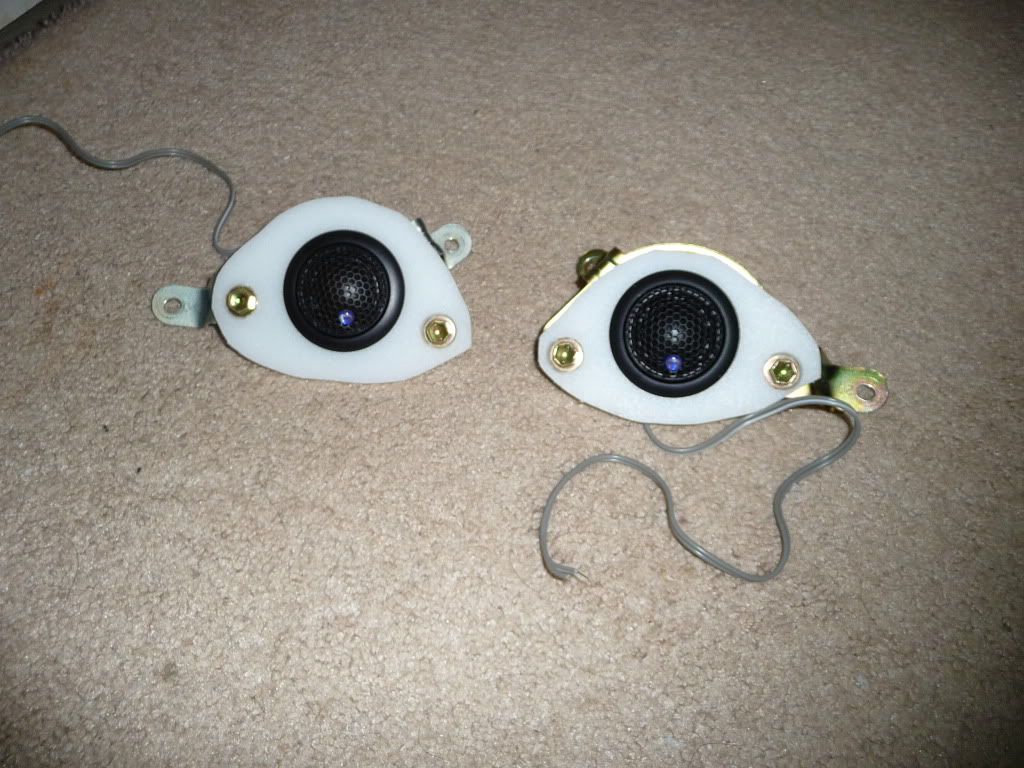
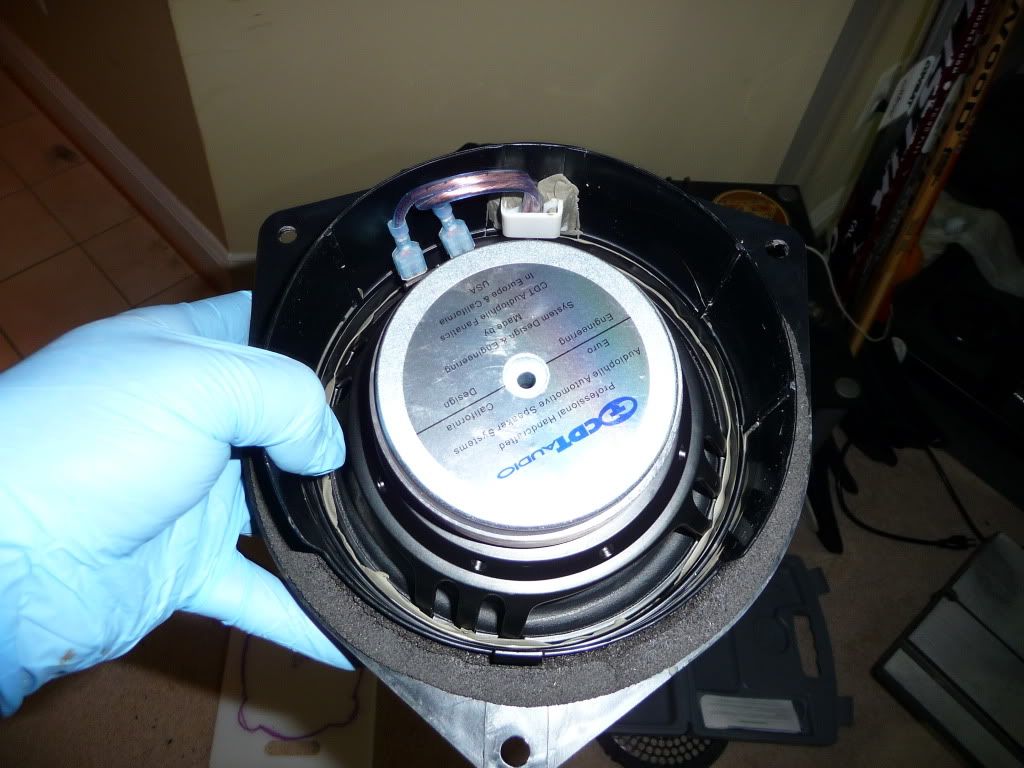
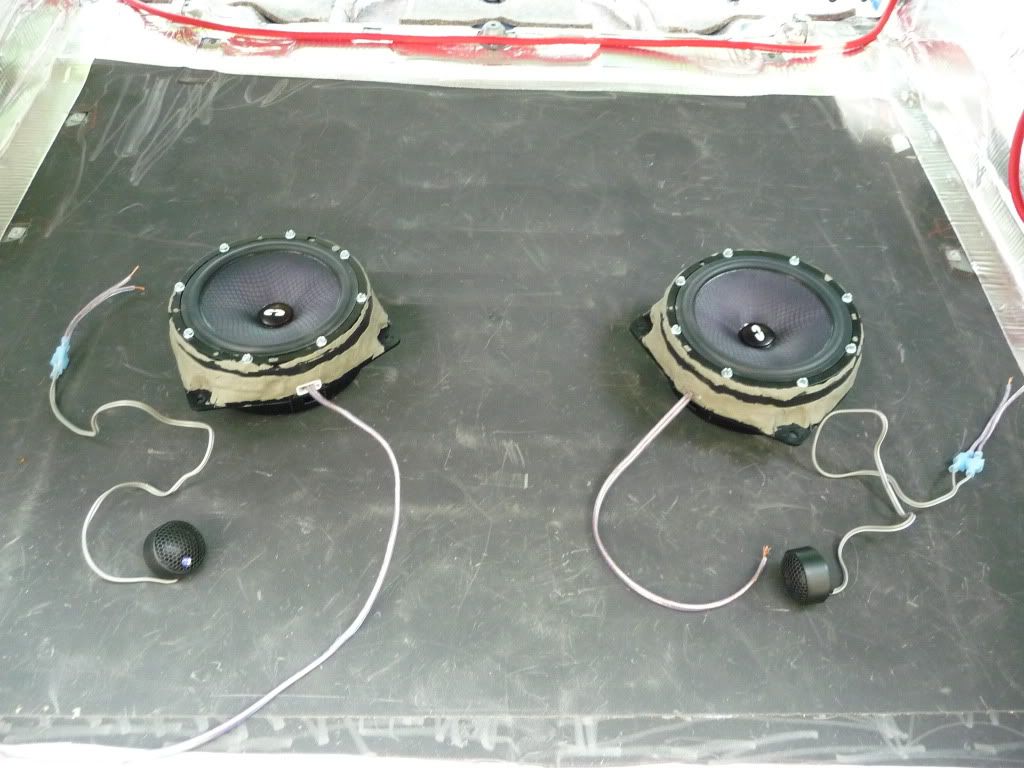
• Speaker adapters/wiring. The stock brackets work well, just needed to either buy or make an adapter. I made my front woofer and tweeter adapters out of HDPE (cutting boards from Walmart provide a very cheap alternative). They’re waterproof (better than mdf which will absorb moisture if untreated) and will not vibrate.

P1050919.jpg~original


Ready for speakers:


P1050921.jpg~original


Tweets mounted to factory brackets:

P1050922.jpg~original


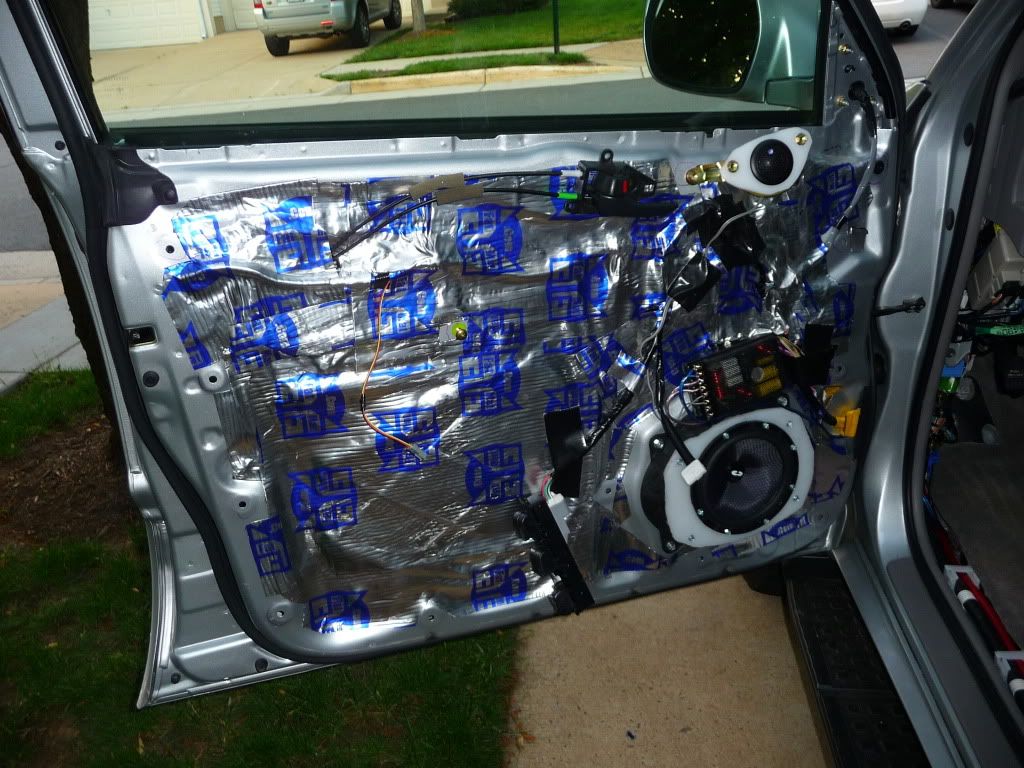
X-overs and speakers mounted:

P1050928.jpg~original


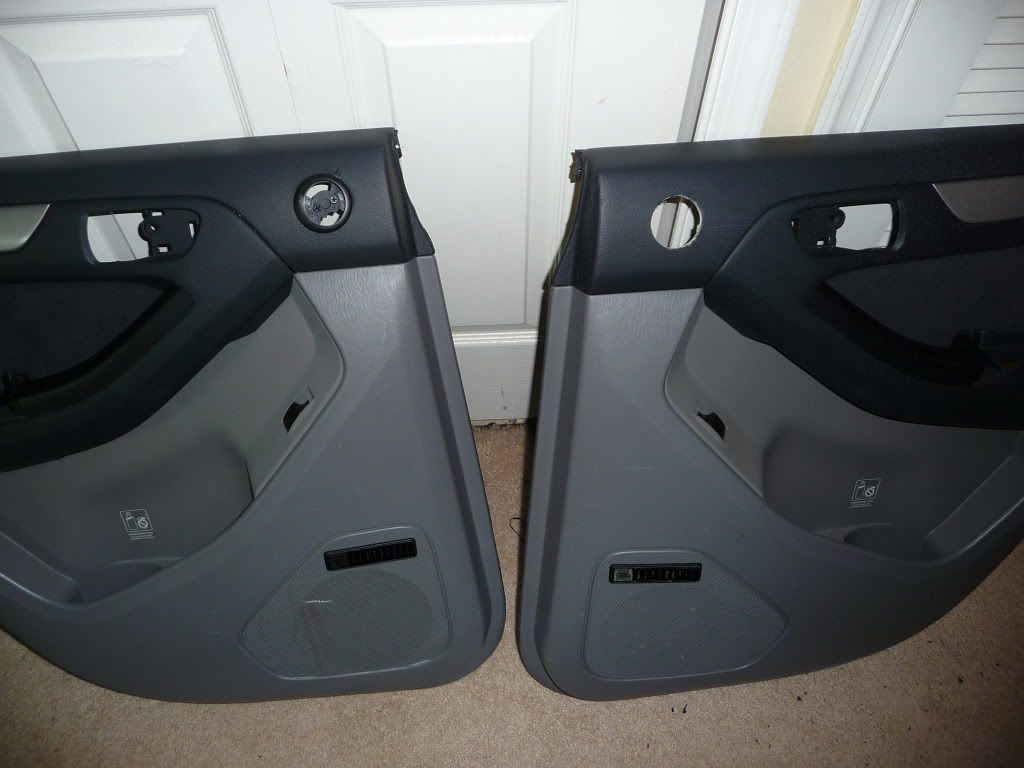
For the rears, I used ½” plastic spacers packed with clay. By drilling through the factory wiring routing system I was able to run my aftermarket wiring neatly through the adapter without having to drill a hole in my door. Using a hole saw, I mounted the rear tweeters in front of the door handle on the rear door panels. Building in a disconnect for the tweeter wiring makes future door panel removal easier.

P1050903.jpg~original


P1050910.jpg~original


Rear panel - tweeter holes cut and mount in place:

P1050888.jpg~original


Rear door speakers installed:

P1050924.jpg~original


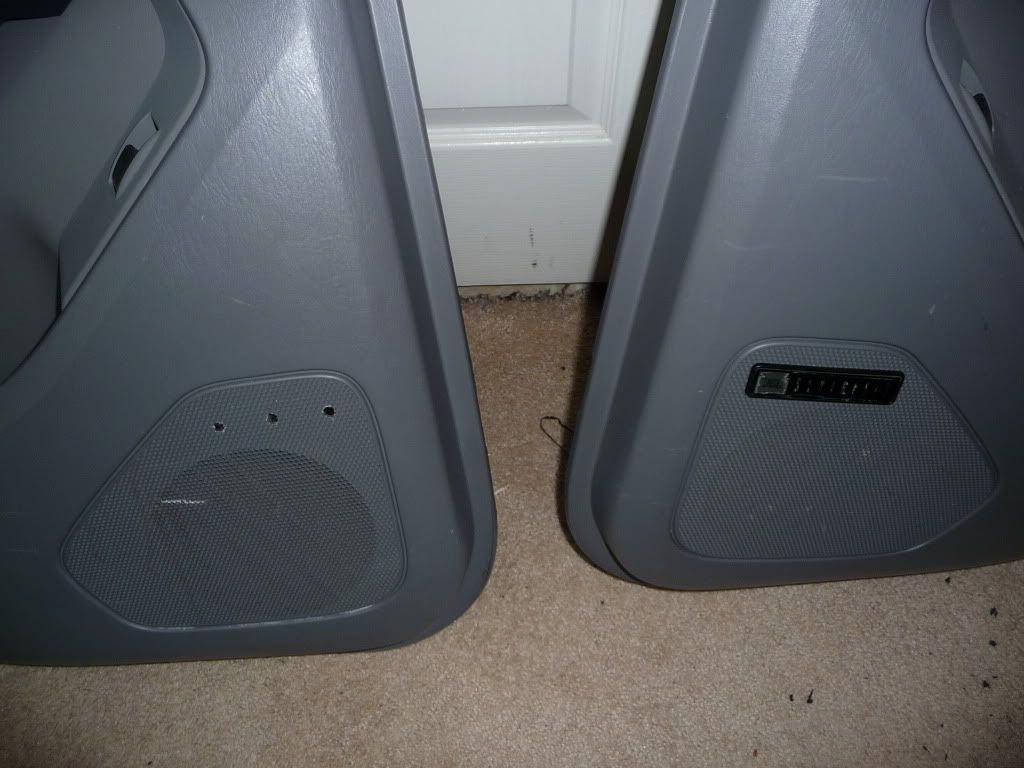
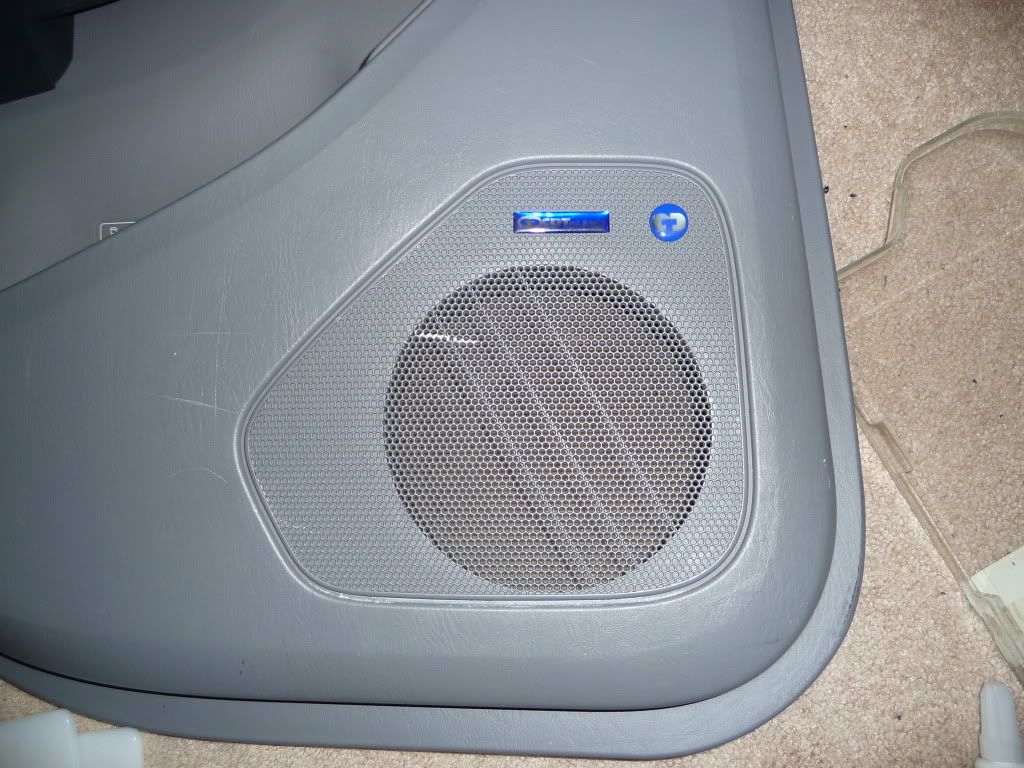
• Door panels. I cut the speaker trim down on the back of the panels and removed the center support brace on the front doors so I could locate my X-over in that location. I also drilled out the JBL nameplates (which were pretty beat up) and replaced them w/ the ‘CDT Audio’ tags I peeled off the X-over covers.

P1050892.jpg~original


P1050899.jpg~original


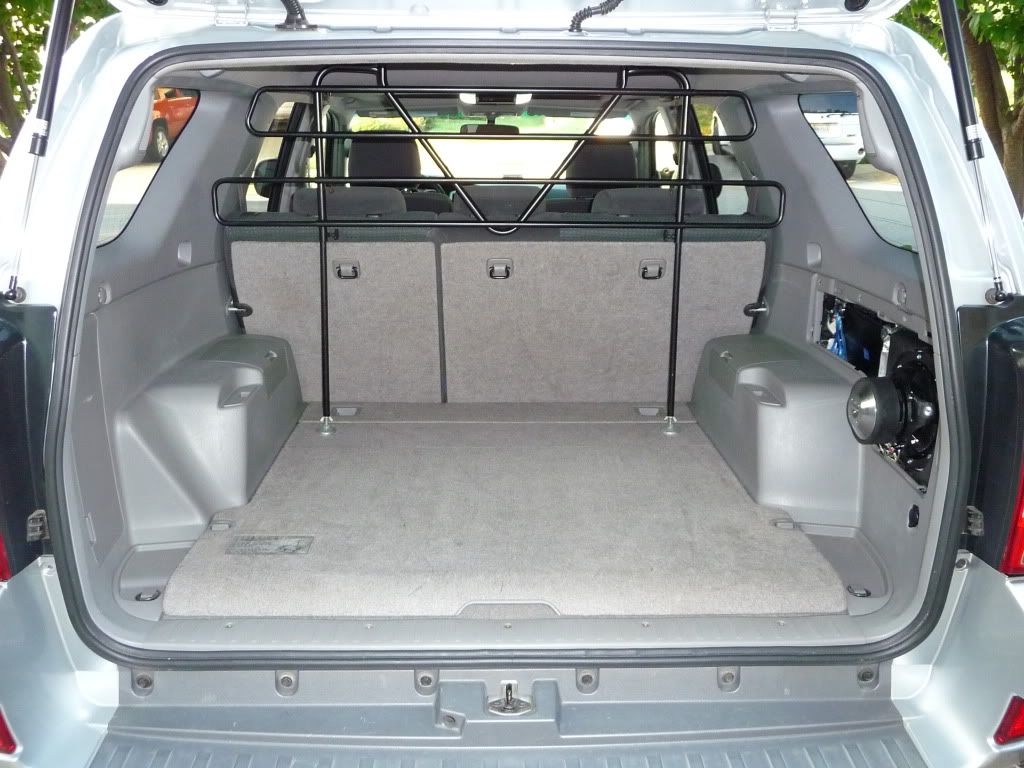
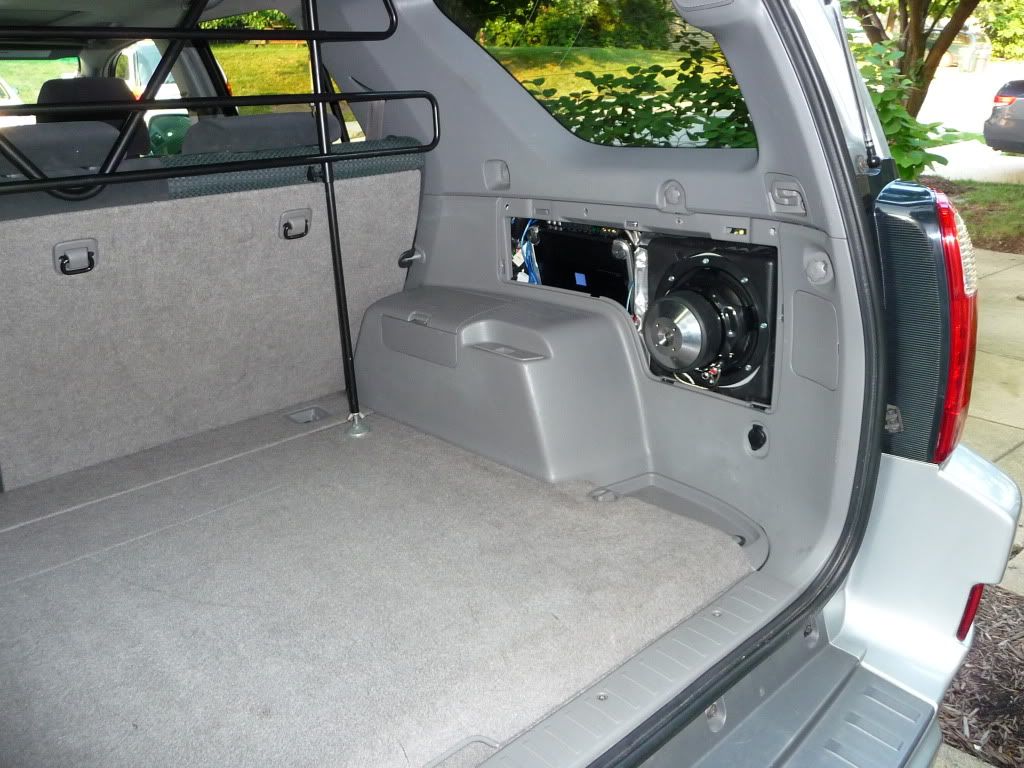
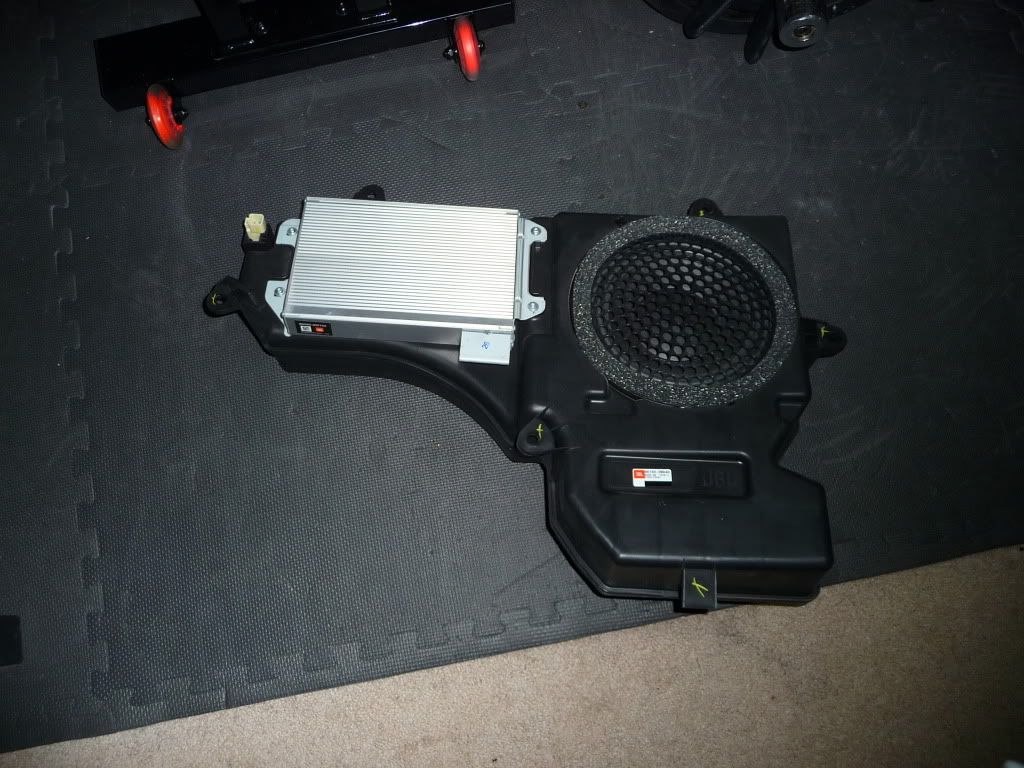
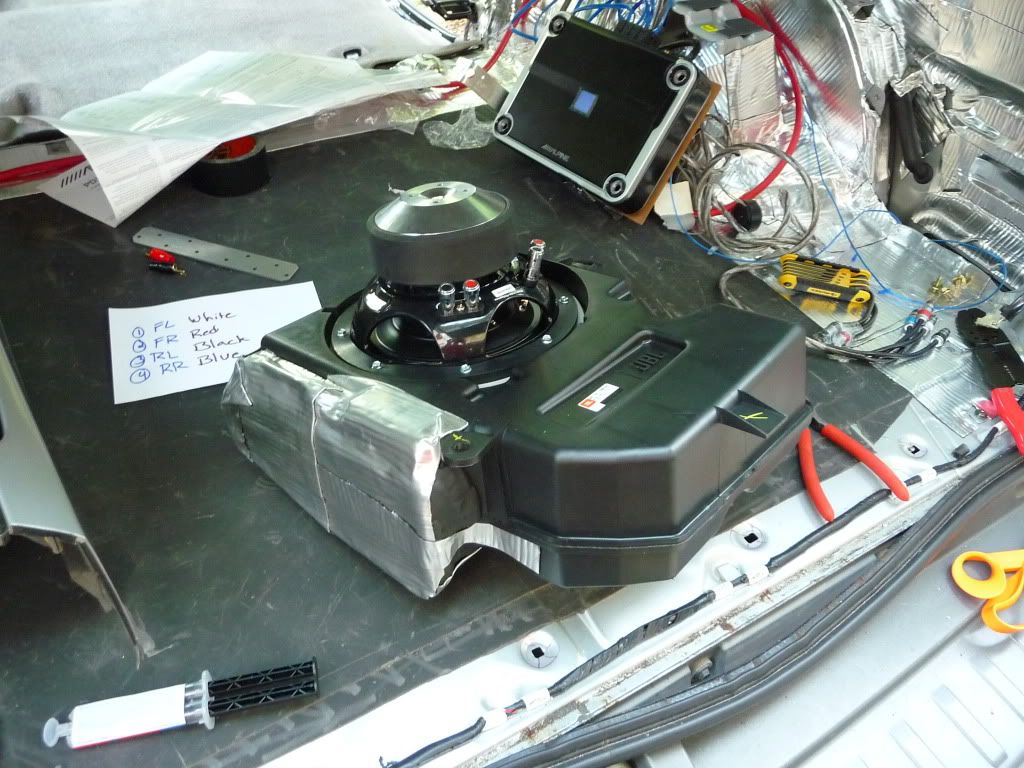
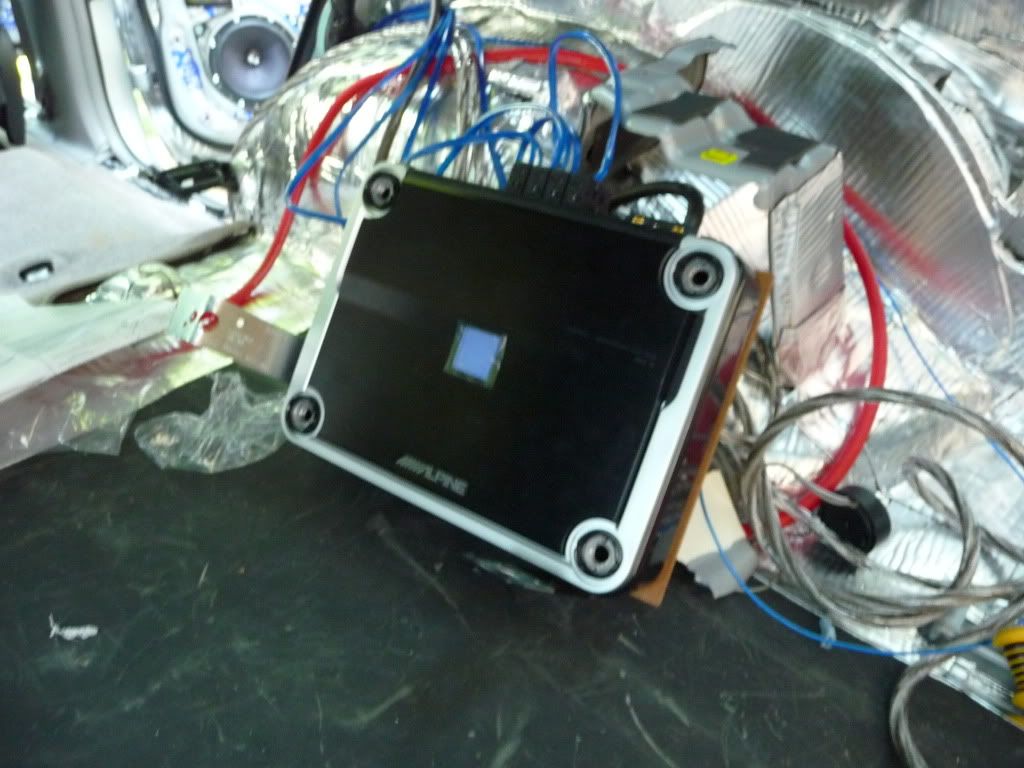
• Subwoofer enclosure. After several attempts to keep a portion of the factory box where the amp is located, I had to cut it completely off and seal up the factory box. It was the only way the PDX-5 would fit. I fabricated a mount out of ¼” mdf with sheet metal brackets that secure the aftermarket amp snugly in the stock location.

Original box:


P1050806.jpg~original


Box after cutting/sealing/reverse mounting sub:


P1050938.jpg~original


Amp mounted on mdf w/ brackets:

P1050937.jpg~original


Everything snugly in place, OEM style, but with more power!:


P1050943.jpg~original


• Wiring. Pretty standard. Ran power through the factory firewall seal (resealed it of course) down the driver side and over. RCA’s/remote/speaker wire down the passenger side and across. Imprint tuning module in the glove box. Speaker wire can be snaked through the factory door grommets with a pin file/silicone spray. On the rear doors be sure to secure the speaker wire to the factory loom which runs low inside the door (otherwise it may interfere with window operation).

P1050875.jpg~original


P1050878.jpg~original


Once everything is wired, fire it up! Hopefully you hear music haha. :party:

If so, it’s time to double check everything and reassemble.
 

Members online

No members online now.

Forum statistics

Threads
278,316
Messages
3,554,120
Members
248,016
Latest member
Advally Service

Trending content

Back
Top