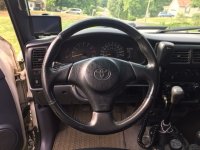
Steering Wheel Swap - Lexus IS300 with E-Shift

midcoma

Member
Helpful Links:
Steering Wheel Wiring
Cruise Control Mods


Parts Needed:
(I purchased all my parts off Ebay. I got lucky and found someone selling an IS300 steering wheel that already had a Toyota airbag in it (I'm assuming from a Rav4, but I'm not positive), and I messaged a seller to verify the clock spring/spiral cable had 6 pins before purchasing)

'01-'05 Lexus IS300 Steering Wheel with E-Shift - came with all automatics, manual transmission cars didn't have the E-Shift buttons

'01-'05 Lexus IS300 Clock Spring/Spiral Cable from a car with automatic transmission. The clock spring must have 6 pins in order for the steering wheel buttons to work.

Airbag that will fit the steering wheel and your airbag plug. There's a few options for this but I don't know them all or specific years. The Lexus IS300 should work, some Rav4s work, some Corollas, some Celicas, some Supras. If the plug on the airbag you get doesn't fit, there's a good chance you can remove the ignitor from the back of your airbag (4 nuts) and swap it onto the new airbag, but that's your call.

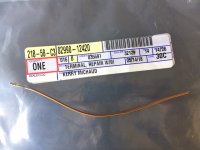
Pigtail wires from Toyota in order to use the steering wheel buttons. Part number 82998-12420, quantity 2.

Random wiring tools/supplies.


Process:

Steering Wheel Swap:
The steering wheel swap is very straight forward and will swap without any modifications. If all you want to do is change the wheel, you won't have to worry about the wiring. Without the wiring modifications, your horn and airbag will work. Cruise control will probably turn on but I don't think you'll be able to set or adjust a speed. The buttons on the wheel won't do anything.

To change the wheel:
- Center the steering wheel.
- Disconnect negative battery cable. Do this because we're disconnecting air bags and don't want to run into any problems.
- Remove the small round caps on the left and right side of the steering wheel with your fingernail or small flat head screw driver.
- Use a small torx bit to loosen the screws under these caps that hold the airbag. The screws should not fall out all the way. There's a retention clip that holds them in place when they're backed out.
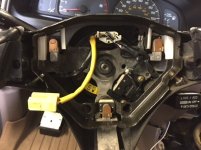
- Carefully remove the airbag and disconnect the yellow plug. To disconnect the plug, slide the white part of the plug away from the connection, then pull the plug out.
- Disconnect the white plug inside the steering wheel.
- Using a 19mm socket, loosen the nut in the center of the steering wheel. Back the nut off a bit but don't remove it completely.
- To remove the steering wheel, you can use a puller if you want, but it isn't necessary. With the nut still on the shaft, grab the left and right side of the steering wheel and pull while wiggling left to right. The wheel should break loose after a few seconds and the nut will prevent it from coming completely off.
- Remove the nut completely and take off the steering wheel.
- Install the new steering wheel on the splined shaft, ensuring it is level.
- Install the nut on the end of the shaft. Torque is 25ft-lbs.
- Plug in the white connector.
- Plug in the airbag and place it in the steering wheel.
- Secure the airbag with the screws on the left and right side (if you care, 78in-lbs). My screws for the Lexus airbag were phillips, not torx :shrug:. You may have to hold the airbag out slightly. When I replaced the steering wheel on my Tacoma, the horn sounded continuously as soon as I reconnected the negative battery cable. Turns out the airbag was seated too far down and the horn connections were making contact inside the steering wheel.
- Reconnect negative battery cable.


Wiring:

Connectors:
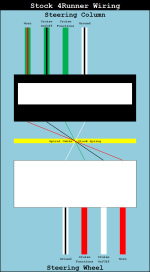
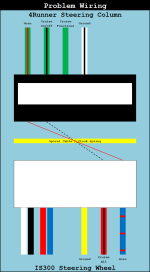
There's a few problems with the wiring, mainly because the wiring doesn't quite match up.

- The 4Runner plug on the steering column has 4 wires.
- Green with red stripe - Horn
- Green with black stripe - Cruise control (on/off)
- Green - Cruise functions (resume/accel, set/coast, cancel)
- White with black stripe - Ground
- Empty slot
- Empty slot

- The 4Runner plug on the steering wheel has 4 wires.
- Empty slot
- Empty slot
- White with black stripe - Ground
- Red - Cruise functions (resume/accel, set/coast, cancel)
- White - Cruise (on/off)
- Red (far right) - Horn

- The clock spring/spiral cable on the 4Runner has 4 pins, because the 4Runner has 4 wires. The clock spring/spiral cable on the IS300 has 6 pins but only 5 of them are used.

- The IS300 has 7 wires that use 5 pins.
- 2 wires, White and Black - Downshift
- 2 wires, Red and Blue - Upshift
- Empty slot
- Yellow - Ground
- Red with black stripe - Cruise (all functions)
- Blue with red stripes - Horn (mine is black in the pictures because there was damage to the wire casing, so I covered it with heat shrink)

Cruise Control:
Looking at the info above, you can see that the 4Runner uses 3 wires for the cruise control (ground, cruise on/off, and cruise functions). The IS300 only uses 2 wires for the cruise control (ground and cruise functions).

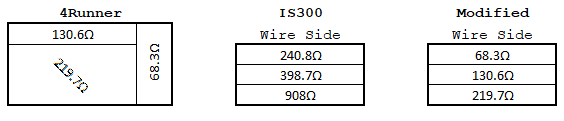
The cruise switches use resistors to control the different functions. The 4Runner cruise control switch and IS300 switch have different resistance values. These resistors need to be switched so the 4Runner computer gets the correct signals.
 

Attachments

  • IS300 Steering Wheel.JPG
    IS300 Steering Wheel.JPG
    85.4 KB · Views: 6,056
  • Stock 4Runner Steering Wheel Wiring.png
    Stock 4Runner Steering Wheel Wiring.png
    28 KB · Views: 6,183
  • Problem Wiring.png
    Problem Wiring.png
    24.4 KB · Views: 5,918
  • Needed Wiring.png
    Needed Wiring.png
    32.4 KB · Views: 5,659
Register to hide this ad
Steering Column Wiring

The steering column wiring is also relatively straight forward.

Process:
- Remove steering wheel using above steps.
- Remove the 2 screws in the front of the plastic trim and the screw in the center of the bottom piece of trim, under the steering column.
- The 2 pieces of trim snap together and will take a little persuasion to get apart. Once they are apart, remove them from the steering column.
- You don't have to, but it's easy to go ahead and remove the clock spring/spiral cable at this point to get it out of your way. Simply remove the 4 phillips screws holding it on.
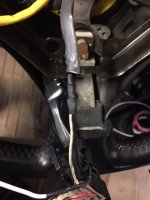
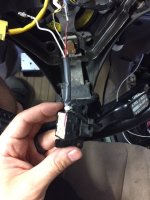
- Disconnect the 2 plugs from the spiral cable. The airbag plug has a locking clip on the bottom side that needs to be disconnected first.
- Attach extra wire to the pigtail wires you bought from Toyota. Use a color of your choice and enough wire to reach whatever you want to connect them to.
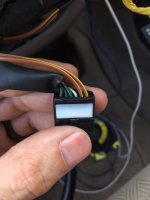
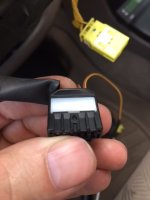
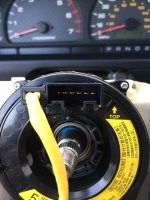
- Using a small flat head screwdriver, pry up the white block in the top of the black connector. It doesn't need to be removed completely.
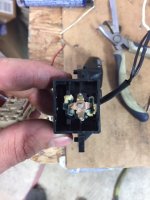
- Insert the pigtail wires into the empty slots on the back of the plug. Make sure they snap in. The empty slot next to the white wire with black stripe will be for the upshift button on the back side of the steering wheel. The empty slot on the far right of the connector will be for the downshift button on the front of the steering wheel.
- Press the white block back into the connector until it is fully seated.
- Route the extra wires as necessary.
 

Attachments

  • 1-1.jpg
    1-1.jpg
    89.6 KB · Views: 4,949
  • 1-2.JPG
    1-2.JPG
    133.2 KB · Views: 4,865
  • 1-3.JPG
    1-3.JPG
    79.1 KB · Views: 4,863
  • 1-4.JPG
    1-4.JPG
    66.5 KB · Views: 4,884
  • 1-5.JPG
    1-5.JPG
    77.8 KB · Views: 4,898
  • 1-6.JPG
    1-6.JPG
    76.3 KB · Views: 5,184
  • 1-7.JPG
    1-7.JPG
    67.2 KB · Views: 4,906
  • 1-8.JPG
    1-8.JPG
    82.2 KB · Views: 4,769
Last edited:
Clock Spring/Spiral Cable

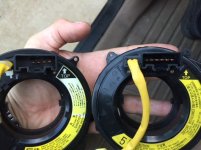
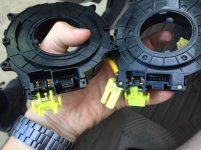
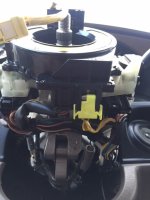
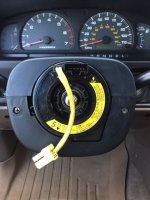
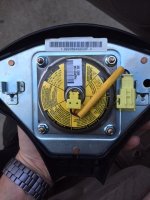
These pictures will show the difference between the 4Runner and IS300 assemblies. You can also see the 4 phillips screws that need to be removed in order to remove the clock spring/spiral cable.

- The 4Runner only has 4 wires and the clock spring/Spiral cable only has 4 pins.
- The IS300 clock spring/spiral cable has 6 pins, but only uses 5 of them. You can see in the diagrams attached to the first post that one of them is left open.
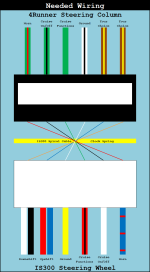
- In order for the wiring to work properly, all 6 pins of the IS300 clock spring/spiral cable will be used, as seen in the diagram for "Needed Wiring".

Process:
- I'm going to assume you have completed the steps above and have already removed the stock clock spring/spiral cable.
- Insert the connectors into the back side of the assembly and ensure they are fully seated. Make sure you secure the locking portion of the airbag connector.
- Slide the assembly over the steering shaft and align the mounting holes.
- Insert the 4 phillips screws into the mounting locations.
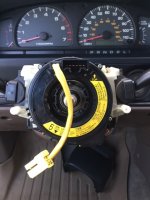
- Follow the instructions on the front of the assembly to center the clock spring/spiral cable. This assembly allows the steering wheel to be electrically connected to the steering column and still turn. There is a ribbon cable that is wrapped in a spiral inside the assembly. It connects on either end to the plugs on the steering wheel/column. The assembly has a total of 5 rotations. If you turn it beyond the 5 rotations, there is a good chance of breaking the ribbon cable inside. Turn the plug at the top left until you feel slight resistance. This is the max left point of the rotation and the plug should be towards the bottom. Now turn the plug right 2.5 turns. This centers the assembly. The plug should be at the top and the arrows at the bottom should align. Leave it in this position while you finish the steering wheel install.
- Reinstall the steering column trim. Snap the two halves together and insert the 3 screws, 2 in front, 1 underneath.
 

Attachments

  • 2-1.JPG
    2-1.JPG
    105 KB · Views: 4,803
  • 2-2.JPG
    2-2.JPG
    104.8 KB · Views: 4,679
  • 2-3.JPG
    2-3.JPG
    102.3 KB · Views: 4,828
  • 2-4.JPG
    2-4.JPG
    99.4 KB · Views: 5,295
  • 2-5.JPG
    2-5.JPG
    104.2 KB · Views: 4,952
  • 2-6.JPG
    2-6.JPG
    88 KB · Views: 4,778
  • 2-7.JPG
    2-7.JPG
    100.3 KB · Views: 5,608
Last edited:
Cruise Control Resistor Modification

Both of the cruise control switches will need to be disassembled for this modification. You will also be cannibalizing the switch from your 4Runner, so be sure you really want to install this steering wheel. It's not difficult, but may seem a bit intimidating. Other people have installed the 4Runner switch into this type of steering wheel, but it doesn't fit properly and the controls are at the wrong angle. That wasn't going to work for me.

Process:

Disassemble the 4Runner Switch:
- Remove the 3 phillips screws holding the switch assembly in the steering wheel.
- Remove the switch assembly from the steering wheel.
- Using a small flat head screw driver, pry up the white clip on the top side of the connector.
- Using a small pick, hold back the retaining tab for each wire inside the front side of the connector.
- Pull the wires from the back side to remove them from the connector.
- Using the small screw driver, pry the cover off the top side of the cruise control switch. I'm considering the top side the side with the white writing.
- Lift up on the switch handle to remove it from the body. The white tab on the left end has a spring inside it so be careful.
- Remove the black block to the right of the electronics. There are tabs holding it in place.
- Cut the white zip tie that holds the wiring to the body.
- Remove the circuit board.
- The layout of the resistors can be seen in the attached image. If you don't have a multimeter, I suggest keeping very good track of which one is which.
- Using a soldering iron, heat the solder on the circuit board in order to remove the resistors. Keep track of which resistor is which.

Disassemble the IS300 Switch:
- Remove the 2 phillips screws holding the switch assembly into the steering wheel.
- Remove the switch assembly from the steering wheel.
- Following the same steps as above, remove the red wire with black stripe from the connector.
- Cut the white zip tie that holds the wiring to the body.
- Remove the black sleeve from the cruise control wiring. I cut it off.
- You can do the rest with the white and black ground wires still connected if you'd like, but I removed them so I didn't have to deal with the assembly being attached to the steering wheel. I cut the white wire with black stripe at the crimp where it connects to the black and white wire.
- Using the small flat head screwdriver, remove the white block from the switch body. There are 2 tabs on each side (left/right) holding it in.
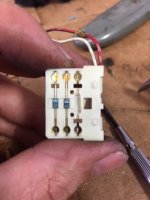
- Remove the resistors from the white block. I used the small flat head screw driver to break them off. I removed and replaced one at a time, but you can remove them all at the same time. Which ever you prefer.
- Once the resistors are removed, the center section where the resistor body goes needs to be enlarged because the 4Runner resistors are physically larger. I used a drill bit about the size of the resistor and carefully removed some plastic until the larger resistor fit.

Modify the IS300 Switch:
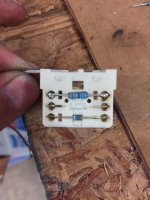
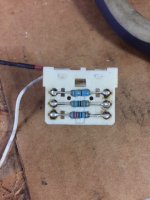
- The layout of the resistors can be seen in the attached image. The values are what I measured with my multimeter. For replacement, I matched the smallest 4Runner resistor with the smallest IS300 resistor and so on.
- Straighten out the leads on the 4Runner resistors and clip them to fit in the IS300 assembly.
- Solder the resistors into the IS300 body with the smallest resistance by the wires and the largest resistance away from the wires. I put flux in the holes at the end, laid the resistor in place, placed the tip of my soldering iron in the hole on top of the resistor lead, then inserted solder. It worked for me. Make sure the resistors are attached.
- You can see in the attached picture that there isn't much room between the resistors and the switch body, so it's important that they lay as flat as possible.
- Once all your resistors are replaced, insert the white block back into the switch body until it snaps in place. Make sure the resistors don't get hung up on the body.
 

Attachments

  • Cruise Control Resistance.png
    Cruise Control Resistance.png
    6.9 KB · Views: 4,694
  • 3-1.JPG
    3-1.JPG
    92.2 KB · Views: 4,699
  • 3-2.jpg
    3-2.jpg
    136.3 KB · Views: 4,638
  • 3-3.JPG
    3-3.JPG
    83.3 KB · Views: 4,686
  • 3-4.JPG
    3-4.JPG
    105.4 KB · Views: 4,668
  • 3-5.JPG
    3-5.JPG
    98.3 KB · Views: 4,689
  • 3-6.JPG
    3-6.JPG
    92.7 KB · Views: 4,655
  • 3-7.JPG
    3-7.JPG
    91.7 KB · Views: 4,589
Last edited:
Cruise Control Wiring

We need to convert the 2 wire cruise control from the IS300 to 3 wires in order to match the 4Runner wiring. Overall it isn't that difficult.

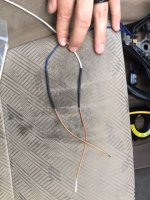
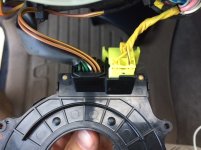
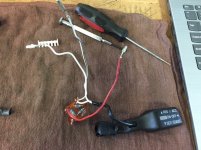
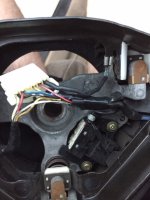
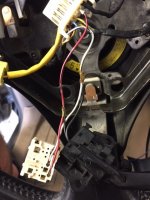
In the first 2 attached pictures, you can see that the yellow wire is the common ground for the steering wheel buttons. The red and blue wires go to the upshift buttons on the back side of the steering wheel. The white and black wires go to the downshift buttons on the front of the steering wheel.

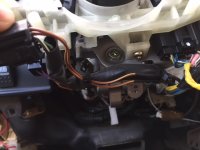
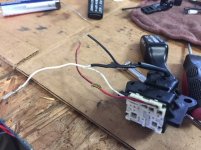
The third picture shows the stock wiring configuration of the steering wheel. Remember, I covered my horn wire on the right side with heat shrink due to a damaged casing.

Process:
- Again, assuming you've done everything above and already have the wires removed from their connectors.
- You're going to use the white wire from the 4Runner switch as a pigtail. Cut it off of the 4Runner switch with as much length as possible. I cut into the black wire sleeve to make sure I had a good length.
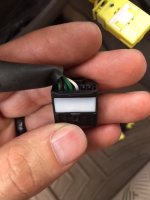
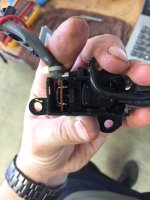
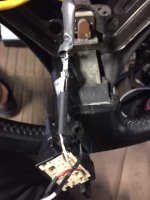
- Looking at the 4th attached picture, you can see that the red wire with black stripe is connected to a black and red wire for the IS300 cruise control switch.
- Cut the black wire off of this connection right at the crimp.
- I removed the remaining crimp from the red with black stripe and red wires by cutting it out, restriping the wires, soldering them together, and covering with heat shrink. If you want to do that, I suggest doing it now because it will shorten your wire some. You need to know your wire length for the next step.
- Now you need to connect the white pigtail wire you cut off the 4Runner switch to the black wire you disconnected from the red with black stripe and red wire. Cut it to a length that will make the connected wires closely match the red with black stripe and red wire length. Remember to account for the wire connection overlap. Solder the wires together and cover with heat shrink or use your preferred connection method.
- This new white wire will be the positive side of the connection for the cruise control on/off.
- The remaining red wire with black stripe that is connected to the red wire will be the positive side of the connection for the cruise control functions (resume/accel, set/coast, cancel).
 

Attachments

  • 4-1.JPG
    4-1.JPG
    91.7 KB · Views: 4,620
  • 4-2.JPG
    4-2.JPG
    95 KB · Views: 4,592
  • 4-3.jpg
    4-3.jpg
    95.2 KB · Views: 4,621
  • 4-4.JPG
    4-4.JPG
    109.4 KB · Views: 4,736
  • 4-5.JPG
    4-5.JPG
    117.7 KB · Views: 4,567
Last edited:
Cruise Control Wiring (Continued)

Process (Continued):
- If you removed the cruise control switch from the steering wheel in the above steps, you now need to connect the remaining black and white wire to the white with black stripe wire in the steering wheel.
- I did everything previously outside of the 4Runner on a bench. I already had the steering wheel bolted into the 4Runner, so now I went into the 4Runner to complete the following steps.
- I used the piece of black wire sleeve that I kept in tack from the 4Runner switch to keep things tidy. Place the sleeve over the white wire with black stripe first.
- Place your heat shrink over the black and white wires.
- Solder the black and white wire to the white wire with black stripe and cover with the piece of heat shrink.
- Feed the loose ends of the red with black stripe and white wire through the black sleeve.
- Slide the sleeve down towards the switch body and zip tie in place. There is a plastic tab meant for this purpose.
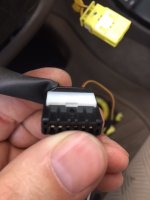
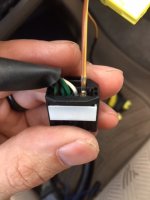
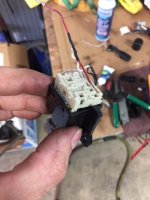
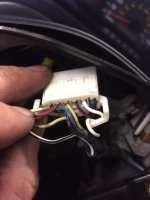
- Following the steps above, remove the yellow wire from the white connector and move it left one slot. It should be right next to the red and blue wires.
- Insert the red wire with black stripe into the white connector next to the yellow wire.
- Insert the white wire in the remaining hole, between the red wire with black stripe and blue wire with red bands.
- Reinstall the white retaining clip into the top of the connector.
- The white connector should now have all 6 slots filled and the wiring will match the 4Runner.
- Place the cruise control switch through the hole in the steering wheel and reattach it using the 2 phillips screws.
- Plug the white connector into the clock spring/spiral cable. The white arms are to hook the cable and keep it out of the way.


Important Notes:
- The buttons on the steering wheel are momentary (on when held, off when released).
- The switches are completing the ground side of a circuit. This means that the extra wire you added earlier needs to be connected to a hot (+12V) wire. If you were to test these switches with a test light and you had the light connected to a ground and the tip touching the wire, nothing would happen when you pushed the button. If you connected the test light to a positive source and the tip to the wire, the light would illuminate when you push the button.


My purpose for installing this wheel and making the buttons functional is for a backup camera system. I have a camera mounted inside the 4Runner that displays video from my child's car seat on the radio screen. This camera is always running so we can keep an eye on him without turning around. I'm in the process of installing an actual backup camera on the rear of the 4Runner. The backup camera will be wired to display when the car is in reverse, or when the button on the back of the steering wheel is pressed. With the limited view from my tire carrier I thought it would be neat to be able to display the rear view while driving down the road. Now I'll be able to do that by pressing the steering wheel button and when I let it go the video will switch back to my child's car seat.
 

Attachments

  • 4-6.JPG
    4-6.JPG
    85.9 KB · Views: 4,509
  • 4-7.JPG
    4-7.JPG
    85.2 KB · Views: 4,499
  • 4-8.JPG
    4-8.JPG
    98.7 KB · Views: 4,586
  • 4-9.JPG
    4-9.JPG
    77.4 KB · Views: 4,611
  • 4-10.JPG
    4-10.JPG
    107.1 KB · Views: 4,581
Last edited:
Airbag Connections

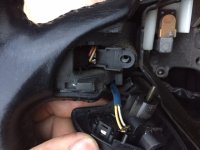
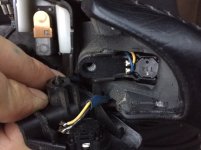
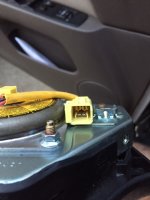
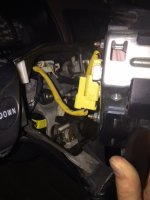
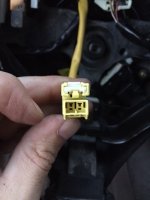
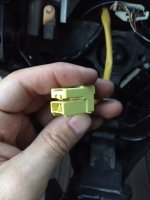
The airbag should be plug and play. Install using the directions in the first post for the steering wheel swap. These pictures are so you have something to refer to for connection type.
 

Attachments

  • 5-1.JPG
    5-1.JPG
    76.6 KB · Views: 4,564
  • 5-2.JPG
    5-2.JPG
    80.7 KB · Views: 4,473
  • 5-3.JPG
    5-3.JPG
    106.9 KB · Views: 4,493
  • 5-4.JPG
    5-4.JPG
    84.1 KB · Views: 4,456
  • 5-5.JPG
    5-5.JPG
    77.6 KB · Views: 4,478
Last edited:
Awesome to see someone give great detail and directions in a write up! Makes me have hope for the future of forum knowledge.
 
Awesome! Can't wait for the finished product.

Well, that was pretty much it. My phone died so I didn't get any pics of the final product.

So I guess I'll add some now.

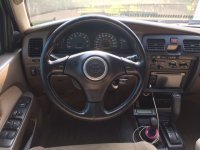
The first picture is the IS300 wheel in the 4Runner.

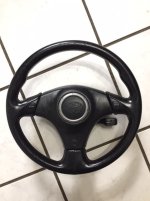
The second picture is an '06 Corolla S steering wheel with a '99 Rav4 air bag and spiral cable in my Tacoma. No buttons on this one. My Tacoma has aftermarket cruise control that is on the steering column, so the only wire going through the spiral cable is the horn.
 

Attachments

  • IMG_1047.JPG
    IMG_1047.JPG
    98.3 KB · Views: 5,700
  • IMG_1046.JPG
    IMG_1046.JPG
    108.5 KB · Views: 8,333

Members online

Forum statistics

Threads
278,310
Messages
3,554,080
Members
248,016
Latest member
Advally Service

Trending content

Back
Top