SURF RUNNER 2.0 Build, Maintenance & Modification: 2001 Stellar Blue Limited 4WD

SURF RUNNER

Senior Member
Initial Purchase in Virginia | Reinstalling Upgrades

I sold SURF RUNNER in early October and bought SURF RUNNER 2.0 on the morning of October 10th, 2015 in Richmond, Virginia. This near pristine 4Runner had 133,000 miles when I picked it up. Here is the link to my first build thread: http://www.toyota-4runner.org/3rd-gen-t4rs/160445-surf-runner-build-2001-stellar-blue-limited-4wd.html I will be referring to it from time to time, but please don't post on the old build thread. Buying this new 4Runner felt like being the guy who traded in his wife for a newer, younger model. I felt bad about it for about 3 minutes.

Anyway, when I put down the deposit on SURF RUNNER 2.0 and knew for sure I was going to sell SURF RUNNER I removed everything I wanted to keep from my old 4Runner and basically returned it to stock. I think that the only part I didn't remove was the Injen air intake - it was just too difficult and time consuming to find a complete factory intake system replacement and swap everything out. Parts I removed include the Sport hood, Sport grille, FJ Cruiser TRD Trail Team wheels, clear Hilux Surf corners, Weathertech floor liners, and square cargo shade brackets. The hardest part to find was the chrome 2001-2002 grille. It took me three trips to Houston to finally get the right one. The parts I had left over from my new 4Runner are listed for sale here: http://www.toyota-4runner.org/sale-t4r-items/207488-fs-multiple-parts-my-01-4wd-ltd-sneak-peak-surf-runner-2-0%3B-central-tx.html

My plans are to modify my 4Runner to be a blend of everything I like about the 3rd Generation 4Runners. There will be some elements from the Japanese Domestic Market (JDM) Hilux Surf, some TRD upgrades, some from the Mexican Baja 1000 race, a little bit of the California and Hawaiian surf theme, and other influences from here in the U.S and this forum.

The plans for SURF RUNNER 2.0 include:
- Rear Shrockworks bumper with tire carrier and jerry can mount (standard width; modified for 1" body lift); not mounting license plate in center of tire; fender flare extensions and mudflaps will be incorporated into the design
- Front ARB Taco Bumper (modified for 1" body lift and fender flare extensions)
- Rock sliders (probably Stubbs Welding)
- Gobi stealth full-length roof rack (sunroof option)
- Savage front and rear skid plate package (in aluminum if that option is available)
- 1" RB/4Crawler body lift
- 2.5" or 3" suspension lift to accommodate larger tires (Toytec front and Sonoran Steel 1.2 rear hybrid)
- Mickey Thompson Baja MTZs in the 285/75/16 size
- Spidertrax 1.25" wheel spacers
- TRD or Doug Thorley headers
- Warn M8000 winch
- Kenwood double din navigation/stereo head unit
- Hilux Surf JDM 185 Field Monitor
- Injen air intake

I'm going to paint the bumpers, fender flares and limited cladding Mini Cooper Horizon Blue... that should compliment the Stellar Blue factory paint. The flare extensions that cover the stock bumpers will somehow be incorporated into my aftermarket steel bumpers. All of the "bars" or "tubes" on the vehicle will be painted Millennium Silver. This includes the jerry can holder and the roof rack. I want to add some bars on the rear bumper that protect the rear quarters and tail lights. I will display my license plate on a 1990-1991 license plate holder (swing out tire carrier option). The skid plates and the recovery hardware (shackles, D-rings) will be painted Corvette Electron Blue which is my accent color. I'm buying the olive drab 20 litre Wavian jerry can from 20 Liter (Olive Drab) Steel Wavian Jerry Can. I think the army green will look good against the silver painted jerry can holder, but I might decide to paint it another shade of blue.

n1MJW7Ch.jpg


I was lucky to find the original window sticker in my owner's manual

m9H5N0lh.jpg


Back in late 2000 or early 2001 a price of $40,321 was a decent chunk of change

67cSi35h.jpg


Preferred owner's manual zippered folio

bdUkVPNh.jpg


The folio was packed with information

xlV8IM5h.jpg


This 4Runner came with four keys

SmmJuQVh.jpg


The eight photos below were taken at the dealership in Richmond

1JkWBnEh.jpg


I'm not a fan of all the wind screens; these were removed immediately

cxYPlfRh.jpg


The running boards have since been removed

aODkXzFh.jpg


Notice the condition of the original driver-side Limited floor mat

DzVmRQ7h.jpg


The 4Runner I sold did not have the extra trim piece seen in the above photo; the missing bolt cover was found under the seat

ihPnCd4h.jpg


I sold the cargo cover because I prefer the earlier version (1996-2000) for various reasons stated here: http://www.toyota-4runner.org/3rd-gen-t4rs/160445-surf-runner-build-2001-stellar-blue-limited-4wd-2.html#post1631288

MkJGoI9h.jpg


mfGoJUAh.jpg


Notice how the Commonwealth of Virginia inspection/registration sticker is in the middle of the windshield

gHJ5AF1h.jpg


As you can see the engine bay is completely stock and very clean

gQi25NNh.jpg


The factory system will be replaced with an Injen air intake

uPhLlHAh.jpg


qKcVrn1h.jpg


Sport hood, Sport grille, clear corners and TRD rims have been installed

6Uld15Uh.jpg


The front door windows need to be tinted

fJPlwnqh.jpg
 
Last edited:
Register to hide this ad
Previous Experience Modifying Vehicle | 2001 C5 Corvette

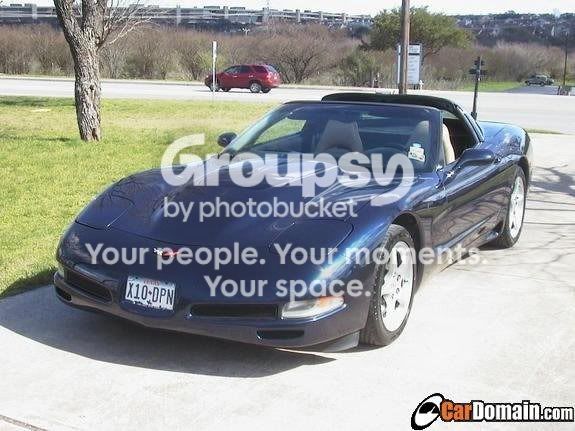
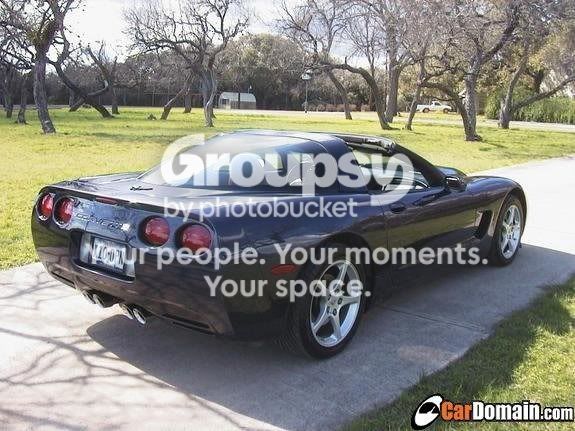
I learned a lot about modifying cars from my C5. Below are some photos of my 2001 6-Speed Corvette that I sold back in early 2010. I had decided to move down to the Caribbean for a while, so I had to sell it. At first glance it looks stock, but I actually did quite a few modifications to it. The build style was "stock on steroids".

2001 Corvette Coupe
- 160,000 miles when I sold it
- Daily driver, this high mileage car gets compliments all the time
- Navy blue metallic
- Oak interior with sports seats
- HUD display
- Vararam cold air intake
- LGM long tube headers
- High flow cats
- Corsa pace car (indy) exhaust
- Motor city mold carbon fiber supercharger hood
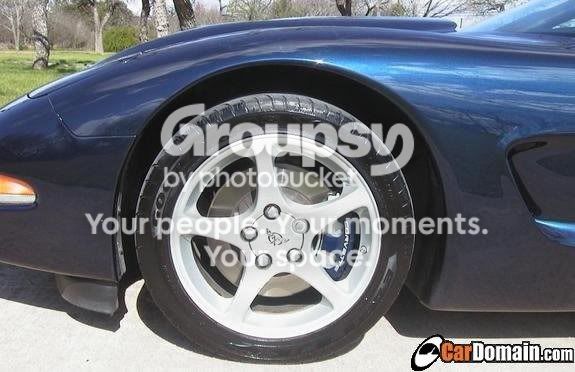
- Functional rear brake vents
- Powdercoated navy blue calipers
- Navy blue engine accents
- Black leather arm rests
- Cargo net
- Custom storage bins
- Steel mesh screens on all vents


NavyBlueCorvette1_1.jpg~original


NavyBlueCorvette2_1.jpg~original


NavyBlueCorvette3_1.jpg~original


NavyBlueCorvette6_1.jpg~original


NavyBlueCorvette12_1.jpg~original
 
Last edited:
And subb'ed cuz I like to shamelessly steal your ideas and compliment your attention to detail!
 
Last edited:
Spidertrax | Tuner Lug Nuts | Scoop Insert Emblem

I received a set of 1.25" Spidertrax for Christmas. I was excited to finally get them installed over the weekend.

01/02/2016 Installation
137,892 Miles


csfZb0Mh.jpg~original


These are the Spidertrax you need for a 3rd Gen (unless you want 1.5" and/or black)

ve4osAmh.jpg~original


I knew it might be close, but when I compared the Spidertrax to a can I painted 2002 Corvette Electron Blue it was an extremely close match. Corvette Electron Blue is going to be my accent color (TBU calipers, D-rings, winch hook, etc.). Obviously once installed the Spidertrax are only visible if you are really looking for them. The only reason that this really matters to me is because this particular color blue seems to be a fairly standard color for annodizing aluminum, so that means I can more easily buy accessories in my accent color. I didn't plan this, I just got lucky here.

RWGW6n2h.jpg~original


I went ahead and got the tires rotated while the Spidertrax were getting installed.

lbDUPJSh.jpg~original


Before...

ERMKdgSh.jpg~original


After...

okyHVRxh.jpg~original


There look of my 4Runner with the Spidertrax installed is more aggressive than I had imagined. I would say that the difference in aesthetics is dramatic and I was thrilled with the outcome. I have 265/75/16 tires and there is some slight rubbing against the Limited flares when I turn in reverse. Going forward there is some slight rubbing if I turn really sharp. I plan on getting a 1" body lift soon, so these minor rubbing issues should be resolved then.


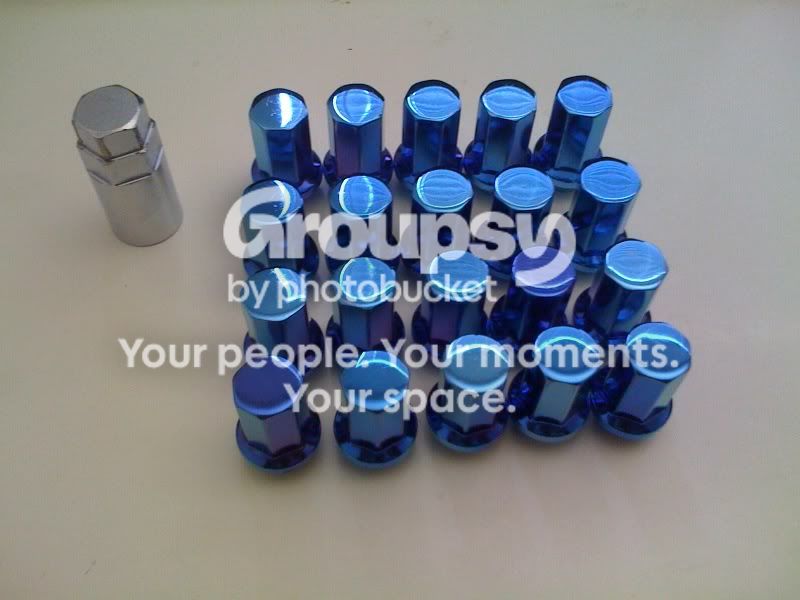
So staying on the subject of wheels I have been doing some research on aftermarket or tuner lug nuts. As most of you know, the OEM lug nuts that most of us use are chrome shank or mag seat with a built-in washer (12mm x 1.50 thread pitch). They are very durable, but I am just getting a little bored with them. The only other color I have seen these offered in is black, which I don't want. I would like some blue lug nuts that have a durable finish. I've done some research on powdercoating lug nuts, and the results are mixed - mostly not good.

1)-------Tuner----------2)-3rd Gen 4Runners/Other Toyotas-3)-------------------------4)----------------------------5)--------------------------

seat-type-faq.jpg~original


This led me to looking at all of the tuner lug nuts. Most of the tuner lug nuts (#1 on above chart) have a 60% cone seat vs the flat seat of our mag seat or shank-style lug nuts (#2). The cone end of the lug nut corresponds to the cone depression in many aftermarket wheels. People have done it, but you never want to used tuner lug nuts on the flat surface of an OEM wheel. This would result in a contact point that is an extremely thin circle... not safe.

Originally I thought I found a solution with the washers/adapters pictured below, but these only work on wheels with the flat seat (#4) in the chart above. Our OEM alloy wheels have a relatively large cylinder-shaped hole that would need to be filled with a metal cylinder that you could thread down there before the washer below could be added. A machine shop could probably do it, but it would probably cost a fortune and wouldn't be worth it.

I asked one of the most knowledgeable sellers of lug nuts and washers on eBay http://www.ebay.com/usr/massey1946 and I copied the response and pasted it below...

UNFORTUNATELY YOU CANNOT DO WHAT YOU WANT TO DO. TOYOTA OEM WHEELS HAVE A LARGER LUG NUT HOLE THAT REGULAR LUG NUTS AND NOTHING ELSE WILL FIT.

YOU DON'T WANT TO PUT YOUR LIFE IN DANGER WITH THE WRONG LUG NUTS.

IF YOU TRY TO DO WHAT YOU WANT TO YOU THEN YOUR WHEELS WILL VIBRATE AND FLY OFF.

DON'T DO THIS JUST FOR A DIFFERENT LOOK IN LUG NUTS. IF YOU VALUE YOUR LIFE JUST STAY WITH FACTORY OEM LUG NUTS.

gorilla-lug-nut-washers-tapered-flat-adapter-style-26.jpg~original


Before I found out that there was no easy way for me to use tuner lug nuts I did some research. The lug nuts offered in blue that consistently got rave reviews were the Project Kics. I have not found one person to give a negative review of Kics lug nuts. Anyway, the Kics that caught my eye were the Caliber 24 Heptagon (7-sided) lug nuts coated in Titanium in a beautiful blue color. I don't like locking lug nuts where one lug nut if different that the other 5 on the wheel. These lug nuts are theft deterrent because they require a 7-sided adapter that most street thugs are not going to have handy. Standard lug nuts are hexagons,or 6-sided. The titanium coating and blue finish is apparently extremely durable. They are made from a forged steel alloy (SCM435) that is extremely strong. Since I have realized that I can't use these lug nuts, I am looking into the cost of getting a company to do a similar titanium coating in blue. Titanium coating is ultra thin and incredibly strong. There are companies that do this primarily for firearms, but there are some automotive applications as well.

kics_hep_24.jpg~original


caliber-24-580x482.jpg~original


photo.jpg~original


This is an incredibly small detail, but I think they look sharp on my TRD wheels. I found these aluminum valve stem caps on eBay. 4 x Aluminum Bullet Style Tire Rim Valve Wheel Air Port Cover Stem Cap Silver | eBay They are $2.88 shipped for a set of 4, so buy extras. These caps are a shiney silver, not chrome. They also come in different colors. Obviously there is nothing wrong with the regular black plastic caps, but why not upgrade when it is this cheap?

uD4apg7h.jpg~original


Earlier today I added a TOYOTA emblem to my scoop insert. I like the Satoshi grille, but I liked the 2001-2002 factory grille more, so that leaves me with the oval emblem in front. A while back I thought about putting a TOYOTA emblem in the scoop insert so that I would have the TOYOTA emblem and the oval emblem visible from the front. I think that it turned out well... you be the judge.

jzfPMmUh.jpg~original


As most of you know this is the TOYOTA emblem from the rear hatch of a 3rd Gen. The red adhesive automotive double-sided tape is from Auto Zone.

fSwE0Ymh.jpg~original


I rubbed off much of the old adhesive from the back of the emblem, but I didn't worry about getting all of it. I cleaned the back of the emblem and the scoop insert screen with rubbing alcohol.

NAj1vSwh.jpg~original


Yes, I realize that my scoop insert needs to be repainted... a project for another day. I placed the emblem flat on the scoop insert against the screen and measured from left to right (from the left tip of the "T" to the right tip of the "A").

olzh9gph.jpg~original


Once the emblem was centered I put down masking take on both the horizontal and vertical surfaces to make sure it was an accurate guide as far as centering left to right.

msuhK0zh.jpg~original


I then cut the red tape into several narrow strips (slightly thinner than the back of the emblem letters) and cut to size. This tape is extremely easy to work with. The hardest part is peeling off the red backing. I don't have much in terms of fingernails so I used a brass collar stay. If your wife or girlfriend has fingernails I would suggest using them! Anyway, for me peeling off the red backing was actually the hardest part, but it just takes a little patience.

anQpB9ih.jpg~original


After I removed the red backing all I really had to do was center top to bottom since I already had the masking tape guide there. There isn't much room top to bottom so I was able to eyeball this accurately.

6ilPFTEh.jpg~original


0SLsIHwh.jpg~original
 
Last edited:
Clean & pristine / are often overused words - but not this time...great find SURF RUNNER, your 3rd gen, is truly a "cream-puff".
- also, nice use of a Toyota emblem, in the hood scoop grill
 
Last edited:
[MENTION=63487]A.Wilson013[/MENTION]

Basically I wanted to get my 4Runner financed for various reasons. My credit union could not loan me money on my "old" 2001 because it had 193,000 miles, but they were able to finance a 2000-2002 3rd Gen with mileage closer to 100,000. This got me thinking about finding a lower mileage 3rd Gen. I already had several color specific items I wanted to transfer to a "new" 4Runner (Stellar Blue Sport hood, Stellar Blue Sport grille, tan Weathertech floor liners, etc.), so I preferred to find a Stellar Blue with tan interior if possible. I found this one with 133,000 miles and was approved for a loan. In addition to financing, this 4Runner was as close to "pristine" as I have seen in person. It looks like it has been meticulously maintained and always kept in a garage. The overall condition of my "old" 4Runner was OK, but not nearly as good as this one. I lucked into finding this one on AutoTrader, so I jumped on it.
 
Last edited:
[MENTION=128917]Staszek20VT[/MENTION]

As you can see on the right side of the window sticker the hood protector and the sunroof wind deflector were options. The door window deflectors were aftermarket - Weathertech if I remember correctly.

67cSi35h.jpg
 
Last edited:
I cannot believe my luck!!! I am going to follow this thread very closely.
I love what you do to your ride and pretty much maintain/Build/ Care for them the way I do and would like to continue.
Stock - but on steroids. I love that.
That color is without a doubt the best color option ever available for these Toyota's and sure wish I could get one in that color. The scooped hood is a must! I don't know how I will get one but I will. It not only makes the runner look better in my opinion but in my climate it will be a huge benefit to have that running extra air over my motor - mentally I would have so much more piece of mind.
I would like to do the same suspension lift you are going to do down to a T so please get that up when you can. I may push closer to 2' lift though as it will be a once in a lifetime opportunity for me and if I plan on going different rims with bigger tires at a later stage then I have the option - then I can do it.
I currently could do with every bit of extra clearance I can get but at the same time not wanting something looking too different from stock.
Will you do bush's as well?
Thanks very much for such a cool thread. I wish you the best of luck and immense amounts of enjoyment doing it all.
Moz
 
$40K back in 2001 was some change. Considering new 4runners now only go for a little more and inflation has increased much more in 15 years, one has to wonder what cutting measures Toyota has taken to keep the costs down.

Still love the blue. Enjoy the build.
 
Thanks for all of the comments so far...

[MENTION=134970]Mozambique[/MENTION]

in my climate it will be a huge benefit to have that running extra air over my motor

The scoop is purely for aesthetics... it is not open to allow for cooling. Air enters the factory air box on the inside of the front passenger fender. As far as I know the only way to increase air flow is with an ARB Safari (or a similar brand) snorkel.

Will you do bush's as well?

If you are asking if I am replacing bushings when I get my Toytec/Sonoran Steel Hybrid lift the answer at this point is yes, if they need replacing. The suspension lift is a long way off... I will be making do with the Daystar lift in the meantime.


Example of ARB Safari snorkel (Tacoma - adapted for 4Runner when installed)

13076836895_18a5b34f3b_b.jpg
 
Last edited:
Thanks Surf Runner.

With the scoop I am thinking of holing out a section of the bottom of the scoop so air can just flow through the scoop and over my motor. Literally the top of it and down out past the gearbox/undercarriage.
I understand the Safari Snorkel concept, we use them a lot here on land Cruiser Pick-ups, hilux Pick-ups etc. That is directly fitted here into your air intake side of air filter housing.
I am busy searching for a company who can supply a complete vehicle bush kit of high quality as I would like new bush's all round as soon as I get my vehicle, as you recently got your vehicle I was wondering if it was something you would consider doing for piece of mind.
Subscribed:wink2:
 
Daystar 2.5" Spacer Lift | 4Crawler 1" Body Lift | Removed Rear Spoiler

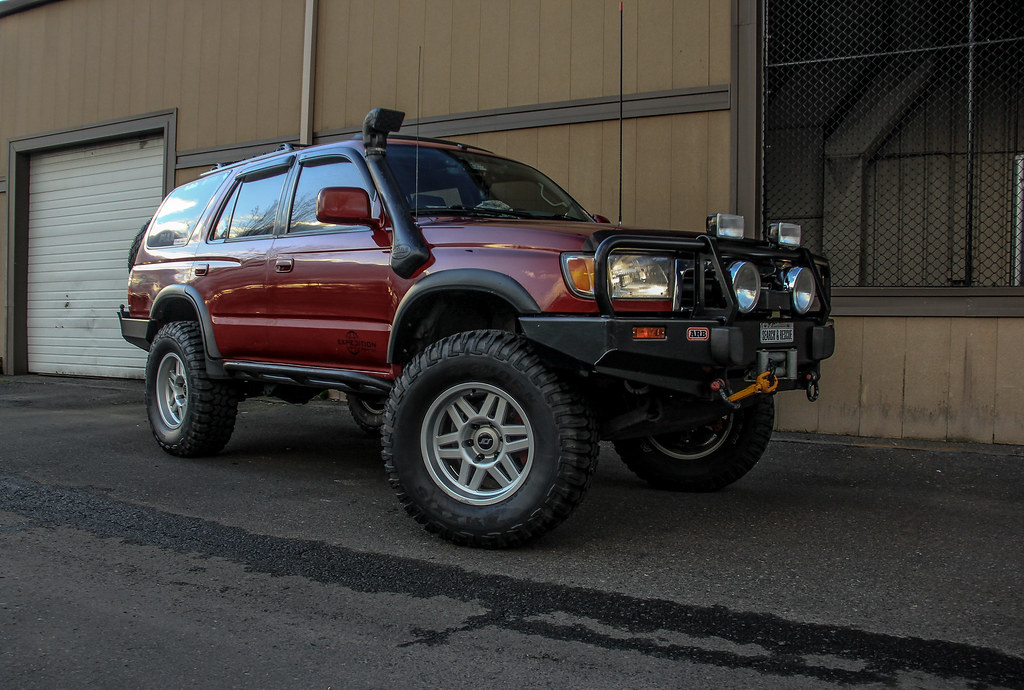
Got my lift installed at the end of last week. The 2.5" Daystar spacer lift is temporary until I can afford a Toytec and/or Sonoran Steel lift. I also got a 4Crawler 1" body lift installed.

Now that I have the body lift installed I can work towards getting my Shrockworks rear bumper/tire carrier/jerry can holder installed. This rear bumper was custom ordered for a 1" body lift so except for paint it is ready to go.

Hopefully I can install 285/75/16 Mickey Thompson Baja MTZs later this year with no rubbing. I will eventually have an ARB bumper on front, so I won't have to worry about rubbing on the Limited flares on the stock front bumper. I already have 1.25" Spidertrax wheels spacers installed all around.

01/28/2016 Installation
138,825 Miles


Daystar 2.5" Spacer Lift (KT09106BK) eBay $112 shipped
http://www.daystarsuspensionparts.com/kt09106bk

RB 4Crawler 1" Body Lift (Part list below) Website Order $182 shipped
http://www.4crawler.com/4x4/ForSale/Toyota4RunnerBodyLift.shtml#GenIII.3
Below is the list of what I ordered:
KIT D - Kit B (Ultimate Lift Blocks Two 2" OD and Eight 2.5" OD) + Standard Grade Hardware
CLR - Flat black lift blocks
FB - Front bumper brackets
RAD - Radiator drop brackets
SE - Steering shaft extension
BS - Bed/Cargo bay spacers
CDOC - Full color printed installation notes

I realize that many consider the front bumper brackets and radiator drop brackets unnecessary, but here is the reason I bought them. I asked the shop to install everything in the box while I was at work. The job wasn't done until every part in the box was used. This was my way to help ensure that everything was done that needed to be done. The two brackets in question were cheap as well.

Now that I have done some more research I will probably install the Sonoran Steel tapered differential drop and their adjustable trac/panhard bar. The differential drop will help save my CV boots and the adjustable panhard bar will help with the alignment of the rear axle and for the 4Runner to track straight. I will need these for my 2.5" - 3.5" suspension lift anyway, so I should go ahead and get them now.

B6uvUI8h.jpg


Three after photos...

KOxklz9h.jpg


wMil7Eqh.jpg


ELhKckfh.jpg


Two before pics for comparison...

bZbotCNh.jpg


fJPlwnqh.jpg


So I decided to remove my rear spoiler/wind deflector Sunday afternoon. I have been wanting to do this for a while. I think that Toyota did a nice job designing the rear spoiler, but I just like a cleaner, more streamlined look - the same reason I removed my window screens, hood deflector, and sunroof wind screen. I've done a little research and some 4Runner owners claim that the rear wind deflector keeps the rear window/hatch cleaner and helps to stop exhaust fumes from entering a lowered rear window while driving at slow speeds, so I realize that there may be some minor drawbacks. If anyone wants to buy the rear spoiler, brackets and hardware I have it listed here:
http://www.toyota-4runner.org/sale-t4r-items/213694-fs-3rd-gen-oem-rear-spoiler-w-mounting-brackets-hardware%3B-central-tx-will-ship.html

You can't remove the brackets without removing the spoiler first.

VawXBOPh.jpg


You can unscrew two of the bracket screws with the spoiler attached, but the third screw can only be accessed in the mounting void you see here once the spoiler is removed.

SB7km2Ah.jpg


As you can see this leaves two really nice sets of three screw holes.

fo0vJ7eh.jpg


I am selling all of the oem machine screws with the spoiler, so I had to go to the hardware store to buy 6 more. My idea was to get flat head machine screws a little shorter than the OEM screws since I would just be using them to fill the holes.

yTpl1Hgh.jpg


The flat head screws fit perfectly...

YRbZ4dAh.jpg


Once I screwed them in to fill the holes I covered the screw heads and the immediate area around them with some Stellar Blue factory match paint I already had. I primarily did this to seal the holes and keep out moisture to prevent rust, but it also helped to minimize the impact of the 6 holes visually. As you can see there is some residue around where the outline of the brackets were that I will remove with some Goo Gone. Eventually I will get these 6 holes grinded, filled, sanded, and professionally painted, but until then this will have to do.

Xm20FDCh.jpg


Before...

Ku0Bxeyh.jpg


After...

O2uxSiFh.jpg


0tCZMsFh.jpg


OK... so about the decals. On SURF RUNNER 1.0 I found some really cool decals on eBay. Individually they were really colorful and cool, but all together on the back of my 4Runner the look wasn't so hot in my opinion - especially from a distance. Maybe color decals look better on white, silver, and gray 4Runners, but I'm not sure they look so great on Stellar Blue. Anyway, my plan this time around was to go with all white decals. I don't worry about it too much... they are cheap and if I don't like them I can just remove them.

Here are some of the color decals I had on SURF RUNNER 1.0...

VuEPscRh.jpg


YmVkwdxh.jpg


For comparison here are the all white decals on SURF RUNNER 2.0...

QvroMKDh.jpg


A few weeks ago I purchased a new set of Bosch Icon windshield wipers. On SURF RUNNER 1.0 I bought the Icons with the 17" blades (which is specified for 3rd Gen 4Runners). I had read on the forum here on the post by the great him (http://www.toyota-4runner.org/3rd-gen-t4rs/141477-windshield-wipers-2.html#post1374829) that 18" icon blades will fit so I went with 18" this time. These give a little more coverage and fit on the windshield with no problem - I think the 18" are better than the 17". Last time I had done some research on wiper blades in general and concluded that Bosch Icons were one of the best available for our 4Runners.

SiRbSEch.jpg


Here you can see how 18" Icon blades fit just fine on the windshield.

UOXBtmoh.jpg
 
Last edited:
Redline Oil Change | Mickey Thompson 285/75/16 Baja MTZs

Back in March I got my oil changed and replaced the fuel filter. I used an OEM oil filter and an OEM fuel filter. I purchased this vehicle in October of 2015 and was not sure when the last oil change was done. This vehicle was meticulously maintained (so I wasn't too worried about it), but at the same time I didn't want to wait too long.

After a lot of research I am going to use Redline fluids all around for my 4Runner. I realize that as long as you change the fluids at the recommended intervals with a suitable product you will be fine, but I would rather spend a little more and use a top of the line fluid. For the brake fluid I may use ATE TYP 200 instead of the relatively new Redline RL 600. Both are Dot 4 and have wet boiling points around 400 degrees Fahrenheit, so either one is a top of the line brake fluid.

Here is Redline's Application Guide for my vehicle:
http://www.redlineoil.com/application.aspx

5W30 Motor Oil
D4 ATF (transmission and power steering)
75W90 GL-5 Gear Oil (both front and rear differentials plus transfer case of 4x4 models)
RL 600 Brake Fluid

03/14/2016 Service
142,464 Miles


f1Z5ftBh.jpg


Towards the end of March I finally got the Mickey Thompson 285/75/16 Baja MTZs that I have wanted for a long time. I had read online that they were discontinuing the Baja MTZ and replacing it with the Baja MTZ P3.

http://www.toyota-4runner.org/3rd-gen-t4rs/216842-if-you-want-old-style-mickey-thompson-baja-mtzs-you-better-get-them-now.html

Obviously I realized that it was now or never if I wanted the old-style MTZs. If I had waited any longer only the MTZ P3s would have been available.

Before they were installed I was a little worried because I never had a tire this aggressive before - especially a mud tire. After I got on Highway 290 leaving Houston my concerns were completely alleviated. This is an extremely quiet tire for how aggressive it is. I had read about this on the internet, but the road noise was even less than I had anticipated. I thought that there would be a very noticeable buzz or a hum because of the tread, but there really isn't. The MTZ is slightly louder than the Michelin LTX M/2 tires that they replaced, but the noise isn't the buzzing or humming that I thought it would be... it is just a slightly more noticeable noise than my old Michelin tires. The tire noise is most noticeable at 50mph, but then it quiets down at highway speeds again. I got them installed for $998 and sold my old Michelin tires for $75, so I ended up at $923, which I thought was a good deal.

03/26/2016 Installation
143,007 Miles


IEkpTNGh.jpg


k3DqMPXh.jpg


5C31Rm7h.jpg


EUDEc1Sh.jpg


0eLUJT6h.jpg


swA7uTVh.jpg


TLTLZMbh.jpg


hjukRQ5h.jpg


F8PChRVh.jpg


TjCocaAh.jpg


G6zrR9th.jpg


NOcby8sh.jpg
 
Last edited:
Clean clean clean. That lift and tires really set it apart though. Really like the stance of it and the OE 2-tone. Are you having any rubbing with those 285s? I may upsize with my next tire purchase in about 20k miles. Figured I should start my research soon.
 
[MENTION=116024]jawga4runner[/MENTION]

I appreciate your comments. Thanks for reminding me about the rubbing question... I should have mentioned it in my above post. There is some very slight rubbing on the inside corners of both the front fender flares (in front of and behind the front wheel) only when I turn sharply in reverse. This can be easily resolved with some minor trimming - it won't be noticeable since the rubbing is only on the inside corners. Right now I have a 1" body lift and 2.5" in a spacer suspension lift with the Daystar kit. When I get my Toytec/Sonoran Steel suspension lift I will have even more clearance, but it may be a while before I can afford that lift.

You can see in the photo below where the rubbing has wiped away the dirt on the inside corner of the flare in front of the front tire... as you can see the tiny triangular area is between 1/16" and 1/8".

1x57NV0h.jpg


You can see in the photo below where the rubbing has wiped away the dirt on the inside corner of the flare behind the front tire... as you can see the triangular area is between 1/4" and 1/2" and includes that bolt.

YO7kabzh.jpg


TjCocaAh.jpg
 
Last edited:
Cleanest ever

Based on the pictures of when you bought it this is got to be the cleanest 3rd gen ive ever seen. And I thought mine was clean!

Am I reading this wrong or the only lift kit you have done has been a body lift kit, not suspension right?

Thanks
 

Members online

Forum statistics

Threads
278,316
Messages
3,554,110
Members
248,016
Latest member
Advally Service

Trending content

Back
Top