Switch panel locations

What is the best auxiliary light switcher for the T4R?


  • Total voters
    24

Jrunr

New member
I am debating between the Auxbeam 9 Gang switch panel and the Trigger Six Shooter system for my 21 TRD Pro. Which system would you choose, and why?

Also, what are the best mounting locations for the switches inside the cabin? I would love if you all could post pictures of your setups.

Show us what you’ve got!!
 
Register to hide this ad
I picked s-tech because I wanted OEM style switches. they take up the little cubby under the radio. super nice system. it says it's for up to 2019 but I e-mailed asking if it would work on my '21 and it does. you just have to relocate one of the boxes to the rear (super easy). rather than have mine wired to a trigger to only be on when the truck is on, i wired mine to a switch to my second battery so I can choose when my switches are active.

S-TECH 6 Switch Systems - S-Tech Switch Systems™

I'll post pics from my phone later
 
1f359d7fb3ca9ffef5a8de78277ccd8a.jpg

They light up blue like the OEM switches. I have another OEM switch to the left of the steering wheel that “arms” these switches. You can even request that your first switch in the 6-pack do that but I wanted 6 specific things.


Sent from my iPhone using Tapatalk
 
Auxbeam 8 gang RGB here. Have had it for about a few months now. It works, it's priced decent. Doesn't feel cheap.
RGB model has a few features like changing the pad back light color and also have a strobe mode you can set for individual lights. You can control the lights with a phone app. Hide the switch and use your phone, if one would want it this way.
 
1f359d7fb3ca9ffef5a8de78277ccd8a.jpg

They light up blue like the OEM switches. I have another OEM switch to the left of the steering wheel that “arms” these switches. You can even request that your first switch in the 6-pack do that but I wanted 6 specific things.


Sent from my iPhone using Tapatalk

That is a very clean installation! Don't mean to hijack the thread but how does that mount? Does S-tech give you a mount that fits in there or is it custom? Do you need to screw into the factory plastic cubby? I assume you need to drill a hole at the back of the cubby but is that the only modification?
 
That is a very clean installation! Don't mean to hijack the thread but how does that mount? Does S-tech give you a mount that fits in there or is it custom? Do you need to screw into the factory plastic cubby? I assume you need to drill a hole at the back of the cubby but is that the only modification?


The switches come in a 3D printed housing that just bolts into the cubby (you get to pick what you want and they are easily swapped later if you want). You are supposed to be able to just drill a hole in the back of the stock cubby, but the plugs are kind of long so I just cut the whole back of it off. I think this install guide will answer a lot of questions. Where my install differs is in the wiring. I ran the power to my second battery. And then rather than that trigger wire going to a fuse tap, I ran that to the second battery with an OEM style power switch in line.

https://stechswitch.com/wp-content/uploads/2020/06/Toyota-Install-Guide-0620c.pdf

d1f0e6f1e0a8b9a7ba2168c52ad51ca4.jpg


Sent from my iPhone using Tapatalk
 
don't use those cheap MIC crap... we do plenty of electrical installs at the shop and many people elect to have cheap MIC alternatives, and more often than not we find these MIC crap not working right out of box and have to send them back for replacement.
We also had a few older versions of auxbeam control panel failures, and when we tried to replace the control panel we found out the new panels use a different style connector to the control module, so the whole thing had to be replaced.

i personally run switch-pro 9100 mounted to the left side dash panel using SDHQ's mount. Inside the engine bay i use PowerTray switch-pro mount and bussman/ bluesea bus bars and fuse blocks. With Switch-Pro set up, I have one touch on for various lights (one master switch for front roof, front bumper, and ditch lights all on without toggling individual switch), 5-step output dimming, auto on when ignition is on (for the back light function of S8 that I use as DRL), bluetooth connectivity (very useful when you're not next to your rig but you see someone suspicious staying too close... very useful in california... or if you have side lights that you use for camp lights), strobe and burst (for people who cut you off and also for chase lights), and ability to turn on your lights with ignition off (camp lights)
 
Online LED Store has some great product. The whole power distribution block, fuse and relay block, and switch box will run you less than $100. All the fuses, wires, and relays included. You would have to spend a few hours wiring every fuse, relay, abs button, however.
 
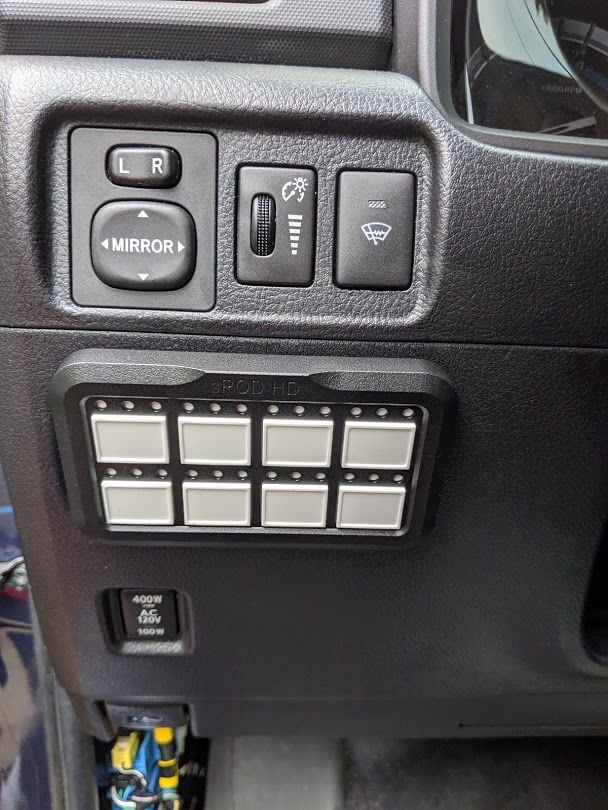
I mounted mine below the factory switches. As long as you know what switch does what, you don’t have to look at them. 2 years now and no issues whatsoever.

6bfb879eee7714ac88b6bf4e68784de2.jpg


Sent from my iPhone using Tapatalk
 
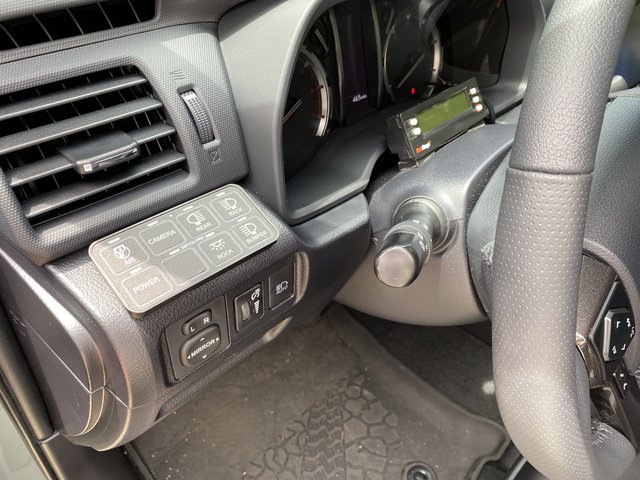
Switch Pro. This location is very visible and easily accessible. Mounted with 3M double sided tape with one hole in dash panel for wiring. Dash Panel can easily be replaced from Toyota for $30+.

D9-E98-EB5-4005-4-E78-B1-A2-D39-D1-FEB1-FB3.jpg
 
I went the path of building my own Bussman IPDM mounted on a Powertray bracket. I moved the USB/AUX. port in the center stack to the glove box, and that gave me 6 OEM switch blank spots. I use AOB switches since they have the same light blue LEDs as Toyota, and they are high quality. 2 of the positions are used for a dual voltage meter and a RJ45 passthrough, so I plan on machining an insert for the useless cubby to add 2 more positions. S-tech has a 3-D insert they offer for that spot, but it's ridiculously expensive.

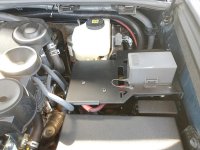
Picture of the Bussman on the Powertray bracket:
 

Attachments

  • Bussman.jpg
    Bussman.jpg
    124.4 KB · Views: 1,171
I went the path of building my own Bussman IPDM mounted on a Powertray bracket. I moved the USB/AUX. port in the center stack to the glove box, and that gave me 6 OEM switch blank spots. I use AOB switches since they have the same light blue LEDs as Toyota, and they are high quality. 2 of the positions are used for a dual voltage meter and a RJ45 passthrough, so I plan on machining an insert for the useless cubby to add 2 more positions. S-tech has a 3-D insert they offer for that spot, but it's ridiculously expensive.

Picture of the Bussman on the Powertray bracket:

Nice clean work! I like to see folks be a little more creative in their add-ons as opposed to just slapping on store bought items - which I readily acknowledge we all do but it's nice to see folks go out of the box occasionally.

Being an older guy (and having the extra time) I try to make my add-ons reflect a little of me - an example of that is I used several of the available blank switch spots on the dash to put in OEM look-alike switches but on my last DIY project I went back to the old school way by building my own simple switch panel with a couple of voltmeters to monitor main & aux batteries. I'm new to this forum so not sure if my picture/video efforts will turn out...

https://www.youtube.com/watch?v=9ZjfeeHldkc

Okay, so I think the video plays okay but suspect there is a better way to do this?
 
Last edited:
Nice clean work! I like to see folks be a little more creative in their add-ons as opposed to just slapping on store bought items - which I readily acknowledge we all do but it's nice to see folks go out of the box occasionally.

Being an older guy (and having the extra time) I try to make my add-ons reflect a little of me - an example of that is I used several of the available blank switch spots on the dash to put in OEM look-alike switches but on my last DIY project I went back to the old school way by building my own simple switch panel with a couple of voltmeters to monitor main & aux batteries. I'm new to this forum so not sure if my picture/video efforts will turn out...

https://www.youtube.com/watch?v=9ZjfeeHldkc

Okay, so I think the video plays okay but suspect there is a better way to do this?

Thanks! I feel exactly the same. I've got quite a few unique modifications I'll be posting about eventually. One of them is a hidden solar panel port behind a self-opening, hinged front license plate. Just unthread two thumbscrews on the license plate and it opens up 90 degrees and stays in place with a spring loaded hinge. Have a flush mount APP receptacle behind it with a weather seal cover on it, and plug in my portable 200w panel.

The video works fine and what a great set-up! That 3000w inverter is a monster. I see you have a 2nd battery as well. Mine is installed in the same spot as yours. Which 500A solenoid are you using? I didn't catch it in the video. I've got a BlueSea Systems remote battery switch I'm using to keep my winch(waiting to be installed) disconnected when not in use, which is also rated at 500A continuous - with 2x 4/0 cables, lol. That's one of my switch positions(winch power).

You've got a lot of radios in there as well. I'm just now in the process of installing a GMRS. Installing the previously mentioned RJ45 passthrough is one of my tasks this weekend.
 

Members online

Forum statistics

Threads
278,304
Messages
3,554,041
Members
248,016
Latest member
Advally Service

Trending content

Back
Top