
You are using an out of date browser. It may not display this or other websites correctly.
You should upgrade or use an alternative browser.
You should upgrade or use an alternative browser.
TexasTJ's 2017 T4R TRD Pro - Cement "Zoe"
- Thread starter TexasTJ
- Start date
- Status
- Not open for further replies.

TexasTJ
New member
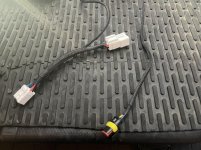
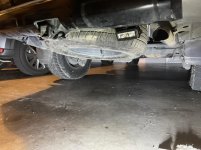
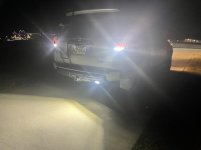
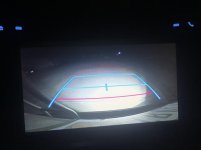
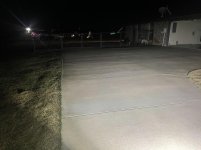
I added JDM ASTAR reverse LED bulbs, but felt like they weren't much of an improvement. I found an old LED scene light I had lying around and wired it up to the 4R for an additional reverse light. I used the stage series wiring harness from Diode Dynamics so it was plug and play to the factory wiring, and didn't have to cut any vehicle wiring.
Attachments
-
 E3EA74C0-D35B-435C-A375-37E2743FDDDF.jpg135.2 KB · Views: 893
 -
 7B9C8329-E8FE-4292-8145-62B20CFCE2A1.jpg130.4 KB · Views: 892
 -
 ABD4179B-760F-4495-970D-432EBEAF31E8.jpg76.6 KB · Views: 3,784
 -
 440CC41F-0937-460C-A315-4F203ABB45E8.jpg53 KB · Views: 879
 -
 D71FAFB7-F694-4AED-9908-FECC970115A0.jpg114.8 KB · Views: 1,157
Last edited:
rageandlove
Member
I added JDM ASTAR reverse LED bulbs, but felt like they weren't much of an improvement. I found an old LED scene light I had lying around and wired it up to the 4R for an additional reverse light. I used the stage series wiring harness from Diode Dynamics so it was plug and play to the factory wiring, and didn't have to cut any vehicle wiring.
Wow, I just discovered your build thread. Looking forward to reading through it.
How does that harness work? Does it plug into the tail lights somehow? Does that require any drilling or anything?
TexasTJ
New member
Wow, I just discovered your build thread. Looking forward to reading through it.
How does that harness work? Does it plug into the tail lights somehow? Does that require any drilling or anything?
I haven’t really “built” this one like my last two Jeeps, been trying to keep with upgrade as necessary more or less. But I have had some good trips in it, and drove it up to Canada a couple years ago.
Unplug the tail light from the housing, plug the tail light connector into the new harness, then the new harness into the tail light. Route the wiring down through the bumper and connect your LED light to the harness. I’m a big fan of reversible mods.
rageandlove
Member
Day 5 continued We stopped by Lake McDonald on our way over to Polebridge/Bowman Lake. We stopped at the Polebridge Mercantile/Bakery for a huckleberry bear claw.
I LOVE both Polebridge and the Polebridge Mercantile/Bakery!
TexasTJ
New member
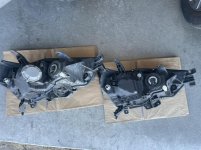
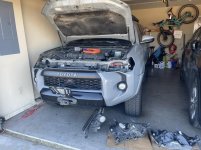
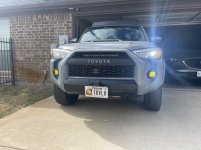
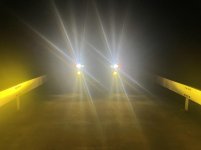
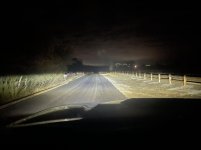
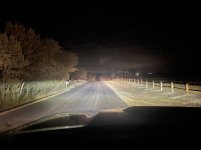
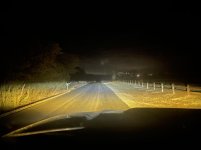
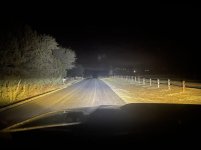
Picked up a set of 2021 ORP LED low/halogen high beam headlights, and I and more than happy with the output. It was a simple electrical connector swap, and plugged right up. I didn't want to remove the entire bumper because of the hidden winch, so I managed to remove and install the housings by just unclipping the sides of the bumper. I also installed some Diode Dynamics SS3 sport SAE fog lights. The sports have a good amount of usable light as fog lights, if you're looking for something to really project the light, I'd recommend Pro/Max and a different beam pattern.
Light photos are in order of:
low beam only
high beam only
low beam + SS3 sport
low beam + SS3 sport + RC 20" LED bar behind grill
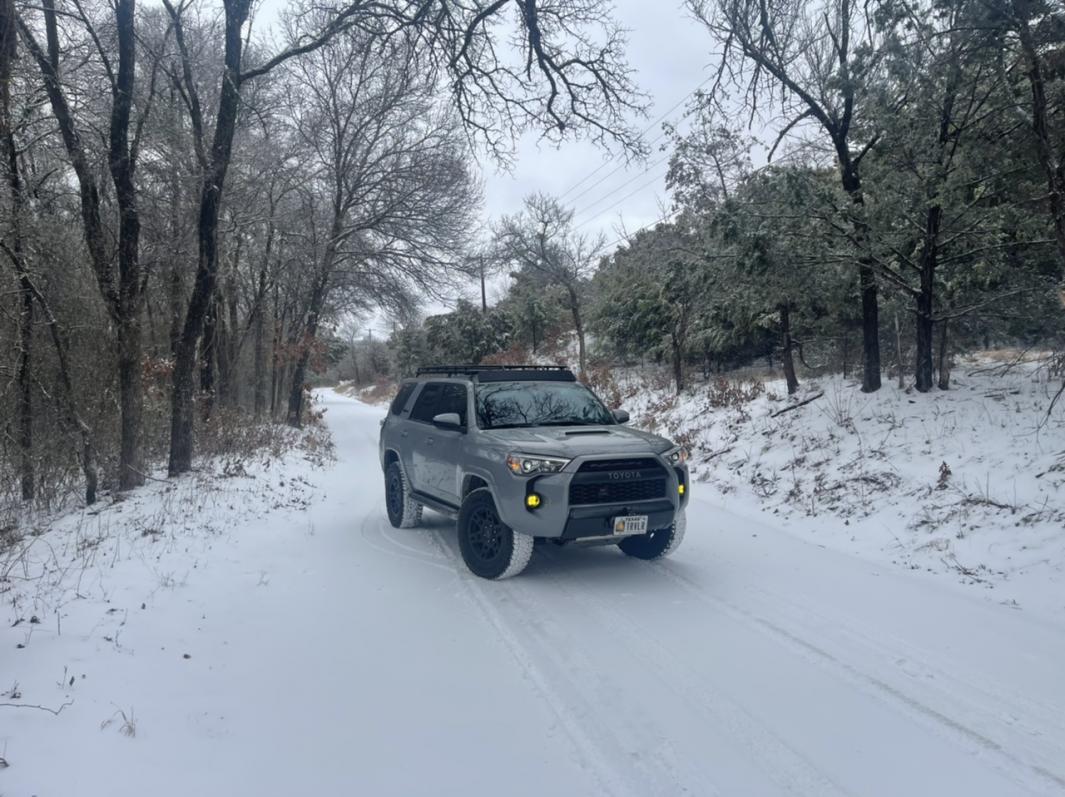
Light photos are in order of:
low beam only
high beam only
low beam + SS3 sport
low beam + SS3 sport + RC 20" LED bar behind grill
Attachments
-
 D6D0098A-1939-4014-80B6-71CA8CBB1E15.jpg132.7 KB · Views: 744
 -
 E5CF1DA5-9E5E-4F12-820B-0820A98550F4.jpg130.8 KB · Views: 1,107
 -
 8175C92D-A6E6-477F-9076-43ED5266F88C.jpg129.5 KB · Views: 1,116
 -
 6532AEC9-37CD-498A-8380-6FDAEEA53252.jpg53.2 KB · Views: 1,273
 -
 F7C49712-170F-4659-A264-E7F01B07F357.jpg70.1 KB · Views: 1,255
 -
 6C5105A7-1976-40D4-BABD-A9CE773FD44C.jpg84.5 KB · Views: 728
 -
 435E0977-3061-477F-9B91-D6B7C5CA8ABA.jpg73.2 KB · Views: 1,501
 -
 6A6750F6-881B-494A-BABF-046616F5687D.jpg85.5 KB · Views: 711
Last edited:
TexasTJ
New member
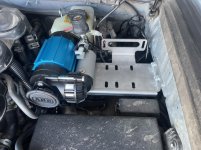
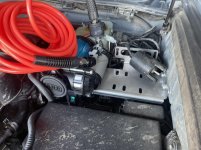
Installed the ARB single compressor CKMA12 on a Slee single/dual mount. I ordered an AOB switch to match the switches on the inside, but while installing I figured it’d make more sense to put the switch by the compressor. So I ditched the AOB and used the ARB switch in the cutout on the Slee mount. I doubt this 4R will ever see 34” tires, so the single should be more than enough to air 4 (or 6 tires if we get a tear drop) from 12-35 psi.
Now that the single ARB is installed, I'm happy to report with my results. Airing four 265/70r17 (31.5x10.5r17") tires from 15-35psi.
First: 1:52.95
Second: 2:05.15
Third: 2:08.50
Fourth: 2:17.61
Total: 8:24.21
Average: 2:06.50
Now that the single ARB is installed, I'm happy to report with my results. Airing four 265/70r17 (31.5x10.5r17") tires from 15-35psi.
First: 1:52.95
Second: 2:05.15
Third: 2:08.50
Fourth: 2:17.61
Total: 8:24.21
Average: 2:06.50
Attachments
Last edited:

TexasTJ
New member
MESO Customs ultimate dual color map lights installed. They are extremely bright, maybe a bit too bright for camping as they will kill your night vision. That’s where the red lights come in handy. Tempted to finish out the rest of the car. I tried the cheap LED bulbs a few years back, and they always flickered.


TexasTJ
New member
Tried the cheap LED route a few years back and didn’t have much luck. This time decided to pony up for Arc Light Icarus eXtreme LEDs with white/red. Install was straight forward and a dremel made quick work of the holes for the button.
Difficult to get a good light output photo since the phone adapts to night mode. Y'all know the first photo of the halogen bulbs are no where near that bright.


No button

Raised button (5700k white)

Depressed button (red)

Difficult to get a good light output photo since the phone adapts to night mode. Y'all know the first photo of the halogen bulbs are no where near that bright.
No button
Raised button (5700k white)
Depressed button (red)
Last edited:


TexasTJ
New member
I removed the Viofo A119, and replaced it with a Viofo A129 Duo Pro. Utilized papadakko's STL file for a rear dash cam mount. I was able to keep the front wiring from the A119, I just had to run the long cable from the front to the back, via the headliner. Not only do I have front and rear cameras, I can now view them instantly on my phone.
Installed the Redarc Tow Pro Elite today in preparation for our camper. I ordered the TPH-021 plug and play 4R harness, and the TPSI-002 plug and play 4R switch blank. I didn't realize it also needed their bracket (EBMK-001), but that was ok because I wouldn't have spent $30 on it. I found an old license plate I had lying around and cut it with some tin snips. Bent it around the dash bracket, drilled 3 holes and called it good.


Installed the Redarc Tow Pro Elite today in preparation for our camper. I ordered the TPH-021 plug and play 4R harness, and the TPSI-002 plug and play 4R switch blank. I didn't realize it also needed their bracket (EBMK-001), but that was ok because I wouldn't have spent $30 on it. I found an old license plate I had lying around and cut it with some tin snips. Bent it around the dash bracket, drilled 3 holes and called it good.
Last edited:

TexasTJ
New member
Swapped out the Pro Bilstein suspension for Dobinsons after 117k miles of use. My front driver strut was a little leaky. Since we’re preparing for a small tear drop, I went ahead and added some Airlift air bags to the rear.
Install was pretty straight forward and did everything by myself. I’ll take some measurements after the alignment and a couple hundred miles of driving.
Suspension heights measured from center of wheel to bottom of fender flare.
TRD Pro w/ 117k miles:
FL: 19 1/2"
FR:19 3/4"
RL: 21 1/2"
RR: 21 3/4"
Dobinson with 10psi in airbags w/ ~500 miles:
FL: 21 1/2"
FR:21 1/2"
RL: 23"
RR: 23"
Dobinsons
Front springs: C59-300 (stock front end, 1.75-2”)
Rear springs: C59-599 ( 1-1.25” stock weight)
Front shocks: IMS59-50700
Rear shocks: IMS59-50701
Airlift 1000(60804)


Install was pretty straight forward and did everything by myself. I’ll take some measurements after the alignment and a couple hundred miles of driving.
Suspension heights measured from center of wheel to bottom of fender flare.
TRD Pro w/ 117k miles:
FL: 19 1/2"
FR:19 3/4"
RL: 21 1/2"
RR: 21 3/4"
Dobinson with 10psi in airbags w/ ~500 miles:
FL: 21 1/2"
FR:21 1/2"
RL: 23"
RR: 23"
Dobinsons
Front springs: C59-300 (stock front end, 1.75-2”)
Rear springs: C59-599 ( 1-1.25” stock weight)
Front shocks: IMS59-50700
Rear shocks: IMS59-50701
Airlift 1000(60804)
Last edited:
TexasTJ
New member
TexasTJ's 2017 T4R TRD Pro - Cement "Zoe"
Finally the reason for the trailer brake controller and airbags has arrived. I enjoyed the RTT for a while, but eventually the flapping of the soft sides kept me up too many nights. Another big reason was it was difficult for my wife and I to install/uninstall it on top of the 4R and it wouldn’t fit in the garage with it on.
I picked up a new 2022 Hiker MidRange XL 5x10 square drop this week. Hikers are custom made to order, you get to pick so many aspects of the build. You can star as low as $6k for a highway model, or push $30k on a decked out Extreme OffRoad.
Ours took 3 months to build, and I drove up to their main location in Columbus, Indiana to pick it up.
Some options:
5x10
Bunk beds
Trailer brakes
21g water tank with pump
Powered by GoalZero Yeti 1500X and Ranger 300 solar
The first night I did a quick car camp in Knobs State Forrest in Kentucky.


The next day I made it up to Columbus, IN and picked up my trailer. We looked it over, signed some papers, and I was out pretty quick.


As you may have notice, I brought my bike with me. I figured now would be the perfect time to hit up Bentonville, Arkansas on the way home.
I camped in my Hiker for the first time in the Huckleberry Ridge Conservation Area. I didn’t bring all of the camping gear for this trip, it’ll take a few trips to figure out the logistics. I was solo, so not too many pictures this time. Bentonville was a blast.


Finally the reason for the trailer brake controller and airbags has arrived. I enjoyed the RTT for a while, but eventually the flapping of the soft sides kept me up too many nights. Another big reason was it was difficult for my wife and I to install/uninstall it on top of the 4R and it wouldn’t fit in the garage with it on.
I picked up a new 2022 Hiker MidRange XL 5x10 square drop this week. Hikers are custom made to order, you get to pick so many aspects of the build. You can star as low as $6k for a highway model, or push $30k on a decked out Extreme OffRoad.
Ours took 3 months to build, and I drove up to their main location in Columbus, Indiana to pick it up.
Some options:
5x10
Bunk beds
Trailer brakes
21g water tank with pump
Powered by GoalZero Yeti 1500X and Ranger 300 solar
The first night I did a quick car camp in Knobs State Forrest in Kentucky.
The next day I made it up to Columbus, IN and picked up my trailer. We looked it over, signed some papers, and I was out pretty quick.
As you may have notice, I brought my bike with me. I figured now would be the perfect time to hit up Bentonville, Arkansas on the way home.
I camped in my Hiker for the first time in the Huckleberry Ridge Conservation Area. I didn’t bring all of the camping gear for this trip, it’ll take a few trips to figure out the logistics. I was solo, so not too many pictures this time. Bentonville was a blast.
Last edited:
TexasTJ
New member
That trailer is awesome! Congratulations. How do you like the Dobinsons vs the factory Bilstein stuff?
Thanks, we’re really excited for it.
I’ve only got about 5k road miles on the Dobinsons, but so far so good. Definitely stiffer than the Bilsteins, but one of the fronts was blown, and I have air bags in the rear. I don’t think the factory rear remote reservoirs were large enough diameter to be very beneficial.
Thanks, we’re really excited for it.
I’ve only got about 5k road miles on the Dobinsons, but so far so good. Definitely stiffer than the Bilsteins, but one of the fronts was blown, and I have air bags in the rear. I don’t think the factory rear remote reservoirs were large enough diameter to be very beneficial.
looking at the dobinsons rear shocks to replace the Trd pro 5160s (rear shock is leaking) . I dont plan on changing out the 6112s up front yet till I need to. As for the stiffer ride is it harsh going over speed bumps , pot holes etc? Rear more planted to the ground? How does it feel at highway speeds?
Goal is to keep the level look and a firm comfortable ride that is good on roads. I do little to none off roading. I like the current set up but the life span of the 5160s was about 55-60k miles, could replace with the 5100s but would prefer something more long term and better quality.
TexasTJ
New member
looking at the dobinsons rear shocks to replace the Trd pro 5160s (rear shock is leaking) . I dont plan on changing out the 6112s up front yet till I need to. As for the stiffer ride is it harsh going over speed bumps , pot holes etc? Rear more planted to the ground? How does it feel at highway speeds?
Goal is to keep the level look and a firm comfortable ride that is good on roads. I do little to none off roading. I like the current set up but the life span of the 5160s was about 55-60k miles, could replace with the 5100s but would prefer something more long term and better quality.
It’s a little stiffer, maybe more planted is a better way to describe it. Even with the airbags in, I wouldn’t call it harsh. I just did a 2000 mile road trip, half with a trailer, and it felt fine. I can’t speak to long term durability, but there are tow Dobinsons threads on this forum that can help. One is more about springs, and the other is the IMS shocks.
- Status
- Not open for further replies.
Similar threads
- Replies
- 2
- Views
- 2K
- Replies
- 4
- Views
- 3K

- Replies
- 42
- Views
- 28K


