TheRustyRunner Build Thread

TheHennDoggg

New member
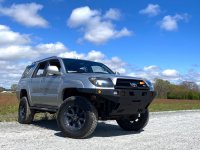
Hey t4r.org, I have been using this site for awhile now and it's helped me out a lot, so I've decided to start a build thread with hopes of helping (and receiving some more help :high5: ) from others!

Info:

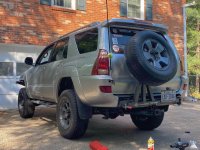
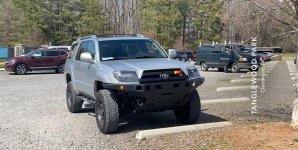
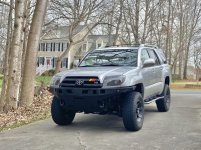
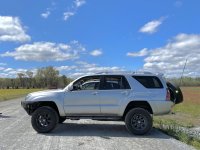
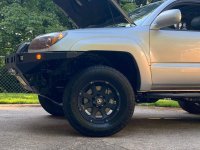
2003 Limited V8 4WD 200k miles
265/70/17 Terra Grapplers
17x8 American Racing ATX 188 wheels
OME 885 front, Superflex standard duty springs rear
SPC Upper Control Arms
All energy suspension poly bushings in front
SPC Alignment cams
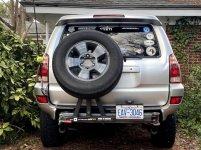
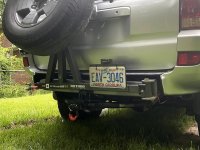
Self-made rear swingout and rear crossmember replacement
4xinnovations Sliders
FJ Cruiser swaybar
5100's
Toytec 1 inch body lift
CB Radio and Dual amp'd stereo w/ sound deadening
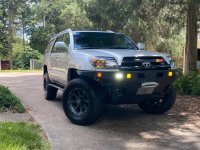
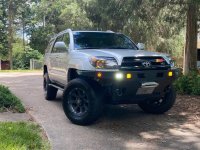
Retrofitted a stock set of headlights with the ACME H1 kit and Panamera 2.0 shrouds
Completed the evap core replacement (eugh)
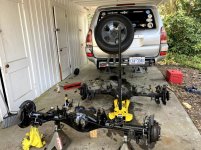
8.2 E-locker swap from junkyard FJ (brakes, ss brake lines and custom wiring harness)
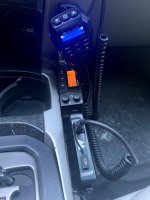
GMRS Radio (MTX275)
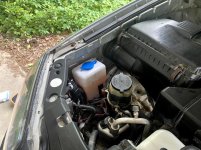
Windshield washer reservoir relocate
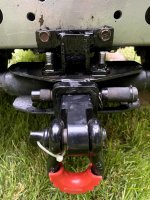
V8 weight distributing hitch
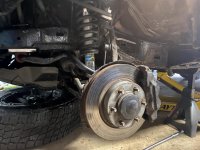
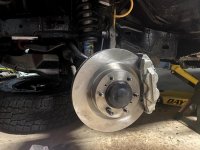
5th gen brake swap

Currently working on:
Fitting 35's
Frame hole patch

I'd be happy to answer questions if you have them!

Here are some pics of how she sits today:
 

Attachments
  • 7721BB34-A476-4B7E-BCEB-3EBFF5F77364.jpg
    7721BB34-A476-4B7E-BCEB-3EBFF5F77364.jpg
    140.1 KB · Views: 911
  • D602F4AA-C4F8-4759-BCFC-25BAEE0E47D6.jpg
    D602F4AA-C4F8-4759-BCFC-25BAEE0E47D6.jpg
    138 KB · Views: 856
Last edited:
Register to hide this ad
Looking good man! Really like those off-road bumpers. Debating which one I want to put on mine. Which of the traction boards are you running?
 
Looks great, I have the same shrouds, but they're not wired up yet. Did you just tap into a fuse?

I T-Spliced my marker lamp with the orange wire of the switchback so that they would turn on with the headlights.

Later, I am going to tap orange into the turn signal/DRL's and have the white side go to headlight positive so it turns white with headlight and orange with marker.
 
Got a few things done this week:

  • Cut the bumper more clean around the rear tire carrier and added some plastic edging to make it look better
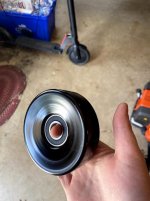
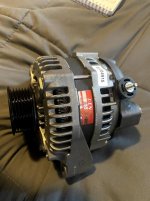
  • Checked to see what pulleys were making noise. 3 are: the alternator, tensioner pulley and the small idler pulley at the top of the engine. All are original 2003 and have 200k miles on them. The alternator is very difficult to turn
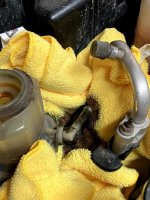
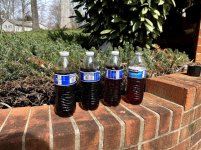
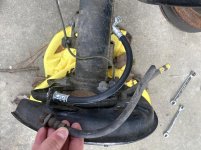
  • Flushed the burnt to hell power steering with some Valvoline ATF. Pic shows the flush from left to right
  • Got a new tensioner pulley and alternator
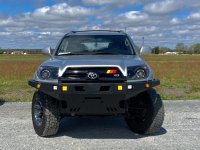
  • Finished welding the Coastal Offroad bumper and I am so happy with it!!
  • Also finally got brake lines for the 8.2 axle, rotors are on the way
 

Attachments

  • IMG_0812.jpg
    IMG_0812.jpg
    111.3 KB · Views: 1,008
  • IMG_0832.jpg
    IMG_0832.jpg
    138.4 KB · Views: 1,046
  • IMG_0833.jpg
    IMG_0833.jpg
    133.2 KB · Views: 1,045
  • IMG_0831.jpg
    IMG_0831.jpg
    51.1 KB · Views: 995
  • IMG_0866.jpg
    IMG_0866.jpg
    58.3 KB · Views: 1,203
  • IMG_0848.jpg
    IMG_0848.jpg
    152.6 KB · Views: 1,026
  • IMG_0854.jpg
    IMG_0854.jpg
    125.1 KB · Views: 1,191
  • IMG_0867.jpg
    IMG_0867.jpg
    137.2 KB · Views: 969
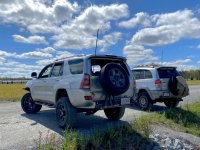
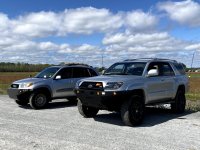
Added lights and completed the independent fog light mod with [MENTION=296097]That_Titanium_4RNR[/MENTION] 's help! Here's a few beauty shots I took with my buddy's lifted Rav4 @rav4explore.
 

Attachments

  • IMG_0963.jpg
    IMG_0963.jpg
    134.7 KB · Views: 905
  • IMG_0968.jpg
    IMG_0968.jpg
    135.7 KB · Views: 913
  • IMG_0967.jpg
    IMG_0967.jpg
    136.6 KB · Views: 1,014
  • IMG_0972.jpg
    IMG_0972.jpg
    133.2 KB · Views: 917
  • IMG_0975.jpg
    IMG_0975.jpg
    137.8 KB · Views: 947
6/3/2020 Update

Finished some mods since the last time I updated this:

Completed the 8.2 swap on 3/28/2020

Thread: https://www.toyota-4runner.org/3464153-post22.html

I have yet to wire the locker due to laziness. Need to get it done before the first trip of the summer

Got my halos to "switchback" between my headlights and blinkers, so they turn white with my white headlights and amber with running lights and blinkers

Relocated my windshield washer reservoir

Painted the back of my bumper and the front of the body black, it stood out earlier because it was silver/unpainted

Installed a GMRS radio (MTX 275) next to the CB to have a better communication option with my friends

Modified a v8 hitch from @That_Titanium_4runner to work with the rear tire carrier I made
 

Attachments

  • 7721BB34-A476-4B7E-BCEB-3EBFF5F77364.jpg
    7721BB34-A476-4B7E-BCEB-3EBFF5F77364.jpg
    140.1 KB · Views: 1,007
  • IMG_1018.jpg
    IMG_1018.jpg
    141.8 KB · Views: 969
  • IMG_1429.jpg
    IMG_1429.jpg
    139.1 KB · Views: 877
  • IMG_2087.jpg
    IMG_2087.jpg
    128.4 KB · Views: 805
  • IMG_2124.jpg
    IMG_2124.jpg
    137.3 KB · Views: 832
  • IMG_2125.jpg
    IMG_2125.jpg
    138.1 KB · Views: 814
5th Gen Brake Swap

Hey guys, just completed the 5th gen brake swap. I used the Power Stop kit from RockAuto and it was a success, very easy! I had to cut a TON of the dust shield and the brakes are way bigger, so something tells me I didn't have the "sport brakes" even though mine was a limited.

Pedal feel is still kinda squishy but it stops well. I need to figure out how to bleed this thing, it is a pain in the ass. Excited that another step towards 35's is complete
 

Attachments

  • IMG_2189.jpg
    IMG_2189.jpg
    132.5 KB · Views: 812
  • IMG_2191.jpg
    IMG_2191.jpg
    132.4 KB · Views: 809
  • 3CDA3088-04A3-47F5-AA8D-1A1B99E08A0F.jpg
    3CDA3088-04A3-47F5-AA8D-1A1B99E08A0F.jpg
    136.9 KB · Views: 783
Finished wiring my locker on June 9th, surprisingly easy process and looks pretty clean! I used the rearmost body mount grommet and ran it from the very back to the front. The locker needs to move a few feet before it locks in, but that seems pretty normal. I might add a "safety" switch to make sure I cant accidentally activate it with my knee.

a7e7a854d117f308f3e49ccdea152039.jpg

2a88b000ff67085190f70d0a4972eb8a.jpg

1f5ae497b65e214d85851612f8f933ba.jpg


Sent from my iPhone using Tapatalk
 
Last edited:
Took a trip to NC-105 and Brown mountain with a lot of my buddies. The locker wasn’t needed, but it still works! Loved seeing the rav4s keep pace with the bigger Toyotas.


afa06cb69e1638a84d96ca3676a3574f.jpg

2ff31ae537def781a4b1fa260e0cb5ef.jpg

8d4610d489c34f4e1ccd4e2f085fc140.jpg

2dc498bb7f550f464108857119033ddb.jpg

db123d3e992d7167a9953f4bc24bb8d1.jpg


Sent from my iPhone using Tapatalk
 
Last edited:
$212..... for the whole rear axle and elocker?!


Yes! At LKQ as long as you pick the part off the vehicle yourself, a rear axle “drum to drum” (which includes the diff) is $200. A locker doesn’t add to that, fortunately. I think the sway bar made it a little more than the online price.

Now, if you go to the already picked stuff on the LKQ website those axles and lockers will be up in the $1000 - $2000 range!

Here’s some pics of us tearing it out of the FJ. Oddly enough, it was a 2wd automatic with a locker, which I didn’t even know existed. Got lucky because if it was a manual I would have had to regear it.


bd57a46cec9a8743660b1bf2ccdbca71.jpg

804dd952e88d4fe1633f7031a5db98fe.jpg

cc4b33a03dcd80254902174322bb317f.jpg


Sent from my iPhone using Tapatalk
 
I haven’t been updating this build thread as much as I really should been, so I’m gonna post some projects I’ve done in the past and haven’t really documented on here!

I created a swing out tire carrier for around $250. I made it out of:

2 inch square tubing 1/8in thick

A Destaco 344 Latch: DE-STA-CO 344 Pull Action Latch Clamp DE-STA-CO 344 Pull Action Latch Clamp: Toggle Clamps: Amazon.com: Industrial & Scientific

4x Innovations Locking Hinge: Swing Out Tire Carrier Hinge Assembly

4x Innovations tire carrier hub: Tire Carrier Wheel Mount Plate and Support Gusset

I first had to replace my rear crossmember due to rust. I found a 4th gen in the junkyard and cut the crossmember off for $30. I painted it silver with the intention of having it exposed later, and welded it on. This was challenging because I’m a novice welder and the metal seemed so thin, but two nights of welding and grinding had some great results!


eb77b64a2b3af99ff6eac39943a11db3.jpg


a2b83cdd1c895a0ba394a21d3349adad.jpg

88771307d8445cf8218396676e5702f6.jpg

99fef16d194aef9d7f69149f4cdaa93a.jpg

79d8633a48198d59592d11e857d6d958.jpg


I was in my final year of college studying engineering, so I had access to SolidWorks to help design the swing before putting it together. Two things I looked out for were that the tire wouldn’t block the brake light if I had 35s and the hatch could open even with 0 offset wheels. I modeled the rear crossmember so that I would know exactly how long the swing arm could possibly be


bbeb1383f7cb03c90a92ca71c35f5468.jpg

7ad6a0e03eac92f98d40ac7f292b9285.jpg


This model really sped up the process of figuring out what angles to cut all the square tubes at. It also helped me realize I couldn’t have a Jerry can holder because the swing was too short; it would have hit the hatch.

Next, me and my buddy welded it together over a few nights during school.


fd1a9c4c0392d398a306910f618aaa58.jpg

6e33dbd15ce3fe014418d24b285f8596.jpg

6c50b8a2eca57f1002a689a74d130ef1.jpg

f81e1fb838b18b0203b3c8027c74ad25.jpg

cf88beb3d7a980d150d6c6fecc755dcd.jpg


I haven’t updated it since we built it, but next I plan to bedline it and slightly alter the angle of the tire so that it clears the hatch better when I get big tires. I tested it with a 33 and it didn’t hit, but I fear a 35 will not be the same story


05c9179085229a11c5875d2ccd07dc2f.jpg
 

Members online

Forum statistics

Threads
278,306
Messages
3,554,045
Members
248,016
Latest member
Advally Service

Trending content

Back
Top