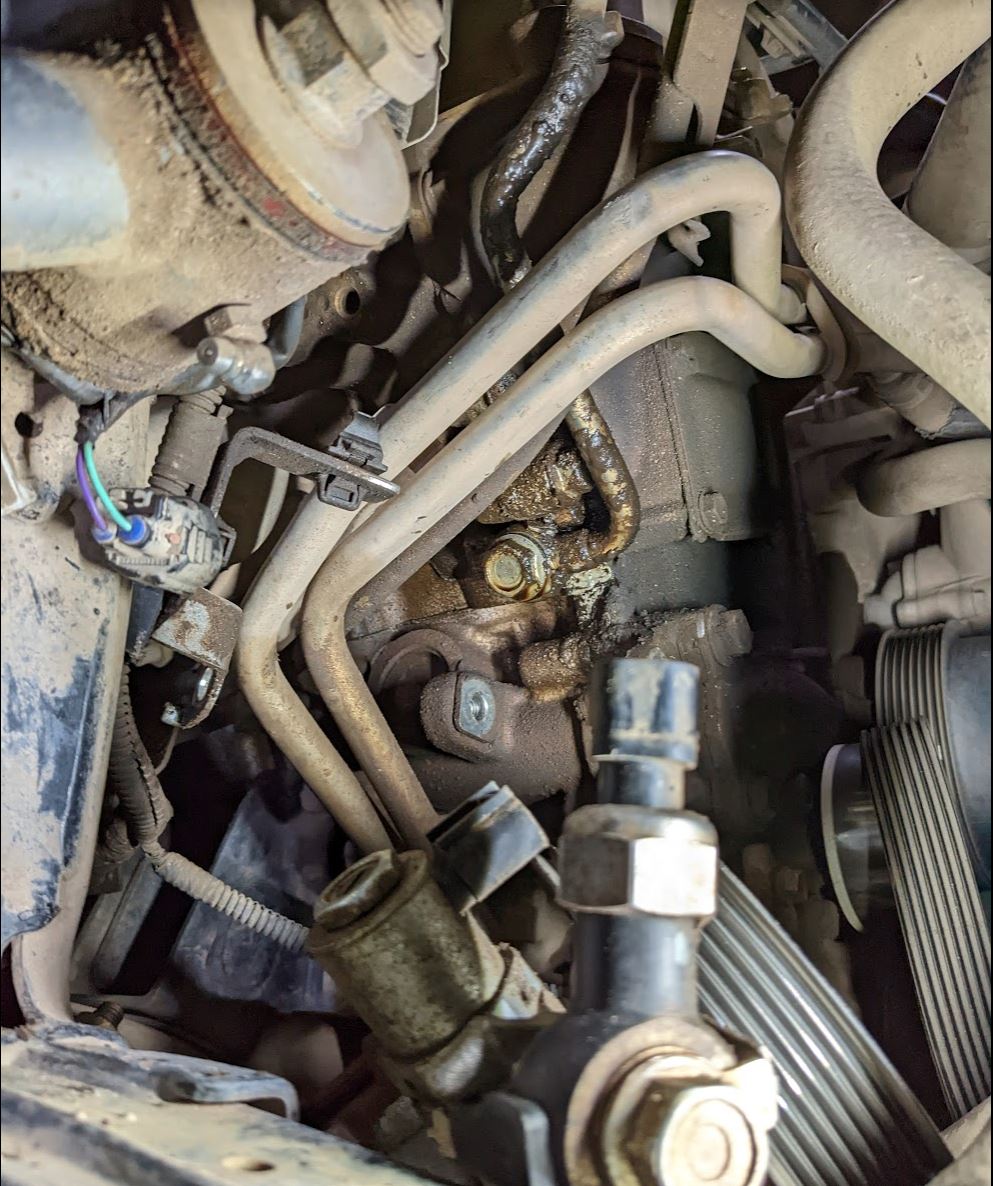
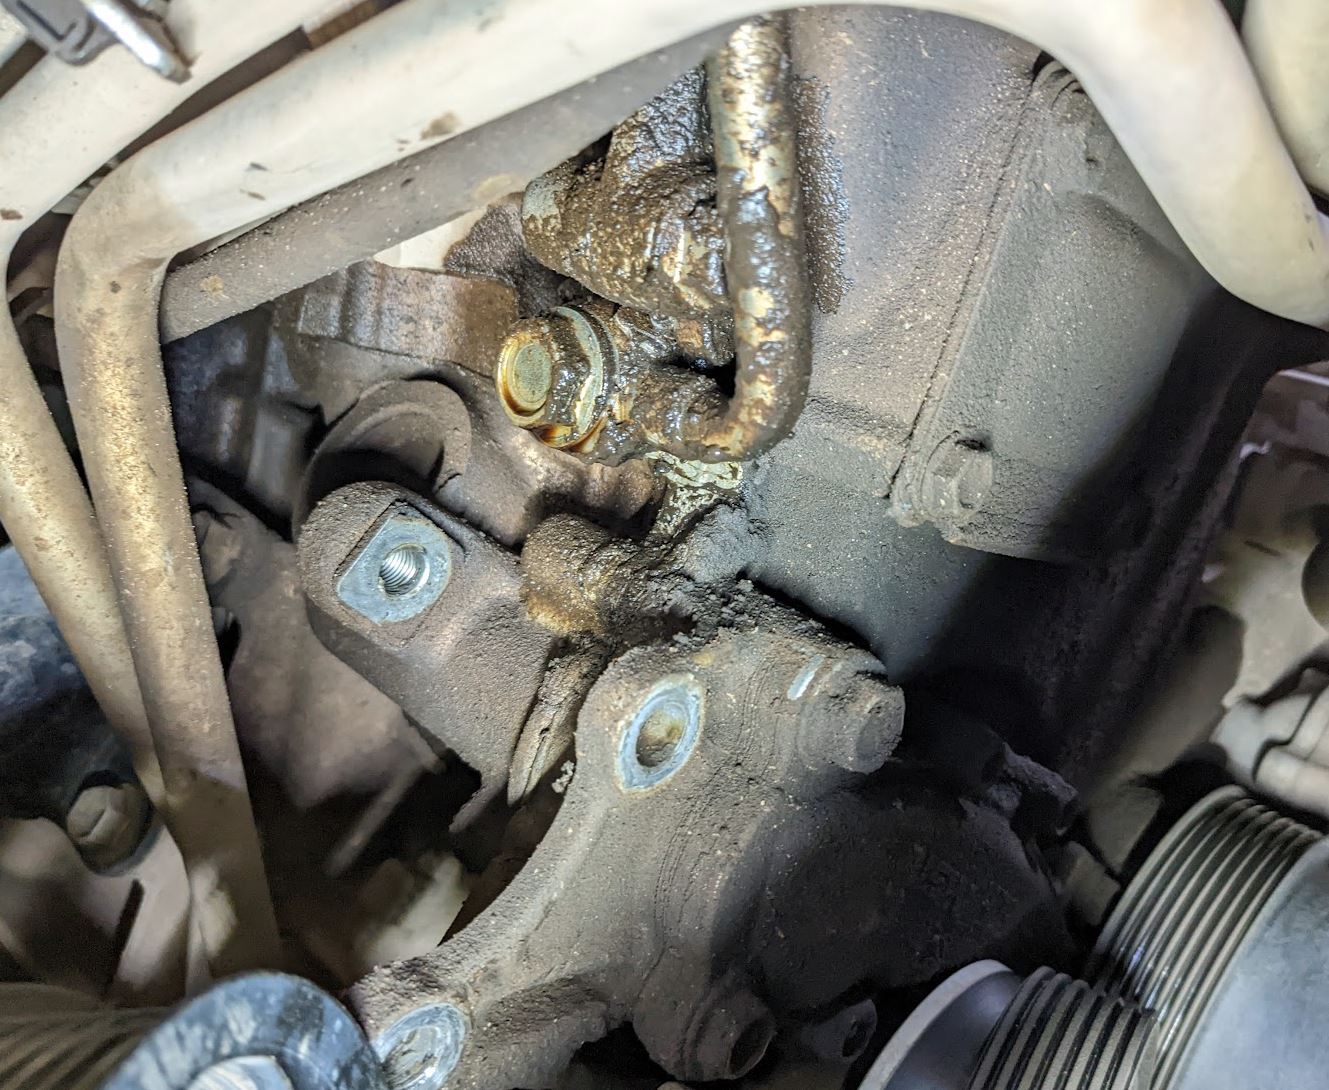
For what it's worth to anyone else with the excessive oil leaks onto the front of the engine, I do still have a slight timing cover leak on my drivers side back behind the AC compressor & alternator but it's manageable for now compared to what I had going on. Had the dealership recheck the location of the oil leak and they confirmed it was my main front crank seal but said it wouldn't fix everything but maybe 50%. I was in a rush to get my wifes car back on the road and I'm $600 lighter in the wallet, but that fixed 99% of the main oil film, belt slinging, and drops forming everywhere along the bottom of my undercarriage. The past few test drives have been clean and dry every time I've checked. Looking back I should've just done it myself for the cost of a $20 seal but I've heard how tough it is to get that crank pulley bolt broken free so screw it, plus has a 1 yr warranty if it starts again.
Also, to anyone with the common seep/leak at the passenger side timing cover corner that's not covered under warranty and dreading that $5-7k cost it really wasn't that bad to pull and access behind the PS steering pump to attempt to seal it, maybe 3-4 hours over 2 days total.
-Pop hood to remove serp belt off the PS pump.
-Jack up that corner and remove passenger wheel and fender well flap/cover, now you've got a pretty good shot of unbolting the PS pump. Use jack stands to be safe of course.
-Unclip the 3 electrical connectors and push them towards the rear out of the way.
-Unbolt the two bolts through the pump pulley, one of long and goes all the way through, the other is short.
-Pull the pump (without disconnecting the hoses) out of the way towards the front, and you've got access to that entire leaky area directly on front of you.
-Mine was still relatively clean in that corner with mild oily dirt. It was easily accesible especially with the VVTi pipe removed, but I'd think you could access it even leaving it on there. De-grease with a spray or brakleen, wipe down, scrape/pick any solid chunks or pieces of crud.
-Once that area is completely clean and dry, use Toyota FIPG along the seams reaching out about 1-2" in all 3 directions from that corner point. Make sure it covers the entirety of the existing gray bead if you still have it showing.
-Let it sit and cure overnight, then put everything back together.
That area has luckily still been dry for me since that repair and throughout all of this, we'll see how long it lasts but I plan to do the same to the other side and remove the alternator/ compressor in order to perform the same sometime in the near future.