TiVo FD Rotary Build

tv4184

Member
6d383152bc9dcc89e7ecd5417f3e679a.jpg


42227391_10105153192812466_1472512452053696512_n_fc2c64aa2aff13a3a028012fdd59a862d413d218.jpg

2/2/18

5d0054a1279a31aab400e3e2d5f15326.jpg


MODS

Suspension
- Stance XR+ Coilovers with Swift Springs (10k/8k)
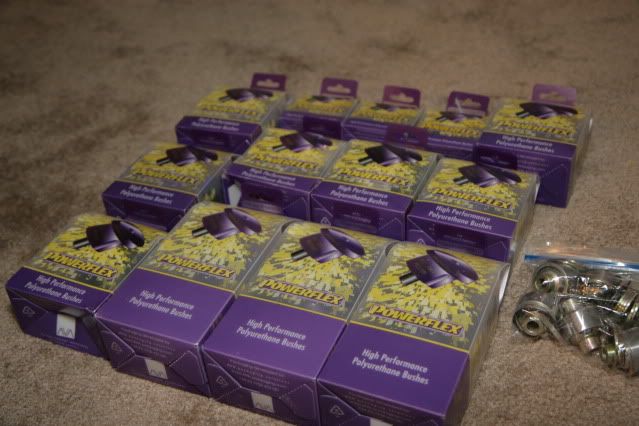
- Powerflex polyurethane bushings
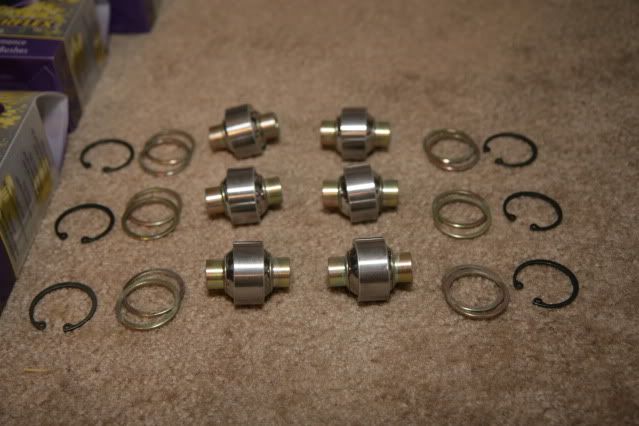
- Atomic Rex pillowball race bearings
- Delrin differential bushings

Shoes
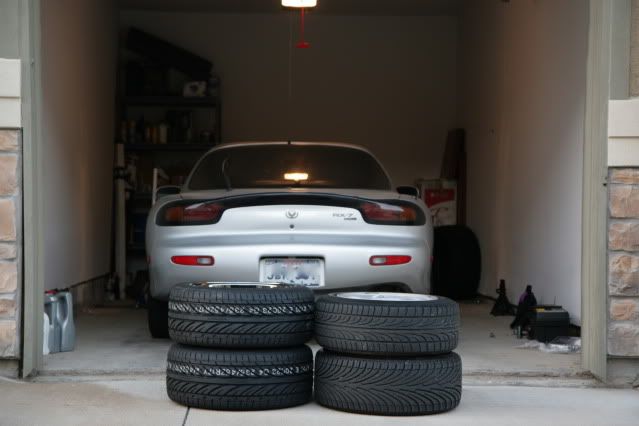
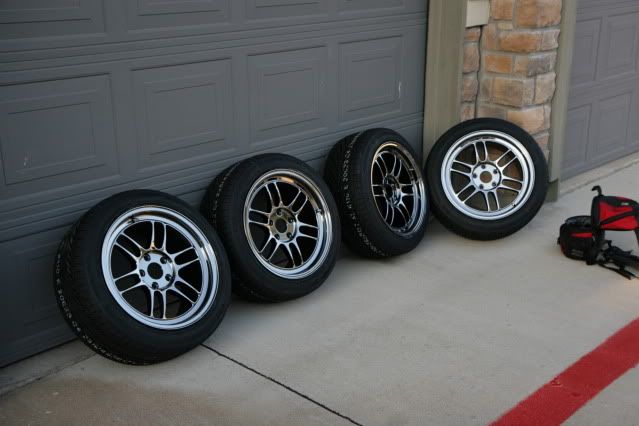
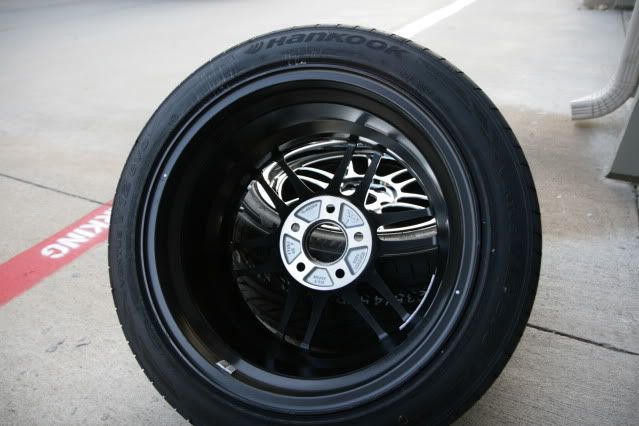
- Volk GT-P 18x8.5 / 18x9 (Future)

Engine
- Blitz FMIC (Future)
- eBay intake pipes w/K&N universal filters (previously had M2 intake)
- Power FC ECU with OLED commander
- Koyo Aluminum radiator (regular flow)
- Tri-Point Air Separation Tank
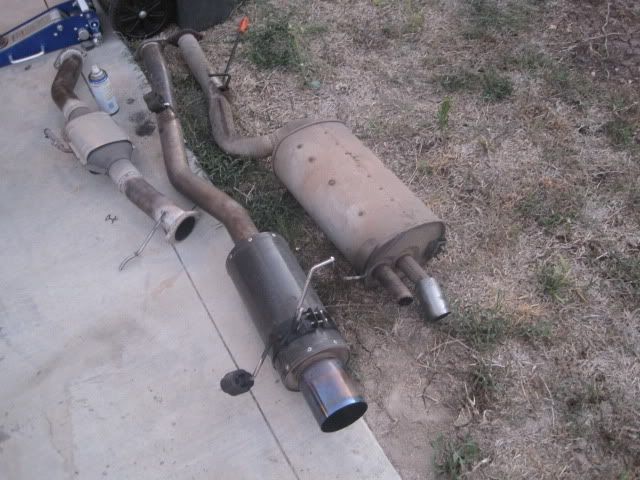
- HKS Carbon Ti exhaust
- custom Magnaflow high flow cat

Electrics
- early 2000s Sony MP3 CD player unit
- Morimoto Mini D2S retrofit in Sonar Housing by TurboII
- AGM Miata battery in rear passenger cargo bin

Misc
- B&M short shifter
- rear wiper delete hatch​

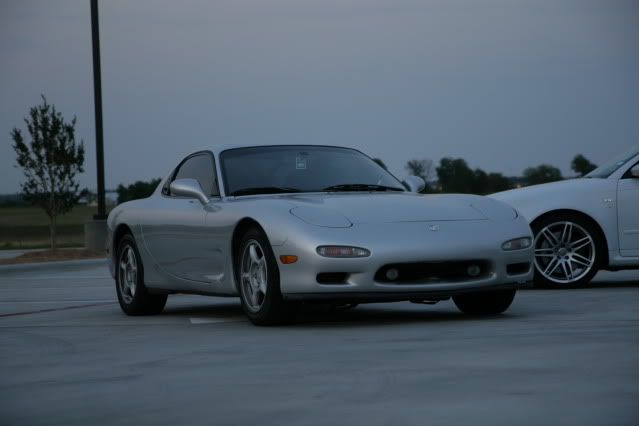
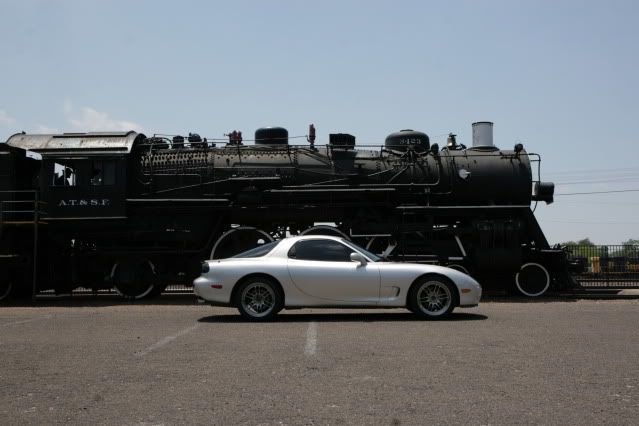
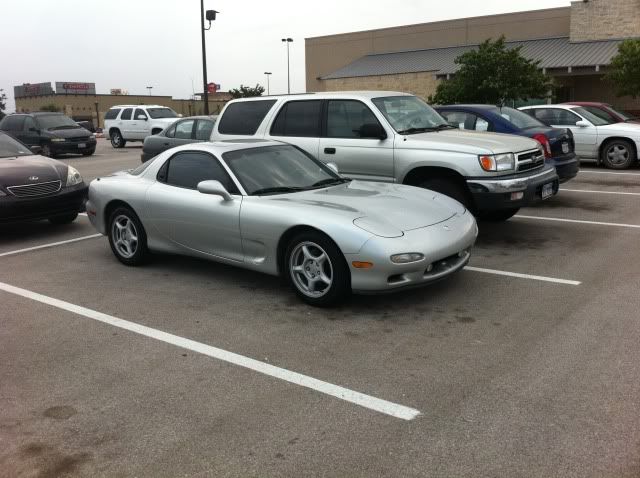
I've had this FD RX7 since November 2011. Picked her up from an RX7 reseller in Raleigh and drove her back. Pretty much the same route I did from Asheville, NC this past year in my 4th gen. I figure my build is a bit subdued for the rx7club members but I'll put it here out of the way. I came close to selling the car twice already too. Once 2 years ago when I had it for sale for 2 months with barely any takers and I listed it this past weekend for about 10 hours before I decided that I didn't realize what I had til I put it on the market. I had a change of heart after people started blowing up the thread.

At first, I didn't think I had the time to wrench on her, but the past couple months showed me otherwise. Back then when I first bought her, I used to have only 5-6 hours to do any kind of work in the parking garage of my apartment or my friend's houses. Now with my own garage, I can have her on jackstands while I spend extra time making sure everything is done right. I already have quite a bit invested time and money wise. I mean, even with the parts I have lying around, I'm pretty far from getting anywhere I want to with the car. Direction of the build will probably change too, initially I wanted a track build, but now I just want a weekend / clean JDM look. Time to do this right...again
:lol:
 
Last edited:
Register to hide this ad
Introduction - Part 1

I'm gonna try to keep this short, since this is a recounting of events from seven years ago and wouldn't want to drone too much. The white RX7 is actually not my first RX7, I bought my first one about 6 months prior to getting the current one. I spent about a better part of the year on and off looking at RX7s, even while I had owned an AP2 S2000. I sold the S2000 to get my second 3rd gen 4Runner for practicality purposes since I was moving out of town. I tried to fill the sports car void with the purchase of my B7 RS4, but that was more of a grand tourer than a light weight sports car. I debated between getting another S2000 or trying my hand a new platform, the FD RX7. The rest is history.

RX7_01.jpg

05/23/11

My first RX7 was silver just like the 3rd gen I got the year before. It was a 93 with a manual swap and a few issues, including the usual blown pillow ball bushings, leaking ac system, and couple wiring issues due to the manual swap. It was a great deal at the time being less than $10k. The guy delivered it to the Target down the street from my apartment (on and I had to get a co-worker to bring me back (pre-Uber days) to get the 4Runner. I cleaned her up and got a few nice photos together.

IMG_3327.jpg


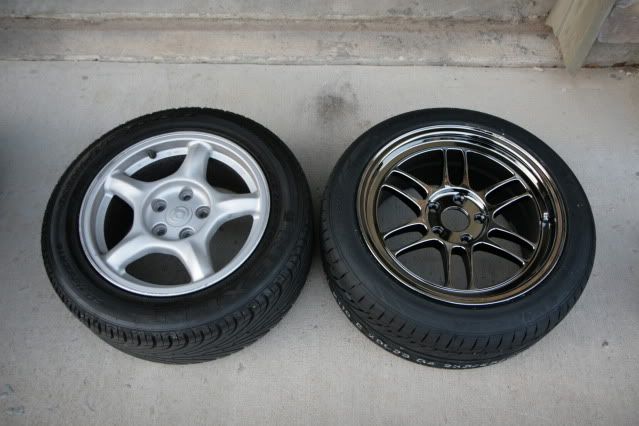
Ended up learning several lessons along the way. The 93s had weak ass paint because blue painters tape tore off the clear coat. The keys to RX7s were pretty weak, being really long and having a slim point due to the cut, are prone to breaking. The clutch master cylinder ended up giving out a month into owner ship, which I replaced with a factory fresh one. I restored the AC system and got the system to blow cold air again. I also did a few "mods" including getting the RZ strut bar and replacing the wheels with some Enkei RPF1s that I had laying around. I bought them before I knew I wasn't going to have the S2000 anymore and didn't want to lose my $600 deposit on them. Funny though because I just sold those wheels last week on craigslist to fund my garage clean up project.

IMG_3362.jpg

IMG_3346.jpg

IMG_3353.jpg

IMG_3356.jpg

Here are the brand new wheels I had laying around for almost 8 months. Gotta admit, it was fun being able to mod again because at this point it was close to the end of my residency.

IMG_3368.jpg

5/29/11

I did get in a couple other mods because my friend over in Ft. Hood, I was in Temple at the time, was doing an LS2 swap and was parting out his 13B parts. I bought a B&M short shifter and an HKS carbon ti catback off of him.

IMG_0059.jpg

IMG_0060.jpg

IMG_0061.jpg

6/24/11

I remember being glad to get rid of that heavy stock exhaust that was already missing a tip. I also put in a mid pipe deleting the catalytic converter. The RX7 sounded pretty sick afterwards and I didn't care that it droned because I had three other cars at the time I could drive if I wanted to have peace and quiet.

IMG_4261.jpg

IMG_4262.jpg

7/5/11

I bought a full polyurethane bushing set along with "new & improved" bearings to replace the stock "pillow ball" bushings. More to come on this, but I was planning on it being a track build so I was moving towards a more solid suspension setup prior to fuel / power upgrades and ultimately exterior cosmetic upgrades.

IMG_2277.jpg

IMG_2264.jpg

IMG_2269.jpg

7/30/11

This was one of the last things I did besides the AC, which I'll leave it out of the introductory post, was the clutch MC. I completely forgot I did this until I reviewed my build thread from back in 2011. Looked like at the time the car badly needed a full hydraulic system bleed, the RX7 shares its brake fluid reservoir with the clutch system. The clutch MC was weeping and caused the clutch pedal to not come back up after trying to clutch the car.

After restoring the clutch hydraulic system and ultimately AC system, I was able to daily drive the FD for the next four months. Until I found the white one with 50k less miles and a fresh engine swap. I jumped on it and flew out to Raleigh, NC to pick up the car in November of 2011. Stay tuned for part 2.
 
Last edited:
Helluva "get home drive" through Asheville/Blueridge Parkway!
Still drooling from my romp earlier this month in the v8.. I cannot fathom how amazing it would be at 9,000+ rpm
 
11/05/11-11/07/11 - Introduction Part 2

In a decision I sort of regret later on and frequently curse myself for, I picked up a second FD RX7 because of my obsession with white cars. If you can't tell by now, I mostly shop for white cars, sometimes settling for other colors depending on the situation. One of these days, I'll learn me some patience and wait for the right car to show up, like my low mileage 5 speed IS300. Shortly after picking up my V8 4th gen, another one popped up with 35k miles at the cost of roughly twice what I paid for mine. :ybrick:

70f3a9a2378d7e9edad73d4b152bded2.jpg

While still at the seller's garage

So I flew out to Raleigh, where the seller picked me up and we went to the bank for me to get him a cashiers check for the car. Short backstory, this guy buys shells / complete cars, rebuilds the engine, gives it a 1 year "warranty", and resells them on the forum. Unexpectly, we had to fish a key piece out of the passenger key cylinder since that was the only side I could lock the car from. I loaded up my tool box (checked a bag full of tools including my torque bar and wrench), along with my other luggage. Before leaving Raleigh, I promptly made 2 more copies of the keys in case mine broke at any point on the way back. I made the same journey to Asheville like I did with my 4th gen to visit my friends. This was before my friend picked up his own 4th gen.

399bf4ed15158b9415afce45adc61c70.jpg

Broken key that was fished out

30e485be43f5c2a130430df7501ab435.jpg


Spent some time around town visiting local joints that my friend, who had just barely moved there a few months prior to my visit. I also had to dial back in some height because the previous owner had it pretty much slammed. This not only made the ride terrible but it also messed up the front fenders a bit. I'll need to get a shop to fix this in the future, but at least they didn't ultimately become bacon fenders. After a short day and a half trip, I started to make my solo 2 day journey back to Houston.

26b219d64fe938ccc4460c1573b8673e.jpg

12 Bones Smokehouse for lunch

eff0f899b22d5b074487d0eba6448121.jpg

Thirsty Monk for dinner and a flight

I stopped in Meridian, MS after the first night of driving and stopped at a Holiday Inn Express. It was pretty rough because I ended up doing the Tail of the Dragon three times, which ate 3 hours total. I lost cell signal, this was back when 3G was all the rage, so I had to retrace some steps back to the beginning of the trail to figure out the quickest way back. I ended up having to go back the way I came, hence the third time. Spent only 6 hours on the road because of this slight delay and also trouble shooting a vacuum leak, which was a simple line falling off of a sensor. I did the fix on the side of the road with a flash light and re-installing the spring clip that wasn't in place before.

42d0de73f4807021baa0c31bf1795829.jpg


e7faaa7364ad0c15ceedb2446a31ea3c.jpg

Fuel stop before hitting the Tail of the Dragon

1c645ff1743a606df9e71c377ad80a0d.jpg


71c5f20e70fe322e310c42f013577a0b.jpg

Tennessee border

816dbffdaf3ef212989314b91a625c16.jpg

Alabama border

317080ae96e5a2d70f2bf6bd736e8ea5.jpg

Mississippi border

On day 2, I left early in the morning and made a stop in Louisiana at a hole in the wall for some boudin. This was where the lack of AC in the car started getting to me because of the swampy heat and being mid day. Besides the heat, it was mostly uneventful except for a giant engine on the back of an 18 wheeler. I had the old Minnesota plates on the car the whole time since the car was insured but not registered in Texas yet.

67c14d7006bd0f92927e9eeb2f7d6545.jpg

Holiday Inn Express continental breakfast

db2dc9e485785acab89ac3e7763235c8.jpg

Louisiana border

2f1829d7c2bf50530ca02d8731d503fb.jpg

Hole in the wall boudin lunch

75330874ee5a30cdda3aa011d61084bf.jpg


64c8ea19f79051492d1252af6e4ea16c.jpg

b19847ad7b1edd7e04cc777f674ec780.jpg

Texas border

52201184221a9895e782b631894a4049.jpg

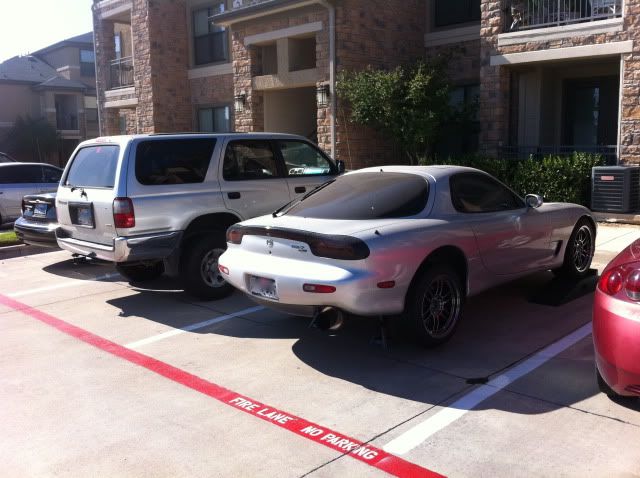
One of the few pictures I have of the car with the elusive silver FD and the other cars in the fleet minus the CB7 Accord

f6071a34e46b288f882b302aa6229855.jpg


My souvenir from my trip to the Tail of the Dragon. Each car always gets some kind of unique piece to them. I was glad to be home after 2 days on the road and was pretty stoked at the time to swap over all the parts from the old to the "new" RX7. I did note that the car felt loads better, might partly be due to the mileage (85k at the time) and also the freshly built engine. The engine might be questionable because, although it was rebuilt like the previous FD's transmission swap, it was cobbled together with new and old parts. Remember to also note the Minnesota plates, that will come into play later on in my build.
 
Last edited:
Awesome thread. I'm a big FD fan, always been a bucket list car for me. I have an AP1 S2000 now, but would rather sell it for an FD. I just don't have the time or appetite for a 13B right now. Some day.
 
11/18/11

4fad9afc3f8b3dda5f33030f1d509e29.jpg

Some parts that I had ordered on 10/24/11 prior to picking up the white FD (which was on 11/5/11). Turns out I didn't even need the fuel filter. Looked like someone already did some aftermarket setup for the filters.

09bd4a480852998a8cbc9d75d8855fb6.jpg

4ba2fae8dccfffcd34bd05686b0db63f.jpg

First thing I did when I got her back was to start swapping in parts from the old FD. This was exactly the next day too (11/7/11).

d9ac6a1e608720f75ceb8e5474186ee2.jpg

b36341243ea8c987131c0c83db0f673b.jpg

1d07b0042ad9e5023e13a394531e8568.jpg

Went out to Harbor Freight on 11/14/11 to get the smallest shop press they had to start the bushing / "pillowball" replacement project.

64db8e993c00b254ab45bed605e62898.jpg

Here's the stock "pillowball" and delrin bushings.

8df85719fbcaa2511baf52103ff9e879.jpg

Barstock I had to get to make most of the weird angles work.

58cf3883115105f7e684692ba68a7834.jpg

a3a4fab5ee18750c8d31f8996a9684d6.jpg

ed0c790cfe72a7e1690303c3b72cf522.jpg

3a1ff0e77d3abe803621e5dc359ad12b.jpg

967aadcdc879df0b771c2edf088da5b9.jpg

Took a few tries after that between my friends and me to push out the first couple of bushings. Took a few trips to the store and iron yard to get the right socket sizes, harbor freight bushing clamps, and iron bars to make the right contraptions to push out the stock / delrin bushings. I think the bar stock I got had slightly rounded edges so sometimes the pressure we had on the bushing from the press would sometimes have the bars go flying. Good thing we practiced safety with goggles and shoes at the time.

a79cc7fcb3d4872f0bb8b3b03ceeea86.jpg

This is the first time I encountered problems where I couldn't get a seized bolt out. The stock bushing just kept absorbing my hammering so I ended up using a hack saw to cut out the bolt. No access to power tools because I was living at an apartment with no nearby electrical outlets. Lived life on the edge working on a car in a parking garage. I used my 3rd gen as a makeshift storage shed for tools and random parts.

7f2621519319b8acd9de8f8534aac62f.jpg

The Powerflex bushings came with some grease but I decided to use Green Grease at the time to grease the bushings. I think I'll probably regrease them with Mobil 1 when I start taking her apart again.
 
Last edited:
11/19/11 - B&M short shifter greasing

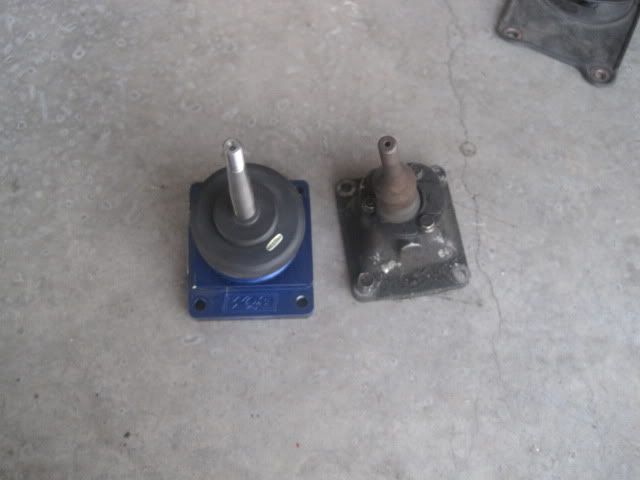
The next part I swapped over was the B&M short shifter I got from my friend back in July. I followed another forum member's DIY on how to regrease the shifter. The shifter is known to seize up over time so might as well do it while its out of the car.

99d6ca7dcb1295482ece9723b1932de9.jpg

A busted shifter boot is pretty common with the amount of heat build up from the exhaust system and the age. The main side effect from this is the smell of exhaust fumes in the cabin. Most of the time it would be apparant when the car is stopped and less whenever the car is in motion.

4b1b791d73bd1a009ec2d5df96cdeced.jpg

0910e4f5bb42cc3eb1134c6e4b0833fa.jpg

97fe970956a37a23712cf923bb35bcdf.jpg

The stock shifter on this car happened to have the Mazdaspeed aluminum bushing. I should have swapped it over to my short shifter but it was more trouble than it was worth at the time.

30de3364f5710371bbd87cacaa358782.jpg

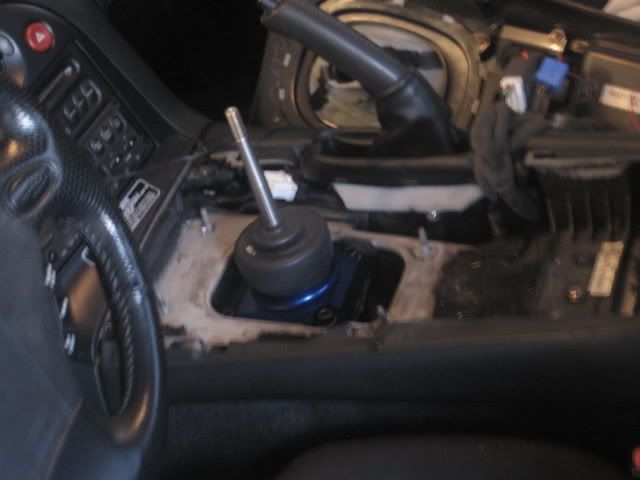
I had to drill out the transmission tunnel to get to the bolt since I did the install with the transmission dropped on the old FD.

d26617ca4aba6f4e9ff78365b6f7d1f6.jpg

6a14a42846aa45eb479b5446cf7df1ac.jpg

6cb82acffd2587c2358650244ab6e4df.jpg

21187943c92d0f34a6ea133afe23e490.jpg

Disassembly, clean up, and reassembly was pretty straight forward. The only big deal was to make sure not to lose the shifter springs and magnets.

42fb5acb0c31d9e72e0014c396b6d2e0.jpg

1652bf7b997bb2f70454c4baaeac83c0.jpg

Green Grease came in handy again.
 
Last edited:
11/20, 11/30, 12/1/11 - Steering rack bushings

26ddc685922f3185a3b673762b2caaf1.jpg

Next up was the steering rack bushings. Found the usual issues with a car that was lowered more than it should have been. Bent front tow hooks...

a1eb13218e34dee1faa3ddd3dac57de4.jpg

207022edc2c3bed9e7fa1a915e1da4a4.jpg

ea91ebaa2f1ab4115095bbe5231def70.jpg

c1f6327aa355c17e37e6dfec0cae5be9.jpg

07db03adce07402d722c1a071014d62c.jpg

...and trashed sway bar mounts. The sway bar mounts are flawed from the factory. Mazda designed them to be light weight with swiss cheese holes in the structure so most will bend under any kind of cornering load. Luckily the aftermarket support is still solid for FD RX7s, so Widefoot used to make solid mounts until they stopped delivering and another company called Sakebomb took up their place. What's the cost? $300 dollars...

Also discovered the radiator was meant for an automatic FD. The radiator has the same connections that an automatic 3rd gen radiator would have, although it doesn't have the strawberry milkshake issue like the 3rd gens do.

2952f8f8600196408bc37e505934b01b.jpg

795bd2e74f76c8e2f34d31800187d812.jpg

04183290be38ba95d51b78e825ff6251.jpg

Removal of the steering rack clamp wasn't too bad. At least I already bought new hardware from Mazda to replace the old one.

9d6b59c275417c7d533979fb5bd0a62a.jpg

74ffdac877dfc7ede73bb9c53f0efddd.jpg

b502654b7cc6a416eff618c38f8755f3.jpg

af9ecdd0221736b43a0ae15e1e15d962.jpg

The only downside to upgrading to Powerflex polyurethane steering bushings for the FD was that they needed triming. Powerflex makes them square when the stock ones have rounded edges. Superpro bushings actually fit better, but I didn't get them in time so I took out the dremel and spent countless hours trimming away and then test fitting them til they fit properly. Even the Superpro bushings need some trimming, just less because its a small line where the mould comes together.

595555c113b48fbaaaf8f72920ef8c7a.jpg

Just like the polyurethane bushings I installed on my 3rd gen, it was more placebo effect than actually any change in feel. Still nice to remove a 85k mile 17 year old set of bushings. I'll probably have to regrease these too and maybe recoat that bushing clamp.
 
Last edited:
12/2/11 - headlight shrouds & shifter boot

Small workings, painted the headlight shrouds with Rustoleum trim paint.
e1d67a5927e9bb88ed7c050c647344fc.jpg


Replaced the broken shifter boot with a factory fresh one.
a88e24b190c832685fba9e553f45c841.jpg

5d85a335a9cd873a0becd88569b15bab.jpg

e21d9646c995e02fb92b390037cf8f30.jpg

aa8838e425bbab7723ca124ea58b065b.jpg


<iframe width="560" height="315" src="https://www.youtube.com/embed/IK3LdL8Ts9o" frameborder="0" allow="autoplay; encrypted-media" allowfullscreen></iframe>
Also had a nice encounter with the factory alarm. My driver lock is busted so I had to disarm it by unlocking the passenger lock. Gotta refresh the lock set whenever I have a chance to remove the cylinders and find a locksmith that can do it.
 
Last edited:
12/9/11 - rear toe links & lower control arm part 1

5b2fedacd87ce70a45289b775c54c8cf.jpg

42fe8bde11b4f3c0a3c9a1992070a76f.jpg

After working on both my 4th gen and the FD, these look oddly familiar. The aftermarket replacements for the FD and the long travel kit sold by Metal Tech are quite similar actually. If I ever get around to getting both, I can post a side by side, but I guess thats the thing with suspension parts.

c4a6578a78645f3b9db7101e54309ab1.jpg

ffb4ecad6e5ccc1fbd1471163e3a9f3b.jpg

Ended up ordering some non-powdercoated toe links. I also had the guy sell me a complete set of suspension bolts off a lower mileage FD. I was using some grade 8 bolts from Ace Hardware for about a month until these came in.

c9d24d137a125bc27aabe7fab5577b32.jpg

ff98041d00a2cef32447ca6b02e99996.jpg

f5ddcacf709254d97a4c4ced27e93f7a.jpg

4f0ae441893e9d5e8b05d82680c69671.jpg

0f2301468e2c09d3afc0131cb27f240d.jpg

Another trip to Lowes to get a 1.5" socket to press out the bushing in the traction bar. The trick here is to cut off "ears" from the stock bushing so the bar stock can hold the lower control arm in place while pressing out the stock bushing.

05b0a2db371b70e688db659b3ed7ec30.jpg

e4d825a6ab90de600153eb1e2a278df2.jpg

fd3dd797b40d83450ad1e5ef49fed791.jpg

eda6f50b95529eb62608546a51035d30.jpg

Here's a side by side of the old and new hardware. The old pillowballs were really loose. The new hardware will probably wear out quicker but the miles won't be piling on like before so they'll last long enough until I need a new set. If I ever needed replacement pillowball bushings, there is an alternative produced by another forum member, since these have long since been out of production. There is also the option of aftermarket toe links, control arms, and traction bars made by various companies similar to how Metal Tech has long travel kits for the 4Runner. Using the factory hardware is always more cost effective though and if I polish up the aluminum everything will look like new.
 
Last edited:
12/14/11 - toe links part 1

It took a combination of sockets available to me, larger ones from Lowes again, and a ball joint service kit from Harbor Freight to tackle the toe links. Some work from the hacksaw was also required.

268083f170d7f85cfbba5dfda1c06dc0.jpg

4344eadb62baee4b5746d63ede17192f.jpg

497851677a5c16f08ab7d5e70a5b81d5.jpg

cfe4a0b0fb4e73398c991f6b52019764.jpg

The aluminum lined bushing made it more difficult to press out.

9117a938c97591a0c076ef39827bf25f.jpg

6e0ff4dc091917abb1f9a6fd9e276599.jpg

All flaps around the larger bushing had to be removed so there could be a surface to keep the toe link in place while pressing out the bushing at the same time.

18e9880784164a691acd9b5f7deceb82.jpg

Both the ball joint kit and the bar method did not work for getting the larger bushing out on my first try. I had to throw in the towel and try again a few days later.
 
Last edited:
12/16/11 - toe link bushings part 2

After hacking some more of the rubber and aluminum off along with a trial and error of several sockets / ball joint combinations, my friend and I were able to finally press out the larger toe link bushing.
0899c7598cc694a0aeedfd7e1db5284e.jpg

f315ee4386e268d102dea1ff97821383.jpg

eded1b84b170daaeb7a55fedf140775c.jpg

5aa5b978cdb98cbbcb98283af2662404.jpg

c0205b9bef425590a76055ac8a95dd2f.jpg


f5dfa7b658d118993ae669e8a1425dcf.jpg

bea5991868760361a052fc190d369f53.jpg

The new bushing will probably have to be cut off if I ever need to remove it. The polyurethane bushings have a lip that extends around both sides of the toe link arm leaving no room to properly press out the bushing.

7c047bfcf375a4902a99f0d59f5d5986.jpg

0925d317f12b3b335902f1e79279838a.jpg

fb76d57aea8ebb9bb52fee28cc14a211.jpg

Then it was onto the last part, the trailing arm. These were fairly easy because the previous owner had delrin bushings in so they required very little pressure. The replacement bushing was another two piece, which will be easy to service later on.

716b29a588301481e1dd0210a8d3d11d.jpg

ce9eb74bfc8de19acffe001b158447fe.jpg

The final product would look nicer if I had the tools to polish up the aluminum arms. That'll be a project for much later.

I'd like to say in retrospect, I would have skipped out on working on the toe links altogether. Aftermarket toe link arms would have retained the 3d movement the stock ones had because I noticed both the Superpro and Powerflex bushings do not flex like the stock bushings were designed to. Now taking into account the time/effort, the replacement arms I had to order, and the cost of the Powerflex bushings for the toe links, it would have been better just to go with the aftermarket toe link arms in the first place. Not to say I didn't enjoy the time I spent on them.
 
Last edited:
12/22/11 - Depo "JDM" bumper signals

I ordered a set of these on eBay a few weeks prior to this install. The delay was mainly due to the seller sending me some MR2 signals by mistake. It's funny because I think I've been buying lights from the same eBay seller since highschool. A set of clear bumper/corner lights both for my old 93' Corolla and first 3rd gen 4Runner.

25a9f93224fd05be2485d22271889f7c.jpg

81cc6532f9baff69d5d359dbacc241f1.jpg

90530c815c051cc8c18aee9ac99cdecc.jpg

96fd07164a9248f02870999946f0bae2.jpg

af1b9f6cecfb930a3ea357c477de07f3.jpg


I wanted the smoked ones, but most sites had them for almost 3x the price of these non-smoked ones. I figured if I really want smoked ones, I can do it later on my own. These can hold me over til I decide whether or not I want to do a 99 front end.
 
Last edited:
12/23/11 - rx7club retrofit kit

I received this retrofit kit in along with the TRS kit I used to retrofit my 3rd gen. At the time there were 3 options for the FD, one from Sakebomb garage ($$$), one from another forum member ($$), and DIY ($$). I say the DIY option is almost the same as the second option because you still have to get clear headlight housing and the parts to do the retrofit, plus the time involved in getting it done right. Just depends on how much your time is worth.

41109b341afc32accab69ed0e284cd02.jpg

5d60f28e48b8041a1aadde8f1705dfc0.jpg

a8ba28f6668c307e8c4cd1572dc8b33f.jpg

ebe8ef453d70c42247dab5398303e4ea.jpg

2887aed4c16ea6c4e820f7c46f3855ba.jpg


In a few years, I might consider redoing this setup with an MLED morimoto projector or just getting a set of RE-amemiya headlights for a sleeker look. The only problems are that RE-A headlights cost ($$$$), out of production, and halogen non-projector lamps. This means a retrofit would be done on some pretty expensive headlamps. The HID retros look and work great, way better than the fluted stock headlamps.
 
Last edited:
12/28/11-1/19/12: battery relocation project

The builder I bought the car from had an Optima red top installed in the hatch area. The car did not originally have a factory spare and I had the seller include it with the purchase. The battery not only took up cargo space but it also blocked access to the factory spare tire area, so the spare had to be carried on top instead of underneath the trunk carpet.

11bc9730c0ddf4f0fa4662befc68d6b8.jpg

0cd1af5c12eee443c4f5478e271cf74a.jpg

f38ce1de0b1ad015857201bfbbe372ac.jpg

f7bcd8dd4b519939e283b4fa5436a585.jpg

The factory carpet also had a nice cutout in it after removing the battery.

cbb96b2137b14b68afad0cf83edad756.jpg

5f44667f78c15d688c290f5ca0ad2c52.jpg

I kept the 4 gauge wire they used for the Optima battery. I re-routed the power wire inside the cabin under the carpet and through the firewall. The original route they used was through the fuel tank lid, underneath the car next to the exhaust and up into the engine bay to the factory battery mount. The battery post mount was coupled to the wire using a nut and bolt. Removed the post mount/nut bolt setup and just bolted the positive wire directly to the main fuse.

9287568a19b17c8b10cef59d9c5e560c.jpg

I added a circuit breaker for easy disconnect within the cargo bin. I connected the ground wire inside the passenger compartment to the seat belt mounting pount. I didn't take as many pictures of the process but anyone that's done a dual battery setup would know the basic details.

443b82edadbda26a3eec3ac2f0fd1bb4.jpg

e3500a925d63a27fc56c3d4aeb4beef9.jpg

df75a969643fe6bf402c6a431c3a5e24.jpg

fb36b924ffa1239e93a2c03e42cae4bb.jpg

Battery was tied down to the car frame using a simple battery strap setup. I'll test the battery voltage from time to time with the terminal wire touching the battery ground. I used a Westco AGM Miata battery from GoMiata. It's been working well for the past 6 years and I keep it connected to a Battery Maintainer most of the time.

d692ea607e7cde3c3ba6d3e6404080dc.jpg

a63fb40836f1afe9e3e0f32c96f600d9.jpg

Voltage only looks high because it’s connected to the maintainer.

Future plans include rewiring the engine bay and the fuel pump once I get all the details together. The ground in the engine bay is pretty ghetto looking with the yellow ring terminal. The floating main power source is also just as non-asthetically pleasing.
 
Last edited:
3/7/11 - M2 intake & XSPower SMIC

I decided to do some work with the engine bay with air flow and the coolant system. I decided on an M2 intake, which took a while to hunt down. Didn't take too long to find the CF one from another member. The good thing about rare parts is that someone is always holding on to it and might be willing to sell to fund their new projects.
c10922bb273d6bce4c0dea3ecfc85e94.jpg

bfeb78cdb8672d4a2f677da89f9a874b.jpg


Then I also got an XSPower SMIC from a friend in Austin. He spent a good deal of time grinding away the XSPower logo and polished it up. Looks pretty close to an M2 SMIC to an untrained eye.

ca2cce4037ca9657a9851482e5c4f3b9.jpg

5209be02d74a8c28290c70e3e150570e.jpg

The oem SMIC looks like it does very little cooling if anything.

553ee4196a385636d19c0acbc3bcb185.jpg

The only downside is that I didn't realize I needed the Greddy elbow to make this kit work so car was going to be down for a little while til I could make it work.

8c631e7e76c89989f48a8bd90e00b56e.jpg

Actually if I didn't have the M2 intake box it would have fit fine because I could have shifted it over to fit the smaller connection that was meant for the stock elbow. I should have done more research in the end because I ran into overall fitment issues. My RZ bar wouldn't clear the hot side pipe. I didn't have a proper place to mount my AST anymore after installing this SMIC either. It's not surprising that I used to rush into things before researching. Now a days though I might spend too much time reading and making spreadsheets on information before deciding on anything.
 
Last edited:
3/28/12 - Koyo radiator / Tri-Point AST

Decided on the regular flow Koyo radiator. Looked so shiny and new that I almost felt bad installing it into my dirty engine bay. I also went ahead and bought brand new OEM radiator hoses from Ray Crowe.

217174f132c2e3d30994b98a0f36e0e4.jpg

09e90fed56d09aed700afd725a87bef5.jpg

f872b58e85504c01e365b5340356d883.jpg

c067e222c612fab3a172fa0e2a17f511.jpg

This was a time that I wasn't picture heavy and I lost some of my back ups too. The cool thing about the replacement radiator hose clamps were that they came with these red metal ties that you just pull off and they clamp into place. So cool...lol

f48d5b709d905d2fd2f69f3cc3f12c65.jpg

I bought an aluminum air separation tank from Tri-Point Engineering to replace the stock plastic AST. They don't make anything now a days but I used to like what FD parts they offered at the time. I never understood the shape of the stock AST being square, seemed like the coolant wouldn't swirl properly to get rid of air in the cooling system. It'd be cool to add something like this to the 4Runner but we don't have any issues with cooling plus a lot of RX7 owners end up deleting this. If you can properly flush your cooling system, you should never have any air bubbles in the first place.

6e9693008ce30b0c71bddb8ae802849f.jpg

I also met up with a local forum member to talk about the process for restoring the AC system. He had a pretty cool rotary engined pickup truck with TE37x wheels. He recommended on getting a full MANA set of lines, just in case the ones I had were bad, an extra condenser, new compressor, new expansion valve, and rig up a new drier. The new drier was to replace the MANA drier, which was a pain to find a replacement for. For FDs, there was the MANA (port installed) and a JDM (factory installed) AC setup. Differences were very small but mainly the drier for the JDM setup is very easy to find, while the drier for the MANA setup is pretty much impossible. I guess this is partly the reason why most people just ditch the AC setup altogether. The other reason would be racecar...:lol:
 
Last edited:
2011 May photoshoots

I decided that it was time to clean up everything and do a photoshoot.
a70d46e605c75e5714e93d7a1cf5591a.jpg

61638b6c67a105b71c7e026fd850ca40.jpg

Some last minute touch ups from exhaust carbon build up.

6d439e81202e87b6f275606a057cffd2.jpg

cce4f0656e1771544d51f215d781a6b1.jpg

8e33b4d9a589945e2b894f7862eeead9.jpg

2f5d0e399ebd8698756b579ba42804c8.jpg

Exterior was mostly factory, most of the mods were to suspension and engine bay. At least the height was adjustable thanks to the Tokico/M2 coilover setup.

be70ba0a54578158d2b5c7632d0d0d5f.jpg

af30c25a1f692f6d963ffd867905268e.jpg

Also replaced the old PowerFC commander with an OLED commander.

88ab12d337807c0dbe0c49310c39173b.jpg

I liked this shot I did a few days later too. If you're still keeping up, by this time I took off my R1 lip and ziptied on a 99 spec lip to my 94 bumper. A nice side profile of all of my cars at that time.
 
Last edited:
6/3/12 - paint correction and 99 lip remount

At the time, my friend was just starting out with his detailing business so he offered to do a correction and debadge what could be debadged from the rear.

b86b1283209faf844352b2b95b74ffba.jpg

14d740b86d9aaec2a8e82bbac39ec0e2.jpg

296740e6f11182e30cfee071dc422298.jpg

d4d63eaa6150ff06a5b044468720989e.jpg

2749813111edb453d197acaf2c8810ee.jpg

cb53ef53a58bb788e0e612690345e6c6.jpg

79ad0b29632960af1afc98eb311cb538.jpg

The SBC RPF1s always looked great when they were cleaned properly.

89dccadaab224e0126e8b2bf336fe55a.jpg

8f0a8d1e057b01f61e338495f3e393af.jpg

I went ahead and fixed the sagging lip. When I first installed the 99 lip, I ziptied the factory holes to the ones on the 99 lip which obviously doesn't line up. So I did the reasonable thing and just drilled a bunch of small holes in inconspicuous areas and just did about 6 zip ties per side to get the lip as close as possible. I plastidipped the lip because initially it was white but the previous owner must have hit something so it had a giant spider crack on the edge. Looks good enough for a track build anyway.
 
Last edited:

Members online

No members online now.

Forum statistics

Threads
278,312
Messages
3,554,089
Members
248,016
Latest member
Advally Service

Trending content

Back
Top