
You are using an out of date browser. It may not display this or other websites correctly.
You should upgrade or use an alternative browser.
You should upgrade or use an alternative browser.
TorqueOfTheDevil’s Build Thread ..::1UZ-FE VVTi Hilux Surf::..
- Thread starter TorqueOfTheDevil
- Start date

Formidable
New member
Amazing build. Well done!

TorqueOfTheDevil
Member
I like the idea of replacing the Cig lighter with the 2 USB connections.... where did you find that?
Ebay


giguchan
Senior Member
Thanks!!!
After getting all excited to remove my Lighter and install a permanent USB. i realized that my Garmin Navi unit still uses it. I have my Navi in my Kennywood but between the lot I can never get lost.
I even used my portable over your way ... "stoke on trent" Not sure where it is from where you are... but it was lovely..... I liked Cornwall and Bristol too.. Best Grub? Sorry... i loved it in Brixton.
See? Mine is just like yours..... Uh not really...
After getting all excited to remove my Lighter and install a permanent USB. i realized that my Garmin Navi unit still uses it. I have my Navi in my Kennywood but between the lot I can never get lost.
I even used my portable over your way ... "stoke on trent" Not sure where it is from where you are... but it was lovely..... I liked Cornwall and Bristol too.. Best Grub? Sorry... i loved it in Brixton.
See? Mine is just like yours..... Uh not really...
Attachments
Last edited:
White Stripe
New member
Can you tell me where the wire is you tapped in to for the heated mirrors?DIY Heated Mirrors
Yeah I know what you are saying.. "Get onto the V8 already" I will.. I'm just trying to keep stuff in mildly chronological Order..
One thing that really annoyed me on my truck was the utter lack of heated mirrors... I went out to Irvine California on a training course... one of the many things that struck me (other friendly people, sun, hot women, god places to eat, hot women) was that a, there are LOADS of 3rd Gens out there... (we natively never got them here so all ours are imports.. its a bit of an event to see another one) and how TINY they look out there. Here in the UK the country lanes where I live are small, and anything much bigger than this would be awkward for daily use... parking spaces are also way, way smaller... as such I NEED door mirrors that I can see out of!
On the damp winter mornings I was getting to the office and they still weren't really clear, so I decided to do something about it...
I had read on the Internet (Quite possibly this very forum....) some wise person had used motorbike handle bar heaters to heat their mirrors... and they hadn't exploded or cracked or anything.. I figured "I'll do that"

Ordered from china via my favourite supplier (ebay...) 1 pair of motorbike handlebar warmers....

I carefully prized off the mirror glass stuck these to the back of it, and refitted the glass using mirror mastic (I had head that other adhesives can damage the mirror finish) drilling a hole for the cables to escape. I then pulled apart the mirror mechanism (JDM electric folding mirrors, naturally) fed the cables and reassembled.

The end result is... it works! This is when first switched on... but after a few minutes the entire glass clears.
They are activated by turning on the rear screen demister (as in OEM Toyotas) and were first wired in series as I was worried they would be too hot... this was utterly useless so I re wired them in parallel for more heat...
The rear screen demist/heated mirrors are also connected to my Viper remote start alarm, so on a cold morning it activates them. Brilliant!!
I now have a company car... it has non of this... so from being super smug and saying "I never have to unfrost my car" I now do. Not Brilliant.
TorqueOfTheDevil
Member
Can you tell me where the wire is you tapped in to for the heated mirrors?
I can't remember 100%, but the relay that powered them up was operated by the in dash rear screen heater button.
From memory it was one of the wires on the top row, but it was the only one that showed positive when the switch was switched, and nothing when it was off. if you have a voltmeter it shouldn't take long to test. I'll confirm for you next time I have that panel out.
I do remember that I started with the heaters wired in series as I was concerned about them being too hot.. they were quite weak so I re wired them in parallel.
Thanks!!!
I even used my portable over your way ... "stoke on trent" Not sure where it is from where you are... but it was lovely..... I liked Cornwall and Bristol too.. Best Grub? Sorry... i loved it in Brixton.
See? Mine is just like yours..... Uh not really...
Yeah but you can get a Shrockworx front! I mailed them, they wanted $900 to ship

I have a good friend from the Stoke on Trent area, I've never been but its about 3 hours away.. Spending quite a bit of time in Bristol at the moment as I'm building a system for a client down there, its nice, good fun on a night out.. I'm about 45 min to an hour west of London. its a small town, but a nice area, we do get a few tourists.. and people move here, George Clooney is a few miles away, as is Orlando Bloom. I can't say I've seen either... maybe I can ask them to bring me over some truck parts next time they visit family

Last edited:
TorqueOfTheDevil
Member
[MENTION=138011]TorqueOfTheDevil[/MENTION] ,
Is the body lift necessary to fit the V8? I know it was necessary for [MENTION=59542]Singtoe[/MENTION] 's 4.7, and I remember reading that you did it as well.
Thanks for the feedback!
I think you'd really struggle trying to fit the engine in and keeping it level without the body lift. The sump sits just above the cross member, and the transmission mount was moved up 1" to keep things level. You might be able to get away with 1" or 1 1/2" but I too had read it was needed so ordered the kit anyway.
You could mount the engine lower with sump mods, but then the exhaust and upper mounts become more of an issue. I've known people put non VVTi 1UZs into 4Runners with no body lift, but they were SAS, so a lot of the space constraints have moved.
I was fine with the body lift, I know its frowned upon a little more stateside, but I have fairly negative offset wheels, and I need a fair bit of lift to clear them, in fact the passenger side still rubs if I have a passenger, with the Toyotec coilovers and 2" body lift. I'm hoping some camber rejigging when I redo the front end will let me eliminate that, possibly wind the coil overs down a tiny bit too to reintroduce some "droop".
TorqueOfTheDevil
Member
Mini update... for too long I have no tweeter pod cover, as I wanted a "spare set" to mutilate leaving a pristine factory set.
I can't seem to find any in the UK, so I figured I'd just go ahead and cut up the ones I have, to allow them to accommodate my Morel tweeters.
First stage was to trim down the Morel "surface mounts" so they were open backed. I then carefully trimmed out the factory plastic mesh to the tweeter surface mounts fit in snugly. These tweeters have no bezel whatsoever, so unfortunately there is no way I can really do this without having to sue filler and paint the lot. I know its a "visible mod" but I like things to look like "proper factory fitted" where possible, especially on the interior.
I fitted the tweeter rings, and help them in place with masking tape on the front, and mixed up some fibreglass resin and pouted a small amount around the back and allowed it to harden, fusing the parts together and making a solid seal.


It's not the prettiest finish behind but the resin will also add mass. The factory tweeters are bolted to the door, instead of set in the plastic trim, so making it a little heavier and stiffer will help. I then used fibreglass matting in small strips all around the rear side, and added more resin, (no pics yet I was "in the zone" doing it lol).
I thought I'd have a quick check to make sure that the tweeters still fit (and to give myself a sneak preview) They do.

Knowing that the filled area would be smooth and not match the textured plastic surface of the plastic I then set about both pods with 800 grit wet sanding paper to smooth them off, cleaned and degreased them and coated them with three coats of plastic primer, once that had dried I gave them 3 coats of high build filler primer which is currently curing for 24+ hours before I set about it with more fine wet sanding paper prior to final painting.

I'm still undecided what to use as finishing paint. I really want it to look exactly like factory, but think that surface texture will be hard to replicate. I'll probably just use satin black plasticote for now and see how it looks, and refinish with a specific plastic "texture" paint when I find one that I trust.
Silly little job, but all these things still require time and care.. It's not perfect either, but it will look a lot better than nothing! (something I'd got so used to I'd gone blind to it)
I can't seem to find any in the UK, so I figured I'd just go ahead and cut up the ones I have, to allow them to accommodate my Morel tweeters.
First stage was to trim down the Morel "surface mounts" so they were open backed. I then carefully trimmed out the factory plastic mesh to the tweeter surface mounts fit in snugly. These tweeters have no bezel whatsoever, so unfortunately there is no way I can really do this without having to sue filler and paint the lot.
I know its a "visible mod" but I like things to look like "proper factory fitted" where possible, especially on the interior.I fitted the tweeter rings, and help them in place with masking tape on the front, and mixed up some fibreglass resin and pouted a small amount around the back and allowed it to harden, fusing the parts together and making a solid seal.
It's not the prettiest finish behind but the resin will also add mass. The factory tweeters are bolted to the door, instead of set in the plastic trim, so making it a little heavier and stiffer will help. I then used fibreglass matting in small strips all around the rear side, and added more resin, (no pics yet I was "in the zone" doing it lol).
I thought I'd have a quick check to make sure that the tweeters still fit (and to give myself a sneak preview) They do.
Knowing that the filled area would be smooth and not match the textured plastic surface of the plastic I then set about both pods with 800 grit wet sanding paper to smooth them off, cleaned and degreased them and coated them with three coats of plastic primer, once that had dried I gave them 3 coats of high build filler primer which is currently curing for 24+ hours before I set about it with more fine wet sanding paper prior to final painting.
I'm still undecided what to use as finishing paint. I really want it to look exactly like factory, but think that surface texture will be hard to replicate. I'll probably just use satin black plasticote for now and see how it looks, and refinish with a specific plastic "texture" paint when I find one that I trust.
Silly little job, but all these things still require time and care.. It's not perfect either, but it will look a lot better than nothing! (something I'd got so used to I'd gone blind to it)

fightman80
New member
Sweet build man! I can't believe I've never seen this one before.... I guess that's what happens when you're off T4R.ORG for too long... lol!
Gonna sub to this thread... keep up the good work!
Gonna sub to this thread... keep up the good work!
TorqueOfTheDevil
Member
Sorry for the lack of updates!
I fitted all the suspension parts listed above... What a difference. Even though the poly bushes were only a few years old, they weren't that great.. I raved about them at first fitting, but I was comparing them to shot factory bushes that were 15+ year old. Now I'm back on brand new factory bushes all round the ride is better, the suspension cycles better, and the squeaking has stopped. I also hope the geometry settings will stay true for longer this time. The Heim joints on the adjustable trailing arms had play already and were causing an issue so I replaced them with stock, and new OEM bushes (lower) and full new OEM arms (upper).
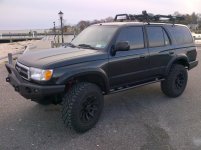
Unfortunately, (along with the holiday photos, much to the girlfriends dismay) After loosing everything on my phone (A long story involving drinking all weekend at a car show, sudden paranoia of being fraped, and setting a pattern unlock after many beers) I don't have any pictures of it, apart from a couple send to one of the Hilux Surf Club members explaining why I was going to be late for another weekend / drinking camping event because my truck still looked like this:


I've still not got around to doing the cooling/AC setup, but have decided to make a few changes to the plan.
I've got a Denso V6 radiator, its the same as the Diesel one, but the inlet outlet ports are on opposite sides, so hopefully I can make a much cleaner coolant hose path. I need to trial fit it and take measurements before I order all the pipe, and look at building a shroud. I have also decided to take a slightly different route with the oil cooler and oil filter location, and have ordered a 2UZ (Tundra) oil filter housing. I hope to use this paired with a thermostatic take off sandwich plate to feed the oil cooler, instead of the remote filter mounted on the airbox (reasons being, longer time to generate oil pressure on start up, and getting oil EVERYWHERE when I change it).
I also had looked at the A/C compressor and realised that it was actually fine, - it was the clutch that had failed, not the compressor. I suspect the reason for failure was that drip of coolant that seemed to occasionally hit it. I tried to change the clutch in situ for the one on my used one, but it was stuck fast.. I've since bought a brand new OEM compressor to fit..
I'm also waiting for another parcel to arrive from across the pond.. hopefully it'll arrive today, so I'll keep everyone updated then, but it's a good one!
I fitted all the suspension parts listed above... What a difference. Even though the poly bushes were only a few years old, they weren't that great.. I raved about them at first fitting, but I was comparing them to shot factory bushes that were 15+ year old. Now I'm back on brand new factory bushes all round the ride is better, the suspension cycles better, and the squeaking has stopped. I also hope the geometry settings will stay true for longer this time. The Heim joints on the adjustable trailing arms had play already and were causing an issue so I replaced them with stock, and new OEM bushes (lower) and full new OEM arms (upper).
Unfortunately, (along with the holiday photos, much to the girlfriends dismay) After loosing everything on my phone (A long story involving drinking all weekend at a car show, sudden paranoia of being fraped, and setting a pattern unlock after many beers) I don't have any pictures of it, apart from a couple send to one of the Hilux Surf Club members explaining why I was going to be late for another weekend / drinking camping event because my truck still looked like this:
I've still not got around to doing the cooling/AC setup, but have decided to make a few changes to the plan.
I've got a Denso V6 radiator, its the same as the Diesel one, but the inlet outlet ports are on opposite sides, so hopefully I can make a much cleaner coolant hose path. I need to trial fit it and take measurements before I order all the pipe, and look at building a shroud. I have also decided to take a slightly different route with the oil cooler and oil filter location, and have ordered a 2UZ (Tundra) oil filter housing. I hope to use this paired with a thermostatic take off sandwich plate to feed the oil cooler, instead of the remote filter mounted on the airbox (reasons being, longer time to generate oil pressure on start up, and getting oil EVERYWHERE when I change it).
I also had looked at the A/C compressor and realised that it was actually fine, - it was the clutch that had failed, not the compressor. I suspect the reason for failure was that drip of coolant that seemed to occasionally hit it. I tried to change the clutch in situ for the one on my used one, but it was stuck fast.. I've since bought a brand new OEM compressor to fit..
I'm also waiting for another parcel to arrive from across the pond.. hopefully it'll arrive today, so I'll keep everyone updated then, but it's a good one!
Last edited:
TorqueOfTheDevil
Member
I thought I'd give another little update as to what I'm up to...
I've been a little distracted recently as I'm moving in with the girlfriend (yup, she has a whole world of car parts in the dishwasher to look forward to!), helping my dad to fix up some cars to sell, and helping the girlfriend with a house extension and picked up a little summer toy which consumed my only garage space... As such not much progress has happened... this weekend my dad had a car collected for auction, so hopefully I have work space again!
Which is handy as the FedEx man (eventually) arrived today with this...

Thanks to one of the guys on the 4GM Facebook page who knew I was looking for one (Are you on there Nathan?) who found this on Ebay for me. It's a TRD supercharger off a 4.7 2UZ.

It comes with nearly everything I need top hook it up, including the 9th injector, extra pulleys and brackets, and a Unichip to help with the management side of things.

It looks like it has been painted blue, (with red pulleys and bypass actuator) then stripped. I imagine it'll end up Red and black

Unichip and P&P loom (for a Tundra lol) I've not checked the plugs and pins yet... I imagine I'll need to hard wire it in (I don't think I have room for the P&P kit!)

I also picked up some fuel rails from a Landcruiser Amazon (Petrol ones are rare here in the UK, and I have found one being broken.... just after ordering the oil filter housing from the US lol (still not arrived) I might ask if they want to sell me the sump...
The circuit board is a Bluetooth serial port. Yup... I want to be able to map my gearbox shift points by Bluetooth! :reddance:

It's not all great news... It had a long way to come from Hawaii.. unfortunately, even though it was very well packaged, the Bypass actuator mounts have taken a pounding (hopefully straightenable) and worryingly the Pulley has a slight dent that I didn't see in the Ebay listing, so it must have happened on the way. The belt still fits without touching, and turning it everything sounds smooth and even, and carefully looking at the pulley there is no lateral movement at all to suggest that the shaft is bent. There is zero noticeable play in the snout! so hopefully that will be ok... I am known for being a bit fussy though.. so It's going to bug me. (Maybe I'll ask the 3th gen V8 guys if anyone has one that has upgraded to a smaller pulley?).
I also have a Fresh TRD Thermostat (71 degree.. still on the way from the US) and Denso IK22 Iridium cooler plugs ready to fit as recommended by TRD/Unichip.
I now need to decide if I want to run the 9th injector and get that mapped, or not bother and uprate the other 8. I have heard that with a modest upgrade (say 315cc, I'm 250ish now) the Factory management will cope at everything but full throttle in closed loop mode, then (safely) over fuel slightly at WOT, which will in turn be dialled out by the Uni chip as part of a complete map... Alternatively I can use the 9th Injector, so "off boost" the ECU map will pretty much run as factory, and kick in that when needed...
The other issue I have is SPACE!
I specifically wanted this supercharger kit, as I know I had no hope of fitting anything else. I needed to retain the front intake as My intake tract is set up to go to the wrong side (because twin batteries and right hand drive) and this setup is pretty clever in how it runs the charger "upside down" in the V, to keep it as compact as possible.
That doesn't totally cover it though, as it IS taller than the factory intake, and I do have my "ram air" scoop feeding the airbox which hands down.
I measured the factory inlet to the top (not including the air feed) from the TOP of the bottom Flange, The supercharger in the same way, then the Supercharger from its highest point (annoying bolt near the back.. grr) and the clearance at the lowest point from my intake.
I got these results:
Current Clearance 2 1/4"
Current Manifold Height 7 1/4
Combined Height + Clearence9 1/2"
SC height 10"
SC height with bolt 10 1/2"
So I have 1/2 of an inch to find if I can remove that bolt, or an inch at that point if I can.
That's a bit disappointing, but I should be able to find that by modifying (or redoing) my cold air intake.. I was thinking of building a new air box anyway. (and that's a better option than modifying the engine mounts, sump, headers to lower the engine)
The best bit is how I measured it :laugh:

Lid for some spray de-icer, and a lump of butter on top.. build it up and keep slamming the hood until it touches!! Slamming it is kinda important, as it flexes about half an inch.. so this is accounted for. - Hopefully that will also account for any engine motion.
So starts the next phase... with more bits of LandCruiser, and a bit of Tundra from Hawaii!
The question is... Shall I do it "crinkle red" like the existing inlet manifold... or gloss enamel red?
I've been a little distracted recently as I'm moving in with the girlfriend (yup, she has a whole world of car parts in the dishwasher to look forward to!), helping my dad to fix up some cars to sell, and helping the girlfriend with a house extension and picked up a little summer toy which consumed my only garage space... As such not much progress has happened... this weekend my dad had a car collected for auction, so hopefully I have work space again!
Which is handy as the FedEx man (eventually) arrived today with this...
Thanks to one of the guys on the 4GM Facebook page who knew I was looking for one (Are you on there Nathan?) who found this on Ebay for me. It's a TRD supercharger off a 4.7 2UZ.
It comes with nearly everything I need top hook it up, including the 9th injector, extra pulleys and brackets, and a Unichip to help with the management side of things.
It looks like it has been painted blue, (with red pulleys and bypass actuator) then stripped. I imagine it'll end up Red and black
Unichip and P&P loom (for a Tundra lol) I've not checked the plugs and pins yet... I imagine I'll need to hard wire it in (I don't think I have room for the P&P kit!)
I also picked up some fuel rails from a Landcruiser Amazon (Petrol ones are rare here in the UK, and I have found one being broken.... just after ordering the oil filter housing from the US lol (still not arrived) I might ask if they want to sell me the sump...
The circuit board is a Bluetooth serial port. Yup... I want to be able to map my gearbox shift points by Bluetooth! :reddance:
It's not all great news... It had a long way to come from Hawaii.. unfortunately, even though it was very well packaged, the Bypass actuator mounts have taken a pounding (hopefully straightenable) and worryingly the Pulley has a slight dent that I didn't see in the Ebay listing, so it must have happened on the way. The belt still fits without touching, and turning it everything sounds smooth and even, and carefully looking at the pulley there is no lateral movement at all to suggest that the shaft is bent. There is zero noticeable play in the snout! so hopefully that will be ok... I am known for being a bit fussy though.. so It's going to bug me. (Maybe I'll ask the 3th gen V8 guys if anyone has one that has upgraded to a smaller pulley?).
I also have a Fresh TRD Thermostat (71 degree.. still on the way from the US) and Denso IK22 Iridium cooler plugs ready to fit as recommended by TRD/Unichip.
I now need to decide if I want to run the 9th injector and get that mapped, or not bother and uprate the other 8. I have heard that with a modest upgrade (say 315cc, I'm 250ish now) the Factory management will cope at everything but full throttle in closed loop mode, then (safely) over fuel slightly at WOT, which will in turn be dialled out by the Uni chip as part of a complete map... Alternatively I can use the 9th Injector, so "off boost" the ECU map will pretty much run as factory, and kick in that when needed...
The other issue I have is SPACE!
I specifically wanted this supercharger kit, as I know I had no hope of fitting anything else. I needed to retain the front intake as My intake tract is set up to go to the wrong side (because twin batteries and right hand drive) and this setup is pretty clever in how it runs the charger "upside down" in the V, to keep it as compact as possible.
That doesn't totally cover it though, as it IS taller than the factory intake, and I do have my "ram air" scoop feeding the airbox which hands down.
I measured the factory inlet to the top (not including the air feed) from the TOP of the bottom Flange, The supercharger in the same way, then the Supercharger from its highest point (annoying bolt near the back.. grr) and the clearance at the lowest point from my intake.
I got these results:
Current Clearance 2 1/4"
Current Manifold Height 7 1/4
Combined Height + Clearence9 1/2"
SC height 10"
SC height with bolt 10 1/2"
So I have 1/2 of an inch to find if I can remove that bolt, or an inch at that point if I can.
That's a bit disappointing, but I should be able to find that by modifying (or redoing) my cold air intake.. I was thinking of building a new air box anyway. (and that's a better option than modifying the engine mounts, sump, headers to lower the engine)
The best bit is how I measured it :laugh:
Lid for some spray de-icer, and a lump of butter on top.. build it up and keep slamming the hood until it touches!! Slamming it is kinda important, as it flexes about half an inch.. so this is accounted for. - Hopefully that will also account for any engine motion.
So starts the next phase... with more bits of LandCruiser, and a bit of Tundra from Hawaii!
The question is... Shall I do it "crinkle red" like the existing inlet manifold... or gloss enamel red?
Last edited:


Jungoes
Member
After reading all of Singtoe's posts... and yours... I don't know how much more you guys can improve these trucks,.. thanks for making this site so awesome
one thing for sure, ... thanks for the inspiration... for everyday guys like myself these threads are so enjoyable to follow...
one thing for sure, ... thanks for the inspiration... for everyday guys like myself these threads are so enjoyable to follow...
TorqueOfTheDevil
Member
Mini Update...
I've been scratching my head about management... as I'm running 10.5:1 compression ratio.. It might be asking a bit much of the piggyback to keep a firm hold on ignition advance at boost, to stop it knocking (and spitting rods). The *UZ forced induction lot are recommending I go full standalone... not something I've wanted to do as I like the all weather rock solid driveability of the factory management... not to mention the issue that the 1UZ - VVTi is a flyby wire throttle...and FBW control is something that standalones try to shy away from (I'd imagine because of legal implications if it goes wrong!). a couple cover it, but its very spendy. (Haltec, etc). the obvious choice is to switch to a full cable throttle.. but then I lose my idle control, as the engine I use manages idle control through the FBW throttle.. and adding an external idle control valve is messy.. and I hate messy.
Either way, I needed new injectors... the 1UZ - VVTi ones were pretty fancy "Air Assisted" injectors.. - they had their own air feed plumbed into the inlet manifold that allowed them to sucked air in using a venturi effect for more efficient carburation (Atomization). Result: better fuel mix, less lost on the intake walls, and in theory better economy.
The 2UZ didn't have this ( at least the Pre VVTi didn't) so it was a feature lost with the super charger.. so I had to go to regular style injectors.
After lots of research on sizes, I realised that my old pink "Air Assist" once were 250CC, as were the Tundra dark blue ones. Further research gave me the hunch that RX-8 injectors might fit.. so I ordered a used one, and it does. The rest are now ordered!


These have a 12 hole spray pattern, as opposed to the previous 4.. no clever air assist but the nozzle is meant to be a lot more efficient than previous designs, if I run them at the factory fuel pressure (call it 43 psi) they are rated at about 350CC... But the RX-8 runs them at 56.5 psi, and rates them at 495CC (source, various Mazda forums and supplier websites). At the higher pressure they'll atomise better too... In reality 350cc will be plenty.
So there we have it.. My Japanese Hilux Surf, with a Land Cruiser (prado) Rear Axle, Tundra Brakes, Lexus LS400 engine with a Tundra supercharger and Land Cruiser (Amazon) fuel rails will now have RX-8 injectors!
I've been scratching my head about management... as I'm running 10.5:1 compression ratio.. It might be asking a bit much of the piggyback to keep a firm hold on ignition advance at boost, to stop it knocking (and spitting rods). The *UZ forced induction lot are recommending I go full standalone... not something I've wanted to do as I like the all weather rock solid driveability of the factory management... not to mention the issue that the 1UZ - VVTi is a flyby wire throttle...and FBW control is something that standalones try to shy away from (I'd imagine because of legal implications if it goes wrong!). a couple cover it, but its very spendy. (Haltec, etc). the obvious choice is to switch to a full cable throttle.. but then I lose my idle control, as the engine I use manages idle control through the FBW throttle.. and adding an external idle control valve is messy.. and I hate messy.
Either way, I needed new injectors... the 1UZ - VVTi ones were pretty fancy "Air Assisted" injectors.. - they had their own air feed plumbed into the inlet manifold that allowed them to sucked air in using a venturi effect for more efficient carburation (Atomization). Result: better fuel mix, less lost on the intake walls, and in theory better economy.
The 2UZ didn't have this ( at least the Pre VVTi didn't) so it was a feature lost with the super charger.. so I had to go to regular style injectors.
After lots of research on sizes, I realised that my old pink "Air Assist" once were 250CC, as were the Tundra dark blue ones. Further research gave me the hunch that RX-8 injectors might fit.. so I ordered a used one, and it does. The rest are now ordered!
These have a 12 hole spray pattern, as opposed to the previous 4.. no clever air assist but the nozzle is meant to be a lot more efficient than previous designs, if I run them at the factory fuel pressure (call it 43 psi) they are rated at about 350CC... But the RX-8 runs them at 56.5 psi, and rates them at 495CC (source, various Mazda forums and supplier websites). At the higher pressure they'll atomise better too... In reality 350cc will be plenty.
So there we have it.. My Japanese Hilux Surf, with a Land Cruiser (prado) Rear Axle, Tundra Brakes, Lexus LS400 engine with a Tundra supercharger and Land Cruiser (Amazon) fuel rails will now have RX-8 injectors!
Last edited:
Similar threads
- Replies
- 3
- Views
- 2K

- Replies
- 0
- Views
- 2K

- Replies
- 2
- Views
- 3K


