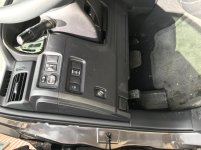
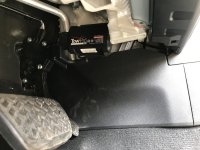
Trailer Brake Controller Installation

CmdrCody

New member
I installed the Tekonsha Prodigy P2 Controller in my SR5 today. I only tow a trailer ~1/mo in the summer, so I did not want to permanently mount it in the truck. I also wanted to make the mount unobtrusive, and keep it out of the way. So, I decided to mount it in the bin in the center stack. Below are some pics from the installation.

I removed the two trim panels on the sides of the center stack, the HVAC controls, and the top of the center console, all without a tool.

IMG_7407.jpg~original


Removed the 6 screws shown in the red circles (a right angled screw driver really helps with the front two screws):

IMG_7407_sc.jpg~original


The tan piece just snaps off (yellow arrow). The sides of the center console need to be gently flexed outward (green arrows) to allow the black piece to be removed (red arrow).

IMG_7407_ar.jpg~original


The two pieces removed:

IMG_7410.jpg~original


The two screws holding the bin in can be removed. The bin is then held in with 4 clips (two top, two bottom), and can be pulled out. Disconnect the AUX and 12V power outlet electrical connectors and the bin is free!

IMG_7412.jpg~original


IMG_7413.jpg~original


IMG_7414.jpg~original


I am using the plastic mount that came with the controller. It has holes in the top for mounting. I clamped it in position in the bin, and marked and "drilled" 3 holes. This was made a bit simpler by removing the AUX jack to access two of the hole locations. The blue tape was to protect from accidental scratching.

IMG_7415.jpg~original


IMG_7418.jpg~original


Three screws later, the plastic mount is in. Then the wire access hole was marked and cut. I started with a drill and made a few holes:

IMG_7420.jpg~original


Clean up and squared off the hole with a utility knife, followed by file for edge rounding:

IMG_7421.jpg~original


Originally, there was just enough room to allow clearance when the controller was installed, as the connector does slightly protrude out of the back of the bin. However, once installed, the wires did not have enough clearance between the back of the bin and the white center stack duct, so the hole had to be elongated.

IMG_7429.jpg~original


The mount in the bin with the wiring harness fed through:

IMG_7425.jpg~original


I bought the generic Tekonsha wiring harness (i.e. only one connector). I looked at the Toyota specific harness, but I was concerned that it might not be long enough to run to the center stack and would need to be spliced anyway. So, I used the connector that came from Toyota and crimp and soldered the two together. Now that I have done the install, I think the Toyota specific harness would have been long enough.

IMG_7427.jpg~original


I ran the new harness up high in the driver’s footwell, and zip-tied it to one of the existing harnesses. Plugged it into the connector near the left kick panel, and coiled the excess up behind the center stack.

IMG_7430.jpg~original


Reassembled all the pieces, and I am quite happy with the result. It is not very noticeable without the controller installed, but I have great access and visibility when it is mounted.

IMG_7431.jpg~original


IMG_7432.jpg~original


IMG_7433.jpg~original


IMG_7434.jpg~original
 
Last edited:
Register to hide this ad
Nice job and good timing with the write-up, I am getting ready to install one this week. I have been looking at mounting locations and actually looked at that spot but was worried about the removal of the console and stuff. Can you provide some more info. on removing the trim pieces?

How do the tranfer case and shifter knob come off? They look like they should just
screw off?

How do the H Vac contro lknobs come off? Do you just pull them off?

How did you remove the trim pieces? Do they just pop off?

I just don`t want to break a trim piece taking it off, everything else looks pretty easy.

Thanks and again nice job!

Mike G
 
Last edited:
All four pieces came off with some gentle pulling. Once I had the first one off, I could gauge how much force was necessary.

I pulled the center console first. Both shift knobs simply unscrew. Pull up on the cup holder near the rear window switch, and work forward. All the hold down tabs are around the edges of the piece. There is one electrical connector under the rear cup holder to disconnect once the console is loose.

IMG_7406.jpg~original


The two trim pieces on the center stack just pull off as well. I held them about where the security window was and pulled straight back. These had fewer clips. The HVAC controls are also just held with tabs. Pull it straight back and out, and then disconnect the electrical connector and the white strain relief bracket.

IMG_7405.jpg~original
 
Thanks for the added info.
Unfortunately the mount that came with my controller is different and will not fit or work in that location, this sucks because that is a clean install and would be a perfect location. I just mounted mine on the lower left side of the dash, it was a quick job. Thanks again, it`s nice when people take the time to post up information to help others out.

Mike G.
 
Thanks for the write-up. With your help I was able to mount my P2 in the same spot. Not sure if I would have tryed it otherwise.
 
Gotcha.

On my 2005 I got a new fuse box door and mounted it on it. When not being used I left the one without the controller on it.
 
Thanks for this write up

I followed this to a "T" to install the same controller in my 2010 4Runner last week. Worked exactly as described. I would have been more than hesitant to start pulling panels off without this excellent description of what to expect. I really like this location because it is out of the way but very visible and easy to access. Thanks.
 
I did this install today and it went exactly this way. I ordered the Tekonsha P3, got the cord that already had both clips on it, ran it over to the console. It was the perfect length. I used a Dremel to cut the whole and that made it super easy. Thanks for all the insight here!
 
I have my P2 brake controller in hand as well as the OEM trailer controller wiring harness. The P2 controller pigtail has FOUR wires as shown in the picture above (red, white, blue, black) but the OEM Toyota pigtail has FIVE.
Studying the wiring diagrams, the extra wire on the OEM one is labeled "green: headlamp switch to vehicle tail lamps". Every other wire makes sense and has a corresponding connection on the P2 pigtail.
Why would there be this wire coming out of the OEM harness presumably to go TO a brake controller? I'd think the signal from the headlamps being on would be pre-wired already in the OEM 7-pin and all that.
Even the pics above don't show this wire connected - so, do I just omit it?
 
Oh, and one more thing. I'm aware they make a vehicle specific plug and play connector. I can't find one locally and I need this SOON.
 
Looking for pics to this mod

Looking for pictures and an update for this thread. Looking to replicate.

I installed the Tekonsha Prodigy P2 Controller in my SR5 today. I only tow a trailer ~1/mo in the summer, so I did not want to permanently mount it in the truck. I also wanted to make the mount unobtrusive, and keep it out of the way. So, I decided to mount it in the bin in the center stack. Below are some pics from the installation.

I removed the two trim panels on the sides of the center stack, the HVAC controls, and the top of the center console, all without a tool.

IMG_7407.jpg~original


Removed the 6 screws shown in the red circles (a right angled screw driver really helps with the front two screws):

IMG_7407_sc.jpg~original


The tan piece just snaps off (yellow arrow). The sides of the center console need to be gently flexed outward (green arrows) to allow the black piece to be removed (red arrow).

IMG_7407_ar.jpg~original


The two pieces removed:

IMG_7410.jpg~original


The two screws holding the bin in can be removed. The bin is then held in with 4 clips (two top, two bottom), and can be pulled out. Disconnect the AUX and 12V power outlet electrical connectors and the bin is free!

IMG_7412.jpg~original


IMG_7413.jpg~original


IMG_7414.jpg~original


I am using the plastic mount that came with the controller. It has holes in the top for mounting. I clamped it in position in the bin, and marked and "drilled" 3 holes. This was made a bit simpler by removing the AUX jack to access two of the hole locations. The blue tape was to protect from accidental scratching.

IMG_7415.jpg~original


IMG_7418.jpg~original


Three screws later, the plastic mount is in. Then the wire access hole was marked and cut. I started with a drill and made a few holes:

IMG_7420.jpg~original


Clean up and squared off the hole with a utility knife, followed by file for edge rounding:

IMG_7421.jpg~original


Originally, there was just enough room to allow clearance when the controller was installed, as the connector does slightly protrude out of the back of the bin. However, once installed, the wires did not have enough clearance between the back of the bin and the white center stack duct, so the hole had to be elongated.

IMG_7429.jpg~original


The mount in the bin with the wiring harness fed through:

IMG_7425.jpg~original


I bought the generic Tekonsha wiring harness (i.e. only one connector). I looked at the Toyota specific harness, but I was concerned that it might not be long enough to run to the center stack and would need to be spliced anyway. So, I used the connector that came from Toyota and crimp and soldered the two together. Now that I have done the install, I think the Toyota specific harness would have been long enough.

IMG_7427.jpg~original


I ran the new harness up high in the driver’s footwell, and zip-tied it to one of the existing harnesses. Plugged it into the connector near the left kick panel, and coiled the excess up behind the center stack.

IMG_7430.jpg~original


Reassembled all the pieces, and I am quite happy with the result. It is not very noticeable without the controller installed, but I have great access and visibility when it is mounted.

IMG_7431.jpg~original


IMG_7432.jpg~original


IMG_7433.jpg~original


IMG_7434.jpg~original
 
Just installed a RedArc Tow Pro elite with factory wiring harness. Dial fits right into Auxiliary port. Didn't want to have a full controller in the way when getting in/out and wanted to keep a clean look. This kept a low profile and very easy to use. Towed a travel trailer from Utah to Wisconsin after install.
 

Attachments

  • redarc dial.jpg
    redarc dial.jpg
    134.9 KB · Views: 5,836
  • redarc mounted.jpg
    redarc mounted.jpg
    136.4 KB · Views: 6,590
Just installed a RedArc Tow Pro elite with factory wiring harness. Dial fits right into Auxiliary port. Didn't want to have a full controller in the way when getting in/out and wanted to keep a clean look. This kept a low profile and very easy to use. Towed a travel trailer from Utah to Wisconsin after install.

That Redarc system is nice looking. Might be the way I go when it's trailer time.

Just got on the website and yeah this is the controller for me. How was the install? I know I ditched the trailer wire harness that was in the glove compartment when I got the truck. Any tricks and hints? Might get this to get the truck ready soon.
 
Last edited:
That Redarc system is nice looking. Might be the way I go when it's trailer time.

Just got on the website and yeah this is the controller for me. How was the install? I know I ditched the trailer wire harness that was in the glove compartment when I got the truck. Any tricks and hints? Might get this to get the truck ready soon.
I used the stock harness that came with the runner. Connected the wires and plugged in took all but 5 minutes. Where you don't have it there may be an adapter out there where you won't have to connect anything but I'm not positive. Other than that all I used was velcro to mount the actual brake controller so that I could easily remove if need be. It stays in place and made it easy as there are no bolts etc. You will need to either purchase the auxiliary mounting panel that is pre cut or cut the fill panel. I bought the pre cut one for i believe $7. The guys over at etrailer are super helpful and have all the diagrams for wiring.
 

Members online

Forum statistics

Threads
278,304
Messages
3,554,040
Members
248,016
Latest member
Advally Service

Trending content

Back
Top