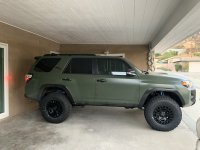
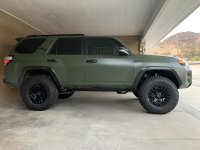
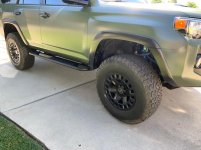
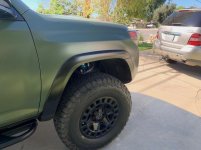
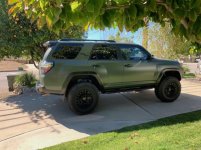
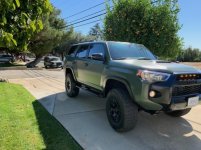
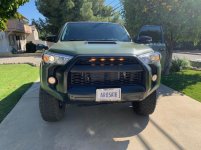
Ultimate Mall Crawler Build

Did a lot of electrical work today. Will post in several posts so I can comment on each individually...

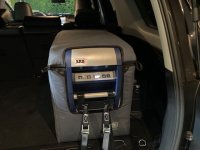
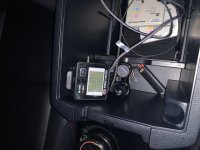
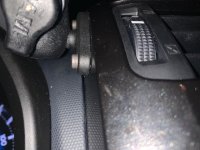
ARB fridge installed. Easy install... used the ARB outlet and wiring kit to go from battery to cargo area. Easy to hide wires under door trim panels. I didn't hide them in cargo area as they sit behind the fridge and it was getting late. Also installed fridge monitor in center console box so I can monitor but it's not exposed (as it is kinda ugly).

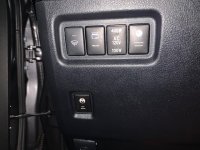
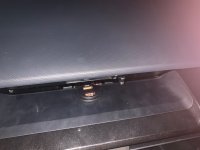
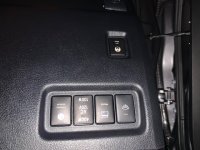
I installed a switch from aironboard.com and used a 30 amp relay (https://www.amazon.com/gp/product/B074QV54V1/ref=ppx_yo_dt_b_search_asin_title?ie=UTF8&psc=1)

Only reason I used this specific relay is because it was the largest gauge wires I could find as you need thick wires to get from battery to cargo area per ARB. Seems to be working fine so far.

I used the relay and switch to easily control when fridge is on as I do not have dual batteries yet. Plan to eventually.
 

Attachments

  • IMG_0208.jpg
    IMG_0208.jpg
    106.9 KB · Views: 1,929
  • IMG_0226.jpg
    IMG_0226.jpg
    68.5 KB · Views: 1,929
  • IMG_0229.jpg
    IMG_0229.jpg
    84 KB · Views: 1,989
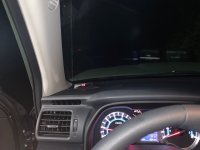
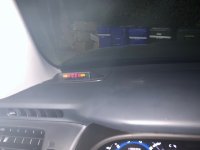
Next was the front parking sensors... I needed them as I park about 2" away from wall in my carport to make sure I am blocking maximum amount of sun. I only installed two on front bumper as that is all I needed. Ordered this kit on amazon... https://www.amazon.com/gp/product/B00P9FZKFQ/ref=ppx_yo_dt_b_search_asin_title?ie=UTF8&psc=1

Also installed a switch for it as I did not plan to connect it to the obd port and wanted ability to turn it on/off only when parking. Photo of switch is in post above. Few photos inside here. It is too dark to take photos of the sensors outside but can take some later if requested...
 

Attachments

  • IMG_0212.jpg
    IMG_0212.jpg
    58.1 KB · Views: 1,919
  • IMG_0213.jpg
    IMG_0213.jpg
    43 KB · Views: 1,914
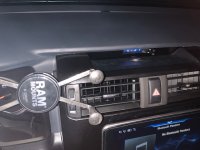
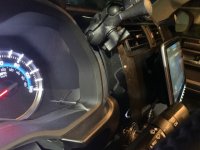
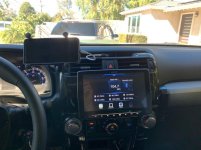
Next up was the cell mount and charger for it. Cell mount (RAM) is basically what a lot of people on this forum have done. Nothing special. Used bolts instead of double sided tape to make sure it stays in place. Turned out solid. I wanted a USB charger next to RAM mount so I don't have wires all over the place. Found a nice spot. Tapped into the cig lighter port on the lower part of the dash for power. Need to buy a 6 inch charging cable though...
 

Attachments

  • IMG_0215.jpg
    IMG_0215.jpg
    91.9 KB · Views: 1,890
  • IMG_0217.jpg
    IMG_0217.jpg
    75.7 KB · Views: 1,894
  • IMG_0218.jpg
    IMG_0218.jpg
    75.1 KB · Views: 1,910
  • IMG_0219.jpg
    IMG_0219.jpg
    94 KB · Views: 1,923
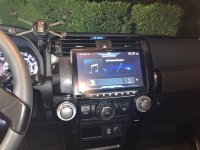
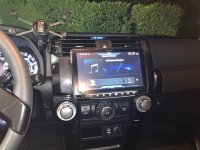
Lastly... installed the Alpine ILX 309 unit. Easy install (surprisingly). I basically followed the Youtube instructional video for most of it. I ended up using the PDF on the website for the wiring portion though... as I have an Alpine sub and amp and it required a different wiring setup. Install went flawlessly.
Only modification I made was the plastic trim panel. I have black(ish) trim from the factory. The Alpine unit ONLY comes with silver trim. Initially I planned to take apart the trim from the unit and get it wrapped or painted. I later discovered that it's impossible to do that because you need to totally dissemble the head unit to separate the screen from the rest of the unit. I took off like 15 bolts and then I gave up as it seemed like I can break something.
I ordered the Metra dash kit from amazon. It came in a gray color (not black as advertised).

I ordered the same Metra dash kit from Crutchfield. It matched the color of my stock trim perfectly. Not sure why the issue with Amazon?

Anyways... I broke off the silver trim that came with the Alpine unit and easily installed the Crutchfield Metra kit. Came out perfect.

The unit is extremely easy to adjust up/down and tilt once installed so I set it to how I wanted it (not blocking the vents).

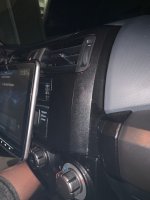
I saw a couple of people do this on the forum but behind the screen there was a large gap that you can see into the electronics of the dash. The Alpine unit came with a plastic box to block out that gap. I installed that box on the Metra kit and it worked perfectly to look as clean as possible...
 

Attachments

  • IMG_0219.jpg
    IMG_0219.jpg
    94 KB · Views: 1,935
  • IMG_0220.jpg
    IMG_0220.jpg
    71.7 KB · Views: 1,906
  • IMG_0224.jpg
    IMG_0224.jpg
    85.1 KB · Views: 1,896
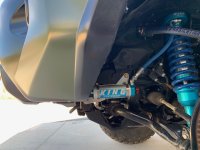
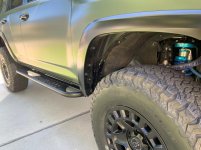
Lift and tires done.... full Kings w/ Res, all control arms, rear track bar.
 

Attachments

  • IMG_0273.jpg
    IMG_0273.jpg
    110.2 KB · Views: 1,796
  • IMG_0274.jpg
    IMG_0274.jpg
    116.7 KB · Views: 1,753
Lastly... installed the Alpine ILX 309 unit.

The unit is extremely easy to adjust up/down and tilt once installed so I set it to how I wanted it (not blocking the vents).
Does it tilt or move freely with alittle pushing or do you need tools. I had an old flip out deck years ago in a jeep and it was motorized to tilt at will (helpful when the sunlight hits it)
 
That wrap looks killer, love how you left a little more of the black front/ rear exposed for accent. really makes the wrap pop and ads depth. wheel spacers, fender flares and black rims would set this off.
 
Does it tilt or move freely with alittle pushing or do you need tools. I had an old flip out deck years ago in a jeep and it was motorized to tilt at will (helpful when the sunlight hits it)

Unfortunately your going to need a screwdriver to tilt it. You don’t have to pull it out or take anything apart, just remove the side screws while it’s still mounted in the dash. Takes about 2 minutes.
 
Does it tilt or move freely with alittle pushing or do you need tools. I had an old flip out deck years ago in a jeep and it was motorized to tilt at will (helpful when the sunlight hits it)

That wrap looks killer, love how you left a little more of the black front/ rear exposed for accent. really makes the wrap pop and ads depth. wheel spacers, fender flares and black rims would set this off.

Tires, spacers, rims and lift are on. Will update new photos to main page soon. Waiting on sso bumpers and rack. Then pocket flares
 
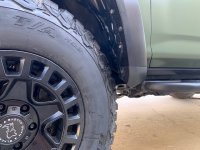
So... running 34" tires (285/75/17). Once installed and did a body mount chop + removal of front mud flaps (with King lift)... it worked perfect on the road. No rubbing at all.

Went up to Cleghorn and pushed the 4Runner to it's limits (no photos yet as friend with camera just had his house flooded and has bigger problems then dropboxing the photos to me...). Stuffed the tires in every direction and rubbed a lot.
 

Attachments

  • IMG_0333.jpg
    IMG_0333.jpg
    102.8 KB · Views: 1,477
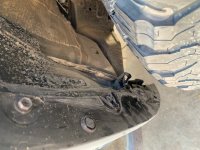
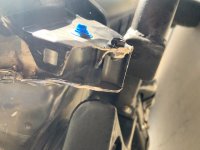
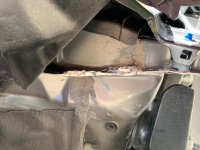
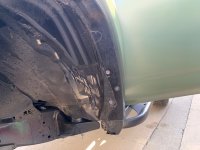
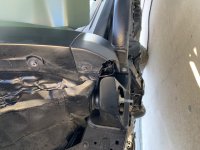
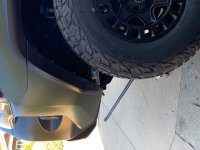
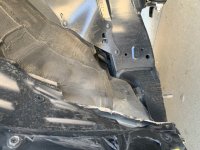
So I took the cutting disk out and started going at it (front fenders only ... rears did not rub)...
Cut off half of the metal tab close to the door that holds panels together. Cut 1/4 - 1/2 inch into the pinch weld.
Used heat gun to put plastic fender wells in further.
Cut part of the plastic tab on bottom closest to the door.
Cut into the bumper a bit in front (waiting to do the SSO chop anyways).
***Also... I moved caster to 5 degrees.

No more rubbing offroad. Honestly... I was extremely surprised as to how easy it was to perfectly fit 34" tires. Took less then 2 hours of work and minimal modifications to the rig.
 

Attachments

  • IMG_0337.jpg
    IMG_0337.jpg
    69.1 KB · Views: 1,473
  • IMG_0339.jpg
    IMG_0339.jpg
    96.5 KB · Views: 1,482
  • IMG_0341.jpg
    IMG_0341.jpg
    77.3 KB · Views: 1,464
  • IMG_0343.jpg
    IMG_0343.jpg
    106.6 KB · Views: 1,509
  • IMG_0346.jpg
    IMG_0346.jpg
    89 KB · Views: 1,510
  • IMG_0349.jpg
    IMG_0349.jpg
    97.1 KB · Views: 1,416
  • IMG_0356.jpg
    IMG_0356.jpg
    83.7 KB · Views: 1,431
  • IMG_0359.jpg
    IMG_0359.jpg
    110 KB · Views: 1,424
After some spray paint... can't see any of the chopping...

aphK0JGOtpVkf2lQGBKhTCVpC6lScpo2bEIs_wOBxjbe8x2lcDlxbOid2VDqYKiqNSxHog43TbQj26loMnIaLm-3zwho5BZ9rsmeAOuk7HZVNX3JEv5cFgYO7HizyRC4JFNBJU4OKCyp_YtzEpI3bPBkNqoYHqI85HepXqunTLuU9cWJ80WoOkIG_sfn1lB9JJ59ogKHepXGHnKOPmBNU5VXuoBzm-8OyL6kMUWiYGHvt7s6cYw5eRkBBOZ-GyvF1Cz2K5wAp_yYvBNeeNSnig0zpR9pR2WMcK0WJBK4FGjYoMOC1akr-1y0066JpPRc7vQ73eryiLzLkjOrIu1F7JTrMlTBrY8B6mCMQqYrOm9f1Hlk-GfvDZ4UEZUBcs4EpbeK4W2JXu4BHPEVHRarm9Vw2GK1o9YuFigXR8xAzHC19v0eQjMxWe-Vyj-dasADqTARXKJUptptOon3dtt6aUMb6VgTAUBDqUs0dcZj3pqZIh9t4ZHc0Zbhxdk-Rnk8fxePJVwe2Vh2bv89W8vIQ3yZ4iViu__diPHtL0d3p-5N6cVwaZP6Bse76h8lU-iqSj7Ez0V8eo8TQw8fT0Pli3xYFYqgNTozB-8i9liDAwOghkc1ugLCGxV3IZ5-1pLqBAXFTPTkl_UOdk1Lvj2f2hU_3DoMoBlSlv_6LF5FdBbD-qzmNPt5QQ=w1304-h978-no


cfFAqzScJE0XP0hi1b6QxCqrMfURB49kkTyt4uMVs9Clnde2Pl1TS6Ex300rZxkSoQTF_FWTUrqfKGglp8lnUF4d-scsemdu4UNyTRqT5-kvu1CZhTOj8x_JNAaHy9PFVx86jLcz4q-DbdX8uJ7LFHLzpWDD7bZH7B6fa-RpIKn3sCU_HUd95R_PIEUp9VE3Zp76kujo8_V4-6tF2sg98NCiVhX9rArdTCxsnOROLa8s91RqIrYBHddfpppOQ-gel02VolNlEdRpQ2TED9r-bbBt9QWj_rNYfigLHm_JJ2Lx1ocVDxcgfd9iapZ3AAaSedkQl-JmQSyTC-BUna9HcKMKaeRledOazHSukT5Ie8MMNTWzlW2uDiBKqjnncVtpi-j4jvdsMmp-k3ycS2rjdcg-2wj7q6VhB-xZ9UJQBuCe3UfpauMqvpUt7iuxok6iFmXTW1XfzcspIJqPXc3-JQYejJLIcktQIAlIXlF5JOCENpAAYerS6I6b9MxIyWsN3ZC4bp-U9ivLn6V1ax7FIRbuDvg9zBufQmbeFuQGF4h3uURP3K0BE7Ly3x3_CC2eStNkZGXNc2nv6wDorLvt66yf0SLcAqOYfXiFJFmsztMR-yTX4vA4zD9k3IkBiTFisOvdcj5O-a8KiBcbvf3UWQVwEoYo-rE6IDO-2GuxoCkfwyCWv-dwDw=w1304-h978-no
 

Attachments

  • IMG_0375.jpg
    IMG_0375.jpg
    66.6 KB · Views: 1,461
  • IMG_0376.jpg
    IMG_0376.jpg
    65.1 KB · Views: 1,680
  • IMG_0377.jpg
    IMG_0377.jpg
    57.2 KB · Views: 1,516
  • IMG_0378.jpg
    IMG_0378.jpg
    58 KB · Views: 1,450
  • IMG_0388.jpg
    IMG_0388.jpg
    57.7 KB · Views: 1,397
Last edited:
Sorry for all these posts at once... been itching to get all my shit/thoughts out but haven't had time earlier...

Installed the amber light mod thing... cheap and took like 25 min. Tons of instructions out there so not going to go into it. Worth it... looks great.
 

Attachments

  • IMG_0382.jpg
    IMG_0382.jpg
    72.3 KB · Views: 1,455
Another photo of my cell mount and USB charger location... really happy with it. Got a 90 degree bent USB plug.
 

Attachments

  • IMG_0389.jpg
    IMG_0389.jpg
    62 KB · Views: 1,487
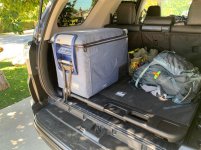
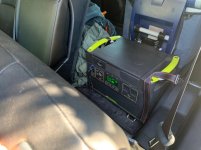
Moved fridge to driver side. Had perfect amount of space behind fridge to mount Goal Zero 1000. Goal Zero is facing towards the front of the vehicle... whenever I need to plug something in, I would pull the rear backrest down. Best space saving option I can think of until I build a rear storage system (probably not for a while).

Reason for Goal Zero 1000 instead of dual battery: portability... I have three vehicles that I use for various outings and it's cheaper to have one portable battery then maintaining three separate dual battery systems.

I plan to add solar which will charge the starter battery and the goal zero once I get roof rack.
 

Attachments

  • IMG_0383.jpg
    IMG_0383.jpg
    124.6 KB · Views: 1,472
  • IMG_0385.jpg
    IMG_0385.jpg
    80.4 KB · Views: 1,479
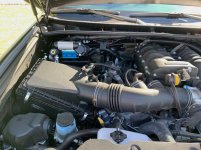
Added ARB single compressor.

Review: I went wheeling recently and aired down my 34" tires to 12 PSI. After trip I aired up to 30 PSI on all 4 tires. By the start of the 4th tire... the compressor was not happy and was turning on and off (assuming due to heat). I don't regret this compressor as it's $300 cheaper then the dual and I didn't want to deal with CO2 tank yet. But if I was going to do anything bigger then 34's... I'd say CO2 would be mandatory.

Mounted using 4X4 Labs mounting plate. Super easy install. Wiring was a bit of a pain though. I wired switch to ignition fuse.
 

Attachments

  • IMG_0381.jpg
    IMG_0381.jpg
    128 KB · Views: 1,468
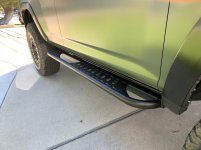
Last mod for this chain of updates: Shrockworks Sliders.

Review: Easy install. Quality is great. Only problem is it has only two mounting points (using 3-4 bolts each) to the frame. This is enough for moderate abuse and overlanding. However, I am 90% sure I will bend these after some harder rock crawling.

I realized the two mounting points only after I got them. Then I did some research and saw other manufacturers use 3+ mounting attachments per side to the frame. I may replace these eventually (will probably wait to bend them).
 

Attachments

  • IMG_0386.jpg
    IMG_0386.jpg
    88.3 KB · Views: 1,454

Members online

Forum statistics

Threads
278,309
Messages
3,554,075
Members
248,016
Latest member
Advally Service

Trending content

Back
Top