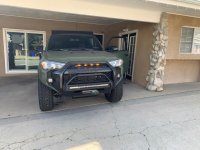
Ultimate Mall Crawler Build

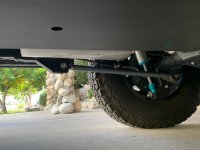
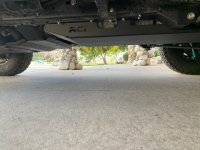
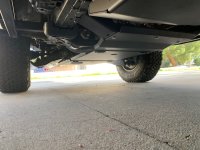
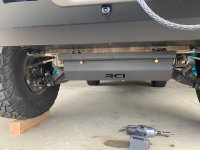
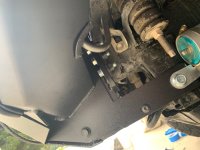
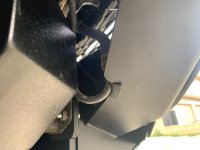
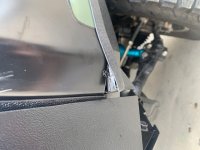
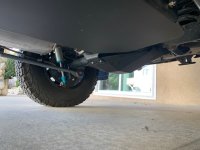
Installed a bunch of armor. RCI Full skid system (easy Install). Only issue is that there was a 2" gap which exposed the foam between front bumper and RCI front skid plate. I purchased their skid plate filler and cut it up to fill in the hole.


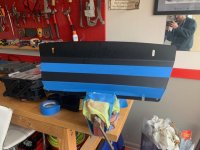
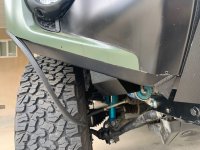
Installed RCI skids on control arms and plates. Also installed RCI rear diff skid. Everything was easy except the rear diff skid. The side lips that go around the axle where not properly molded by RCI. I had to spend about an hour bending and hammering the diff skid to mold it properly...
 

Attachments

  • IMG_2105.jpg
    IMG_2105.jpg
    77.2 KB · Views: 1,544
  • IMG_2106.jpg
    IMG_2106.jpg
    80.8 KB · Views: 1,489
  • IMG_2107.jpg
    IMG_2107.jpg
    92.4 KB · Views: 1,486
  • IMG_2108.jpg
    IMG_2108.jpg
    99.9 KB · Views: 1,505
  • IMG_2085.jpg
    IMG_2085.jpg
    83.1 KB · Views: 1,541
  • IMG_2086.jpg
    IMG_2086.jpg
    124.9 KB · Views: 1,485
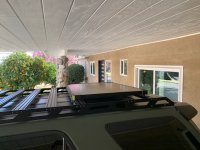
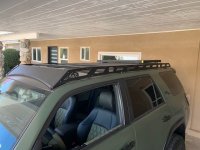
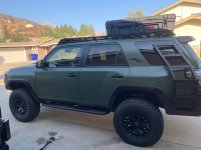
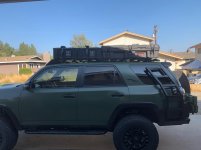
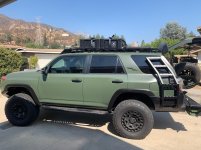
Installed SSO roof rack. Easy install. Took an hour.

Also installed Goal Zero solar. With the Goal Zero solar and controller to get juice from alternator... I am in love with my off grid electrical system.
 

Attachments

  • IMG_2103.jpg
    IMG_2103.jpg
    98.4 KB · Views: 1,487
  • IMG_2104.jpg
    IMG_2104.jpg
    87.1 KB · Views: 1,477
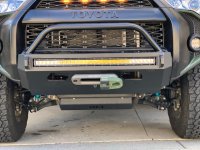
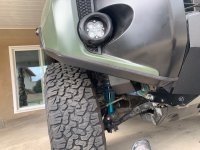
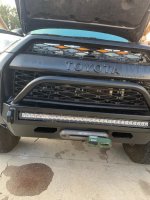
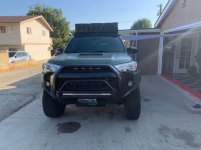
Installed SSO Slimline bumper and Stage 2 fender mod. Also added X20 12K winch and Rigid 30" lightbar. Fairly easy install.

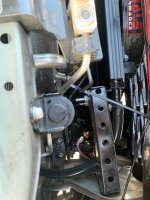
This install took extra time as I NEEDED to relocate my radiator pump for my supercharger or the winch would not fit. I also added Baja fog lights while I had the bumper off.

I also added a front facing camera onto the bumper right under the fairlead (that is why my Factor 55 is to the side... to make room for the camera).

I made two "upgrades" to the bumper. First is I added some rubber molding to the rear where the bumper is very tight with some cooling lines. Second I will describe in next post.
 

Attachments

  • IMG_2112.jpg
    IMG_2112.jpg
    112 KB · Views: 1,496
  • IMG_2115.jpg
    IMG_2115.jpg
    95.3 KB · Views: 1,494
  • IMG_2083.jpg
    IMG_2083.jpg
    90.5 KB · Views: 1,493
  • IMG_2082.jpg
    IMG_2082.jpg
    70.9 KB · Views: 1,517
When I finished installed SSO bumper and high clearance mod... I noticed that my front bumper was a bit flimsy. I pulled back the rubber moulding and drilled 2 small holes on each side. I then used zip ties to secure the bumper in place. The moulding slid right over the zip ties without having to modify the moulding in any way.
 

Attachments

  • IMG_2079.jpg
    IMG_2079.jpg
    97.1 KB · Views: 1,552
  • IMG_2075.jpg
    IMG_2075.jpg
    72 KB · Views: 1,567
  • IMG_2081.jpg
    IMG_2081.jpg
    101.3 KB · Views: 1,489
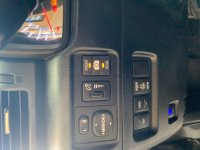
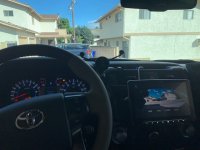
I also added the anytime backup camera mod to the 4Runner. Simply install. However, it took me 30 minutes to get it working with my Alpine 309 system. Eventually I figured it out (it needs to run as an accessory in the Alpine system - then you can use front or rear camera anytime).
 

Attachments

  • IMG_2110.jpg
    IMG_2110.jpg
    80.8 KB · Views: 1,529
  • IMG_2111.jpg
    IMG_2111.jpg
    74.8 KB · Views: 1,454
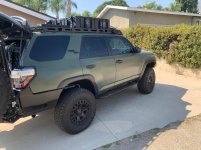
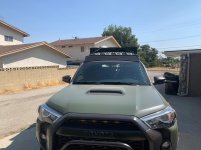
Loving it. The matte green (Halo green) looks nice. Also like the winch for a mall crawler, can pull out some minivans. Gucciest ride on the trail.
 
Got my SSO rear bumper. Didn't have much time due to work so paid a shop to install it...

Reviews: It's heavy but I like the trailgator for camping. I wouldn't trade it for another bumper but would only recommend it if you have a supercharger (assuming if your looking at this rear bumper you already have a ton of added weight in other places...).

Also, it has some noises... but honestly every rear bumper with a tire carrier and accessories will have noises. It's part of the trade off. I have been tweeking with it to reduce noise and eventually will be able to reduce most of it... it's all about getting the exact allignment between bumper and frame (playing with various spacers) and adjusting the rubber bushings.

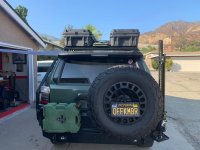
Lastly... I wish that there was a secondary attachment from the SSO roof rack to the tire carrier to keep the tire carrier a bit more stable. With all the added weight (34" tire and hi-lift) I would like maximum stability.
- On this specific topic as well: On my Jeep I've always had three points of attachment for tire carrier. Every tire carrier made for Toyota that I've seen has only 2 points... would be nice to add a third point (seems easiest to do by attaching to roof rack).

I also replaced my springs with 650 pound springs.

SKN_Zlrc6R3SmQeO5I_-QKCMSPTIa4_4Ql3PNrnxfnqJZCeaQBSVRYtfALulMBRJbMYckhj7HANOLDAuo7bKVPvMsl-uqku0J0AUpxx4XylTnlBhlWC7FNynEa5p7-PwMqnpfyHmWekMxpp2MTC6yl0mpugQslIMRtnW9ni-BehoQ9GSrTgq7iQsaYoQ2zw2PT01NAch0AevBZI1BbgVyzMp2rE40Fg1nUu1Nf8TrsMGGoCW487a59E8U5LPskzzJrh6M81rkZdkLHaNES_oVsFU9oalsJrxUBVl5ME0NfsXUVmhX09qoltYOGIIDD2vptG5OEJk5G2fdwSSCrtfp8kiwFil6j6ElPn44gafRAbusI6h33c9hCYR4gcS7keoCZXn1lZpkZW74ZMOsI21msaFx4JD09ic0DdnKYJtbz3OO-oMJLyuJMOMtM4yiLd1xCfkFC9UmgxTPLJBwa96RxY8thJ1Fk_9UcA_7OXA_8MWphsd6B1nA0eyfjP_6KtSWBc0P1SzHulCaP5dTUIK9AWiK2kQcZtP29Kqkv7LKveqgbVNDhCY-_yoy3XVyaUOvVn0cbnOHGjlL-N_8OGPSZBbGs5PVEr54An5JZ_nVP-x1qTC5Ch4XJY-TuoOI8yV4FdTE3VYSr4pYU87uvYtEkPkN785NADBjN-cFq2yT36OIZ_kY8KizIwGLPtf=w1304-h978-no
 
Also added king bumpstops. Had to get custom mounts as they didn't exist for front. Tested the hell out of them and it's day and night difference in performance. No more fears of hitting washboard bumps at any speed. Even dented my steel skid plate hitting some bumps offroad but didn't feel any hard impact due to kings.

ACodCVB2d2jP_1RIjqRvGZzPf2E7DJYgcAJlCDkSGy23HwN1KupwrjEW-gU3dCUhNZVMk28DePdQOK09Oxv0_qqFzFM5YQ_T41LnSFIX-DBa7pcXlQaU3hEc72KYcYedZY1Ybn2kT06C_gsJLEvJ5Ef9ycgze7VYiTSvU8QtytSi4D5swet7yLQasDlqcrXioR0qwsH14ZUYqgsfVmcslENiWoBRYVJ0_RhCcLkHwh3QGkk2l8S_ta6KGuUyRSLPKtC8TyvBsnmSVc5hFre2I-dfoFWGKeWgGJOqtQgF1YRaU8_m1DhWGebkd7RdcdONxsvccg5hC_9YCD2xkOYMglq5zLhH07XKndEq9lCKn_Vr27m0NLIewPLXyMhVcDCTRQ2N5EmiSJqFcHyUSSmnItpbkEguzPs0y5pOgnrHmTYpeK0Kp4FMNnOWKUiFyr50GCS_txS5LSqH_P-lH5z-9Vah0v9DzArIIKTClzzc3flBLbGRCKF5N19-ioza6loYm5EyoGen8RlFrg-VUHkEFFp-1oAsClPAL42kCd-5kNnEm1Y1AJhtGjjo99YQUhG20063lBQTE7_kYGyRdijr1HzUXkLMj9apWD-WkYZ1U5PzTWhchim1YGnS0P-LbAWQBrUNWM-0LGnVeK45oZeUHEnw7wcleJOQmJ1DZFK69hseEanlc427cEzgBFoB=w163-h217-no


vC1wOzQnUxsFEDbL8HNXyyRW_VUkTEqgB-h0kr4OCzfuA5ZTnx7EtJeQQcgL2rbawlKx9nqm93NWs9UVo3pyoVhGW9gBwoHzW5sh53Uovy1Q4qFfPyB_d52qaEkS6gk648MCSQSGQJxyjR0D2o3RKN_hkgLqW0mfghLUu8wuKjF8FVwuKEdvperevBQvcoYMdYd8WrHby-IJ3PxfFLop4biGnX2Syr-FRFAFrTYr6Ujsm-Y4UPvDPQbr05IaWzF5Ei5lMJ8Me8-yGaceVK0PTyFiHfpdw3NDOxYFv0tMvvvfnr2fG-hjfHuDLw7UznbMrZJF_pq1Y5wPh6kjvOG5xHkLM2vQt9JF_ailE6kQvNNJ3sZhxGZTUQcXEF-0C5_1tTw67nZdfYG0Esc4jKu3C7b9NUWgRPF0u0y42ktNxObUGoyB-0cYVw1VBgQIpMdlOQ0uhaBR7LF70Zt5fnmbWE0IJr1jjR8B1E_CAEJpXbMFLisGr9PLVJqjIIodN5njkTm5rhu_jmiowUYmaR3rEgOIARazOSirUI7eOikIk-toAGokNhFQEJtiHRM85TDyt1e-W6ss29teBECKqiYwZAK71dBuTtBhdb9e6mzTxWLk6ph2Wyc2S0PRAjnE91PjlnJtePI0QBzwsOZUJvnRPICOGr_SW2mKW2oV51UyQ0h1QWUQ7cvM5HMikYFU=w734-h978-no
 
More mods... 99% done with build! Only thing left is I am waiting for a dual jerry can holder from SSO to replace my rotopax. Not happy with Rotopax in general... take up too much space for the amount of liquid they hold.

Jerry can holder will go onto same spot where the rotopax are right now...

Anyways... to the build:

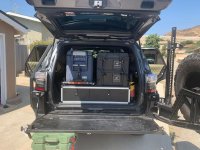
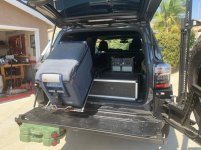
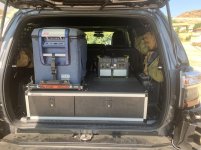
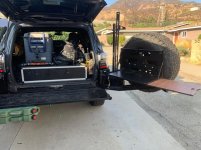
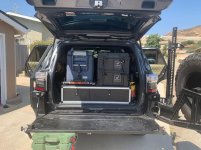
Installed a drawer setup from Goose gear. Purchased there drawers and the flat section to delete my cargo tray pullout (which I never used). Easy to install. Used nutserts to make additional ancho points and install my Alu-cab slideout for the fridge...

On the right you will also see a yellow and red cone thing. That is the Geyser shower system I mounted with ratchet straps. Fit's perfect and works much better than expected and better than portable showers with shower heads!

H2XFyWQ6c7GP7LoM8
 

Attachments

  • 1.jpg
    1.jpg
    133.6 KB · Views: 946
  • 2.jpg
    2.jpg
    135.3 KB · Views: 954
  • 3.jpg
    3.jpg
    130.4 KB · Views: 941
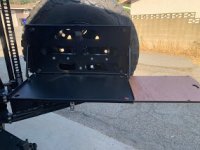
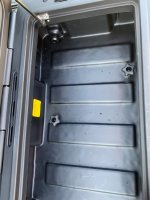
Added a table to my Southern Style Offroad tire carrier. Fairly simple... just drilled some holes and put in some bolts... Works perfect and invisible when closed.
 

Attachments

  • 1.jpeg
    1.jpeg
    21.5 KB · Views: 932
  • 2.jpg
    2.jpg
    135.6 KB · Views: 960
  • 3.jpg
    3.jpg
    129.2 KB · Views: 964
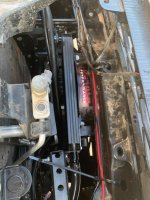
Added a tranny cooler with a fan. Tired of overheating the tranny...
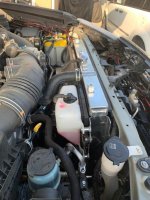
Wired it to turn on at 185.

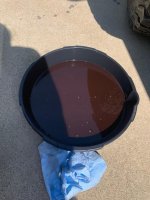
Also changed out tranny fluid. This is what it looked like after 13,000 miles...
 

Attachments

  • 1.jpg
    1.jpg
    95.5 KB · Views: 924
  • 2.jpg
    2.jpg
    96.9 KB · Views: 934
  • 3.jpg
    3.jpg
    90.4 KB · Views: 936
  • 4.jpg
    4.jpg
    91.3 KB · Views: 930
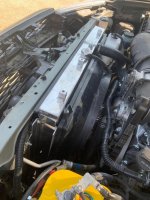
Replaced radiator with CSF aluminum radiator. Engine was also overheating a bit. Please note that I am supercharged, have an extra 1500 pounds when overlanding with gear, bumpers, skids... and am not planning on re-gearing.
 

Attachments

  • 1.jpg
    1.jpg
    95 KB · Views: 934
  • 2.jpg
    2.jpg
    95.7 KB · Views: 961
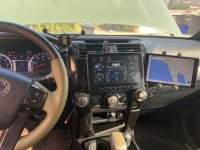
Added another screen on my dash. Can't use Gaia with android auto plus I want to be able to see my temps on my dash. Gaia on my cell is just too small... so I added a Samsung Tab A.
 

Attachments

  • 1.jpg
    1.jpg
    130.1 KB · Views: 967
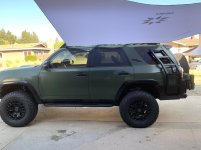
Not a big fan of awnings due to them overhanging on the roof rack and getting rock rash...

Purchased an 8x8 Neso awning thing... works great. Have two poles so can tie off to trees or use poles in the sand...
 

Attachments

  • 1.jpg
    1.jpg
    111.9 KB · Views: 1,027
Rooftop cargo was my biggest issue/ experiment. I love the Front Runner wolf packs BUT two issues:

1. They are all one size and don't work for long items
2. Gotta ratchet strap them and I ended up using a lot of ratchet straps...

This was my first setup:

(Maxtrax on front, Frontrunner cargo in center and solar in back)
 

Attachments

  • 1.jpg
    1.jpg
    132.8 KB · Views: 1,127
  • 2.jpg
    2.jpg
    134.7 KB · Views: 1,000
  • 3.jpg
    3.jpg
    121.4 KB · Views: 1,043
  • 4.jpg
    4.jpg
    133.5 KB · Views: 1,025
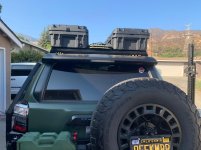
So I wanted to get something longer as far as cargo. I was excited about the pelican cases but the 46" ones didn't make sense as I couldn't use two side by side with easy access. I ended up with the Roam cases (about 46"). Worked out PERFECT.

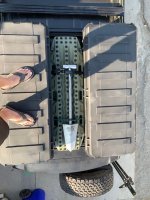
Mounted two cases on each side and maxtrax in the middle. I can stand on the cases so it's easy to work on top of them.

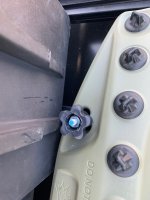
Ended up bolting the cases to the rack for easy removal as I was tired of ratchet straps.

Left enough room in the front of the rack to still get 6 front runner cases on there or solar. Made two l brackets and painted them black for the front section so the front runners can sit between the L-brackets... allowing me to use only 2 ratchet straps to properly secure all 6 front runner cases...

That's all... the only thing left is dual jerry can holder and possibly a front locker...
 

Attachments

  • 1.jpg
    1.jpg
    120.9 KB · Views: 1,220
  • 2.jpg
    2.jpg
    122.4 KB · Views: 1,031
  • 3.jpeg
    3.jpeg
    94.5 KB · Views: 1,021
  • 4.jpg
    4.jpg
    102.3 KB · Views: 1,022
  • 5.jpeg
    5.jpeg
    120.6 KB · Views: 984
  • 6.jpg
    6.jpg
    98.3 KB · Views: 988
  • 7.jpg
    7.jpg
    121.7 KB · Views: 995

Members online

Forum statistics

Threads
278,309
Messages
3,554,068
Members
248,016
Latest member
Advally Service

Trending content

Back
Top