Yogi's Build & Adventure Thread

sigepbiker

Member
Well, my wife and I made some changes:
Moved from Houston, TX to Denver, CO
Had our first son Cooper
Switch from a 2005 SR5 to a 2016 Trail Premium
It's been busy around our house...with little sleep.

Needless to say, my first mod was installing a child seat base. :pound: But I already have a list going in my Google Drive of what I want to add to this beast. And with the mountains at our door step, they're a lot more "justifiable".

The mods will start slow, but I'll update as we go.

The day I brought my Trail home:
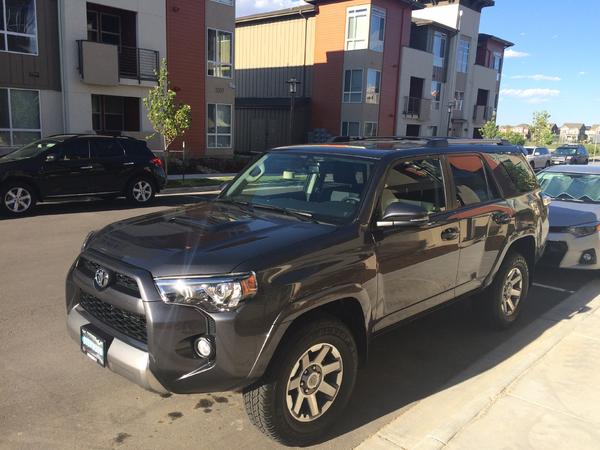
sigepbiker-albums-champ+updates-picture41152-img-3692.jpg


Mod list:
Exterior:
2021 OEM LED Headlamps
Baja Designs Squadron-R Sport Wide Corner Amber Fogs
Gamiviti Roof Rack w/ light bar & RockyMounts HotRod bike mount

Now Removed:
4300K HID w/ IS350 Bi-Xenon projectors STi-R clear lenses - Bulbs were flickering and not igniting. Decided to switch to LEDs for instant on.
DRL's jumper abandoned mod​

Interior:
2020 OEM 4Runner Stereo Entune 3.0 Upgrade
Stereo USB/Aux Plug in Glove compartment
Full-time Dual USB Charger in glove compartment
OEM Sliding Rear Cargo Deck - self installed
WeatherTech FloorLiners Front & Rear
LED Map/Dome lights
Old Red Accessory Panel conversion - he's no longer selling the harness, but I have the installation instructions if you need it
Hatch and Cargo LEDs with red option

Electrical:
Auxiliary power circuit panel
--Custom PowerTray for relays
--HAM full time power switch
--LED Bar
Finn Fab Rear Window Molle Panels with rear Blue Seas Accessory Panel and OEM 12v socket powered

Armor/Off Road Gear:
General Tires ATX 265/70/17 E-rating
Bilstein 5100 suspension
RCI sliders
RCI Skid Plate
Rear Recovery Point
ARB Breather for Rear Diff and E-Locker
Maxtrax
ARB Snatch Recovery Strap
2x Bubba Rope Synthetic Shackles
ARB CKM12 mounted in the bottle jack compartment now on a custom bracket
Quad Air-up/down System with manifold attached to molle panels

Comms/Nav:
Icom IC-2730A HAM Radio w/ full time power switch
Baofeng UV+ portable HAM Radio w/ NA-771 antenna
Nav Override with AOB Switch
 
Last edited:
Register to hide this ad
Nice welcome to colorado! You will see 4runner on every corner here. Which area did you move to? Kind of looks like Broomfield or Stapleton area?

Sent from my SM-N910T using Tapatalk
 
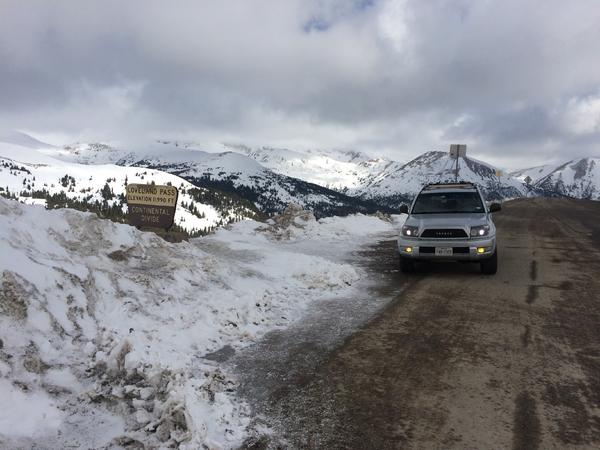
We had it a week and had to test out some of the 4WD features. The CRAWL function is really cool! Made it out to Loch Lomond, a ROCKY, 2.5mi out&back. Already itchin' to get back to the trails...
sigepbiker-albums-champ+updates-picture41153-img-3724.jpg
 
Last edited:
Nice welcome to colorado! You will see 4runner on every corner here. Which area did you move to? Kind of looks like Broomfield or Stapleton area?

Sent from my SM-N910T using Tapatalk

Stapleton. The state seems split between Subarus and 4Runners (or heeps).
 
Short updated: Took Champ to the dealership and had them go through the "Customize Parameter" settings list. I printed off this attachment and highlighted what I wanted changed. Glad I did that because the technician had no idea what I was talking about.

Dealership said they couldn't make the Fob Lock Function roll up the 4 door windows. Claimed it was a typo in the manual. It will work with the key in the door.

If I can figure out how to have Constant Power Windows like my 4th Gen, that may be an acceptable alternative. Not nearly as easy since there is no master window relay and all the switches and motors are on 8 different fuses.

Suggestions?
 

Attachments

Last edited:
Made it out to Bill Moore Lake this past weekend with the Rising Sun 4x4 Club.
They were drive some classic Land Cruisers while I was rolling in my stock 4Runner. They were actually really impressed with how well it was handling the trail.
sigepbiker-albums-champ+updates-picture41755-img-3795.jpg

sigepbiker-albums-champ+updates-picture41756-img-3796.jpg

sigepbiker-albums-champ+updates-picture41757-img-3798.jpg


Had the dash board lit up like a Christmas tree!
y94rmsju
 
Last edited:
HID Retrofit with IS 350 projector

Retrofitted my head lights to HID! So glad to be behind HID lights again! My 4th Gen was retrofitted with Acura TL's before I traded it in, so I was ready to get back to HID.

Struggled with getting the OEM headlamps open and ended up buying TYC headlamps. Baked each one at 285*F for 40 minutes and the fell apart like butter. Jury's still out on how well they re-sealed, but if I have any trouble with them, I'll buy glue from The Retrofit Source (TRS).

Here's my parts list:
•IS350 projectors - (eBay) these have the holes for the bulbs on the side, just like the OEM's. They are also Bi-Xenon so they have a high beam solenoid. I wanted this feature.
•HID Kit - (TRS) these guys make great quality stuff. Used them before and NEVER had a problem with their stuff.
~~D2S bulbs 4300K - (TRS) the IS are D4S, but these bulbs fit the slot and groves with no modification needed. Plus, TRS doesn't sell D4S.
~~Ballasts - TRS's ballast have separate wire harnesses (included) so it you were in the middle of an upgrade from H11 (or other) to D2S, all you have to do is buy the harness.
~~Relay harness - (TRS) 5th Gens have H11 bulbs. The headlamps have a harness that connects to the OEM wiring and to the bulb through a grommet to help seal the headlamp. I removed this wire harness (I will cut and shorten it later) and connected it between the OEM wiring and TRS's relay harness.
•TYC headlamps - (eBay) your choice. I struggled with opening my OEM's and opted for these, because you have to remove the bumper to get to the headlamps so I wasn't rushed to finish and have the car drivable every day as it is my DD. The TYC headlamps came with the wire harness and all 4 bulbs

Tools:
•Dremel (or other compact cutting tool)
•QuikSteel - (Autozone) I thought these projectors would mount in the OEM holes on the mounting shroud and make this real easy. That was not the case. Don't let that deter you because QuikSteel dries in 10 minutes and is really easy to work with.

Remove the bumper: Click here
Remove headlight - 4 bolts: 3 on top, 1 on the side
Remove all the bulbs, screws (including the 7 around edges of headlamp that help seal it) and pull the wire harness out of the plug.
Bake: 285*F for 40 minutes (for TYC lights - OEM: YMMV)
Pull apart headlamp and remove mounting shroud

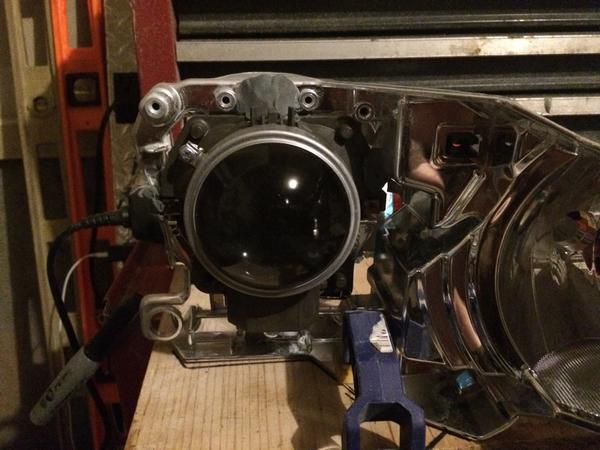
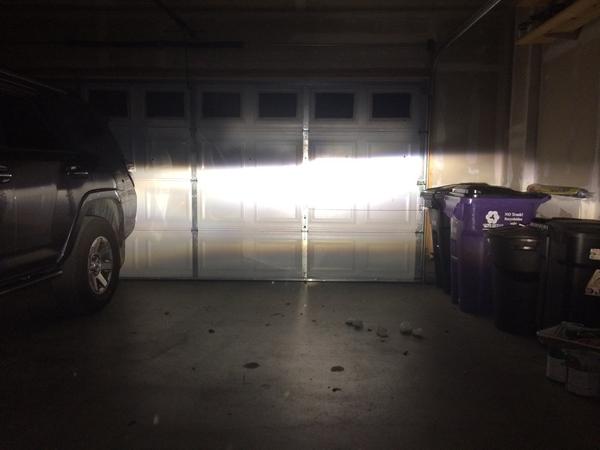
The original projector is mounted to the shroud by three bolts. Before removing it, I clamped the shroud to a board and marked the cut off on the wall. Since I was using my garage door, magnets worked well and were adjustable as the process moved forward.

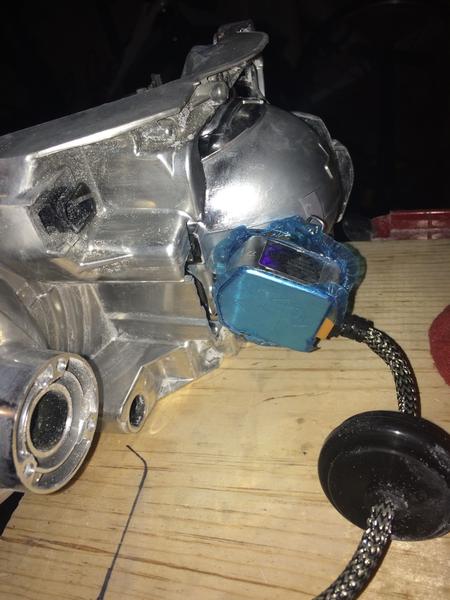
Next, with the IS projectors turned on, I moved them into the shroud to see how close it would line up to the original cut off. Using a dremel with a titanium carbide blade, I cut back enough of the shroud to fit the projector and ballast wire in place with the correct cut off. WARNING: the projector gets HOT!! Work fast.

With enough cut back, I used the QuikSteel to "glue" it in place, all the while holding the projector at the right cut off angle. See warning above.

sigepbiker-albums-lights-picture42756-1.jpg

sigepbiker-albums-lights-picture42757-2.jpg

sigepbiker-albums-lights-picture42758-3.jpg


Once the QuikSteel dried and is securing the projector top and bottom, I put more at the left and right. I was mindful not to cover bolts. I made it possible to go back and change out the lenses to STI-R for a cleaner cut off line if I feel so incline. I'm happy with it now, but I left the upgrade option available.

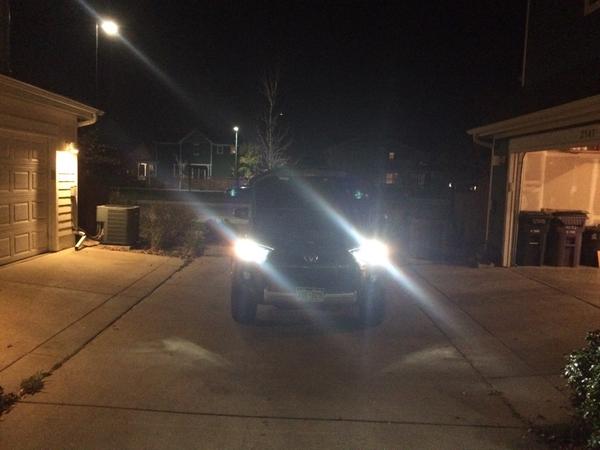
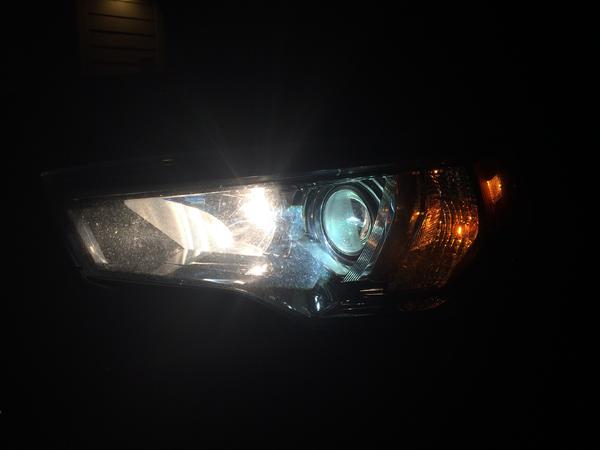
Haven't found a DARK alley to take pictures that do it justice, but here's what crappy night iPhone pics I have:
sigepbiker-albums-lights-picture42759-4.jpg


Haven't wired up the high beam solenoid yet. That will be on the next update.
 
Last edited:
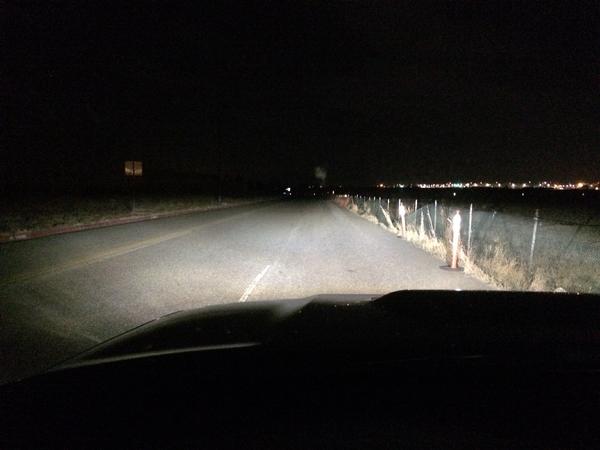
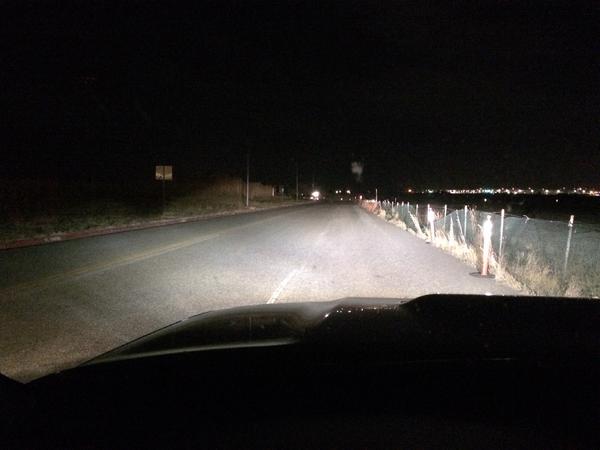
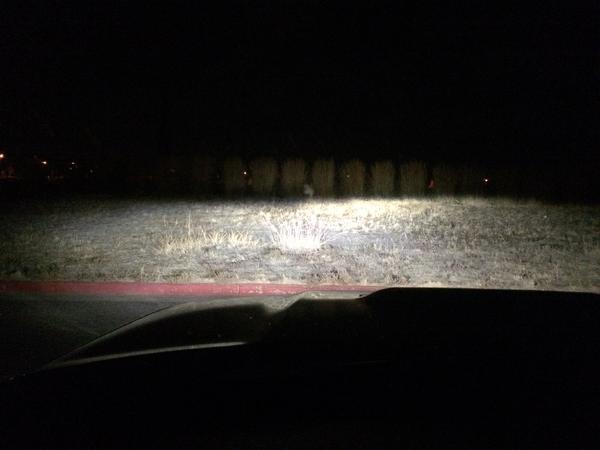
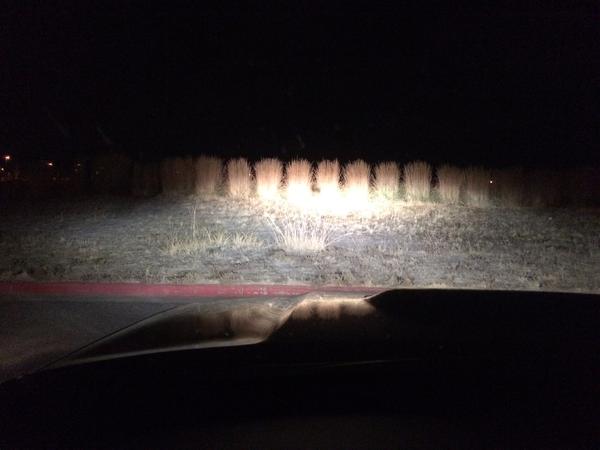
Wired up the solenoids for the IS350 BiXenon Retrofit. This is down a dark street and then on the high berm next to the road. Sorry, I didn't take any pictures without the stock high beam lights to show the BiXenon solenoid difference.

Low Beam only
sigepbiker-albums-lights-picture43057-is350-bixenon-low-beam-only.jpg


Low + BiXenon Solenoid and Stock High Beam
sigepbiker-albums-lights-picture43058-is350-bixenon-low-high-beam.jpg


Low Beam only
sigepbiker-albums-lights-picture43059-is350-bixenon-low-beam-only.jpg


Low + BiXenon Solenoid and Stock High Beam
sigepbiker-albums-lights-picture43060-is350-bixenon-low-high-beam.jpg


I absolutely love how these look OEM! Walking the car, you'd never tell that these were changed out.

Still waiting it out, but the OCD side of me might win to buy the STI-R lens for a cleaner cut off line. It works as is for those that are worried, there's just more random light above the cut off than I'd prefer. Even though it's only noticeable pulling up to walls, I'm only seeing it when I park in my garage.

Now I can retrofit the High Beam slot to house auxiliary off-road lights! (long term planning)
 
Last edited:
How did you wire up the high beams? I'm about to tackle this myself in my girlfriends 2015.

Also did you make a bracket for the IS350 heads? How'd that whole situation work out?

Jake
 
How did you wire up the high beams? I'm about to tackle this myself in my girlfriends 2015.

Also did you make a bracket for the IS350 heads? How'd that whole situation work out?

Jake

Welcome to the forum! Hope this helps you out with your retrofit project.

I bought P/N HWH103 from Napa. It's a 9005 wire harness which has both the male and female plugs. It's an extension cord if your plug won't reach to your lights. I used the male end to connect to the Toyota high beam plug. (The pins determine male and female, not the plastic body) These parts are stored in the back. Write down this part number when you go. It will save you a lot of explaining.

No bracket, just trimmed the OEM shroud with a dremel and used QuikSteel to "glue" the projector in place. Thought about making a bracket so the IS 350 could be screwed onto the OEM shroud, but working with QuikSteel is so easy. I used a vice clamp to hold the OEM shroud to a board of wood - nothing technical. Before removing the OEM projector, I marked where the HID projector needed to light up on the wall.

Biggest set back was buying new headlamps. I really struggled opening up the OEM lights. TYC's were a breeze to open after baking them at 280*F for 40-60mins.

Hope I answered everything. If not, reply again. :biggrin2:
 
Hijacked the Navigation!

***Warning: I DO NOT condone driving and using devices! This mod was completed purely for the use of my Navigator (passenger). I am not liable for injury or accident as there are reasons Toyota set up the computer the way they did. DO NOT DRIVE WITH YOUR EYES OFF THE ROAD!!***

Update:
After upgrading to a 2020 OEM Entune 3.0 radio, this mod still works the same way.

Original post
Now to the fun part - I was tired of the navigation locking my wife out while I am driving and she is using the navigation input. I was going to take the "easy way out" and buy a module I found on a link, but promptly received an email stating they no longer sold them.

Parts required:
Switch: AOB: Press to Turn Something On
5 Pin Relay
OEM Pins for the OEM Connector

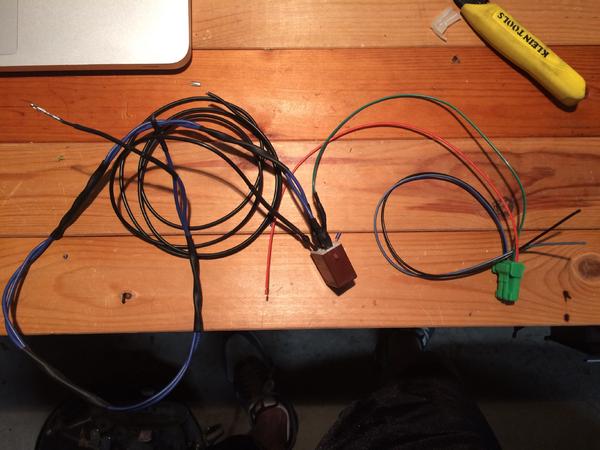
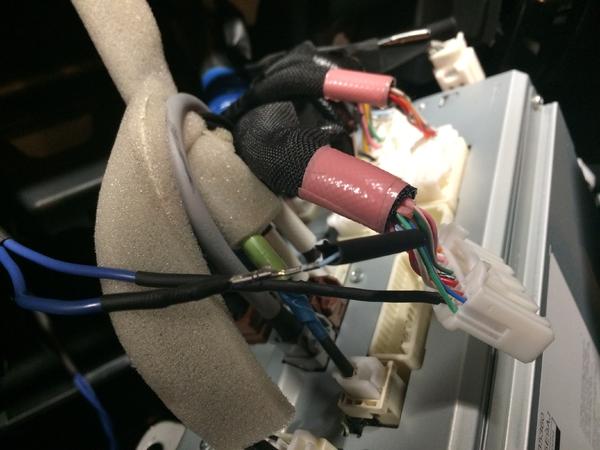
I'm still in the mind set of making all/most of my mods reversible, especial with electrical work - I hate cutting OEM harnesses. Also, had I messed up, I can pull the whole "new" harness and start over.

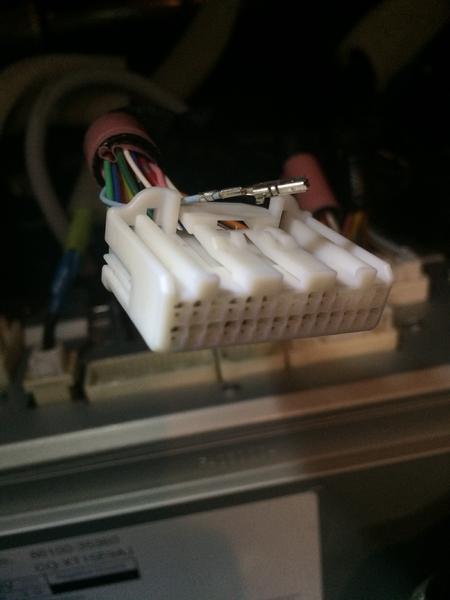
I searched the junk yards for the same OEM connector pin that is the speed sensor input. Found one from an 06 Prius (knew those things were good for something). Was able to pull a small 5-Pin relay out of a Toyota too.
sigepbiker-albums-champ+updates-picture44422-img-4266.jpg

sigepbiker-albums-champ+updates-picture44421-img-4293.jpg


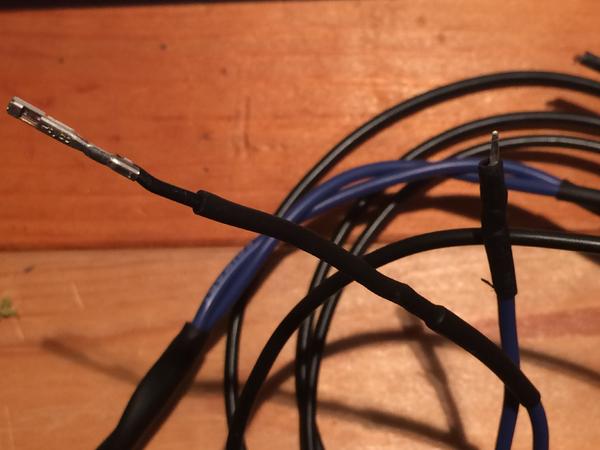
Close up on the pin. Grind down a metal male pin to insert into the OEM Female Pin.
sigepbiker-albums-champ+updates-picture44423-img-4304.jpg

sigepbiker-albums-champ+updates-picture44425-img-4305.jpg


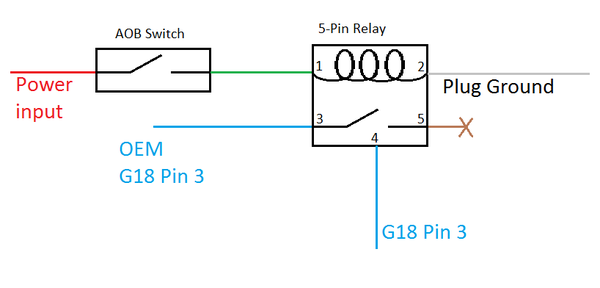
Here's the diagram of how this harness is wired up with the switch and 5-Pin relay. Using a 5-pin relay makes the switch interrupt the signal.
-Switch off - factory mode
-Switch on - Mod Mode
I didn't want the "ON" light illuminated all the time.
sigepbiker-albums-champ+updates-picture44429-harness-sch.png


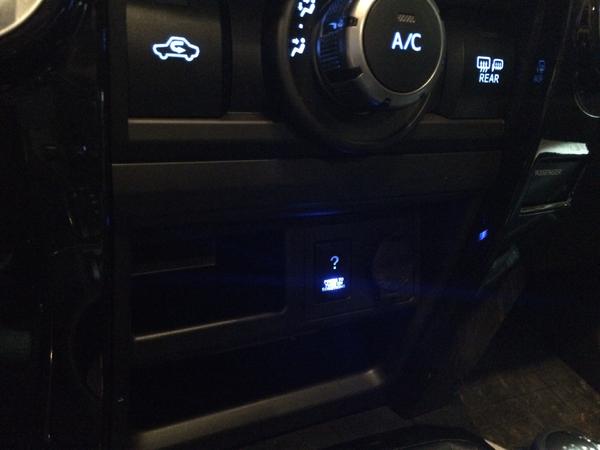
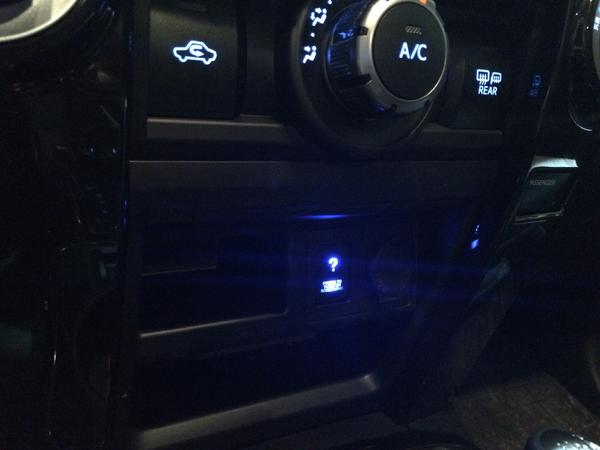
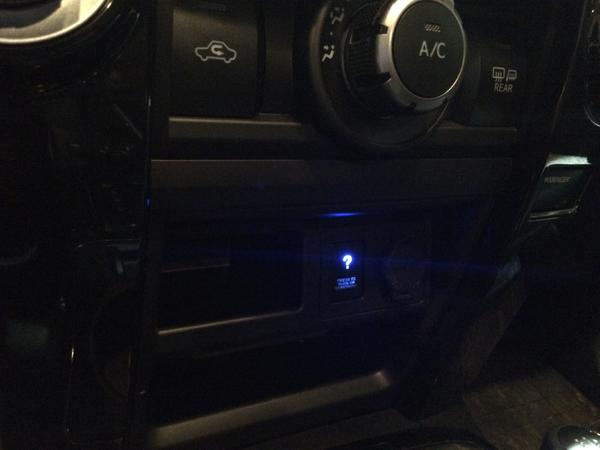
I pulled power, ground, and the dashboard illumination from the Air Conditioning controls just above the switch. 3M taps were all I needed for those connections.
Dashlights
sigepbiker-albums-champ+updates-picture44426-img-4313.jpg

Dashlights + Mod Mode
sigepbiker-albums-champ+updates-picture44427-img-4314.jpg

Mod Mode Only
sigepbiker-albums-champ+updates-picture44428-img-4315.jpg


Now, here's the short comings.
This wiring tells the computer, "The car is stopped." The map will not updated your location while this mod is active. If that's not a big deal, you're done. Wire it up and go. Once you turn the switch off and return to factory mode, it does take while for the map to updated. The GPS will know immediately which direction you're traveling and display that and move the map. However, the map will show your location at the point you turned to Mod Mode. So it displays me not following roads until the map updates.
 
Last edited:
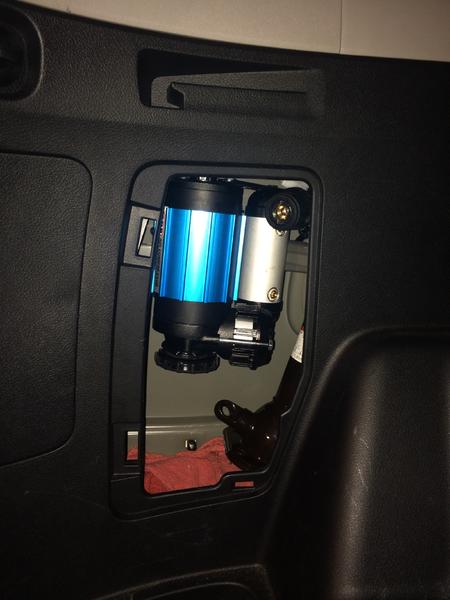
Mounted an ARB CKMA12 in the bottle jack compartment. Had the "idea" prior to seeing that [MENTION=123371]fargo4x4[/MENTION] had actually done it. Love how helpful this forum is! But with that comes the lack of original mods, but I'll think of an original mod eventually.

On to the pictures!
sigepbiker-albums-champ+updates-picture45285-arb-ckma12.jpg


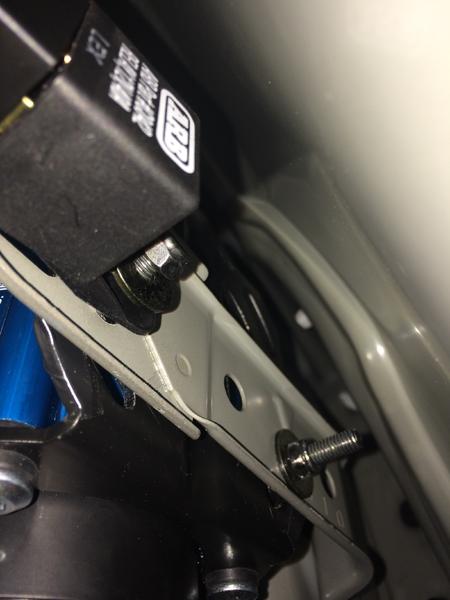
It is tight in that compartment, and it was an ordeal to mount the compressor! What really helped was pulling up the carpet and pulling the side panel out of the way to get more access than the small door. Here's a shot looking up behind the compressor:
sigepbiker-albums-champ+updates-picture45286-mounting-arb-ckma12.jpg

I suggest using a box wrench with a ratchet end.

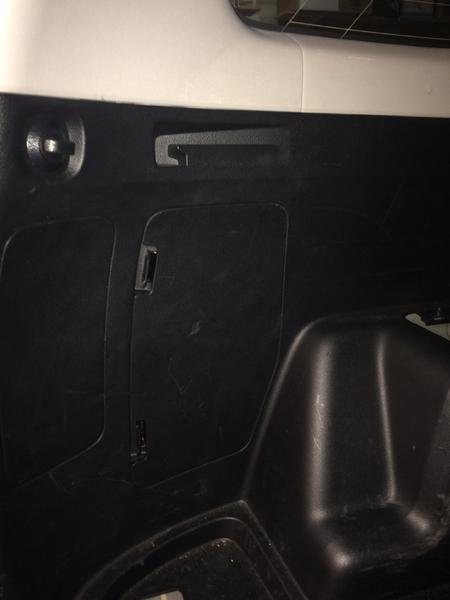
The best part of this mod - the door still fits and hides everything!
sigepbiker-albums-champ+updates-picture45287-arb-ckma12-w-door-closed.jpg


UPDATE!!
The OEM bracket that holds the jack tools started to crack, so I made a custom bracket.
 
Last edited:
Mounted an ARB CKMA12 in the bottle jack compartment. Had the "idea" prior to seeing that [MENTION=123371]fargo4x4[/MENTION] had actually done it. Love how helpful this forum is! But with that comes the lack of original mods, but I'll think of an original mod eventually.

On to the pictures!
sigepbiker-albums-champ+updates-picture45285-arb-ckma12.jpg


It is tight in that compartment, and it was an ordeal to mount the compressor! What really helped was pulling up the carpet and pulling the side panel out of the way to get more access than the small door. Here's a shot looking up behind the compressor:
sigepbiker-albums-champ+updates-picture45286-mounting-arb-ckma12.jpg

I suggest using a box wrench with a ratchet end.

The best part of this mod - the door still fits and hides everything!
sigepbiker-albums-champ+updates-picture45287-arb-ckma12-w-door-closed.jpg

Came out great! Looks just like ours but your install looks cleaner haha!
 
Picked up a Rear Recovery Point from [MENTION=130999]Inv4drZm[/MENTION]
yckkjchs


He designed them for the 4th Gens, but these work perfectly on the left rear side! They're sold bare, and I painted mine orange to help it stand out in mud and what-not.

To make it work on the right rear, the OEM exhaust needs to be modified. If you already have an after market exhaust, you're one step ahead.

Also, I passed my HAM radio test this weekend. If you want some great study material, check out HAMStudy.org. The flash card style study material is great because they explain the answers rather than just trying to memorize the correct answer.
 
Last edited:
Time for some updates

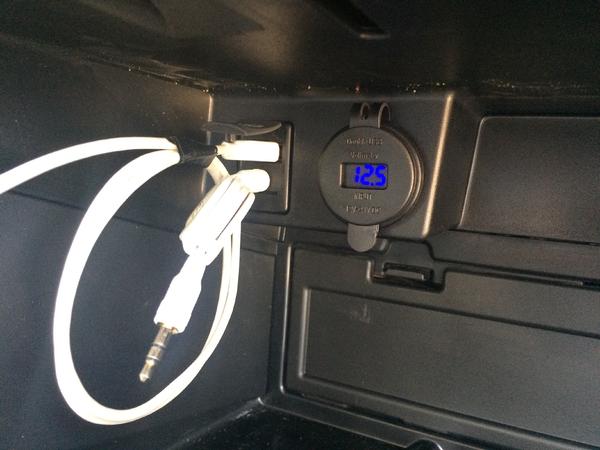
Moving the USB and AUX port into the glove compartment was one of the first things I changed. Being able to leave my iPod plugged and not worrying every time I parked was great. I've since added a BlueFire 4.2A Dual USB Charger to the blank next to it. This one was a little more complicated...

I had to remove the glove compartment to be able to remove the circular blank. The blank has a key slot to prevent it from rotating, so the width of the present hole was nearly identical to the hole needed for the USB charger.
sigepbiker-albums-champ+updates-picture47232-hidden-usb-aux-port-well-always-hot-dual-usb-port.jpg


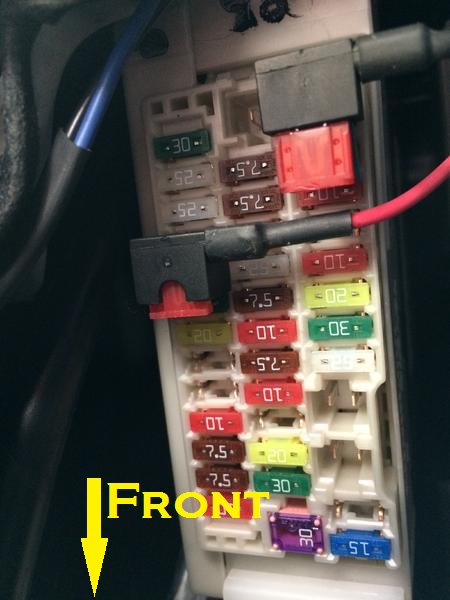
I ran the wiring across the dash board to the interior fuse panel. The spot four down from the top left is blank, so using a Add-A-Tap worked out perfectly. The other tap is only hot with the ignition on.
sigepbiker-albums-champ+updates-picture47236-fuse-taps.png


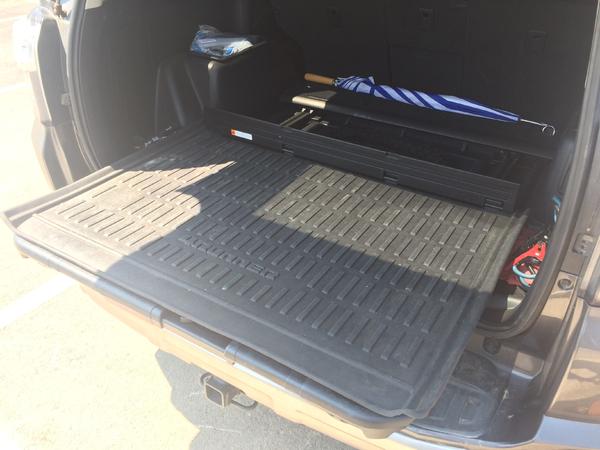
Picked up an OEM Sliding Rear Cargo Deck from a guy off Craigslist. I really wanted this when I bought my 4Runner from the dealership, so I was excited when I read through [MENTION=112865]alpinecowboy[/MENTION] 's thread: pure gold! Had I not found his thread, I probably would have given up on having this.
sigepbiker-albums-champ+updates-picture47233-oem-sliding-rear-cargo-deck-self-installed.jpg


The guy didn't, however, have the Cargo Organizer that prevents your stuff from falling off the slider when it's pulled out, so I picked one up. Here's the Toyota P/N: PT924-89100-20
 
DRL's Re-wired

Reason: After adding Bi-Xenon HIDs and wiring the solenoid to the High Beam circuit, the solenoid is energized by the low voltage (6V) of the DRL's. I'm concerned that having the solenoids energized for long periods of time could cause them to burn out quicker (or maybe it's all mental and I'm paranoid over nothing).

Either way, when it's all said and done, I want to have the Bi-Xenon solenoids be the only thing connected to the high beam circuit, and the DRL signal turn on "demon eyes" in the HID projector. These two steps will open up the OEM High Beams to be wired independently for additional off-road lights. Leaning towards Baja Designs Squadron-R.

Step 1 Complete!
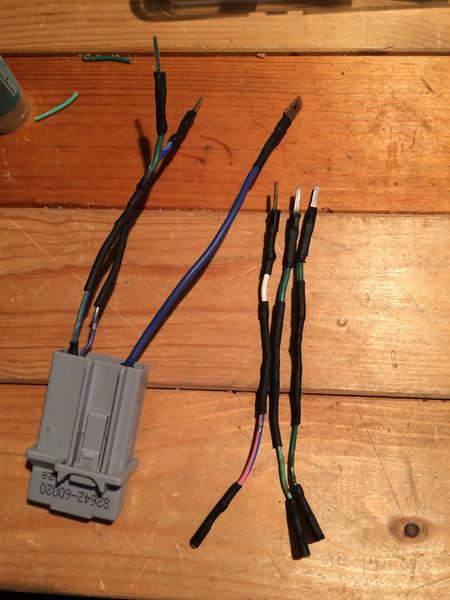
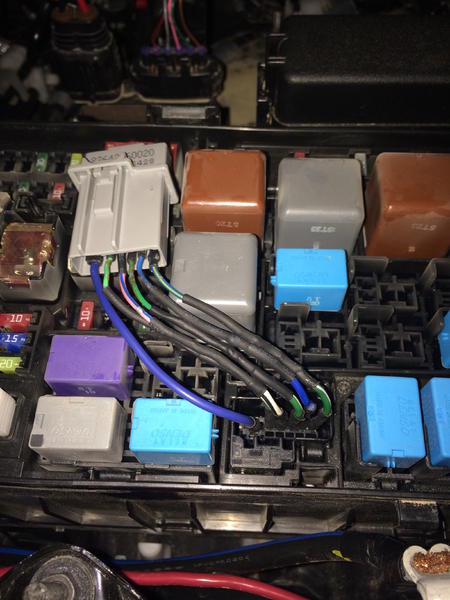
After another trip to the junkyard for some more OEM Pins, I was able to make 6 jumper wires to connect the pins of the High Beam Relay to the engine fuse box. Pin 2 controls the DRL's. By removing it from the High Beam relay, the High Beams will still work correctly, but the DRL's will not turn on.
sigepbiker-albums-champ+updates-picture48118-high-beam-jumper-wire.jpg

sigepbiker-albums-champ+updates-picture48121-high-beam-relay-fuse-box-lid-still-closes-completely-relay-wired-like.jpg

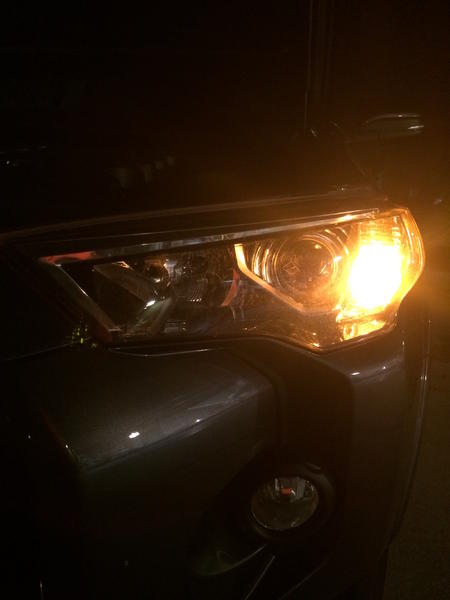
Here's pictures, with the car running, of the headlamps:
1. Parking lights w/ no DRL's
2. High Beams still work. As of now, I have the Bi-Xenon solenoid and OEM High Beams wired together with a splitter from TRS.
sigepbiker-albums-champ+updates-picture48124-parking-lights-w-no-drls-yes-car-running.jpg

sigepbiker-albums-champ+updates-picture48125-high-beams-still-work-they-should-i-have-b-xenon-solenoid-oem-high-beams-wired-together-now.jpg


Step 2: (waiting on parts)
By connecting Pin 2 from the fuse box to a new relay solenoid (to gain 12V) and then 12V power to the "demon eyes", the DRL's will be back to working. The Low Beams and the DRL’s will not be on at the same time which make sense since they are in the same projector and the Low Beams would out shine the DRL’s.

Updates to come...

UPDATED!!
So, the high beam relay with DRL's isn't as simple as redirecting DRL power from the OEM relay to a new relay. I've pulled the wiring and put it back to original. Also, the lower 6V power supplied for DRL's does not activate the Bi-Xenon solenoids. I think I'm safe...

Leaving on the bench for later as of now...
 
Last edited:
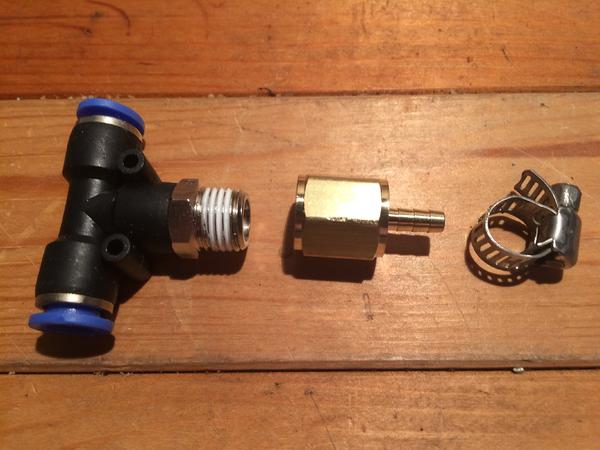
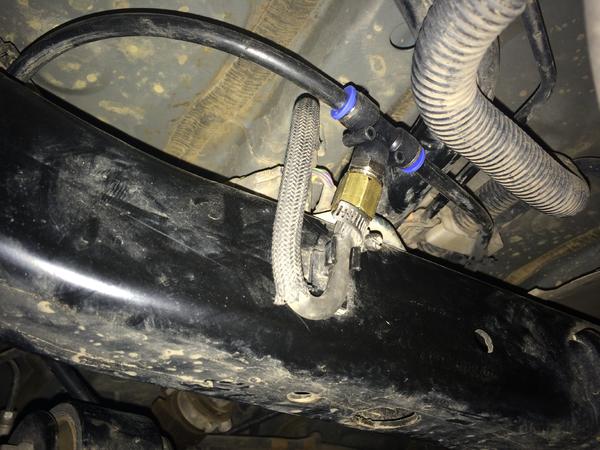
Finally buttoned up the last of my ARB Differential Breather install. I added a tee fitting to include the Factory E-Locker Breather onto the same line for the Rear Differential.
•8mm Push to Connect tee fitting w/ 1/4" NPT-M
•1/4" NPT-F to 1/8" barb fitting
•Hose clamp
sigepbiker-albums-champ+updates-picture48225-8mm-push-connect-tee-fitting-w-1-4-npt-m-1-4-npt-f-1-8-barb-fitting-hose-clamp.jpg


sigepbiker-albums-champ+updates-picture48227-fittings-installed-e-locker-check-valve-oem-location.jpg

FYI: The fittings from ARB included in the kit have the same threads as the OEM breather in the rear diff housing.

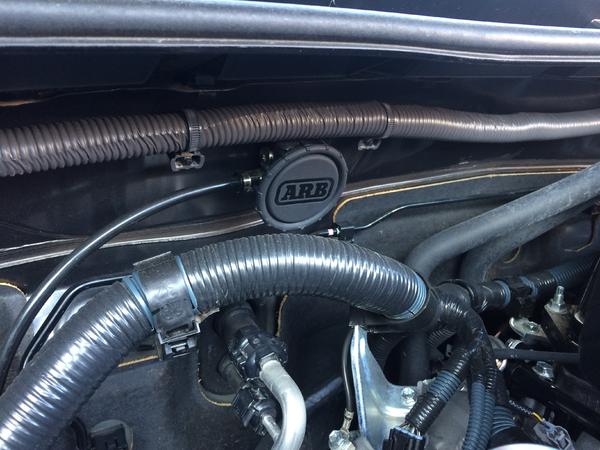
Here's a picture of where I mounted the breather in the engine bay.
sigepbiker-albums-champ+updates-picture48228-arb-diff-breather-passenger-side-engine-bay.jpg


This location will allow for me to extend the breather lines for the front diff, trans, and transfer case to the same location in the future.
 
Slaughterhouse Gulch

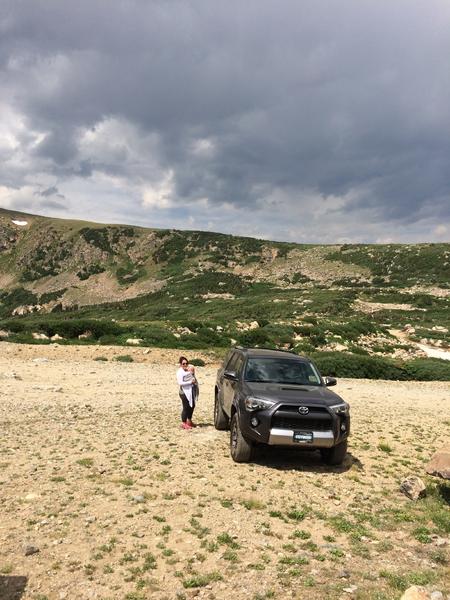
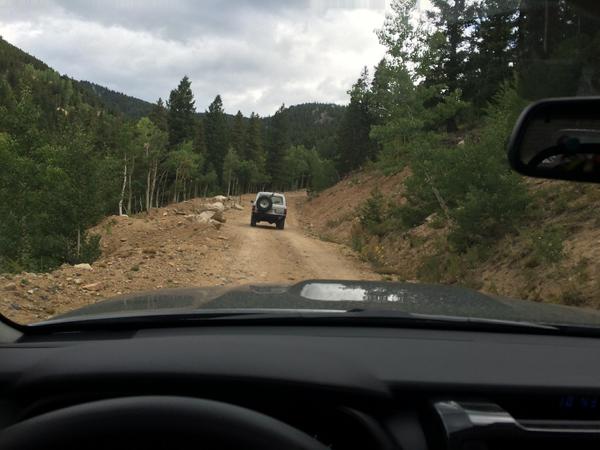
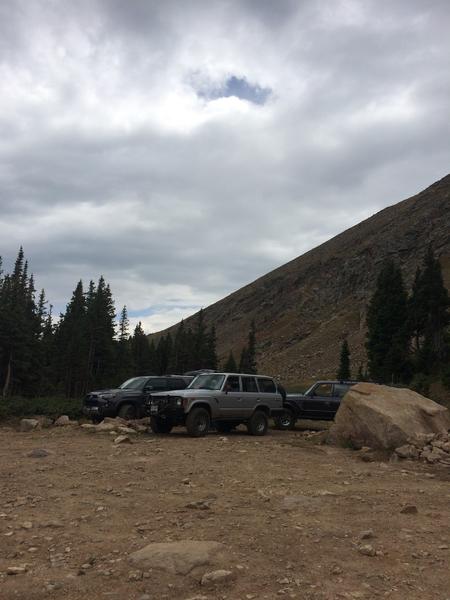
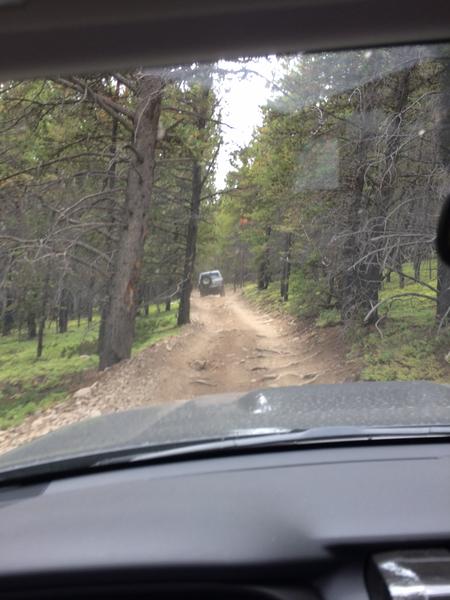
Had a great day wheeling with the guys from Rising Sun 4WD Club running Slaughterhouse Gulch. Still running stock suspension and highway tires and the 4Runner took everything we put it through! Helps having a spotter; one of the guys has over 60 hours training with Bill Burke. If you don't know who he is, look him up! Great resource for off-road driving.

yce7umet


y7lrpgkc


y73khbdp


yclprb2u
 
Last edited:

Members online

Forum statistics

Threads
278,307
Messages
3,554,054
Members
248,016
Latest member
Advally Service

Trending content

Back
Top