sigepbiker
Member
Quad Air-up System
There have been some ideas out there for airing up/down quicker. SponsoredByWifey on Instagram has a cool system as well as TrailRecon on Youtube. I kinda merged the two and put my own spin on it.
Here's a brief list of what you'll need to get started. As for the specialized equipment, the part numbers included are from Zoro.com:
50 ft of 3/8" hose
3 Tee Fitting
10 Hose Barb fitting
4 90° Hose Barb fitting
20 Hose Clamps
3 Quick Disconnect Plugs (Male)
2 Quick Disconnect Sockets (Female)
1 Ball Valve G3007751
4 Schrader Valves
4 Anchor Coupling G0639204
8 Air Chuck G4016166
I started with the hard (driver) side first because I'm a glutton for punishment... :tsk:
Because of where I mounted the couplings/schrader valve in the engine bay on the driver side, I needed an elbow for the hose barb. A straight barb fitting would not fit. Plus, using an elbow for all the frame mounted hose connections removes the hard bends. Here's how the fittings fit together.
Front:
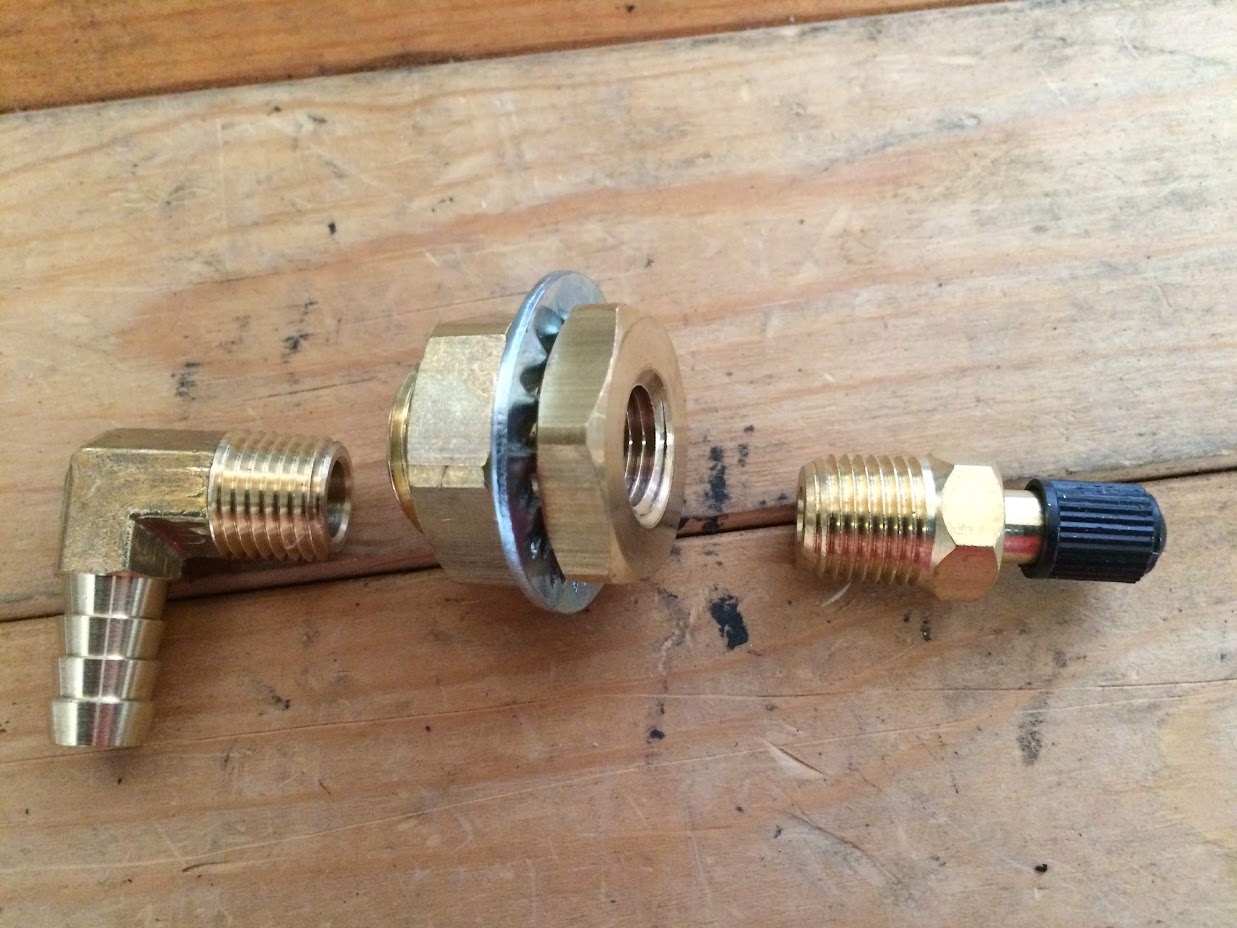
Rear:
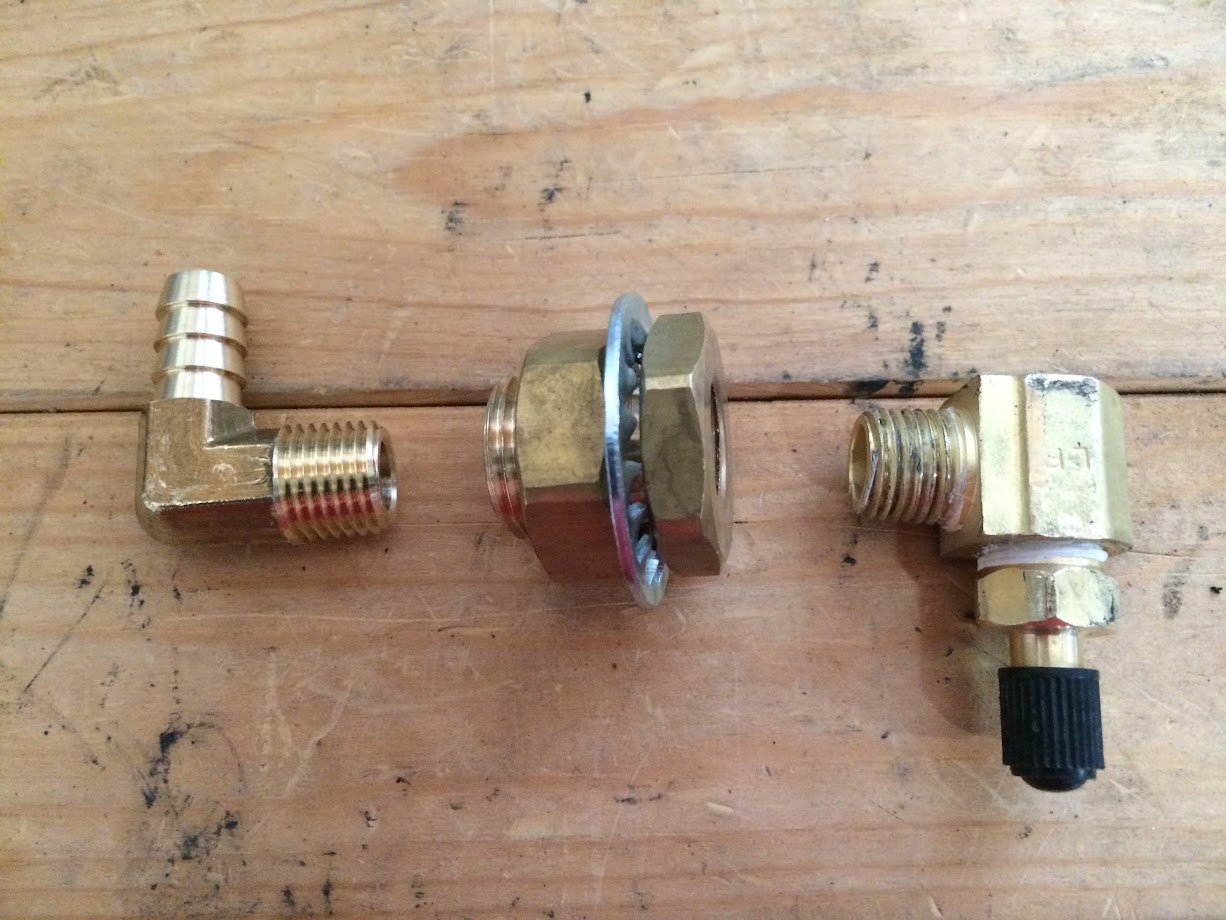
The anchor coupling requires a 3/4" hole for mounting. Here's how they look installed in the wheel wells:
Front Driver


Rear Driver
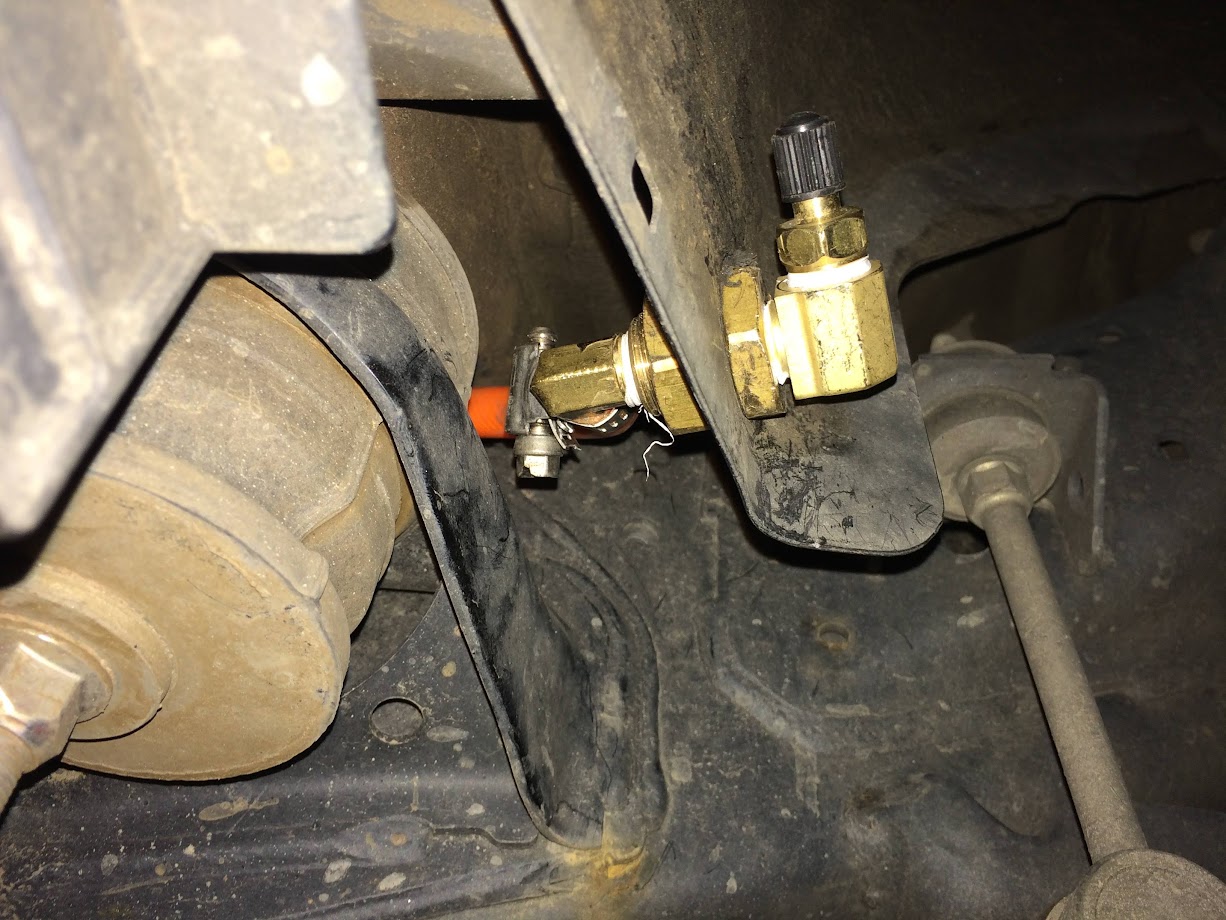
Front Passenger


Rear Passenger

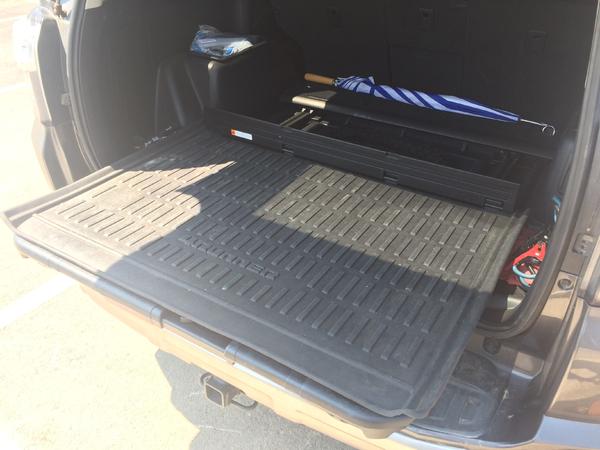
Because my air compressor is located in the bottle jack storage compartment, I ran the hoses from the rear wheel to the compressor. I had an extra tee fitting I mounted the ball valve to. My plan is to remove the middle Quick Disconnect Socket and add another Schrader valve. This way, I can still use my Staun deflators and my tire pressure gauge to check pressure as I air up and down.

UPDATE:
I've since upgraded the hose routing and added a manifold.
Ran the tubing from the rear driver connection point through a factory grommet into the jack compartment.
The blue manifold has a shutoff valve, gauge, and relief valve. I haven't set the relief valve yet, but the idea is to have it pop and then reseat at my desired PSI, ~36PSI. Then it will be "fully hands-free".

There have been some ideas out there for airing up/down quicker. SponsoredByWifey on Instagram has a cool system as well as TrailRecon on Youtube. I kinda merged the two and put my own spin on it.
Here's a brief list of what you'll need to get started. As for the specialized equipment, the part numbers included are from Zoro.com:
50 ft of 3/8" hose
3 Tee Fitting
10 Hose Barb fitting
4 90° Hose Barb fitting
20 Hose Clamps
3 Quick Disconnect Plugs (Male)
2 Quick Disconnect Sockets (Female)
1 Ball Valve G3007751
4 Schrader Valves
4 Anchor Coupling G0639204
8 Air Chuck G4016166
I started with the hard (driver) side first because I'm a glutton for punishment... :tsk:
Because of where I mounted the couplings/schrader valve in the engine bay on the driver side, I needed an elbow for the hose barb. A straight barb fitting would not fit. Plus, using an elbow for all the frame mounted hose connections removes the hard bends. Here's how the fittings fit together.
Front:
Rear:
The anchor coupling requires a 3/4" hole for mounting. Here's how they look installed in the wheel wells:
Front Driver
Rear Driver
Front Passenger
Rear Passenger
Because my air compressor is located in the bottle jack storage compartment, I ran the hoses from the rear wheel to the compressor. I had an extra tee fitting I mounted the ball valve to. My plan is to remove the middle Quick Disconnect Socket and add another Schrader valve. This way, I can still use my Staun deflators and my tire pressure gauge to check pressure as I air up and down.
UPDATE:
I've since upgraded the hose routing and added a manifold.
Ran the tubing from the rear driver connection point through a factory grommet into the jack compartment.
The blue manifold has a shutoff valve, gauge, and relief valve. I haven't set the relief valve yet, but the idea is to have it pop and then reseat at my desired PSI, ~36PSI. Then it will be "fully hands-free".
Last edited: