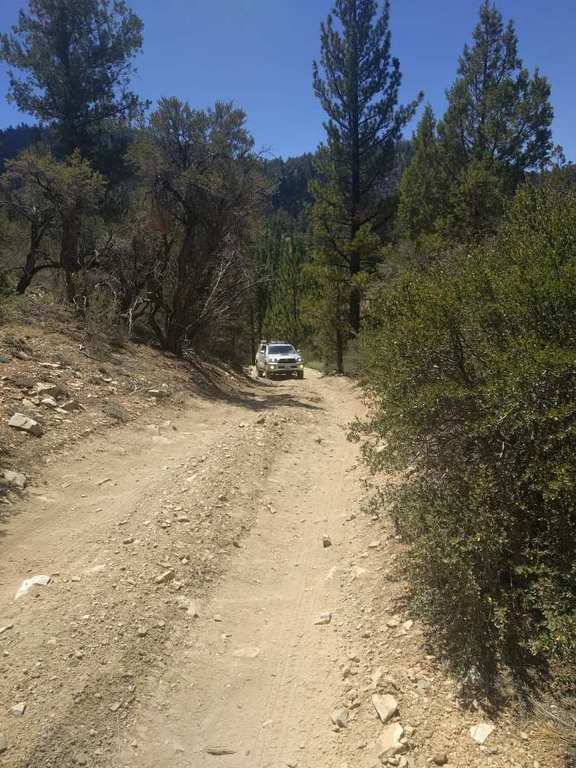
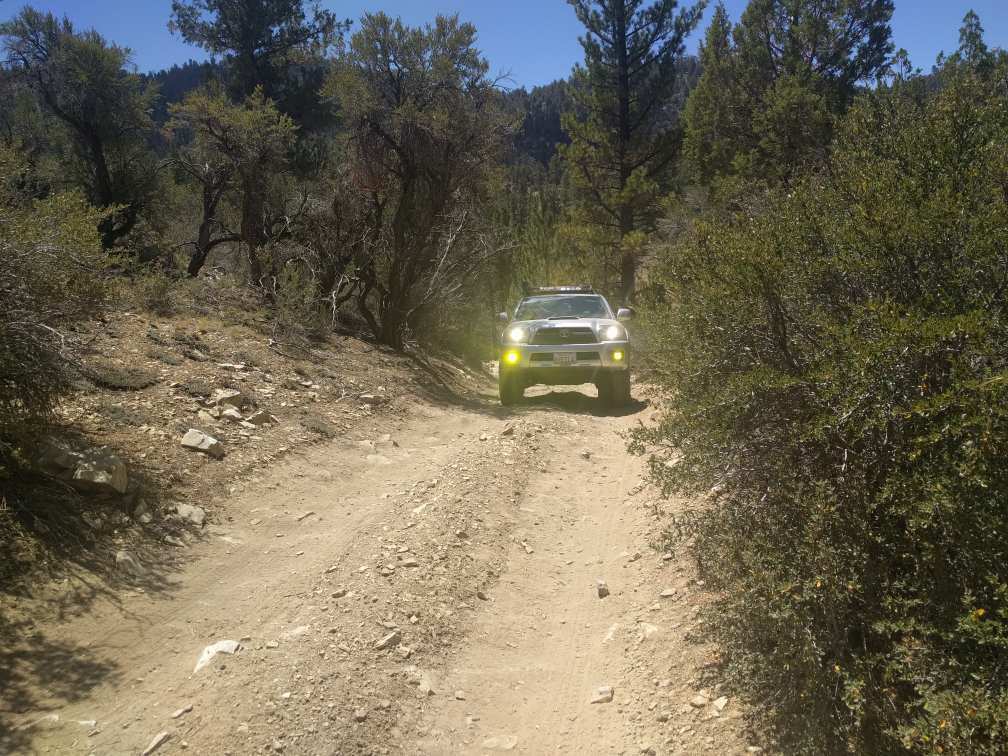
YETIX Build and Adventure Thread aka Travels with Savanna

The Baja Desgins fog lights are, in my opinion, much better as fog lights than HID's. Primarily, they're a lot tougher waterproof and fogs get submerged on even the most basic stream crossing.

Baja Designs makes three levels of Squadron lights, which are what I have. They start with the Sport, then Pro, then Race. The Race lights are insanely bright and I couldn't justify those for fog lights. I went with the Pros and they are very, very bright. I wouldn't run them on the street unless there were no other cars around. They're really an off-road light. One of the guys at BD has a 4Runner and he runs the Sports in his fogs. He keeps them on all the time and has never had any issues. (He probably has them aimed low too.)

I'll be doing a write-up soon of the install since there is no kit actually made for the 4th Gen 4Runner.

Check back soon . . .​


Awesome, thanks for the info. I'll have to start looking for a good deal on a pair.
Looking forward to that write up too
 
Head Gasket Replacement

So, as I mentioned before, it turned out my 4Runner had a head gasket leak. After I found out about my leaking gasket, I did a ton of research on the subject, starting with the ***V6 Head Gasket Action Request*** thread here on T4R. I also contacted a few people I know who work on Toyotas and lastly a work contact who is pretty high up with Toyota USA.

From my research, I have learned that the head gaskets on the 4.0 Liter V6 engines were re-designed and that implementation of the new gaskets appears to have started with December 2005 production. Of course, mine was built in November of 2005. :ybrick:

The most common location for the leak is between cylinders 4 and 6. No one I have spoken with has been able to come up with a reason why that location is so prevalent versus any other location.

Symptoms​
  • Rough idle on cold start-up. Went away after about 30 seconds.
  • "Waterfall sound" on cold start. It sounded like someone turned on a water hose behind the dash.
  • Slowly dropping coolant level.
  • As it gets worse, you'll get a CEL with a P0306 code (most common code).

So, after my trip to Big Bear it was time to have Miles replace the head gaskets. We decided to have the heads cleaned and the valves adjusted, to replace the water pump (it had a weep anyways), and basically everything that could be replaced on the front of the engine. Just for good measure, because it had been repaired once before, we decided to replace the radiator too. Lastly, since it was going to be down for a few days, I asked Miles to cut the exhaust at the resonator and turn it to exhaust to the right behind the wheel so that I can drive around with the rear window down when I have the pups in the back.

The machine shop said the heads were straight with no warping at all, so they were just cleaned up and the valves done. Phew!!

A week and about $3,500 later and I had my truck back.

So onto the pictures:

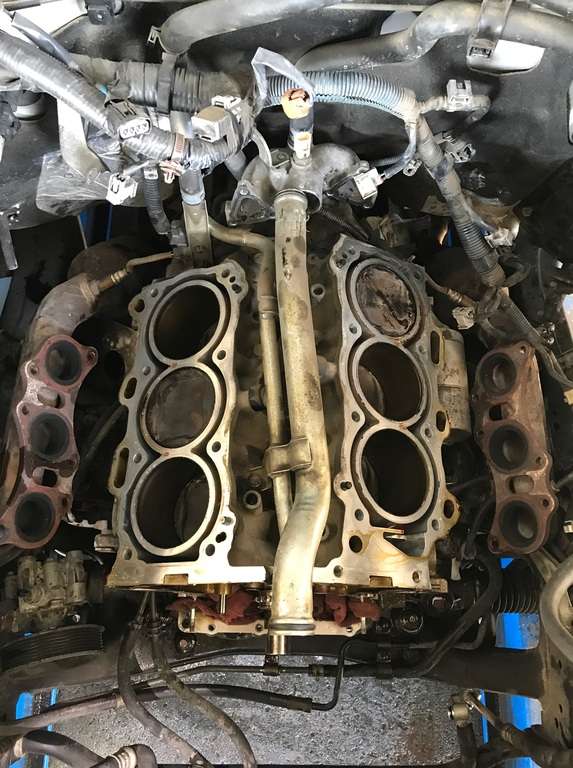
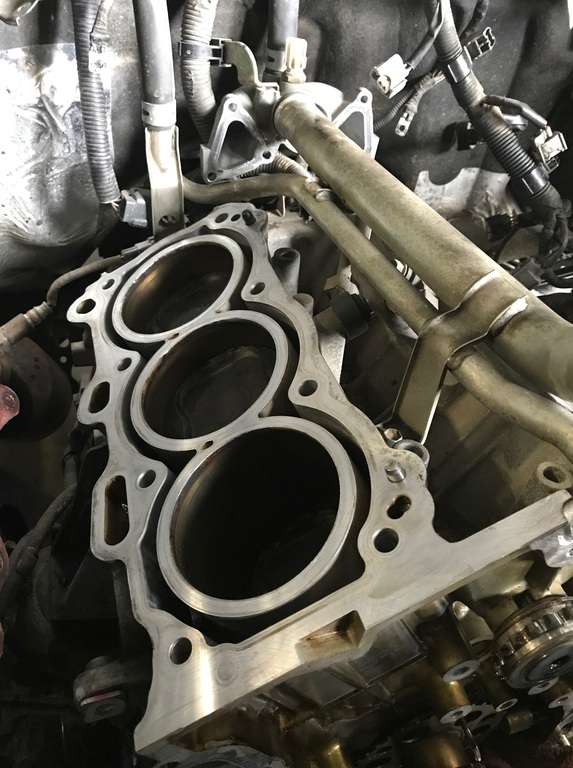
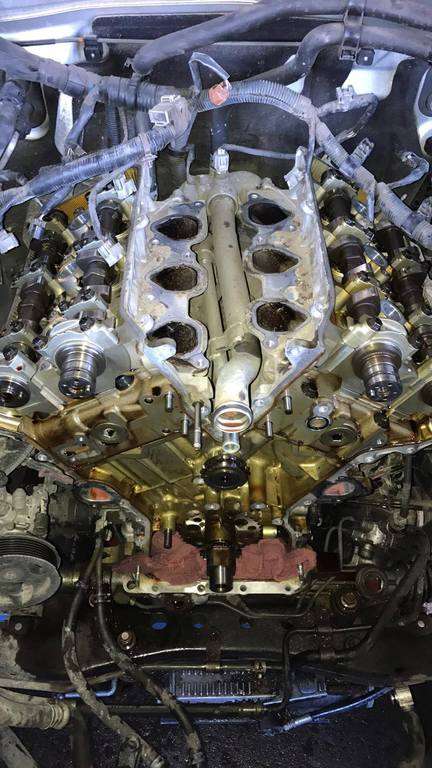
The engine with the heads removed

xqyqDT.jpg


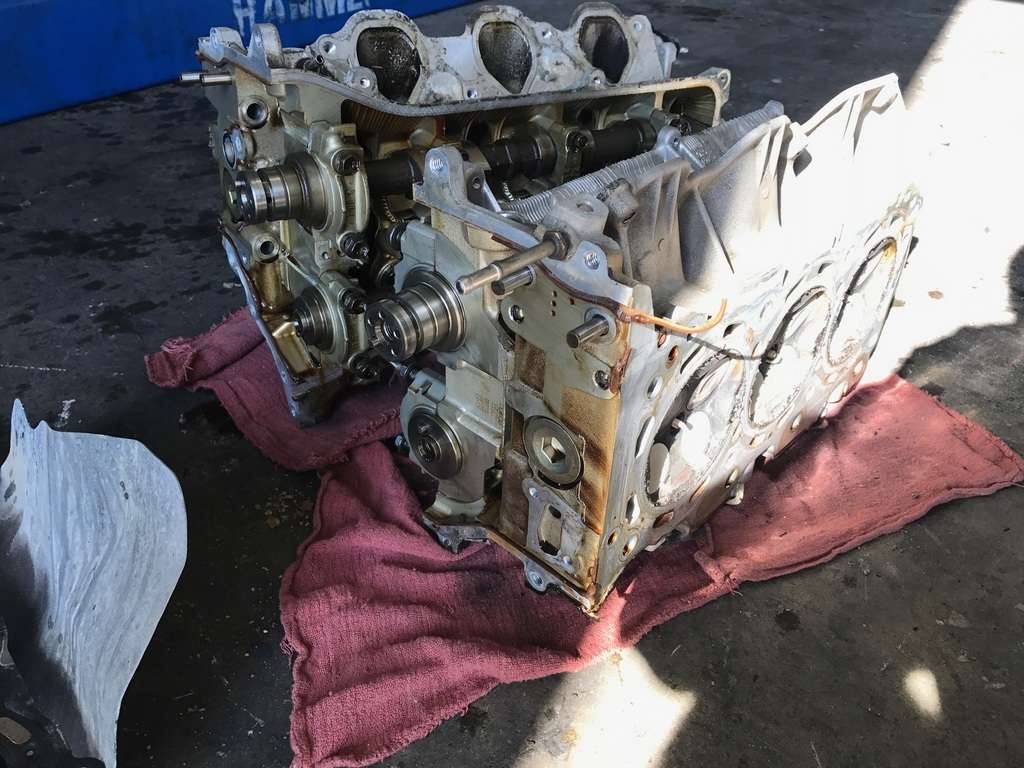
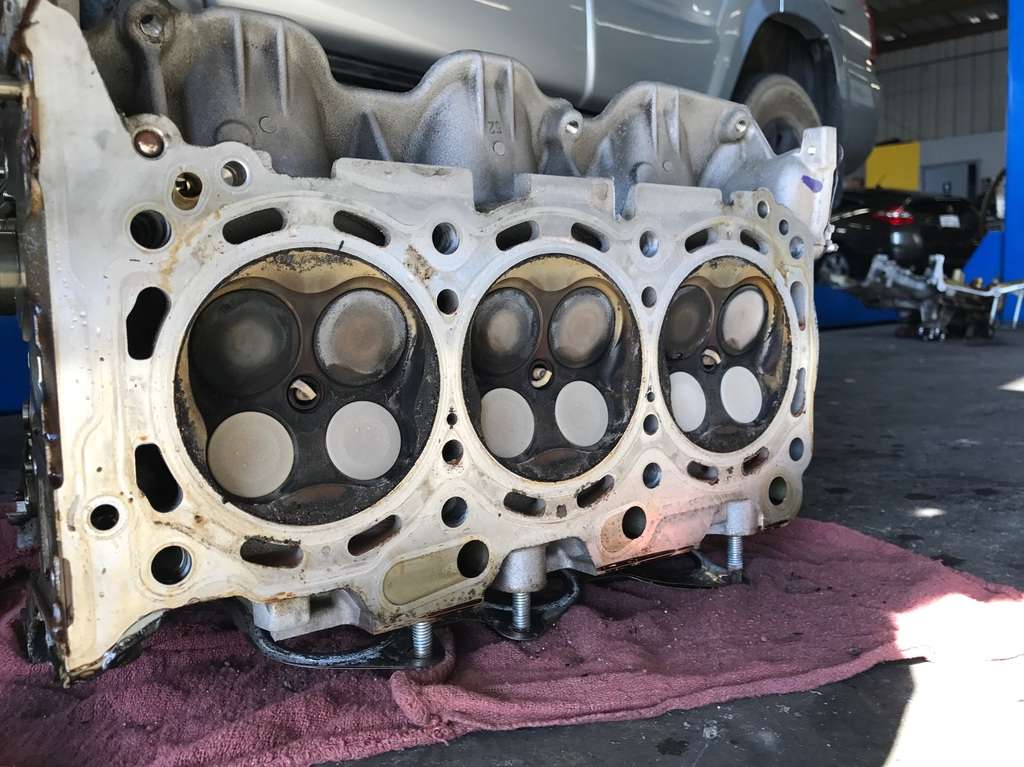
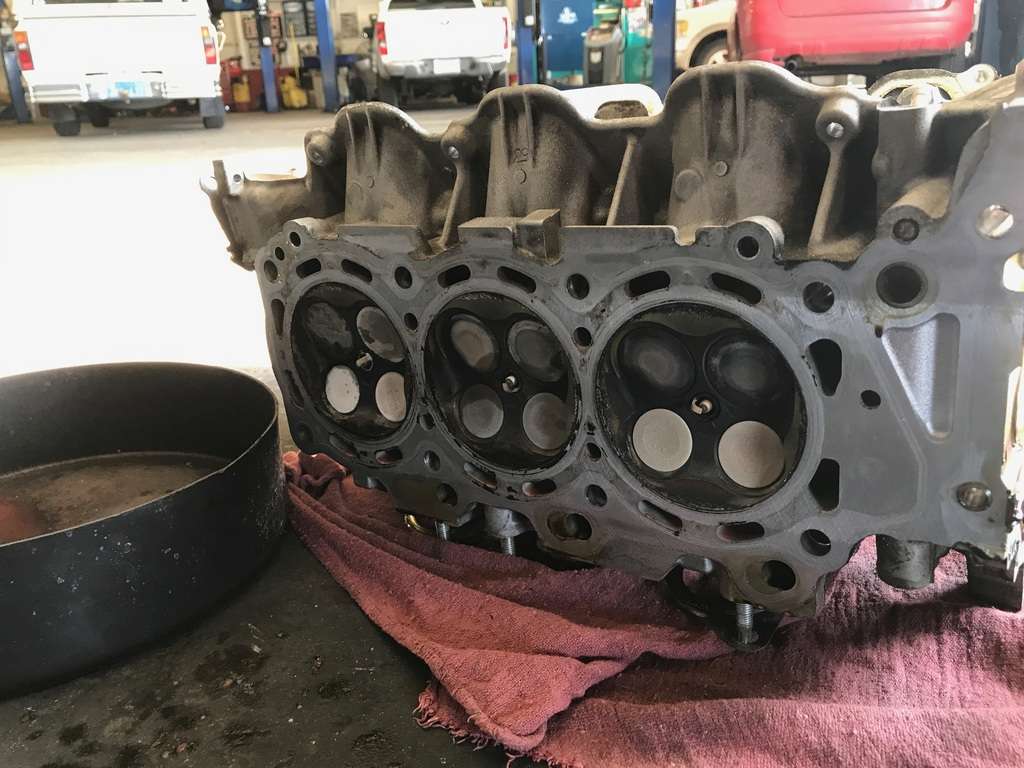
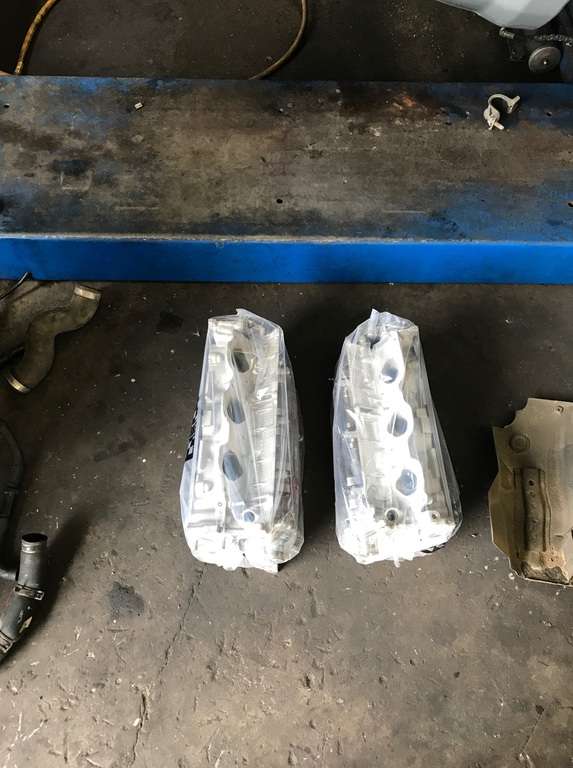
The heads

w0RzsV.jpg


OYHePR.jpg


9yDNIN.jpg


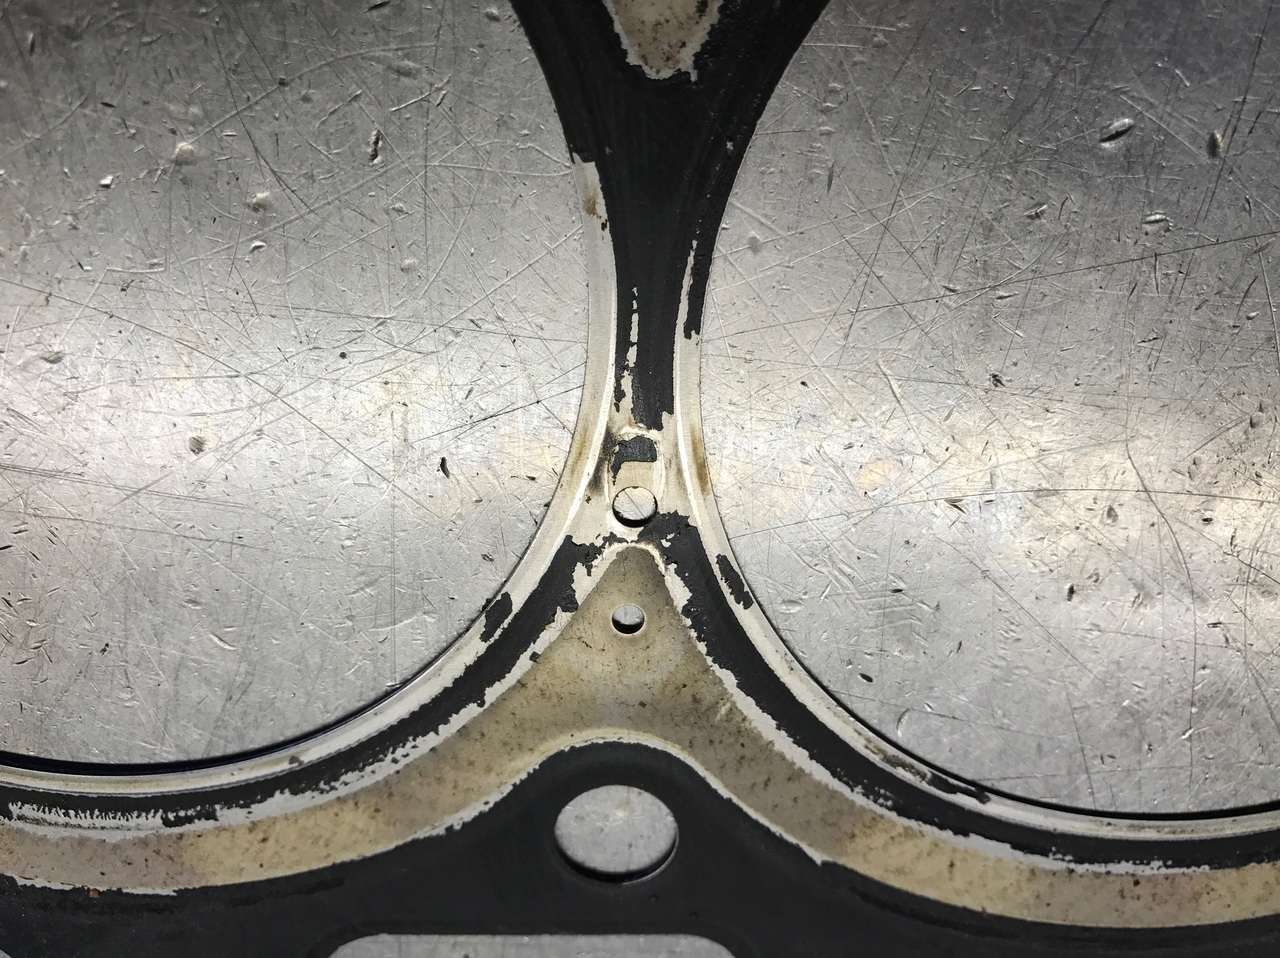
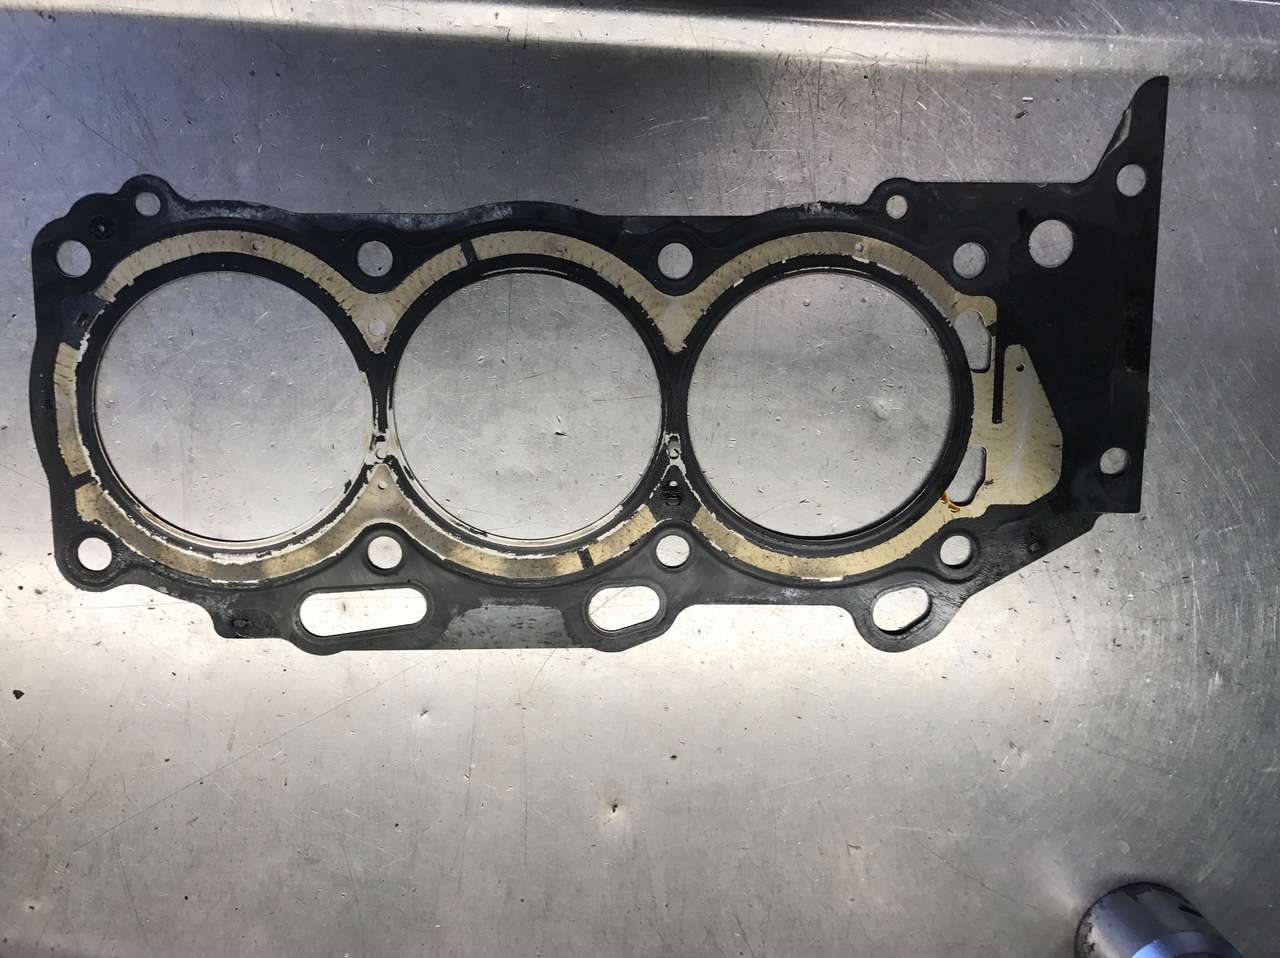
The old gaskets. You can clearly see where the black sealing material is gone from around one of the coolant jackets.

ZSLDgb.jpg


Uz5swu.jpg


lc39xm.jpg


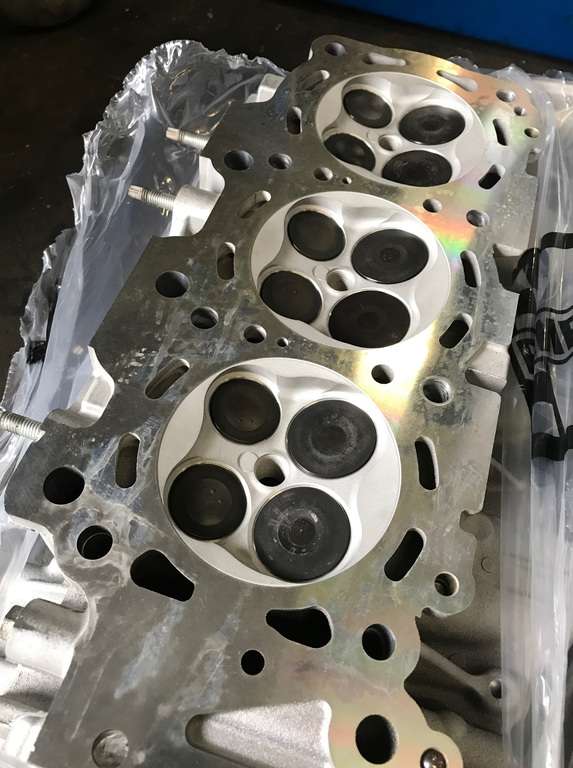
The heads after their spa day at the machine shop

Kc1gYQ.jpg


So clean and pretty!!

FD07on.jpg


And the block all cleaned up

62Cz4f.jpg


And then reassembly

RrCurV.jpg


After getting everything done, my 4Runner ran much more quietly with almost no "tapping" from the valvetrain. It had a slightly rough idle for the first few thousand miles (we think it just needed to break back in) but now runs perfectly with zero coolant leaks or issues.

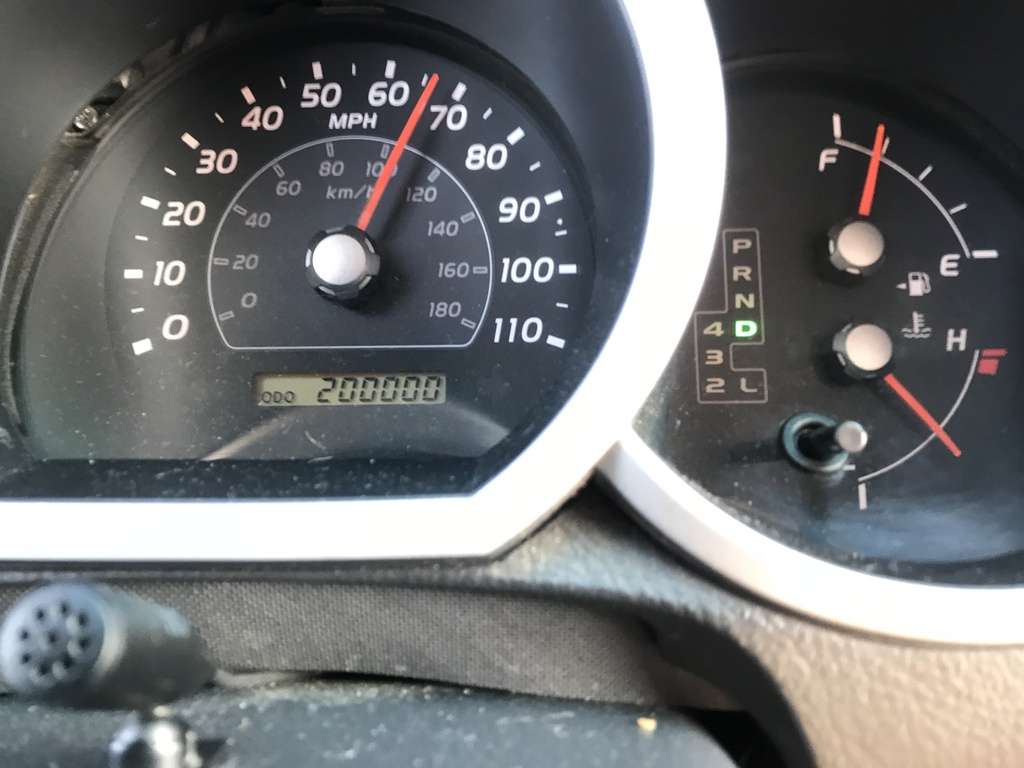
My hope is that with all the work we did, my 4Runner should be good for another 2-300,000 miles. In fact, it'll hit 200,000 miles later this month! :clap2::clap2:

** Up next, building a cargo deck with tool drawers . .​
 
Awesome to see the transformation of your vehicle. Even cooler to see you still getting out on the trails just on 4 wheels instead of 2. Excited about your white knuckles, as mine have been sitting in the garage all winter staring at me.
Can I what cargo/drawer system you will be going with?

Keep the thread going. Love it!
 
Did you replace

the timing chain as well? since you had the valves adjusted and the heads blasted...i may have to do this as well down the line..
 
Awesome to see the transformation of your vehicle. Even cooler to see you still getting out on the trails just on 4 wheels instead of 2. Excited about your white knuckles, as mine have been sitting in the garage all winter staring at me.
Can I what cargo/drawer system you will be going with?

Keep the thread going. Love it!

Thanks! The cargo/drawer system is custom made. I could not go too tall because we have Rhodesian Ridgebacks who need their headroom. I'll post that up Monday or Tuesday.

the timing chain as well? since you had the valves adjusted and the heads blasted...i may have to do this as well down the line..
We debated it, but it measured the same as a new one and these things routinely go 300,000 miles without the timing chain being replaced. I was already getting weak from the amount I was spending (which came at a horrible time financially), so we decided it was good to go.
 
Last edited:
So first request for input on the build. I now have a Wilco Hitchgate Classic tire carrier on the rear. I want to either carry two Jerry cans or two Rotopax on there, but can't decide which to get.

The Jerry cans are cheaper, more available, and carry more fuel or water. On the other hand, the Rotopax seem a bit nicer and are a bit more low-profile. With the Rotopax being narrower, I might even be able to move the Hitchgate in a little closer to the rear bumper.

Thoughts?
 
So first request for input on the build. I now have a Wilco Hitchgate Classic tire carrier on the rear. I want to either carry two Jerry cans or two Rotopax on there, but can't decide which to get.

The Jerry cans are cheaper, more available, and carry more fuel or water. On the other hand, the Rotopax seem a bit nicer and are a bit more low-profile. With the Rotopax being narrower, I might even be able to move the Hitchgate in a little closer to the rear bumper.

Thoughts?

I think a quality jerry can would last longer than the Rotopax. I bought a Rotopax for a trip last year but never got to use it. I've heard the Rotopax can bulge after a while in the heat, but not sure if that was with proper ventilation intervals. I'm likely to swap over to jerry cans for my rear bumper build.
 
I think a quality jerry can would last longer than the Rotopax. I bought a Rotopax for a trip last year but never got to use it. I've heard the Rotopax can bulge after a while in the heat, but not sure if that was with proper ventilation intervals. I'm likely to swap over to jerry cans for my rear bumper build.
Good to know. I think if I go with Jerry cans, I'll go with a steel one for fuel and a plastic one for water.

Anyone with experience with the Rotopax?
 
Sleeping/Cargo Platform

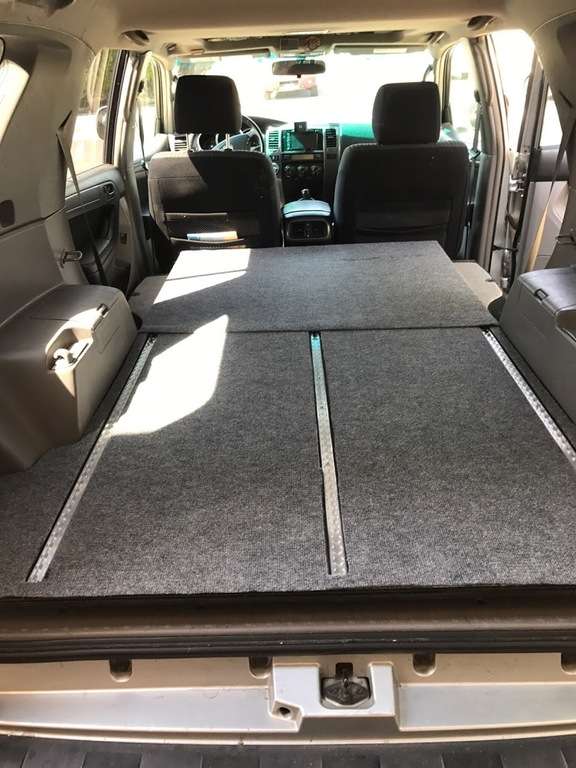
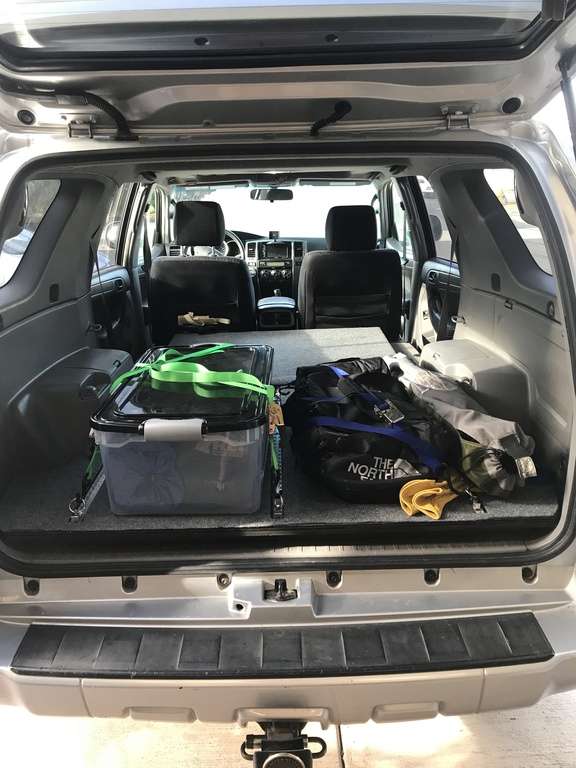
One of the features of my 4Runner I find the most useful is the cargo/sleeping platform I made with the help of a friend. I wish I could build nice deep drawers like so many people do, but I have two reasons why I can't.

tKRmW6.png


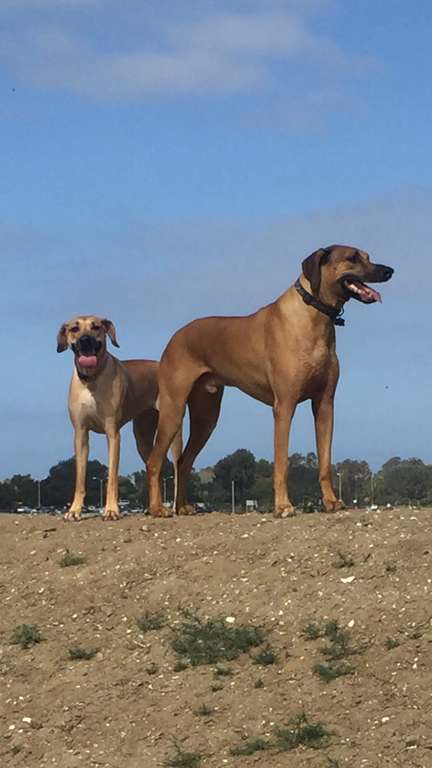
We have two large Rhodesian Ridgebacks who travel with us, so I had certain design limitations/criteria. Meet Emmett and Freya, aka the Notorious A$$-Clowns. I love them like they're my children, but they definitely have more size than brains.

So the criteria for my platform were as follows:

1. It could not be tall because I didn't want it to be more difficult for them to get in the back of the 4Runner and I wanted them to have plenty of room to be comfortable on long drives;
2. I wanted a flat sleeping platform for when I sleep in my rig;
3. I wanted tie downs so I could secure my gear in the back;
4. I wanted at least a little bit of additional storage space; and
5. I wanted it mounted in the rig without any permanent modifications to my 4Runner.

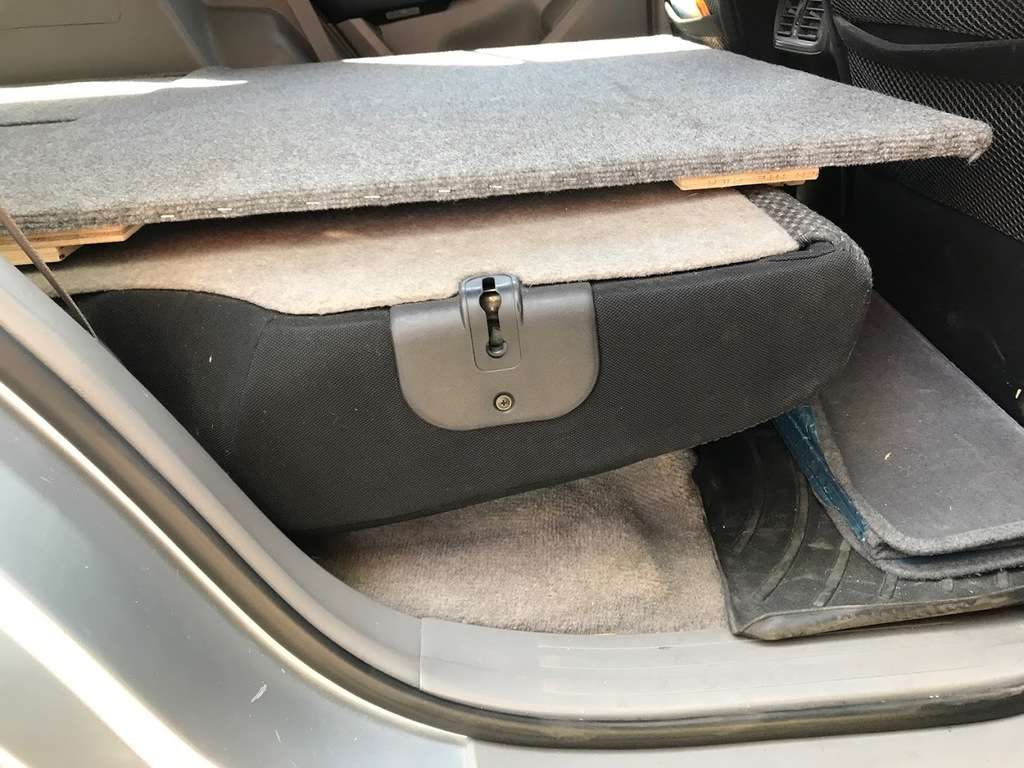
What I figured out is that if I remove the two rear seat bottoms (4 x 14 mm bolts) and then fold the rear seatbacks forward, there was a 2 1/2" step between the rear cargo area and the seat backs. I slept on that a few times and it was long enough for me (6'3"), but the step was noticeable and uncomfortable. My plan was to build a platform for the rear cargo area that was 2 1/2" tall that would bolt in place using the existing tie-down points. Using 2x2 framing would give me 2" tall drawers underneath as a bonus. I use the drawers to hold a full set of tools for working on the rig which are kept on board at all times.

There would be a second, forward half of the platform that would be removed during daily use, but easily installed for trips. I saw the platform [MENTION=129593]MTN4RNR[/MENTION] built for his 4Runner and it was very close to what I wanted, so thanks for the inspiration Max!!

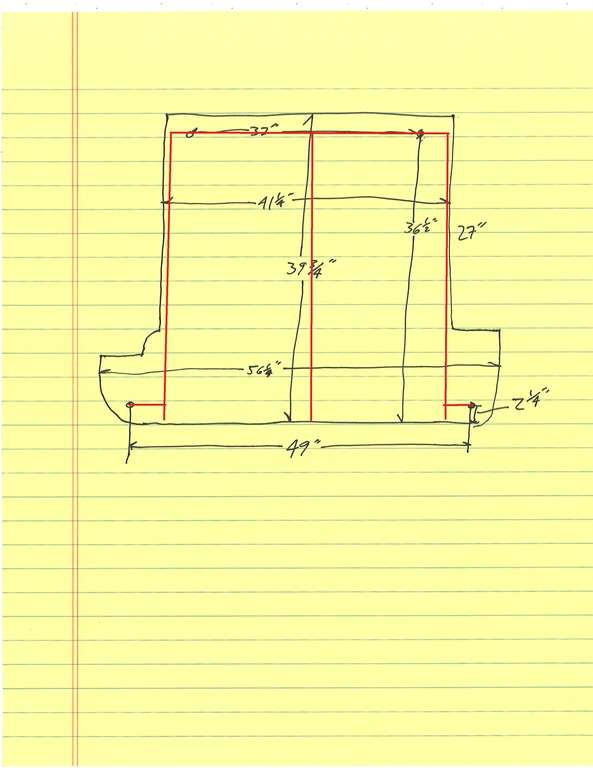
I started by building a frame out of 2x2 aluminum stock a friend had lying around. We carefully measured where the stock tie down points were and then designed the frame to fit. This was the rough diagram we came up with:

Yo7cL3.jpg

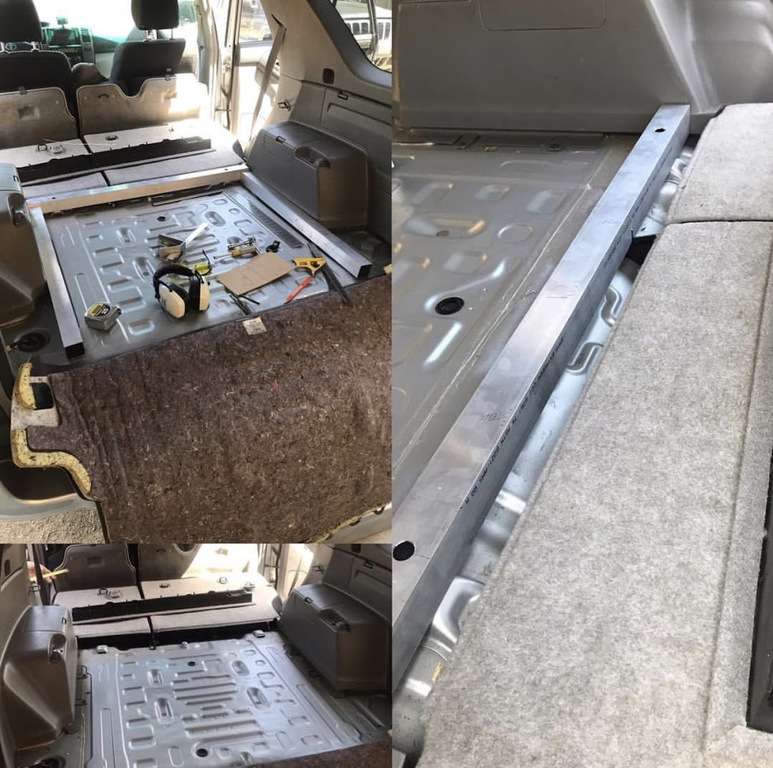
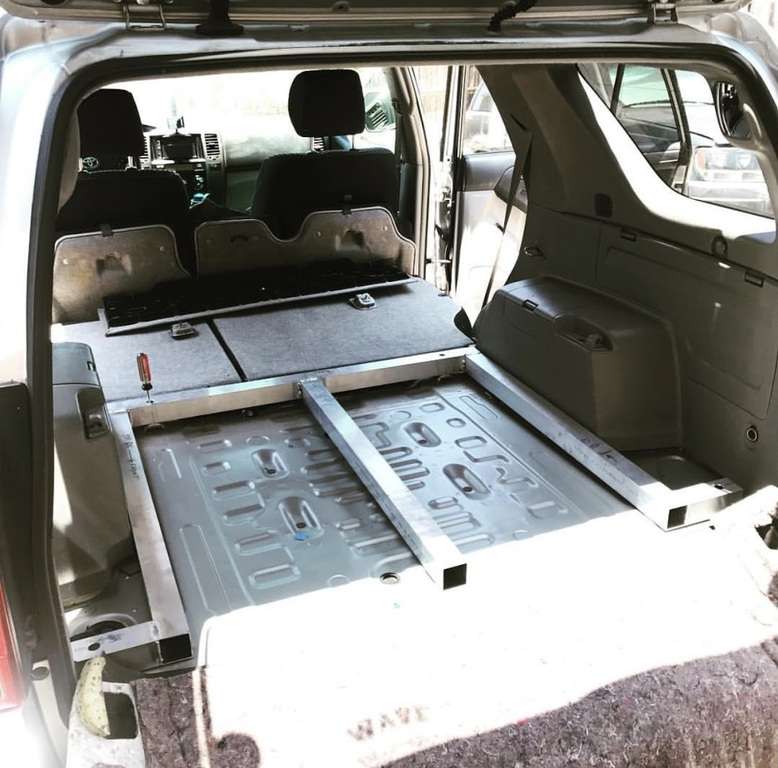
Then we built the frame:

t63ctU.jpg

oNTUJv.jpg

That was the first day.

I took the platform home with me and built the wood platform using high grade plywood the next day. If I recall correctly, the plywood is 3/8" thick.

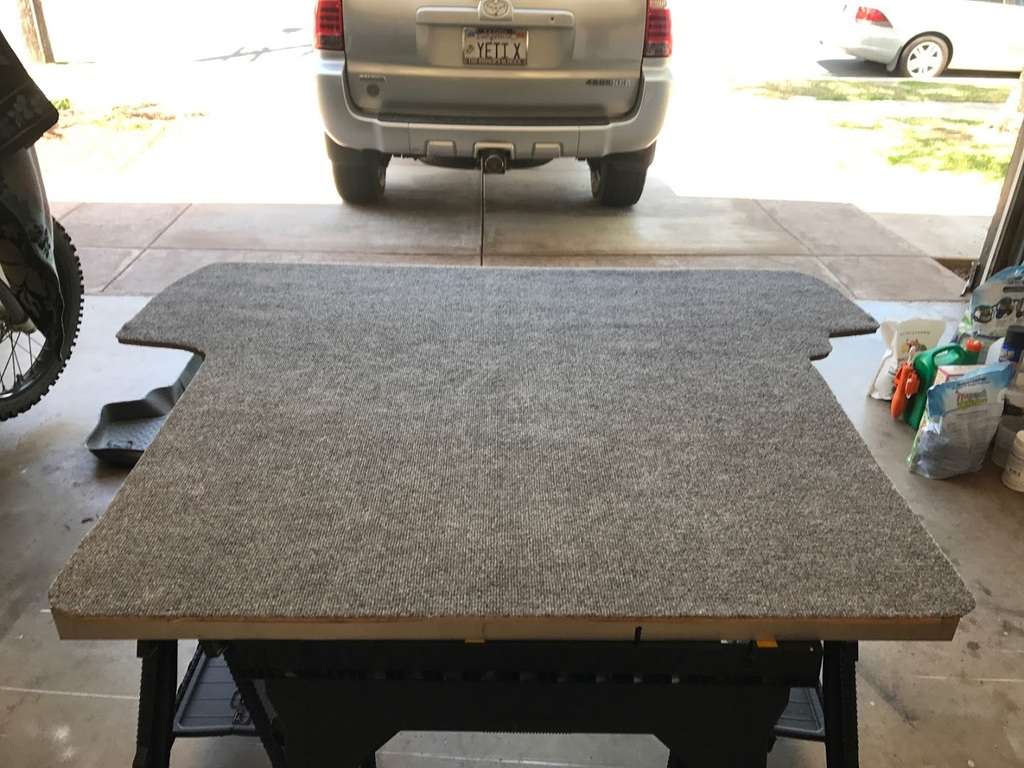
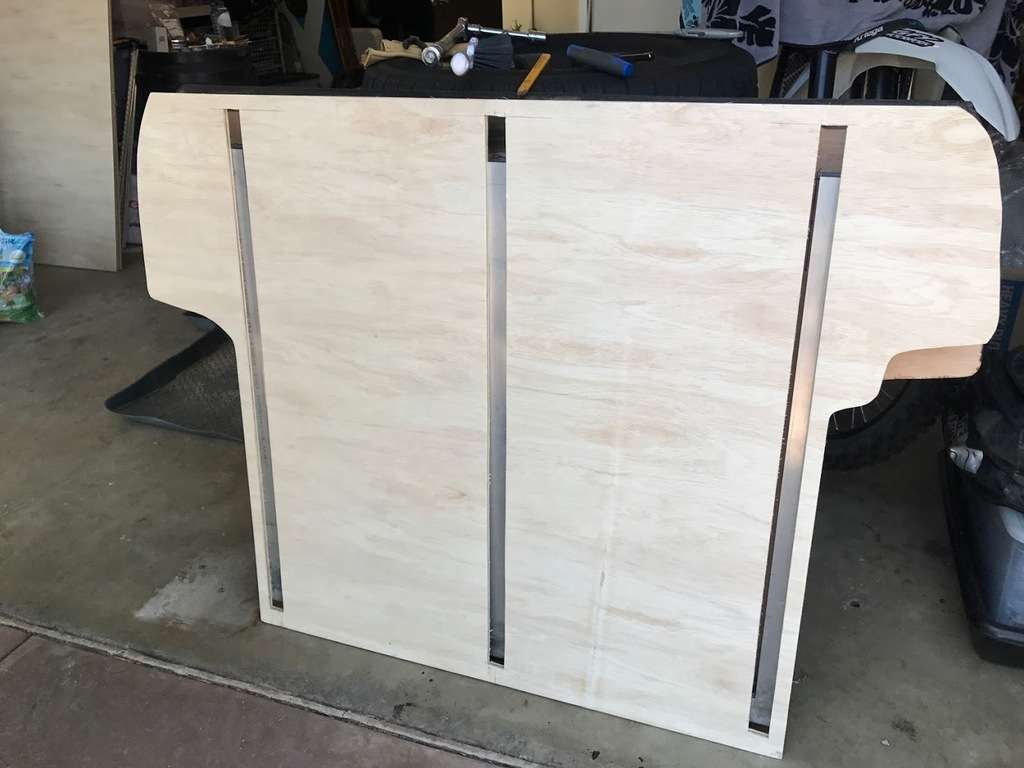
I cracked a nice cold beer and traced the pattern of my cargo liner onto the sheet of plywood and then cut it out using a jigsaw. (Of course I had to buy a new jigsaw since my brother had borrowed mine and I didn't want to wait until the following weekend to get it back from him. New tool, yay.) After test fitting it and doing a little trimming, I then cut a piece of outdoor carpeting I found at Home Depot to size. The carpet very closely matches the color of my interior, bonus. I then cut a second sheet of plywood to match the first. You'll see why in a second here.

EtyxfX.jpg

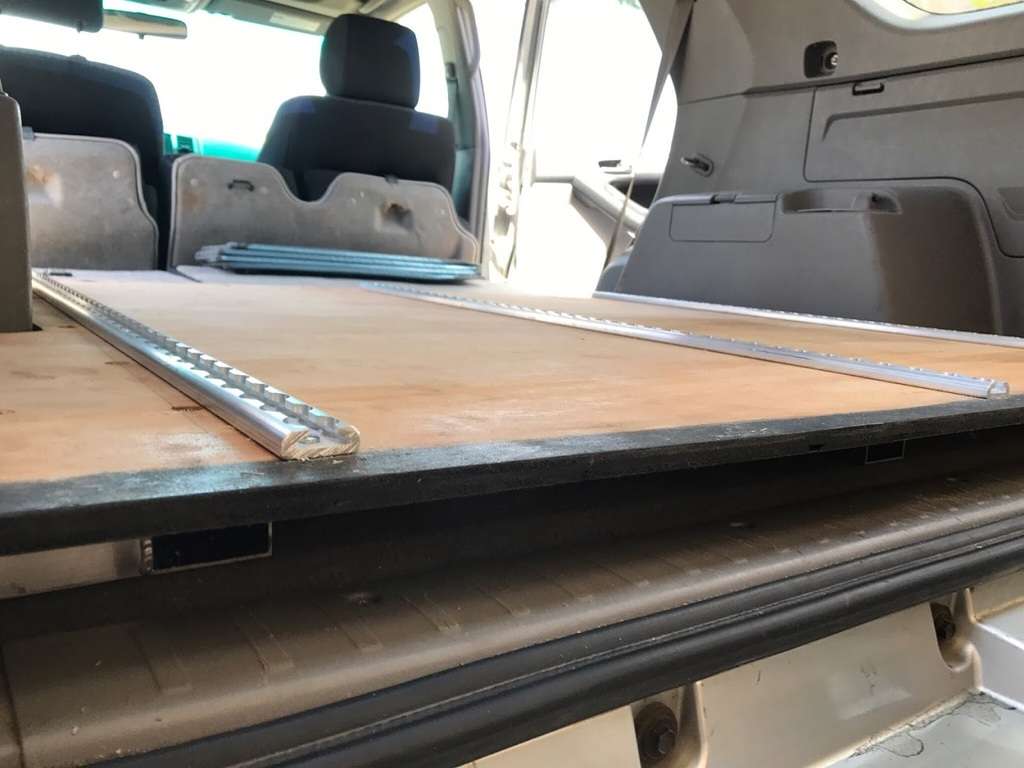
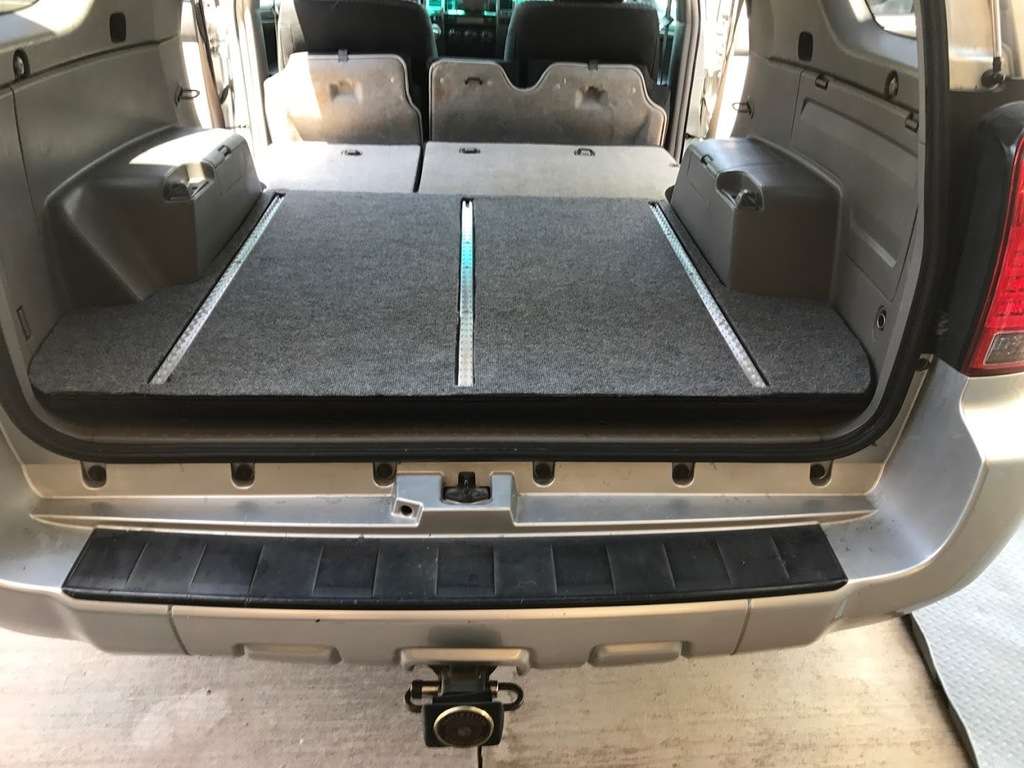
Then it was time to add the tie-down tracks. I used Mac's VersaTie tracks for this. I cut the tracks to length, and then drew around them on one of the sheets of plywood. I cut out where tracks were and then sandwiched the two pieces of plywood together using glue and short screws. Then I screwed the tracks in the holes I had cut out and glued the carpet on using spray upholstery adhesive. This made it so the tracks are flush and do not stand proud of the platform, making for a very comfortable sleeping deck.

b69KGZ.jpg


UZxTae.jpg

I then bolted the aluminum frame in place after removing the four factory tie down points. Max had suggested mounting the platform over the existing carpet because it had noise deadener in it. Without the carpet it would be very, very loud. Then I screwed the wood platform to the aluminum frame and the back half was done!

One IMPORTANT note: I was lucky I positioned the tie-down tracks over the aluminum frame. When I screwed the wood down, I also put screws through the tie-down tracks and into the aluminum frame. At first, I only screwed the tracks into the wood. When I tried to tie my stuff down with ratchet straps, the tracks pulled up from the wood. Not good!! With screws through the tracks and into the frame, everything is solid. Nice!

THE4uP.jpg

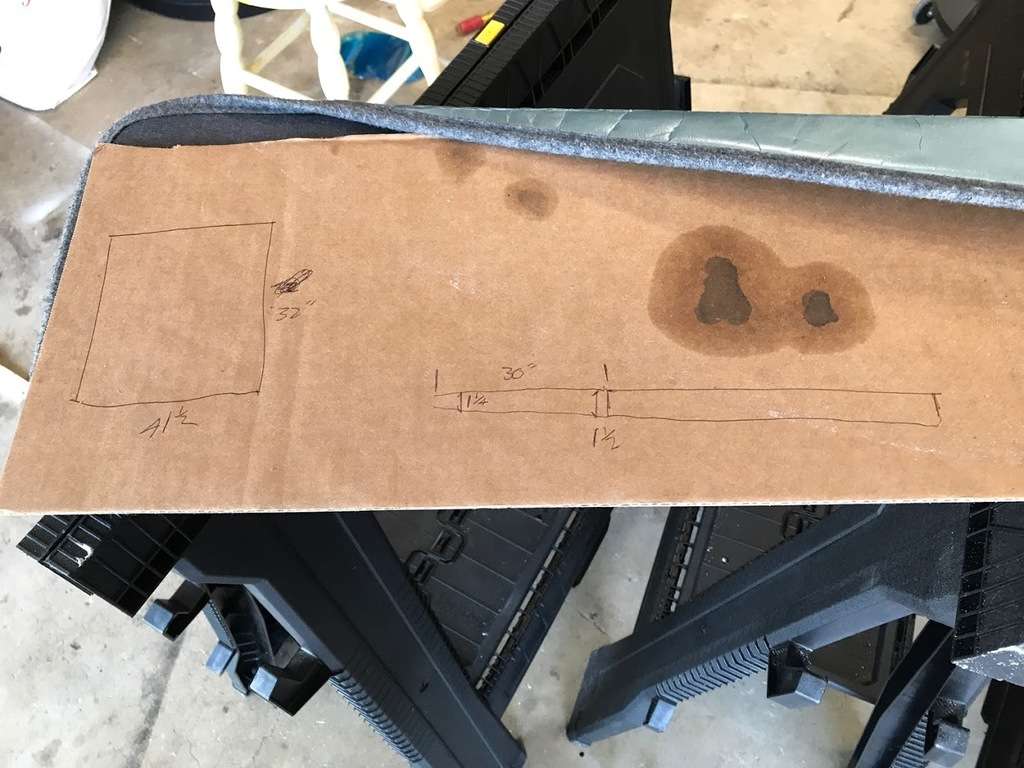
The next step was to build the removable front section. First, I drew a high-tech rendering using CAD/CAM technology. (Is that a thing?)

5iCkT7.jpg

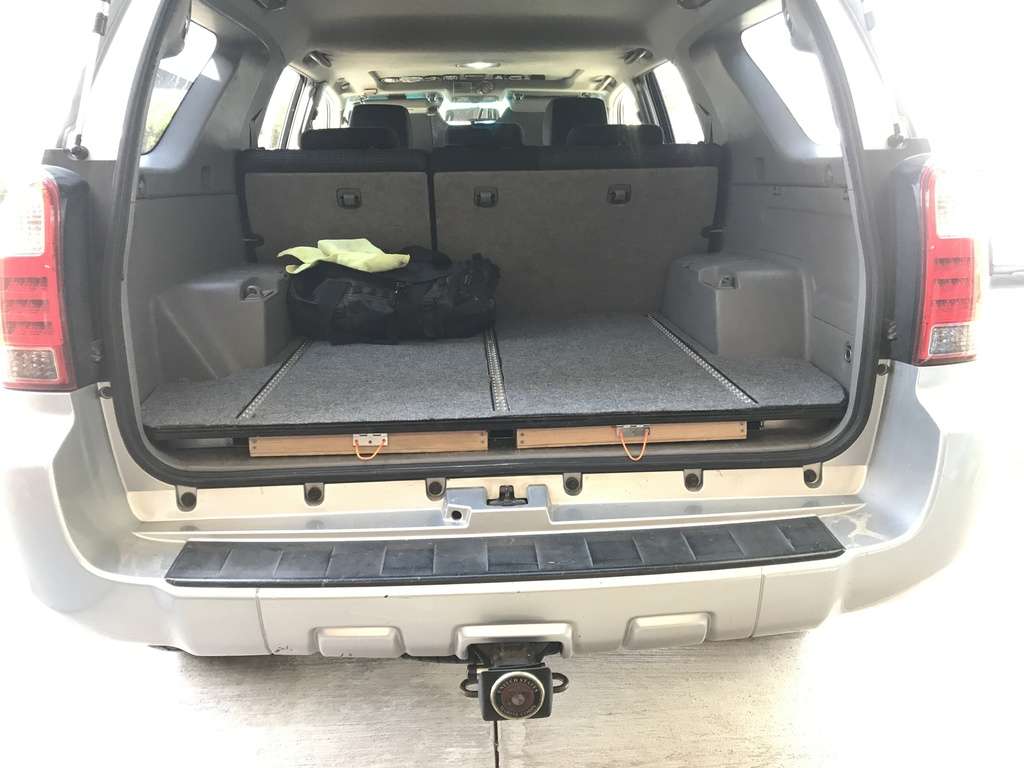
It's basically a rectangle of plywood with carpet glued on and plywood stringers screwed to the bottom to level it out. It is secured to the rear platorm using a couple of Simpson Strong-Tie Strap Ties. There is a flap of carpet that covers the "joint" between the two platforms and I just screwed that into the back half of the platform.

zNSwjJ.jpg


Y1oJcV.jpg

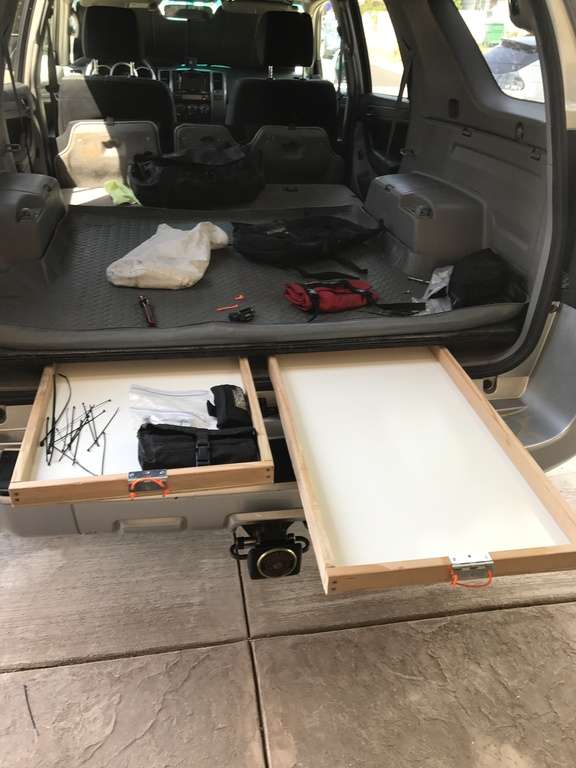
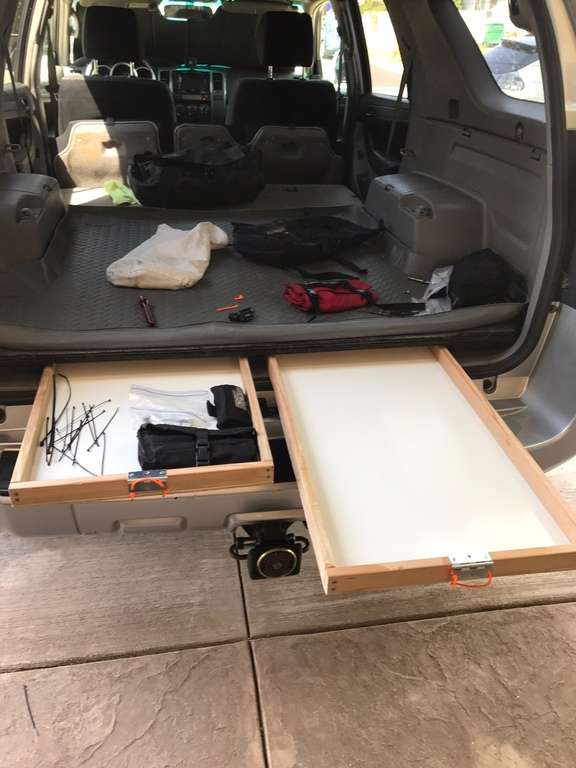
The last step was to build the 2" tall drawers. I used 1 x 2 framing strips for the frame and pressboard for the drawer bottoms. The nice part is that I found pressboard with a white side which makes things easier to see in the drawers. I used hinges with paracord strung through them as drawer pulls. Here are the drawers (please ignore the zipties strewn everywhere, their bag broke open):

JgFFtg.jpg


KPrvKI.jpg

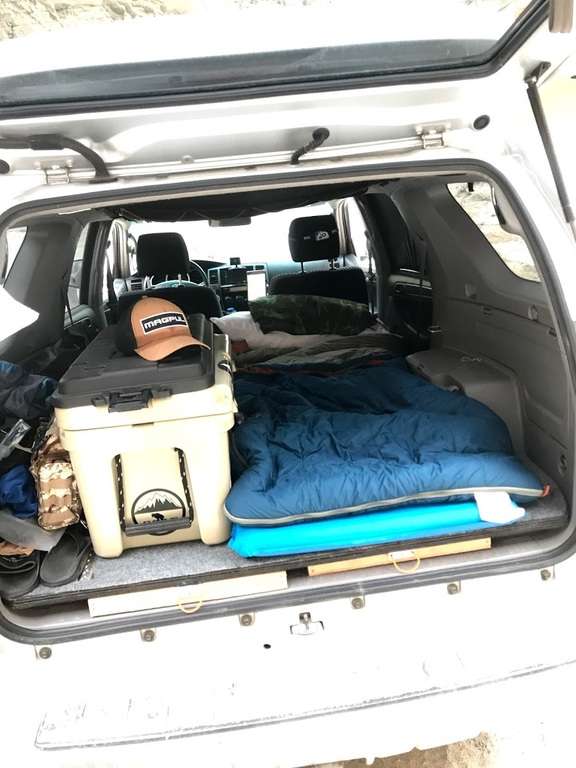
So, how does it work? Perfectly!! With the front section in place, I have a 6'4" long platform which is just long enough for me to stretch out and sleep comfortably. When not in use, I just put the cargo cover over the platform to protect it from the sand and water from my surfboards and wetsuits.

Here's a picture from a recent trip, all set up for sleeping at night:

YMHX7F.jpg

Next up, finishing out the drawers . . .​
 
Tool Drawers

One of my goals when I started the platform was to have a place to securely keep a set of tools which would live in the 4Runner full time. After I first made the drawers, I had the tools in an unrolled tool roll. Problem was, they kept coming out of the rolls and then they rattled around and drove me crazy. I also had trouble locating tools because I had three different rolls. Then I went to a friend's shop and saw his tools in cut-out foam and had an "AH-HA!!" moment.

Mostly empty drawers:

XqZhWm.jpg


This is what came in the box from Creative Safety Supply. The foam is a kit for a Craftsman tool chest, but it only needed minor trimming to fit my drawer. The kit has black thick foam, red thin foam, a knife, and Skittles!!

P21cmJ.jpg


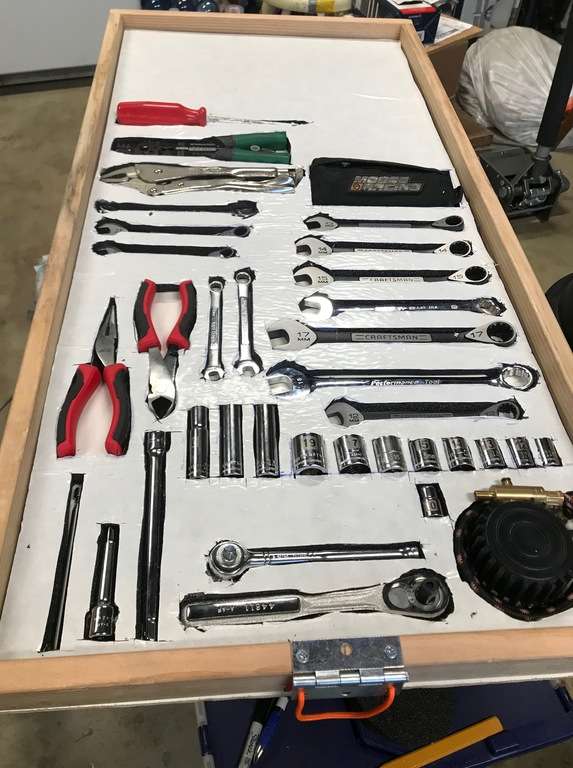
These are most of the tools that I want to fit in the drawer, but I'm still adding tools as I realize I need them:

HcrsqG.jpg


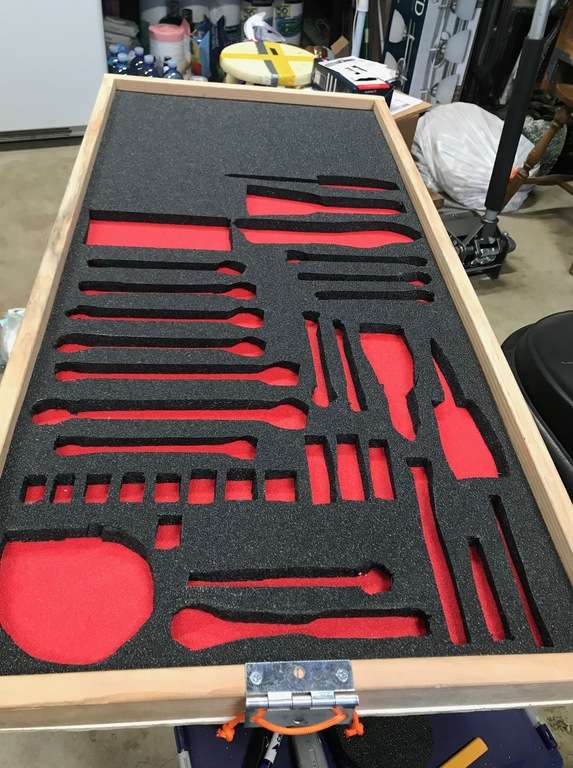
Since I couldn't figure out how to outline the tools on the black foam, I flipped it over and drew on the white sticker stuff on the back and cut through that way. It was not ideal, but it worked out:

5tbrzP.jpg


The cut out foam:

MmTOiD.jpg


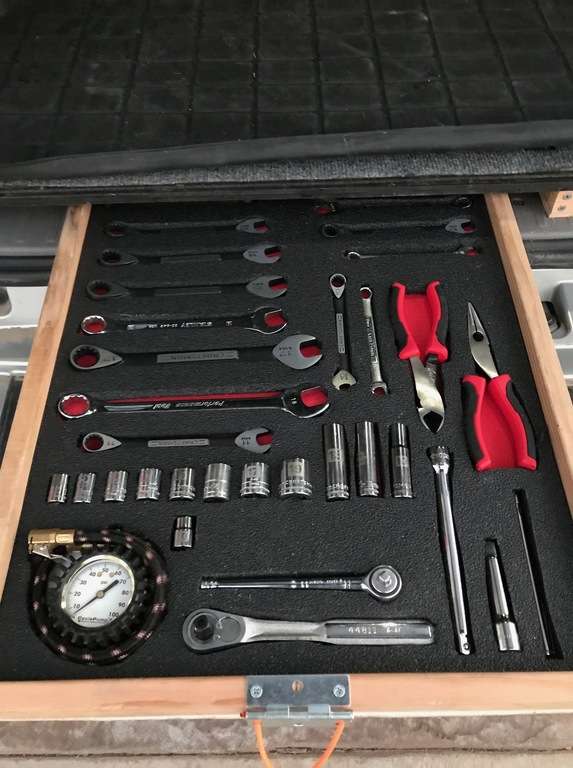
And with the tools in place. The drawer is only pulled halfway out and there's quite a bit more space to the back:

P7muP4.jpg


Overall, I'm very happy with how it turned out. It's not perfect like you see in the pretty pictures on the website, but my tools are secure and organized which makes my OCD happy.

I've been on several trips since doing this and the tools do not rattle and stay in place, even after a day of washboards in the desert. I'm still adding tools (reminder to add spark plug socket) and have a lot of space left over.

The passenger side drawer has the stock wheel tools (I put a fire extinguisher where those were), fuses, paracord, random carabiners, and a spare pair of flip-flops.
 
Baja Designs Fog Lights

[MENTION=87816]Baja Designs[/MENTION] makes amazing lights which I've been using for years on all of my motorcycles. Baja Designs makes kits for the 5th Gen 4Runner as well as a number of Tacoma and Tundra models, but no love for the 4th Gen. Or so I thought . . .

I saw a 4th Gen with Baja Designs fog lights on Instagram so I contacted Chris at Baja Designs to see how I could make this a thing on my 4Runner. Turns out Chris has a 4th Gen and he had done this as well. Since Baja Designs is in north San Diego County, I took a long lunch and headed up to meet with Chris and see how to do it. Turns out it's very simple...

Parts used
Baja Designs Part No. 447103 - Tundra/Tacoma Fog Light Kit
Baja Designs Squadron Pro Lights - more on this...
Drill and bits
Black spray paint
Painters tape
Cold beer. I used a Sculpin IPA.

First, let's discuss the lights themselves. The Squadron lights come in three levels of lumens, clear or amber lens, and with different lenses depending on how you want your light pattern. The Squadrons come in Racer, Pro, and Sport editions. The Racer has 4,300 lumens and a lens designed specifically to throw the light a long distance, the Pro puts out 4,900 lumens and is for close/middle/distance driving (depending on the lens), and the Sport puts out 2,260 lumens.

If you want to use your lights the same way you use the stock fog lights, i.e. you want to use them on the street and don't want to blind oncoming drivers, get the Sports. I wanted mine to be as bright as possible for off-road use only (or when there's no oncoming traffic) so I went with the Pro lights. Because I wanted more contrast in dusty or foggy conditions, I went with the amber lens and I chose the Driving/Combo lens which has two spot lights for distance and two driving lights which put the light out at a 42° pattern for cornering, for a nice blend of both near and distance lighting.

I do not have pictures of installing the mounting kit onto the lights, but it's very simple. You need to remove the bezel from the Squadron lights using a 4mm (I think) hex wrench and replace it with the mount kit bezel.

So let's get to the install . . .

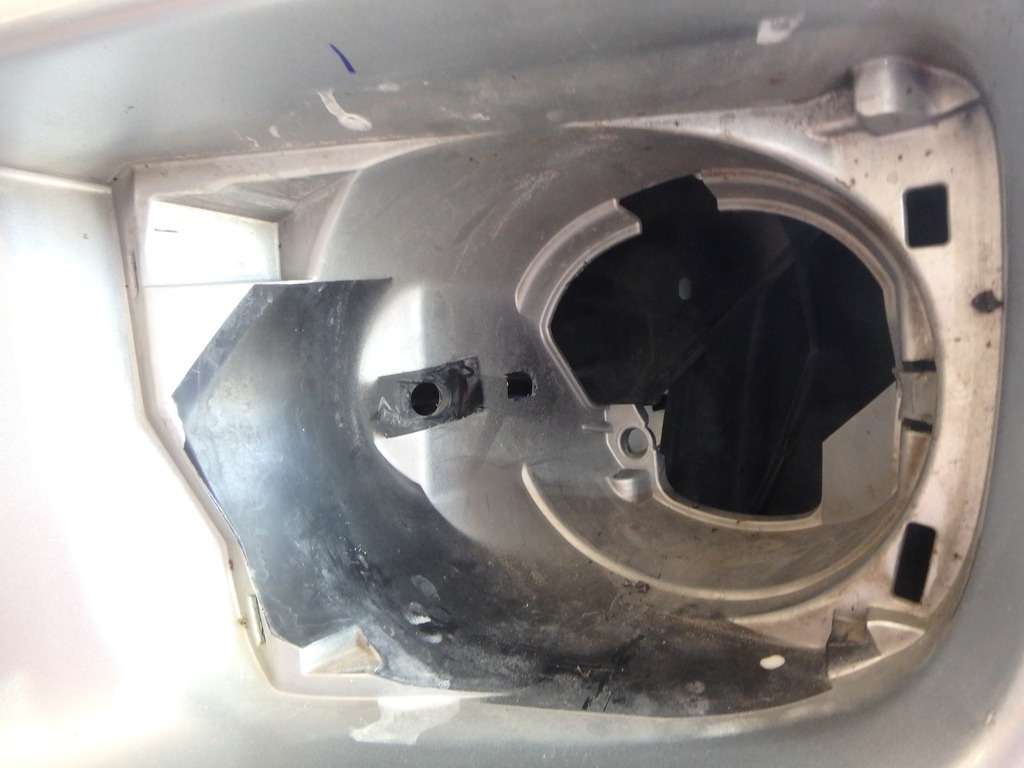
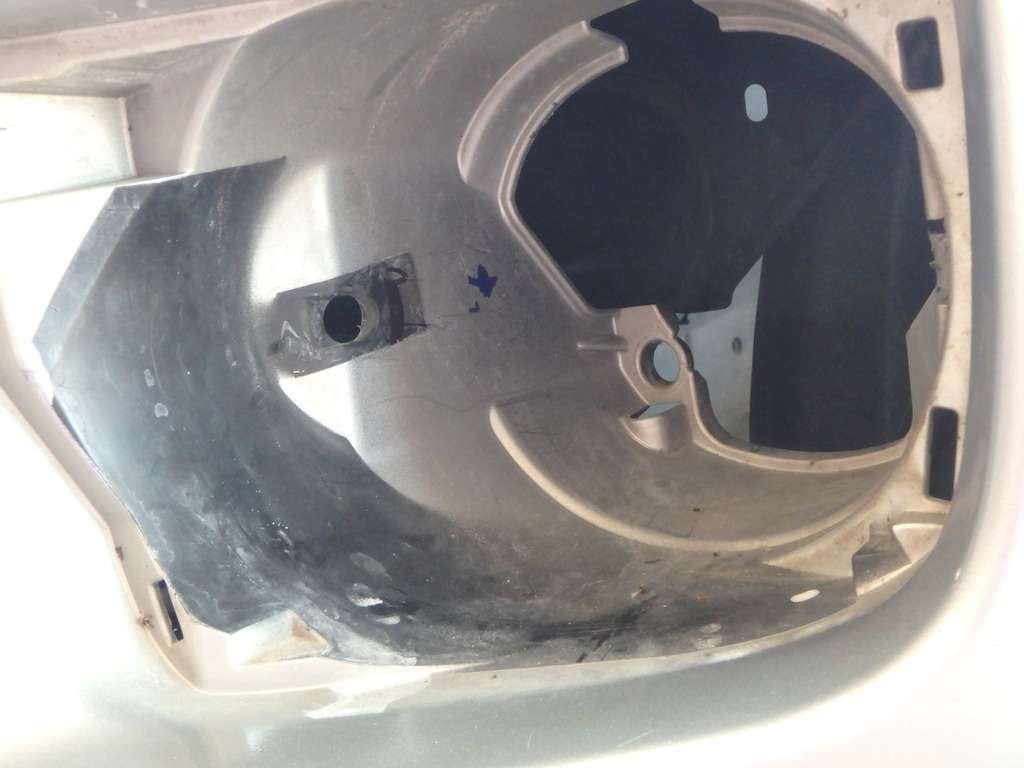
First, you need to remove the stock fog lights. I got under the rig and disconnected the fog lights from their harness. Then it's simple to remove the outer bezel which is held in place by a tab on each side. Once you release one tab, the bezel can just be pulled out from the front. There are two bolts, one on each side, which hold the fog light in place. Once removed, you're left with an empty fog light pocket which looks like this:

2vNNL9.jpg

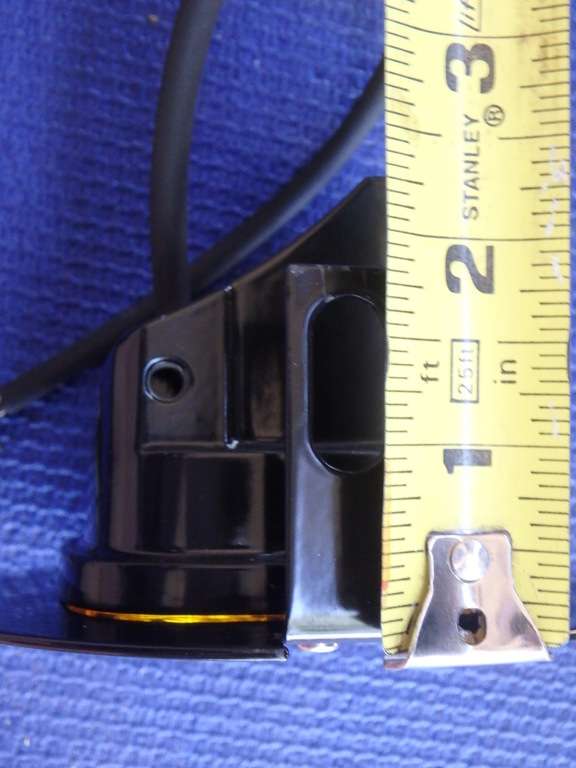
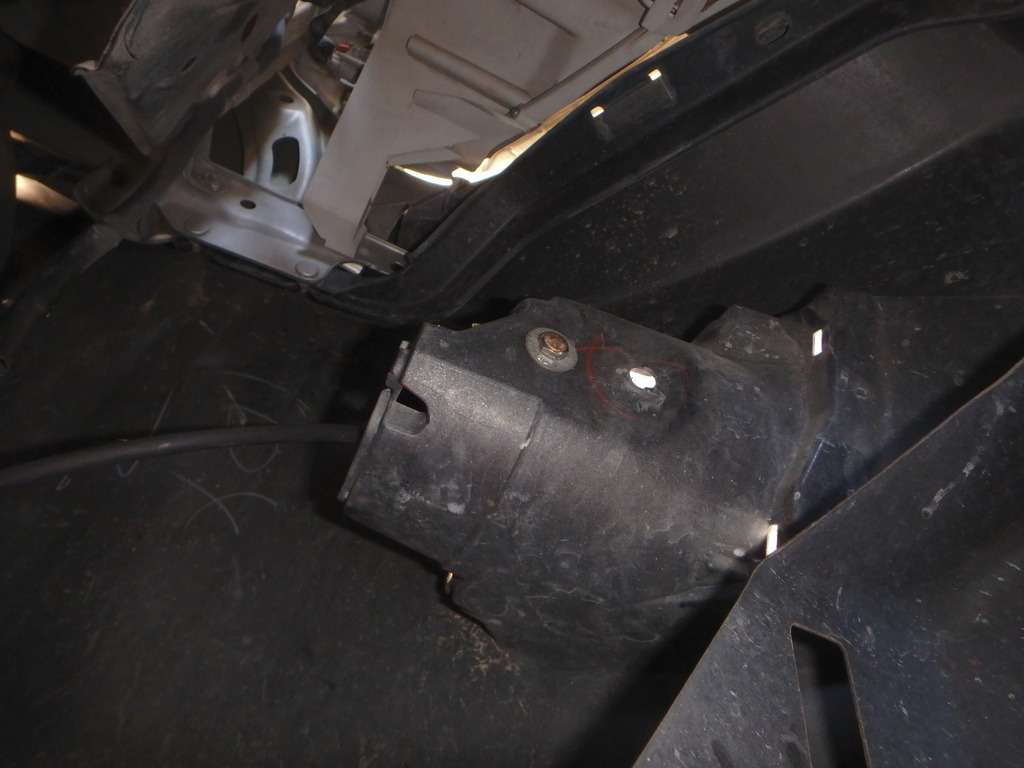
You can see one of the holes where the bolt goes that holds the stock light in place. If you bolted the lights in using the stock holes, the lights would be angled waaaaay out to the outside. To correct this, you need to drill a new hole back about 1 1/4". This is a shot of the Squadron Pro light with the mount kit installed, showing how far back to drill the hole.

MU6O8t.jpg

In the picture above, you can see where I made a mark in the pocket to drill the hole, and in this picture I have drilled the hole:

uGDoTm.jpg

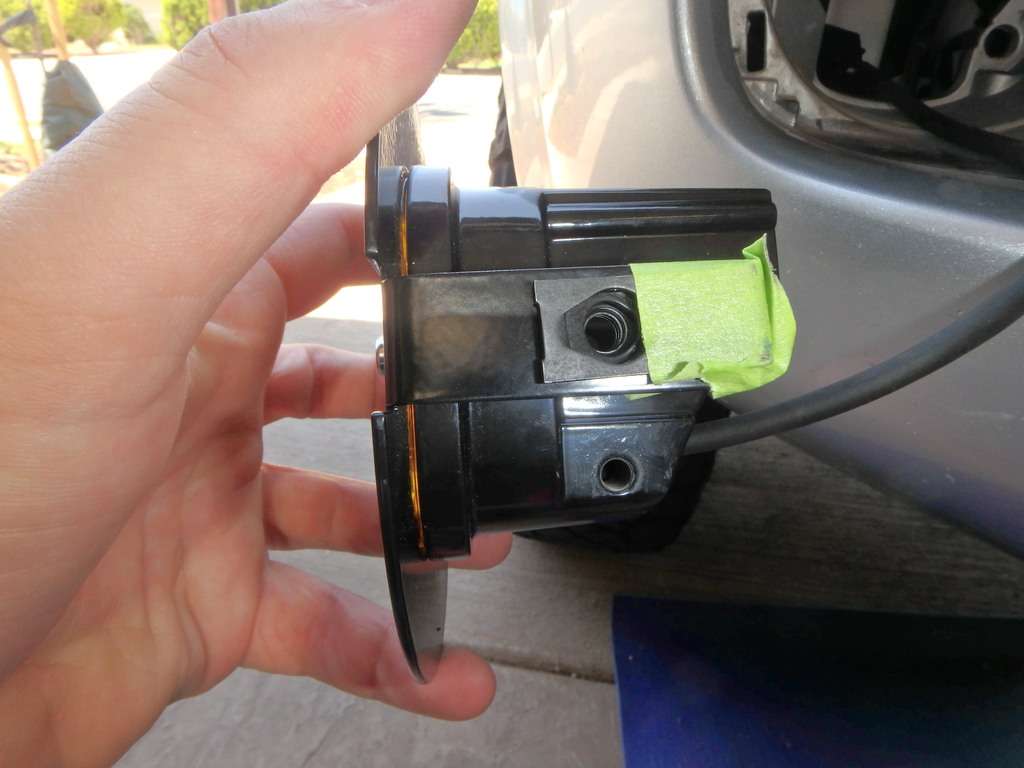
The mounting brackets have little clips that the bolts go into. I found they kept moving around and popping off when I stuck the lights in the pockets, so I used painters tape to hold the clips in place until I could put the bolts in:

Nv3lGA.jpg

From underneath, you can see how the lights bolt into the pocket and the old unused hole:

SJ4TrC.jpg

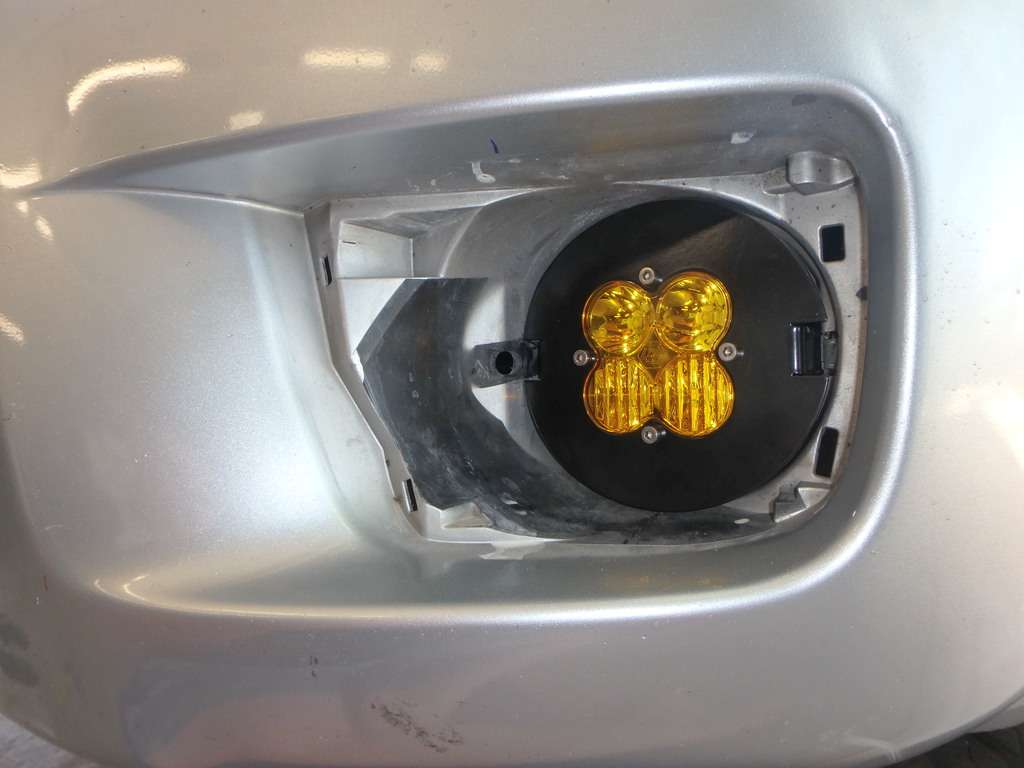
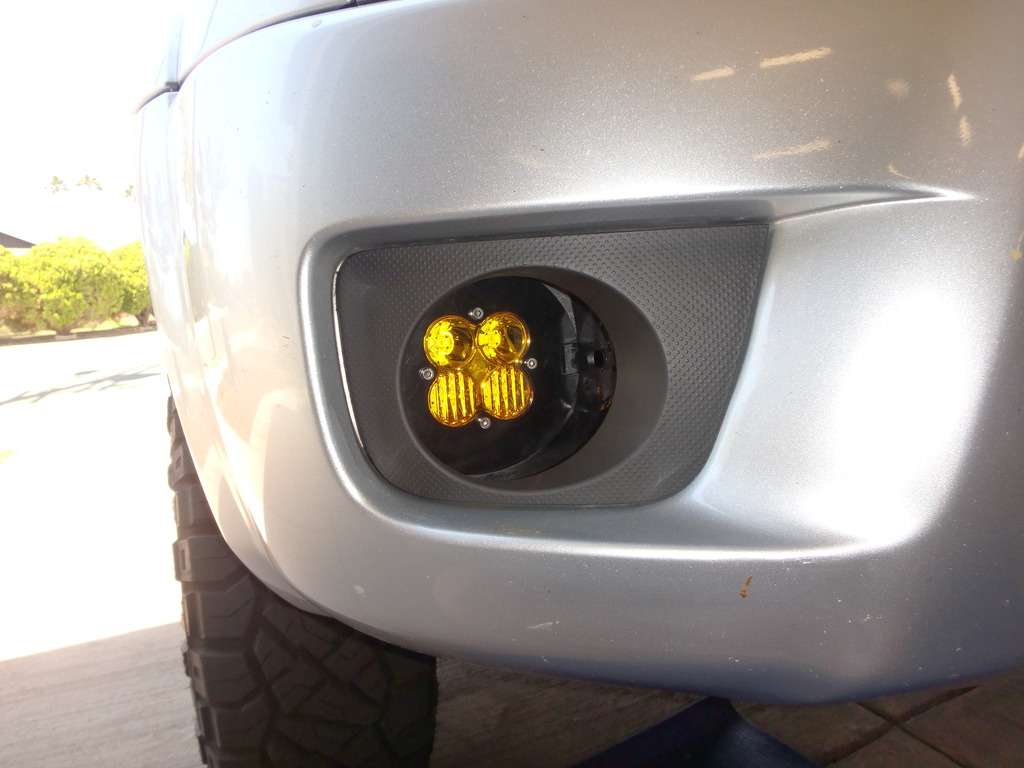
When the lights are installed, they look like this:

4lVDa7.jpg

However, when I put the outer bezel back in, I noticed that there was a lot of silver showing which was not acceptable:

ThMyEN.jpg

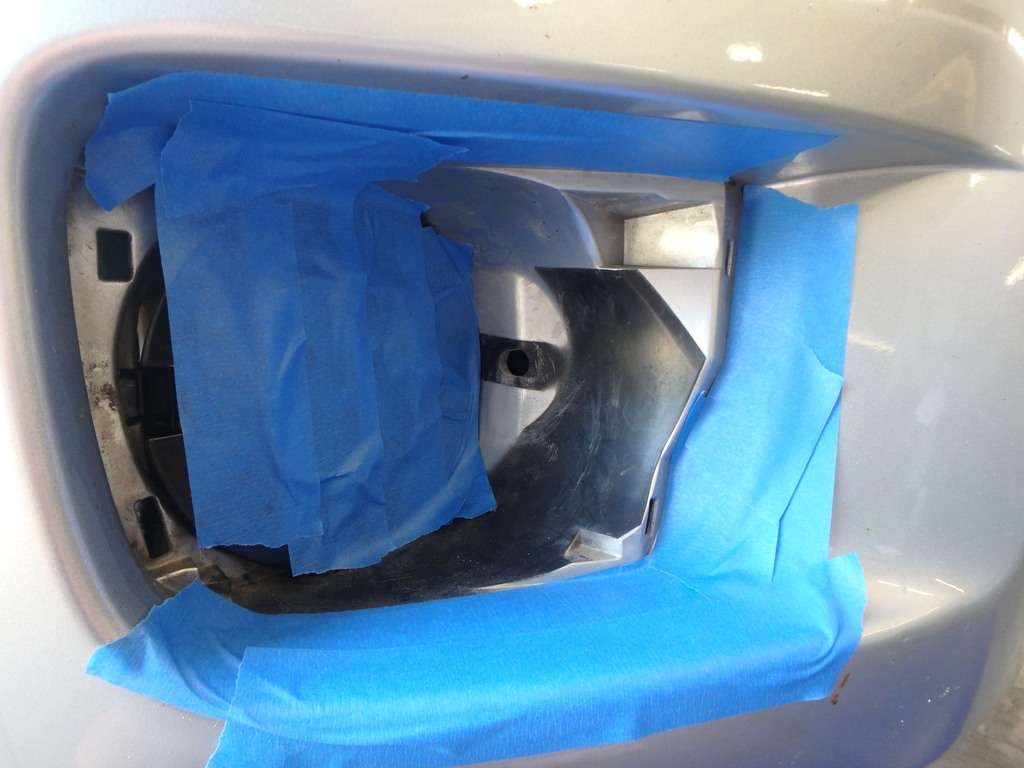
So I removed the outer bezel, masked everything off, and spray painted the pocket all black:

SdGfey.jpg

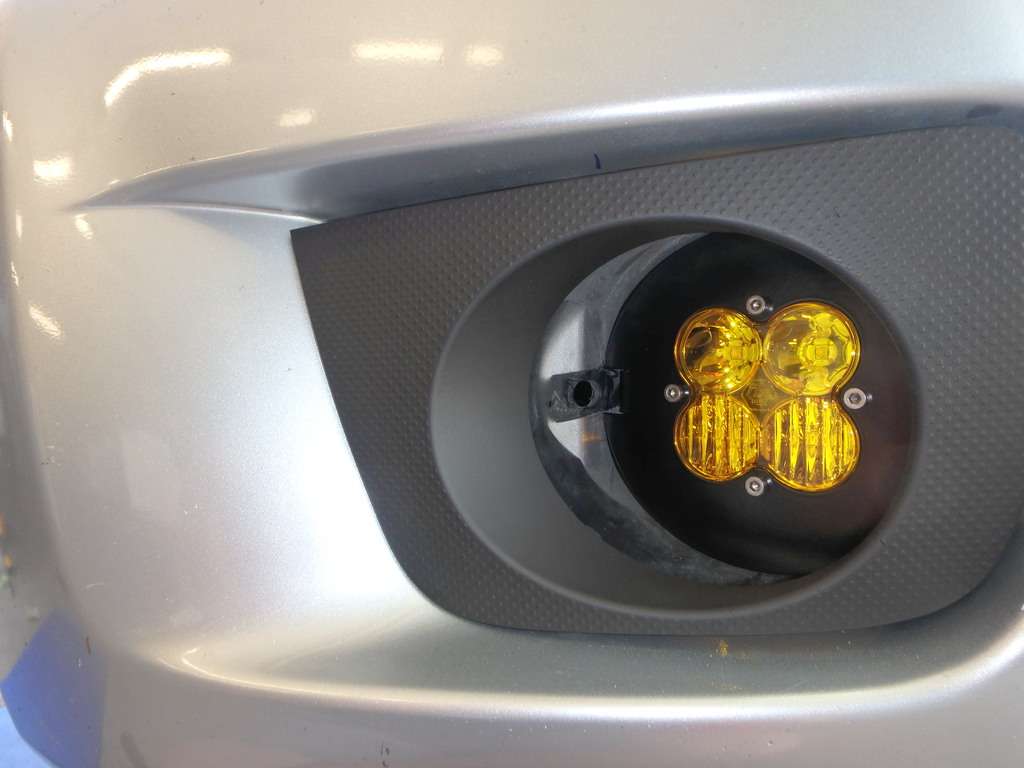
With the final result looking like this:

aSxo43.jpg

(The flash makes it look uneven, but it looks great in person.)

The mounting kit comes complete with an adapter which allows the Baja Designs lights to be hooked up to the Toyota fog light harness, which is what I did since I wanted to control them from the stock fog light switch on the turn signal stalk. I had to reverse the polarity of the wires which was no big deal, I just pressed the little tabs to release the wires from the Deutsch connectors and reversed them. All done:

aFlHCv.jpg

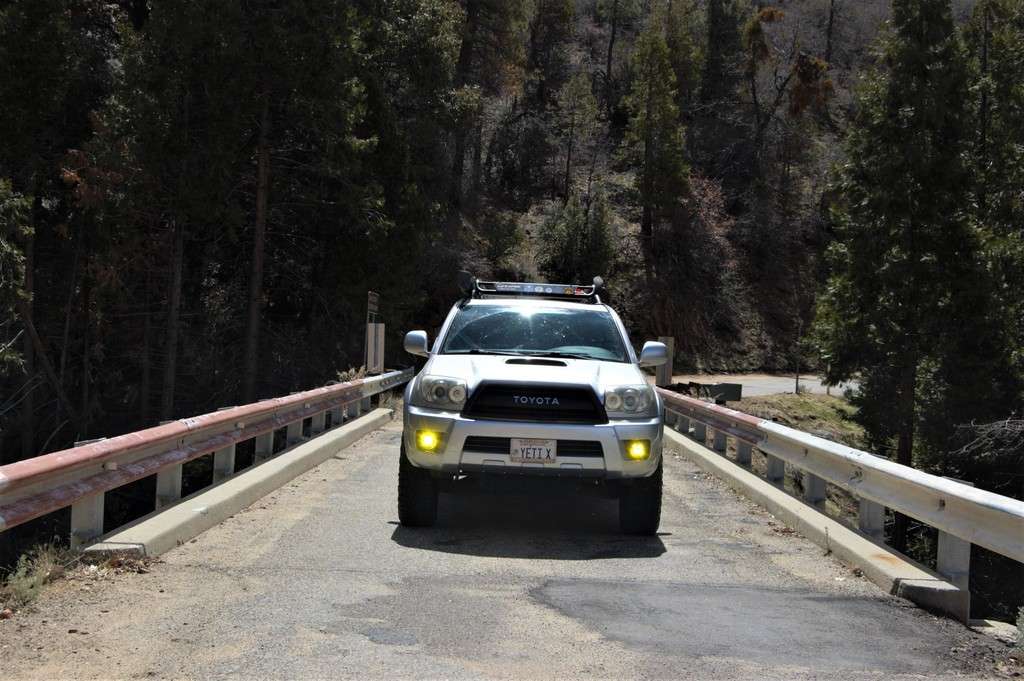
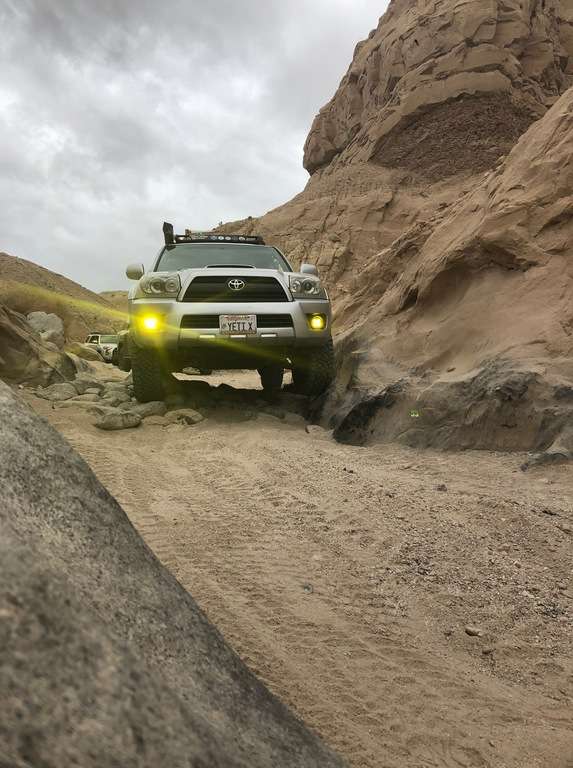
The final step for me was to do the "Independent Fog Light Modification" so that I can turn the fog lights on anytime the key is on. This way I can turn on just the fog lights, and the fogs stay on when the high-beams come on. Here they are turned on without the headlights being on which is great for visibility off road:

bTTVnr.jpg


mKeQMQ.jpg

I could not be happier with the results. The lights are amazingly bright and turn night into day. The amber lens provides high contrast and the combo lens is really nice in twisty tight trails.

Please let me know if you have any questions!

 
TRD Pro Wheels, Ridge Grappler Tires, and Rola Roof Rack

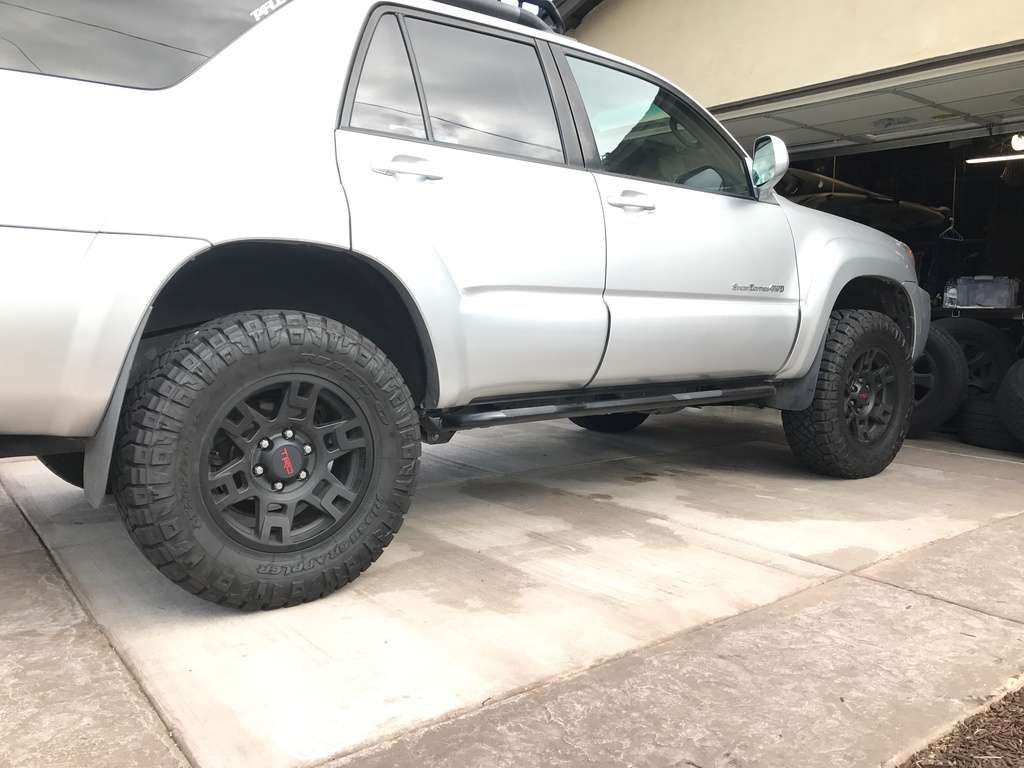
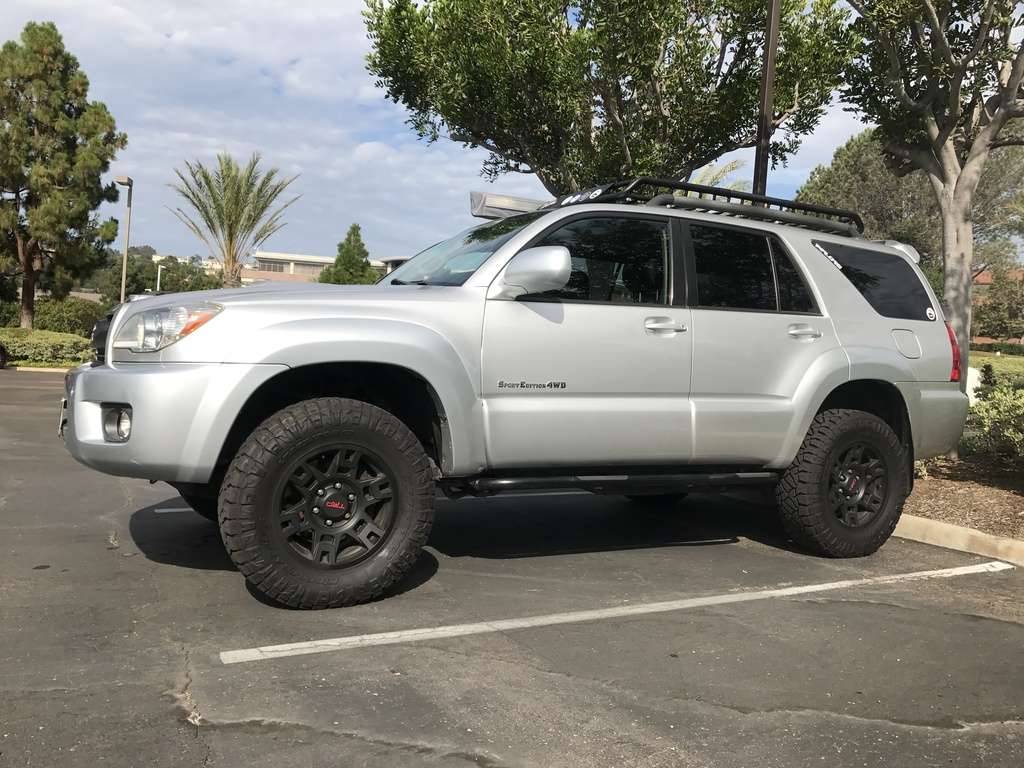
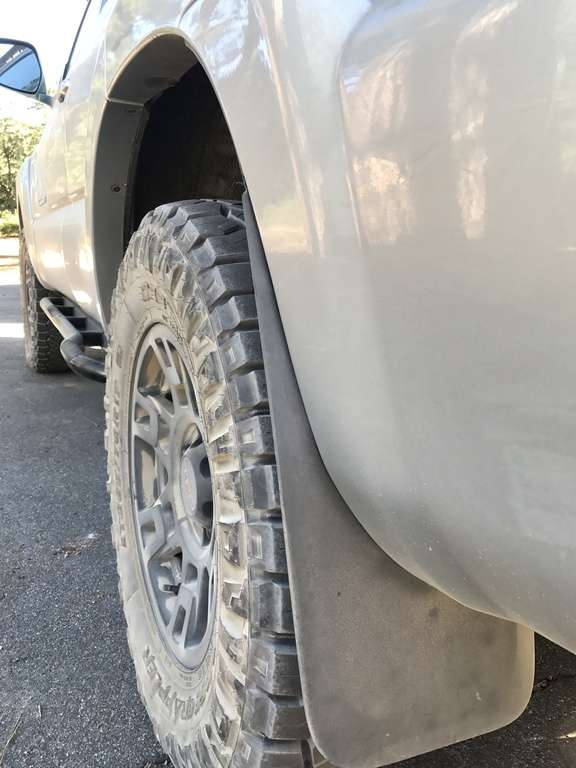
Before my next trip to test out the sleeping platform, I scored big-time in the Classifieds here on T4R. I just happened to log on and check the classifieds right after a guy in Orange County posted that he was selling his TRD Pro wheels with Nitto Ridge Grappler tires for $900!! I immediately replied and PM'd him and made arrangements to pick them up the next day. I think it was meant to be since I had a meeting with a client about 5 miles from where the guy worked. The best part was that as I was swapping the new wheels and tires onto my 4Runner, my neighbor who has a Sequoia came over and asked if I'd sell him my old wheels and tires since he had 22" pimp wheels and hated them. I sold my Sport Edition wheels with tires to him for $500, so in the end I was only out $400 for TRD Pro wheels with near new tires!!
We all know what TRD Pro wheels look like, but #becauseTRD:

Uwxx2K.jpg


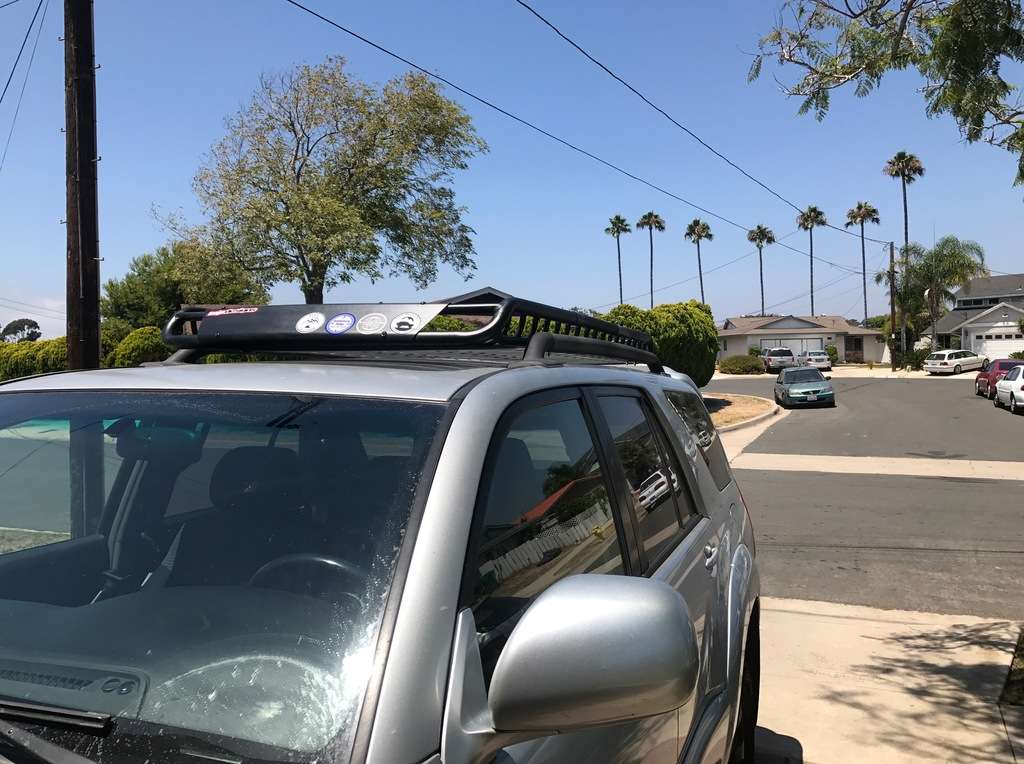
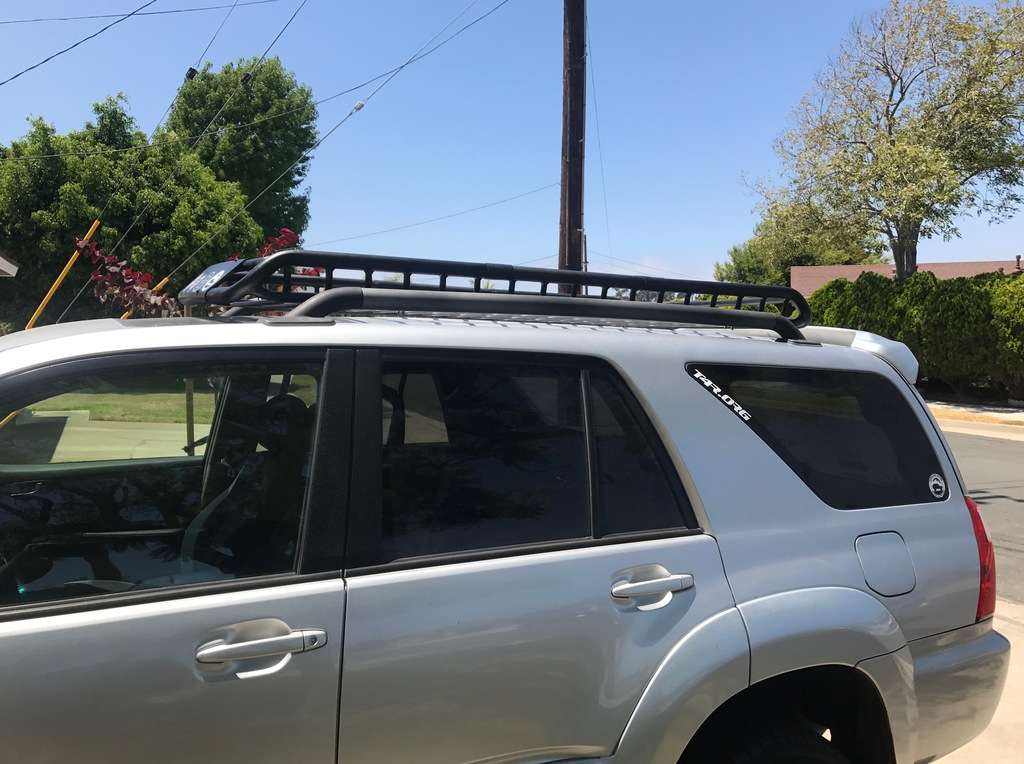
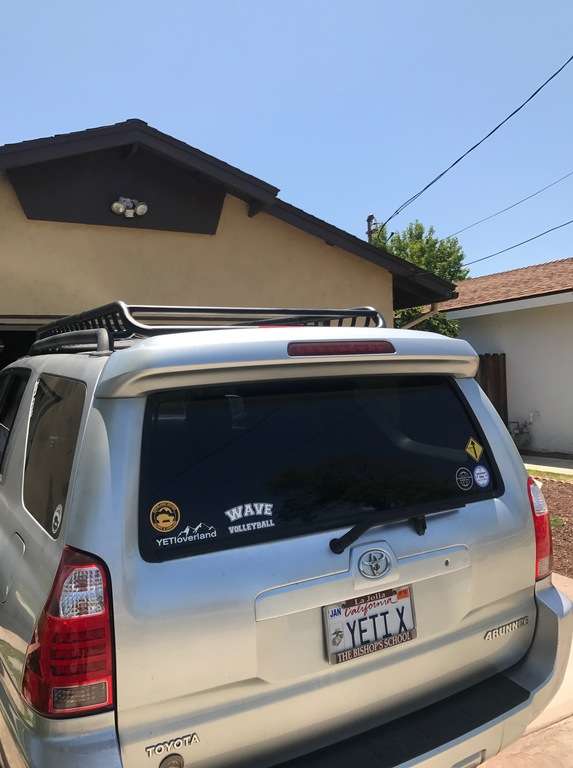
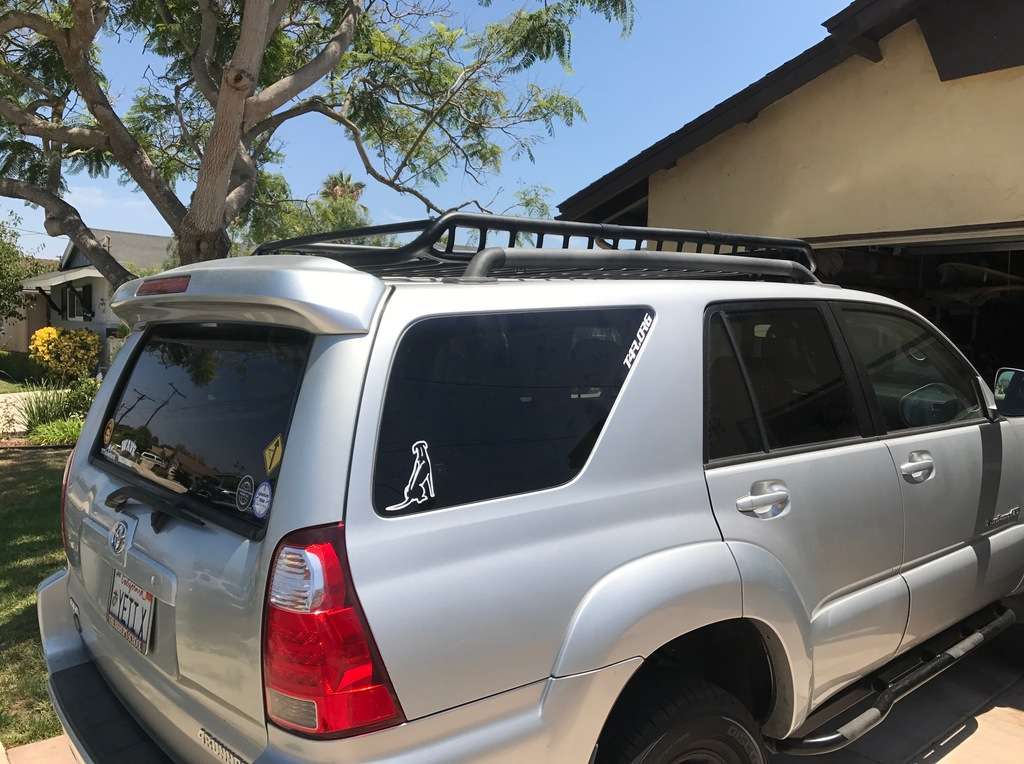
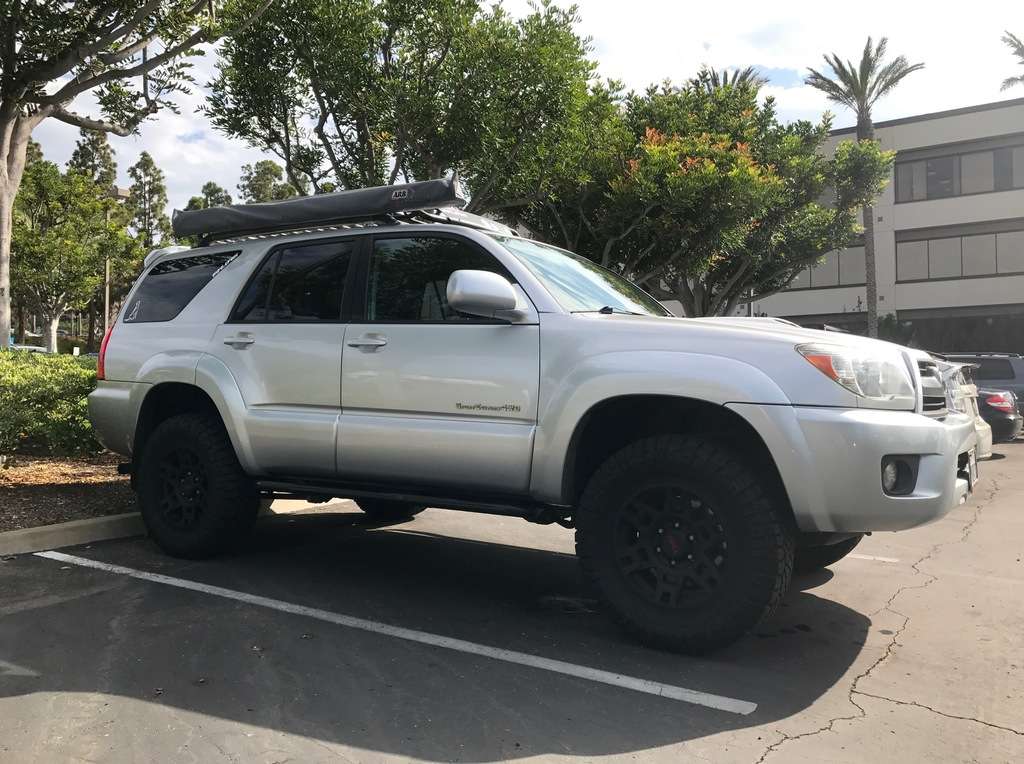
It was also a good weekend because I got to install my Rola Vortex roof rack. I got the rack plus the extension because I wanted a full length rack. Also, from my research here, I decided to get the Armor Tech Off Road low-profile mounting brackets. (LINK) I'm really pleased with how it looks and the rack has been given plenty of use in my trips. Having a roof rack is great for carrying stuff you don't want inside your rig like firewood, muddy MaxTrax, and the boots I was wearing when I stepped in a pile of dog $h!t.

I really like the low profile mounts because they keep the rack lower which makes it easier to load and, from my experience, greatly reduced the wind noise. The only downside to adding the Rola was that I could not use the Four Treks mounts for my awning since they interfered with the Rola rack. Fortunately, Four Treks makes awning mounts that fit on a Rola rack which uses, I believe, 1" tubing.

So here's the rack before I mounted the awning back up:

sdGqR4.jpg


QyuFca.jpg


fnnCMs.jpg


On this side you can also see my totally cool Ridgeback sticker:

PdcbDR.jpg


And here it is with both the TRD Pro wheels and the Rola with the awning mounted up:

Jgup6K.jpg


DaBrWJ.jpg


Next up, time to go camping to try things out . . .
 
Damn that is a steal... I’ve been thinking about getting trd pro wheels or even the fx pro version, but man you scored
 
Damn that is a steal... I’ve been thinking about getting trd pro wheels or even the fx pro version, but man you scored
I really did. What's funny is my wife was NOT happy about me getting new wheels without even chatting with her first. So I showed her the thread where 5 or 6 people posted immediately after me saying if it fell through they'd take 'em. She was still a little "meh" until I sold the SE wheels and used some of the money to take us out for a nice dinner. Then she was good with it. :becky:
 
Big Bear 8/19/17

Well, with the sleeping platform, new wheels, roof rack, Baja Designs lights, etc., it was time for another trip. I didn't have a ton of time, so Devin, Miles and I planned an overnighter to Big Bear. A few friends who don't have 4WD vehicles joined us at the campground and went for rides with us.

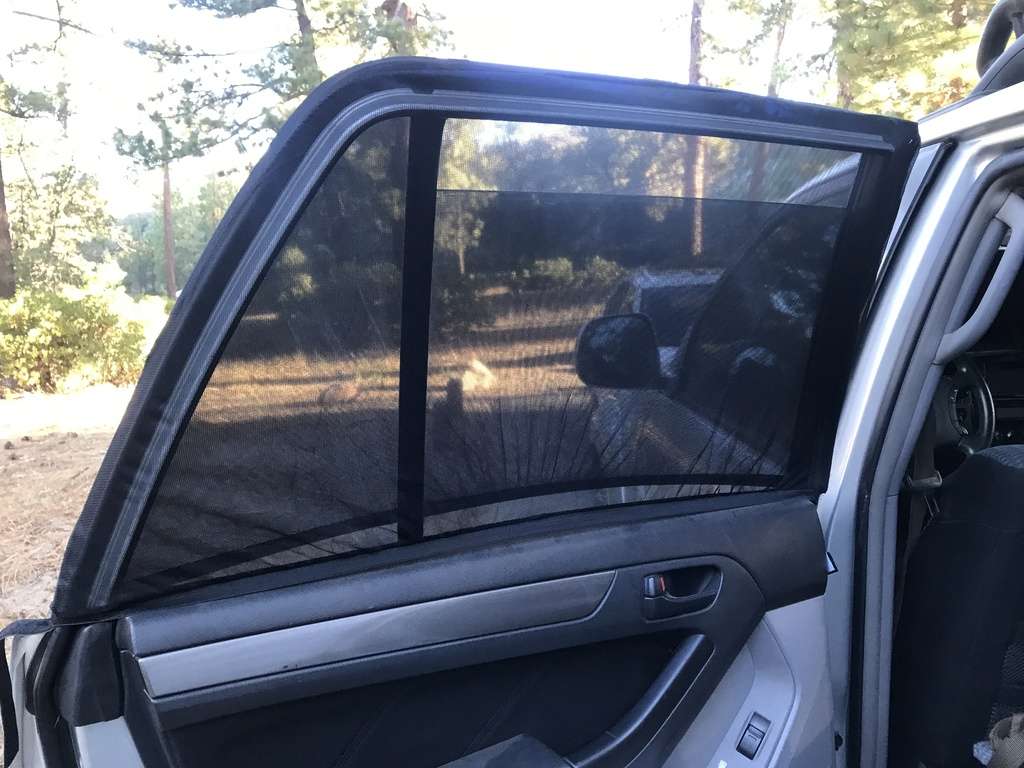
One of the cool things I got for this trip was that I bought a set of mesh screens that slip over the back windows so I can roll the windows down when I'm sleeping and the damn mosquitoes can't get to me. They work great, are simple to install, and give me a nice cross-breeze when I'm sleeping. Amazon LINK

DH9RpA.jpg

I also got a hammock from Overland Labs. Great company and super comfortable hammock.

VYlbHF.jpg

I got to test out the cargo/sleeping platform too and I'm happy to report I got it right. This was just an overnight trip and we planned to eat in town, so I didn't bring much with me, but you get the idea:

RjMOHE.jpg

Oh, and we did actually go out and run a few trails too:

kBy6fg.jpg


weWrpb.jpg


CodcMv.jpg


0eRUSd.jpg

The TRD Pro wheels look good with some dust on them don't they?

D2zbcA.jpg

It was a fun break from the routine and I was glad my platform worked as intended.

***Next up - front recovery points and new "pin-striping" . . .​
 

Members online

Forum statistics

Threads
278,308
Messages
3,554,057
Members
248,016
Latest member
Advally Service

Trending content

Back
Top