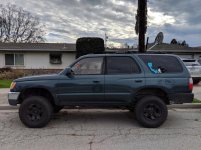
3rd Gen T4R DIY Maintenance, Repair and Modification Videos

ECU Replacement

If you ever needed to replace your ECU (Engine Control Unit), this video shows you how to get it done.

<iframe width="560" height="315" src="https://www.youtube.com/embed/5-t69mMpazg" frameborder="0" allow="accelerometer; autoplay; encrypted-media; gyroscope; picture-in-picture" allowfullscreen></iframe>
 
just watched the "Sway Bar End Link Quick Disconnects". Wouldn't one just need to disco one side? That's what I had done before at least on other rides to quickly and easily liberate the suspension. Also, by keeping one end attached, I believe there won't be a need to secure the sway bar from flopping-around (zip ties).

As always, good stuff Tim and Sean!
 
I have to ask where you procured that large can of Tri-Flow?

Tim being a bike guy, I'm guessing he gets them from a local shop maybe. I recall seeing those in such places before at least...

Having had rod ends on other builds, keeping dirt out of the Heims is paramount to their proper functioning and longevity. Those were on street performance vehicles. For something like this (off-road), if there is anything that would have me reluctant, that would be it... While I might get these, I'd more inclined to get such an offering that was bushed.
 
Hood Lift Strut Mod

In this video, we show you a modification you can do to your 3rd Gen Toyota 4runner. Normally when you lift your hood, you have to use the OEM prop rod to hold the hood up for you. This modification adds a couple gas struts under the hood to do the lifting for you and it also lifts the hood higher than normal so you'll have an easier time checking your fluid levels or working on your engine.

<iframe width="560" height="315" src="https://www.youtube.com/embed/3G_fc5XSgVw" frameborder="0" allow="accelerometer; autoplay; encrypted-media; gyroscope; picture-in-picture" allowfullscreen></iframe>
 
I decided to replace my stock springs on my 2000 4runner 4x4 with 99 springs. I gained a huge 1" lift.

Nice video [MENTION=120071]mtbtim[/MENTION]! I too am looking for that massive 1" lift. It looks like you did this work 2 years ago and I'm wondering if you are still running those '99 "talls", and if so have you taken another measurement lately to see how if they have sagged any since?
 
Nice video [MENTION=120071]mtbtim[/MENTION]! I too am looking for that massive 1" lift. It looks like you did this work 2 years ago and I'm wondering if you are still running those '99 "talls", and if so have you taken another measurement lately to see how if they have sagged any since?


Tim has since removed these because of the weight he adds to his trunk area causing his rear end to drop quite a bit. I have adopted these 99’ Tall’s and even after these being used, my 98’ gained 1” from stock coils.
 
Well after 3 years Timmy finally let me have some airtime. The 96-98’ center consoles leave something to be desired, so we decided to film this cup holder mod/center console mod for your viewing pleasure. A lot of people have had to drill new holes in their body and cut up their center console but with the right parts, this can be plug n’ play.

YouTube
 
4Lo and Your Automatic Transmission

For those of you with an automatic transmission, knowing when to use 4Lo can be the difference of a happy wheeling experience and one where you potentially caused irreparable damage to your trans because you overheated it.

Check out this video to learn more.

<iframe width="560" height="315" src="https://www.youtube.com/embed/wqxeZvljYGc" frameborder="0" allow="accelerometer; autoplay; encrypted-media; gyroscope; picture-in-picture" allowfullscreen></iframe>
 
Tim, your videos are great! With the help of them I have just completed the following repairs to my 3rd Gen:

Front Suspension
Replaced upper and lower ball joints
Replaced the upper and lower control arm bushings
Replaced the steering rack and sway bar bushings
Replaced the CV axles with remans
Replaced the front differential oil seals
Installed new Bilstein 5100 shocks, giving the truck a ~2" lift

Rear Suspension
Replace the upper and lower control arm bushings
Installed Bilstein 5100 shocks and Old Man Emu 2906 coils

Next up will be the timing belt/water pump, and probably the Tundra brake upgrade. Thanks to you and Sean for the very helpful and informative videos, which has turned a non-mechanic into someone who really enjoys working on their truck!
 

Attachments

  • Delilah with Front and Rear Lift (half size).jpg
    Delilah with Front and Rear Lift (half size).jpg
    137.5 KB · Views: 476
Tim, your videos are great! With the help of them I have just completed the following repairs to my 3rd Gen:

Front Suspension
Replaced upper and lower ball joints
Replaced the upper and lower control arm bushings
Replaced the steering rack and sway bar bushings
Replaced the CV axles with remans
Replaced the front differential oil seals
Installed new Bilstein 5100 shocks, giving the truck a ~2" lift

Rear Suspension
Replace the upper and lower control arm bushings
Installed Bilstein 5100 shocks and Old Man Emu 2906 coils

Next up will be the timing belt/water pump, and probably the Tundra brake upgrade. Thanks to you and Sean for the very helpful and informative videos, which has turned a non-mechanic into someone who really enjoys working on their truck!

Hey Dave, that's great to hear you've benefited from a lot of our videos. I hope you're subscribed to our channel. We will be having our first party of the year most likely in April, and since you live close by, you should join in on the festivities.
 
Hey Dave, that's great to hear you've benefited from a lot of our videos. I hope you're subscribed to our channel. We will be having our first party of the year most likely in April, and since you live close by, you should join in on the festivities.

Right on! Yes, I subscribed to your channel, and attended your last BBQ in November. Depending on when the next one is I'd love to come by. I had a great time speaking with you, Sean, Francois, and a couple other guys whose names escape me. One of the guys I spoke with did his brakes on your driveway, and helped me get the proper tension on the belt to the alternator. Got a lot of great ideas, and saw a lot of cool trucks!
 
Toyota Rear Axle Seal/Bearing Replacement (Part 2)

We had heard from many people that the original tool we used for this job made by Durasolid had issues with the manufacturing (the tool wouldn't slide over the widest section of the axle). So, we went searching for an alternative tool and we found a seller on Ebay. His name is Duane, and he builds a very functional tool that is a big improvement over the Durasolid tool which saves you time and money.

Here's a video of [MENTION=102606]infamousRNR[/MENTION] and I using the tool to do the presswork on a pair of 3rd Gen axles.

<iframe width="560" height="315" src="https://www.youtube.com/embed/R-c2x3F8DU4" frameborder="0" allow="accelerometer; autoplay; encrypted-media; gyroscope; picture-in-picture" allowfullscreen></iframe>
 
We had heard from many people that the original tool we used for this job made by Durasolid had issues with the manufacturing (the tool wouldn't slide over the widest section of the axle). So, we went searching for an alternative tool and we found a seller on Ebay. His name is Duane, and he builds a very functional tool that is a big improvement over the Durasolid tool which saves you time and money.

Haven't watched your video yet but thanks for the information on the new axle tool & taking the time to make another video. Looking for a rear axle seal tool has been on my list of things to research and get.
 
always impressive to see how thorough these videos are..

And it also confirms my opinion last summer that this was a job I was better off paying someone else to do. hahaha
 
So, we went searching for an alternative tool and we found a seller on Ebay. His name is Duane, and he builds a very functional tool that is a big improvement over the Durasolid tool which saves you time and money.

This rear axle tool from ebay was the initial one I was considering before I saw your post about the new tool you used. The one I linked is much more expensive but just wondering if you came across any information on it? I didn't even know about the durasolid.

REAR AXLE BEARING PULLER TOOL 09521-25011 for Toyota Trucks MADE IN THE USA ! | eBay
 
I give this tool two thumbs up as well. I had bought it some time back, and Duane didn't have the bearing press sleeve available. I believe he made that part based on Tim's feedback, and was kind enough to send me one at no additional charge! Thankfully I had (err have) bits and pieces out for sandblast and powder coat so I wasn't disassembling / reassembling all at one time, and now when I'm ready to assemble everything I'll have the entire kit.

Thanks again Tim for the awesome video!

We had heard from many people that the original tool we used for this job made by Durasolid had issues with the manufacturing (the tool wouldn't slide over the widest section of the axle). So, we went searching for an alternative tool and we found a seller on Ebay. His name is Duane, and he builds a very functional tool that is a big improvement over the Durasolid tool which saves you time and money.

Here's a video of [MENTION=102606]infamousRNR[/MENTION] and I using the tool to do the presswork on a pair of 3rd Gen axles.

<iframe width="560" height="315" src="https://www.youtube.com/embed/R-c2x3F8DU4" frameborder="0" allow="accelerometer; autoplay; encrypted-media; gyroscope; picture-in-picture" allowfullscreen></iframe>
 

Members online

Forum statistics

Threads
278,310
Messages
3,554,080
Members
248,016
Latest member
Advally Service

Trending content

Back
Top