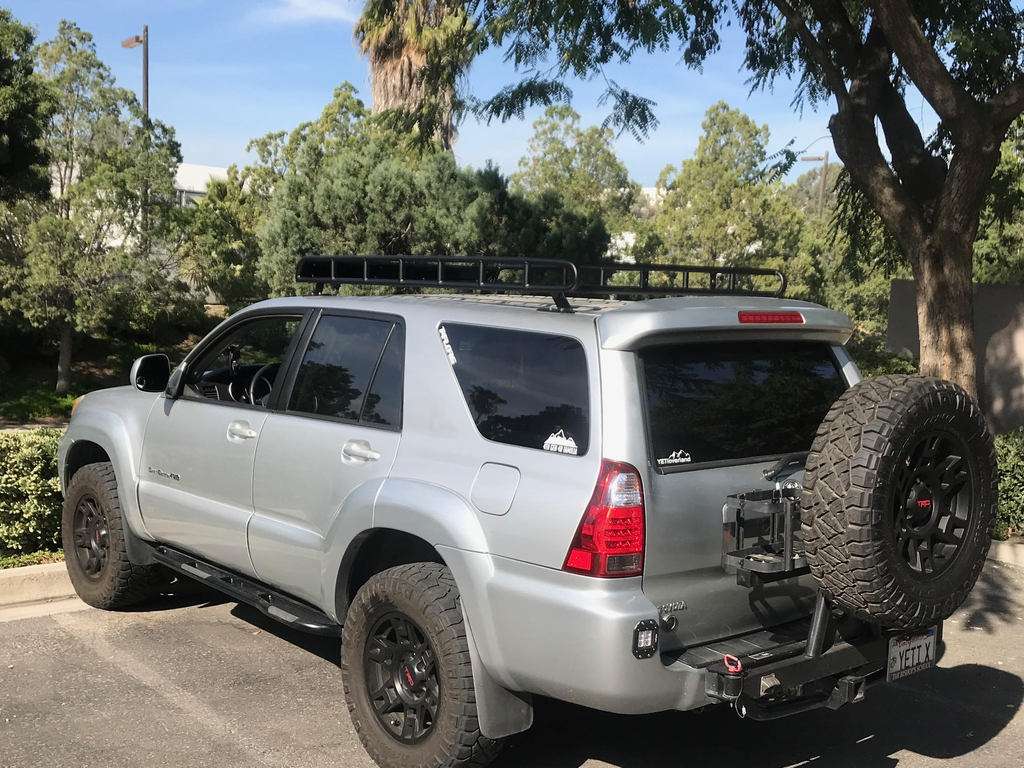
YETIX Build and Adventure Thread aka Travels with Savanna

What’s your favorite spot in SD for a day of wheeling and camping? Is AB the spot?
Depends on the season. Right now, definitely Anza. Conditions in Big Bear are too unpredictable right now and for some people, not me, it is too cold. (Yetis love the cold.)

For a quick day trip, my go to is Corral Canyon.
 
Ham Radio Install

For the past few years we have been using GMRS/FRS radios when off-road, but they have their limitations, especially with range and interference from other users. (Everybody in the desert seems to use FRS or GMRS.) One of the groups I go out with uses hams exclusively so it was time for me to step up and get licensed.

It also helped that my brother wanted to get his license as well. Our father has been licensed since before we were even born so it became a family deal. Neither of us had time to study due to our insane work schedules so we both freed up a day and did a comprehensive class and took our tests at the end of a 9 hour day. We both passed! (I only missed two questions, he missed six.)

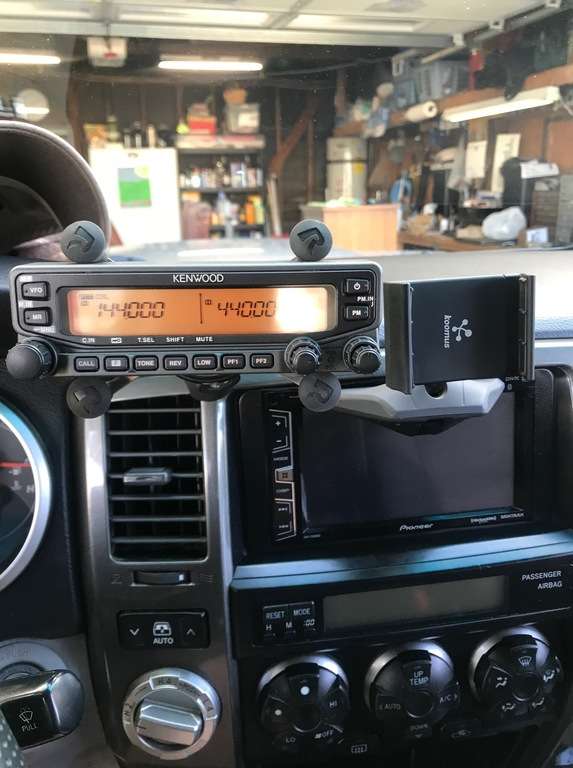
Although I've had a Baofeng for years, I decided I really wanted the added power and permanence of a mobile unit. I also knew I wanted dual cross band radio so I could monitor two frequencies at once and/or act as a repeater station. My wish list also included a detachable head unit, amber backlight, and controls on the handset. There were a few units that fit the bill and when my local Ham Radio Outlet had a sale on them, I picked up a Kenwood TM-V71A along with two antennas, a 1/4 wave for city use and a 1/2 wave for off-road where I don't have to worry about parking garages.

When it came to the install, the first question was where to mount the main body of the radio. A lot of folks mount them under their seats which I considered, but I was worried it might get wet if anything spilled. (A valid fear as it turns out due to a leak from my roof rack, but more on that on another day...) I saw that [MENTION=129593]MTN4RNR[/MENTION] had mounted his ham in his center console and chatted with him about it. He had not had any issues with it there (other than loss of the storage space) so that choice was made.

The next big puzzle to solve was where and how to mount the head unit. I knew I wanted it as high up as I could get it so it would be in my line of sight for easy monitoring. I also wanted to be able to remove it so the radio would essentially be hidden from prying eyes. So let's get started...

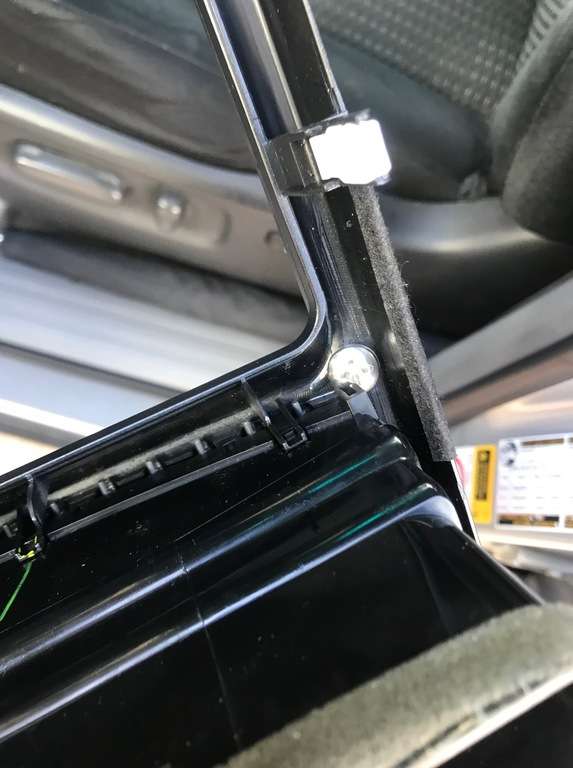
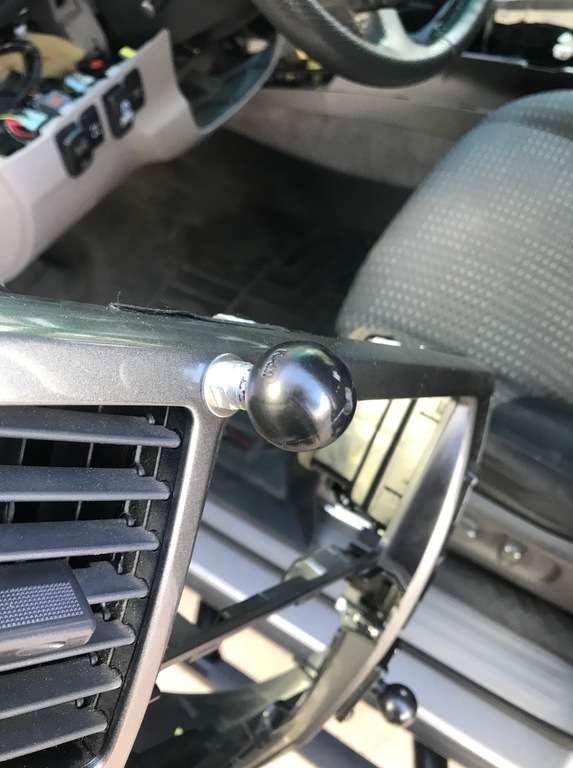
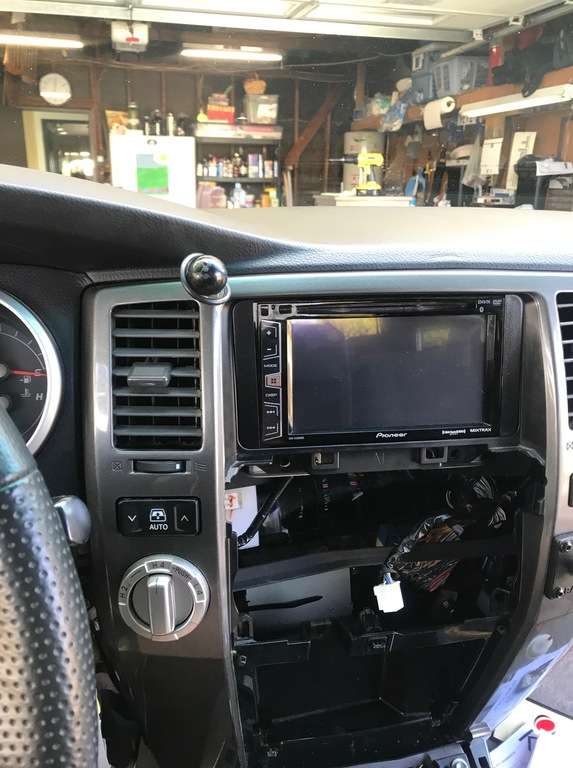
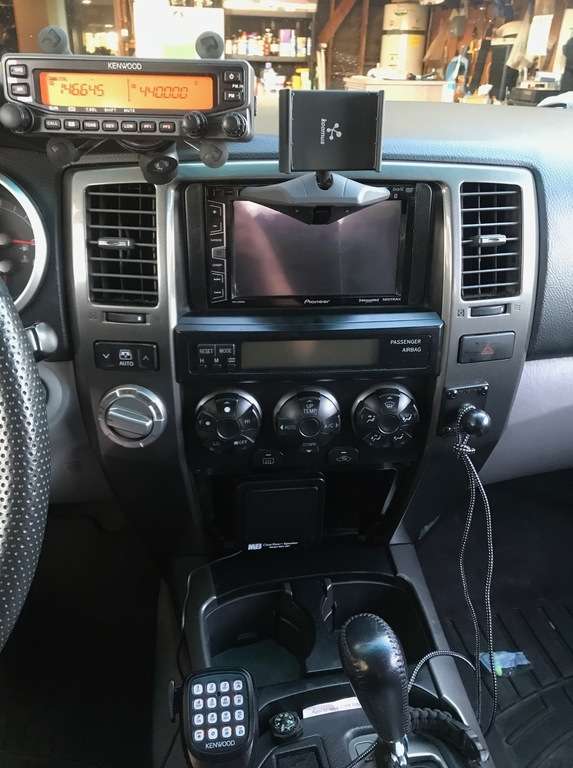
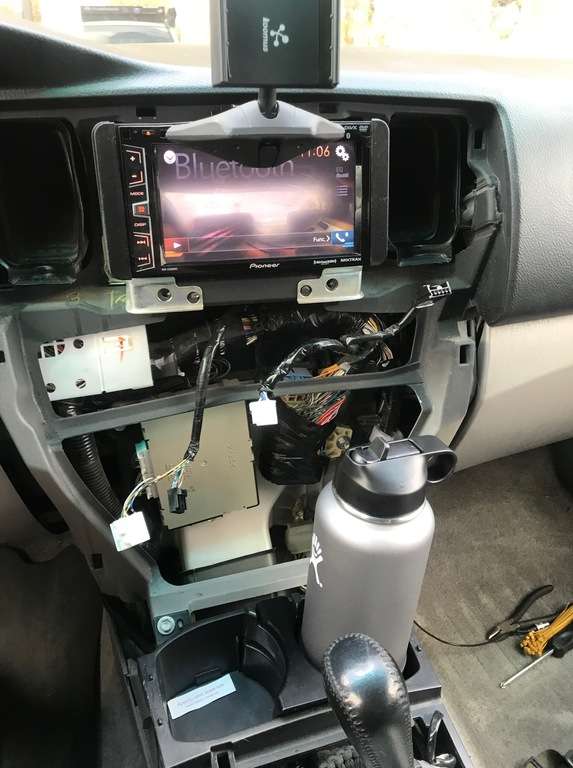
First was the head unit. I decided to mount a RAM ball and mount the head unit with a a RAM X-grip much like my tablet. I pulled the center console trim to see where I could mount a RAM ball.

o30Iqo.jpg

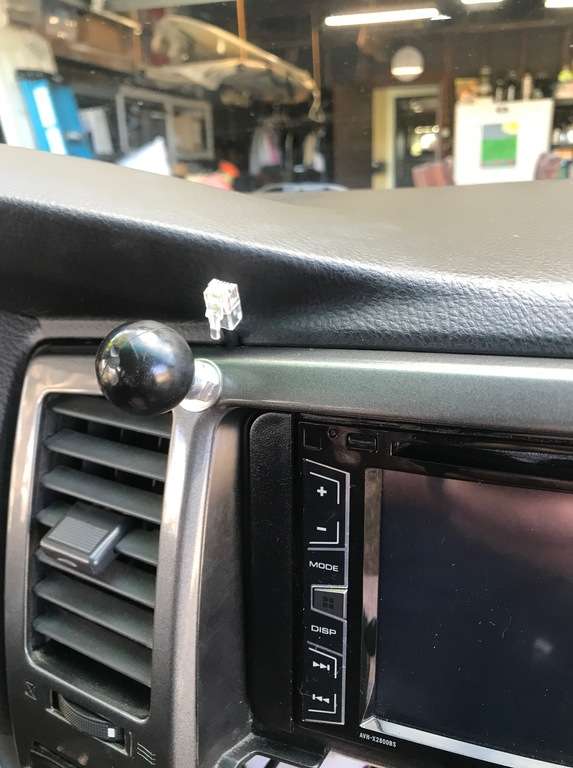
After removing the trim, I realized there was a perfect spot in between the radio and vent where I could put a bolt through and then mount a threaded RAM ball. Luckily, my friend had one handy so that was sorted.

Cyp3K8.jpg


7iL0mI.jpg

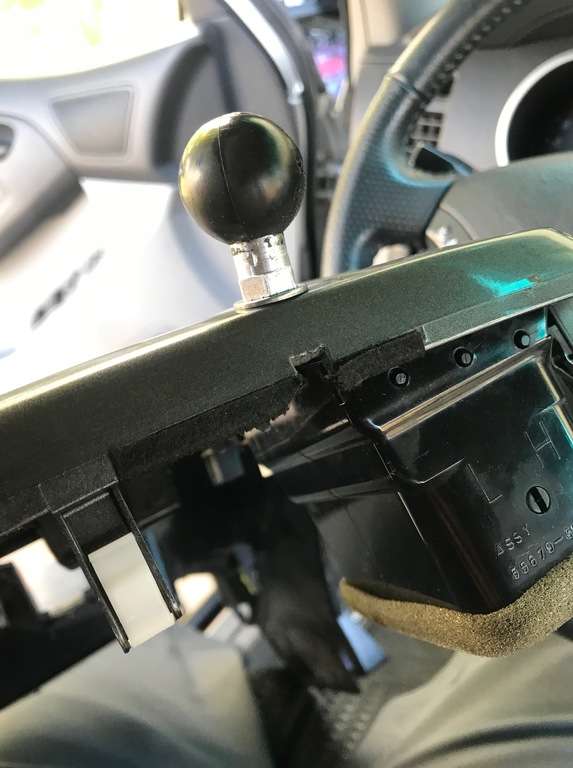
So that I wouldn't pinch the extension cable to the head unit, I cut a small notch in the trim which is not visible when the trim is re-installed.

eQ4SH4.jpg

So the ball was installed along with the extension cable run down the inside of the trim and into the center console.

aHH789.jpg


HpirlJ.jpg

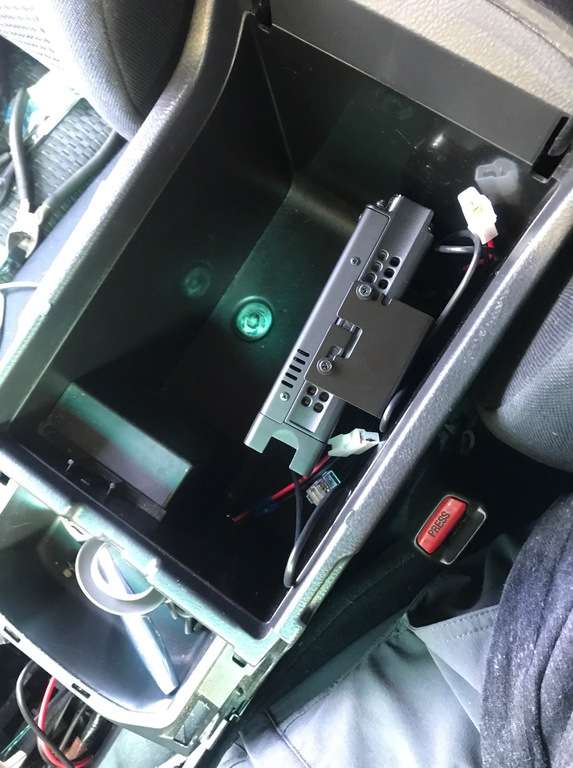
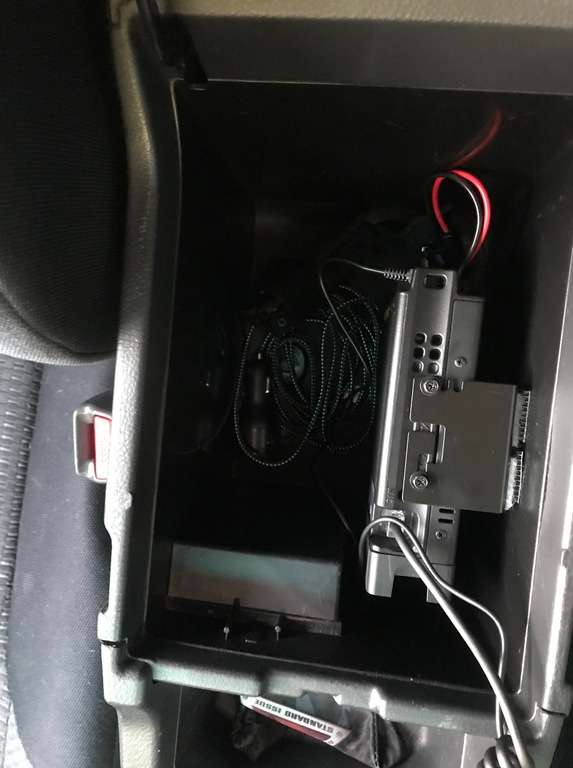
Next up was the main unit in the center console. The only permanent "damage" I had to do for this install was to drill two small holes in the front of the storage compartment to run the power, head unit, external speaker, and antenna wires through. The I used Scotch Extreme Velcro to secure the main unit to the side of the compartment. This works well for a couple of reasons. First, I didn't have to drill any additional holes in the center console. And two, it's relatively easy to remove the unit to attach the programming cable. I then ran the power cables back up the center console, under the dash, through the firewall grommet on the driver's side and connected the power directly to the battery. So this is how that worked out . . .

1jJu9U.jpg


ouFTlL.jpg

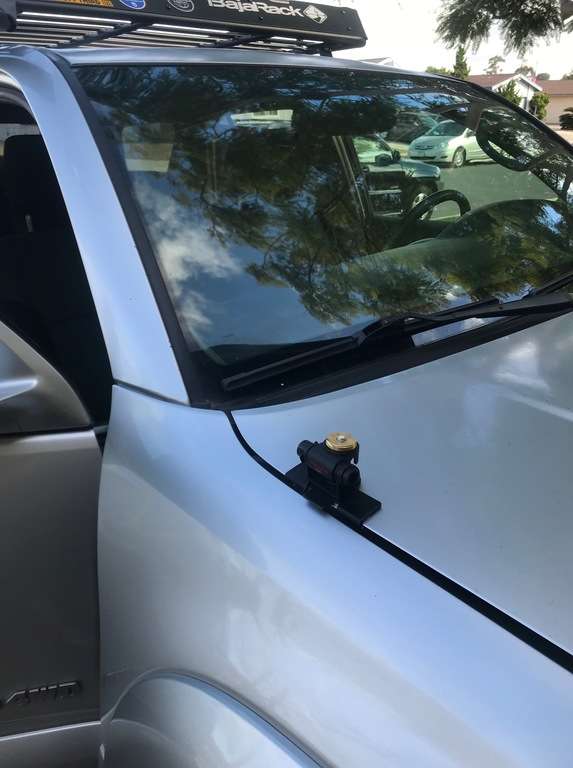
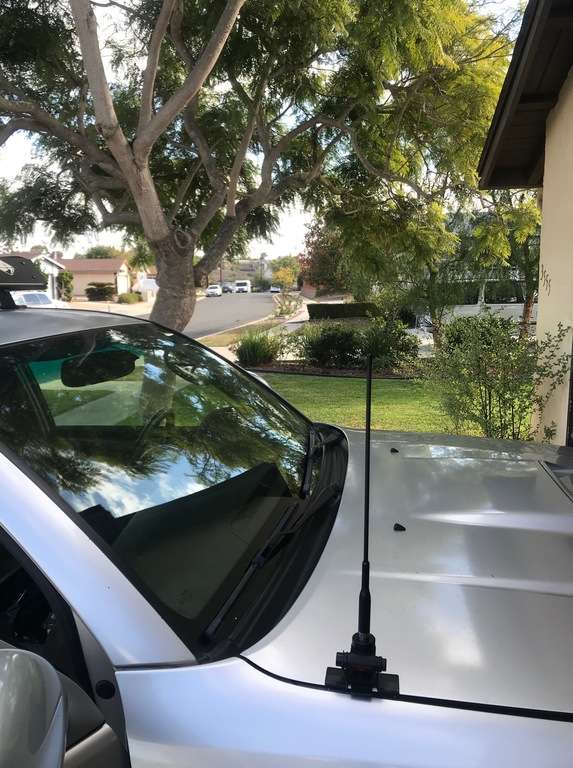
Next up was the antenna. I bought a Diamond NMO mount so I could easily switch between antennas. I originally planned to mount it on the rear hatch, but decided I didn't want the hassle of running the cable all the way from the rear of the vehicle to the front. My dad suggested mounting it on the hood, something about a good ground plane for the antenna. So that's what I did.

ABEhO6.jpg

The short antenna:

N0RPFF.jpg

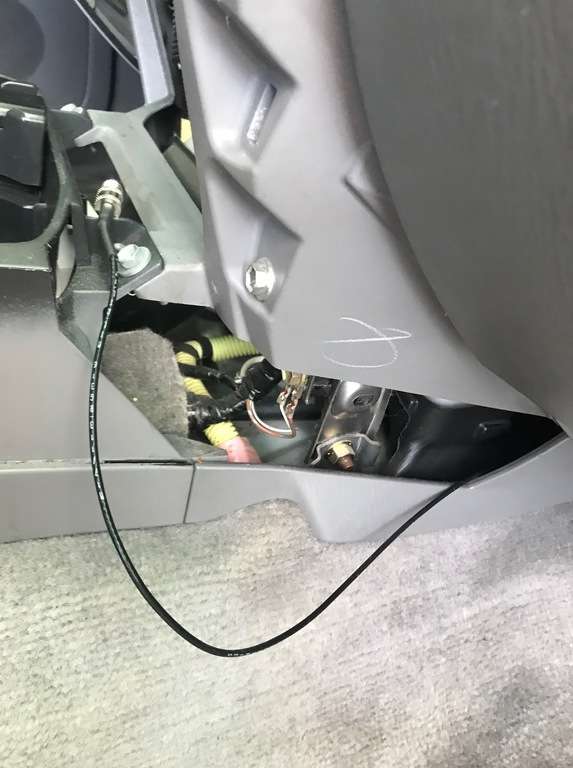
I then ran the cable through the firewall grommet on the passenger side, down under the HVAC vents, etc., and into the center console. I did need an extension cable so off to HRO I went. Only to find out I bought the wrong one. Which required another trip to HRO, where I managed to leave the adapter, which required a third trip to HRO. :ybrick:

NnjhXd.jpg

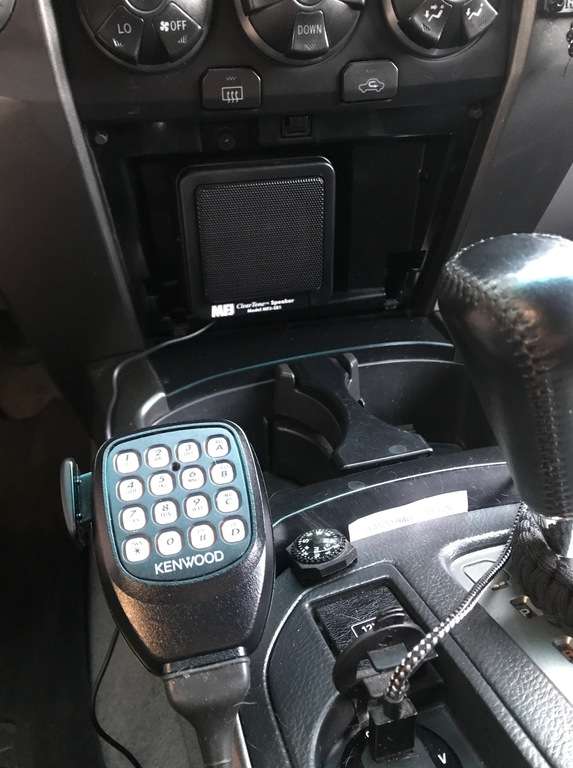
The final steps were to figure out where to mount the external speaker and the mic. After considering a few spots, I realized I could just remove the useless storage bin in front of the cupholders and use more Extreme Velcro to mount the speaker in that space which has worked out great. And then, borrowing again from MTN4RNR's build, I used a Nite Ize Steelie to mount the mic.

B8kquO.jpg

(I have since moved the mic because I kept knocking it with my leg while driving. Now it's up right under the 4Wheel selector switch.)

And the finished project:

nr726e.jpg


uNwLpZ.jpg

Let me know if you have any questions . . .
 
Baja Rack and leak repair

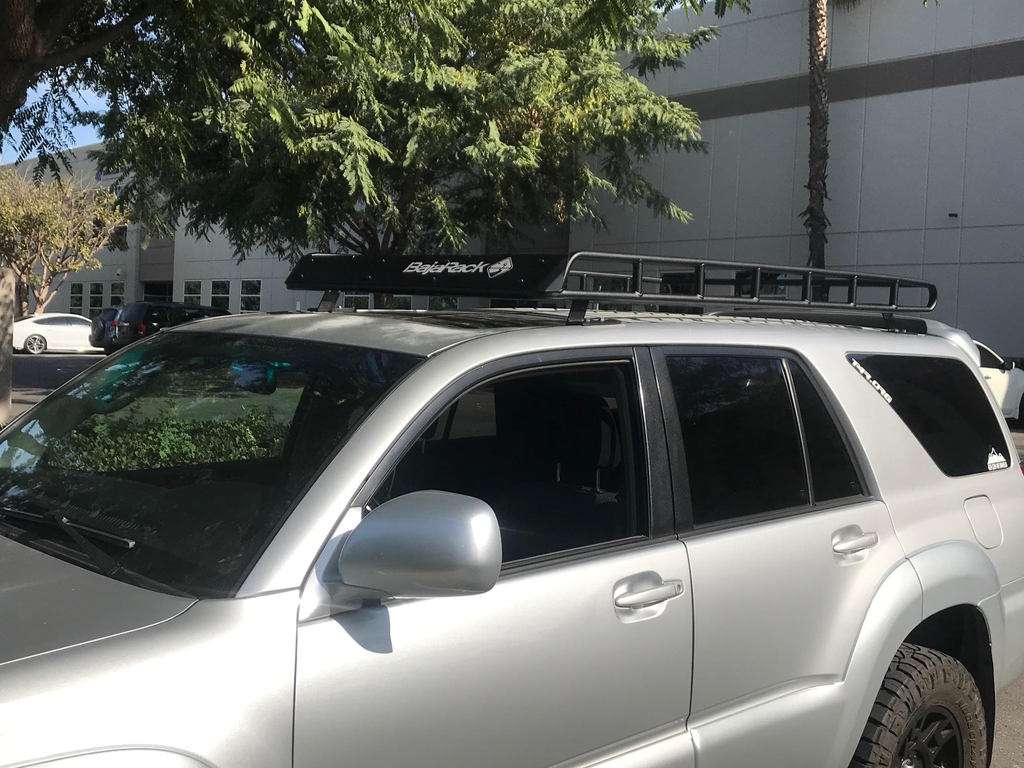
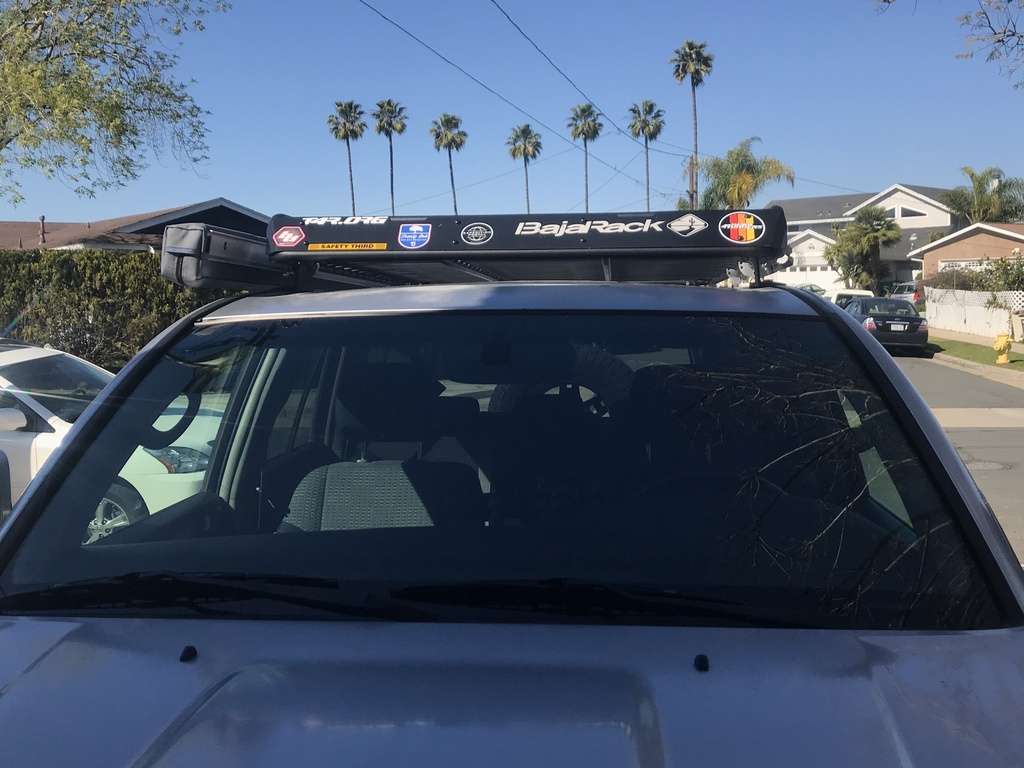
So, back in November I took advantage of the Baja Rack group buy and got one of their full length baskets. Between the group buy, military discount, cash discount, and picking it up in person (no shipping), I scored an amazing deal! :biggrin2:

I drove down on a Thursday morning and installed it in Baja Rack's parking lot.

AQzn3E.jpg


vDUFsX.jpg

That said, the install did not go without complications. Whoever the engineer at Toyota is who designed the roof rack mounting points is a guy I'd love to meet just so I could give him a swift kick in the balls. When I removed the stock rack, two of the mounts fell down into the roof liner (you'll see why later). Luckily, I carry a small magnet on an extendable handle in my tool drawer so I was able to retrieve the brackets and mount my rack. However, you are supposed to run RTV around the mounts to prevent leakage and I was not able to do that well (honestly it looked like a drunken third-grader applied the stuff) because I had to hold the mounts in place with needle nose pliers while threading the bolts through the Baja Rack mounting points.

Fast forward a couple of months and SoCal gets hit with more rain than we've had in years. YEARS. Predictably, one morning I got into my 4Runner and was greeted by a wonderful musty smell and a mushy driver's foot-well.

Water was getting in via the driver's side front mount and then running down the A and B pillars and onto the floor. (Good thing my ham radio is not mounted under my seat.) Ughh.

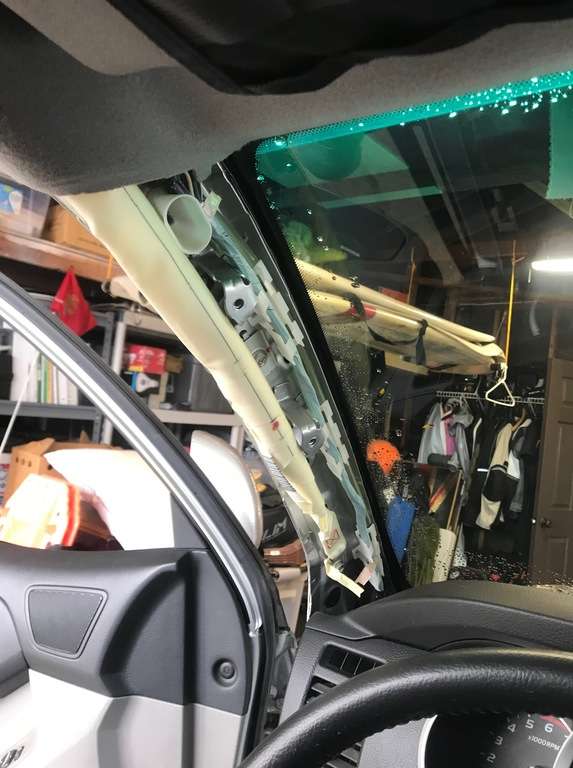
The basic repair plan was to pull up the carpet and dry it out and then pull the headliner down and replace the damn mounting brackets in the roof. I was able to get new brackets and clips from Toyota by the weekend and got a couple of sunny days in a row to make the repairs.

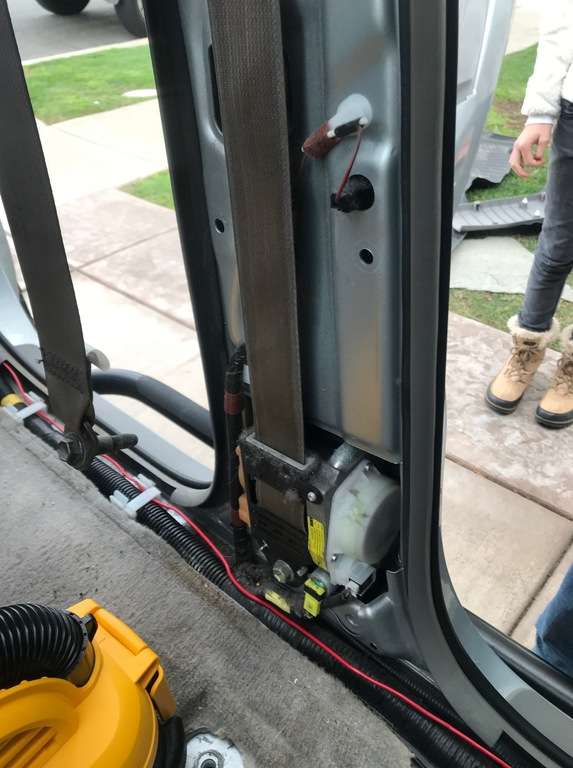
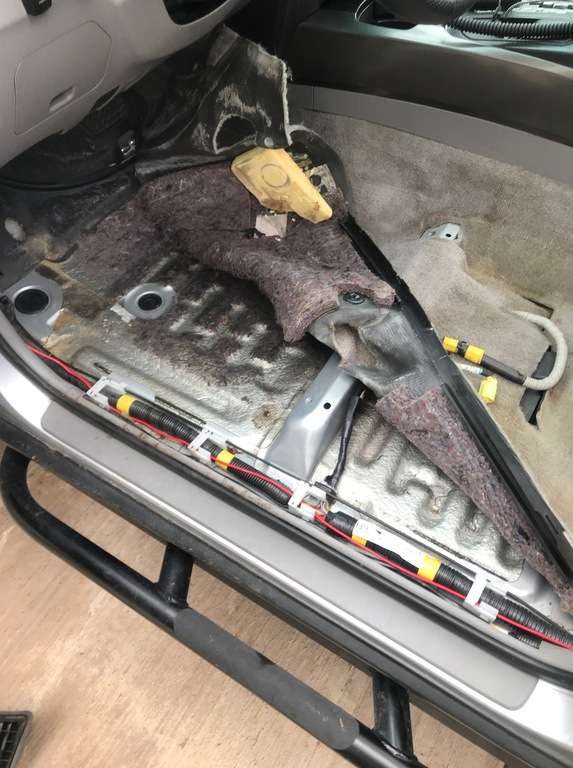
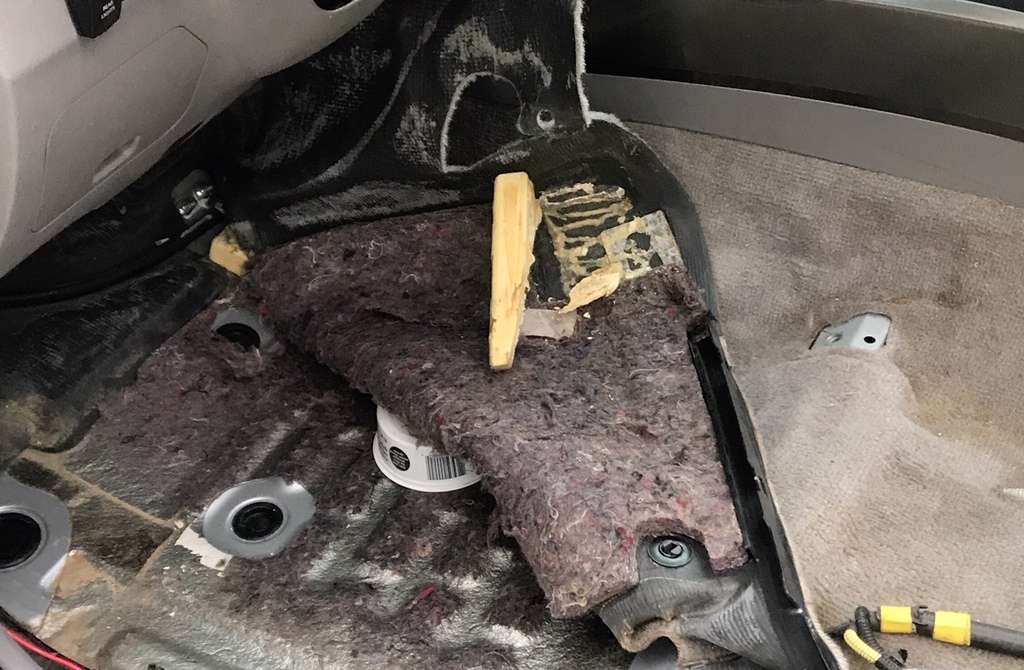
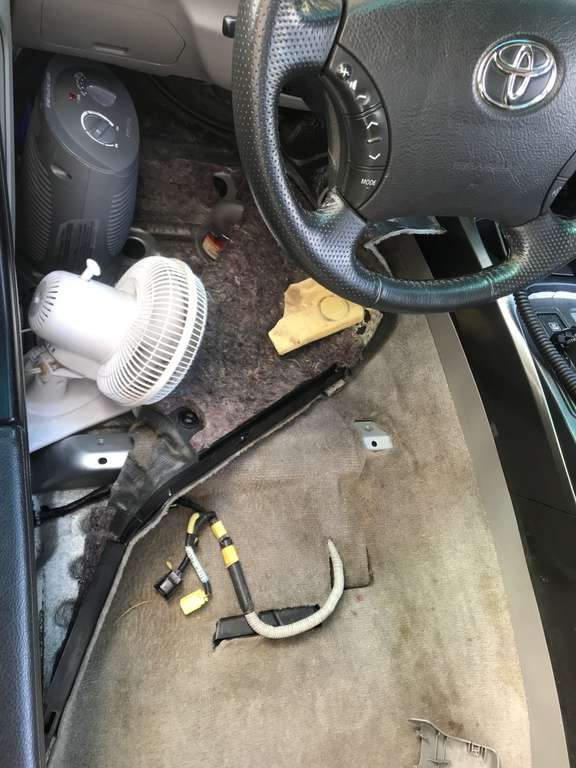
First order of business was to dry everything out. I basically removed the front seats, stripped out everything out from the window line down, peeled back the carpet, and put a fan and a heater on everything. I left it like this for two days while driving the daughter's 4Runner and everything was nice and dry.

FHhVKn.jpg


5qJxqw.jpg


L4BH0K.jpg


13XCEg.jpg


ZnGoTl.jpg

Once everything was dry, it was time to pull the headliner and replace the mounting brackets.

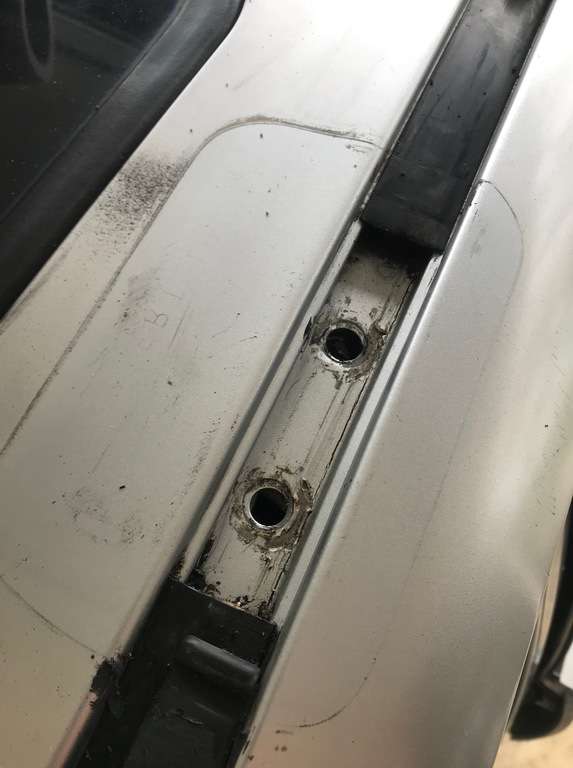
Basically, there are two holes in the roof at each mounting point for the roof rack:

NmydLH.jpg

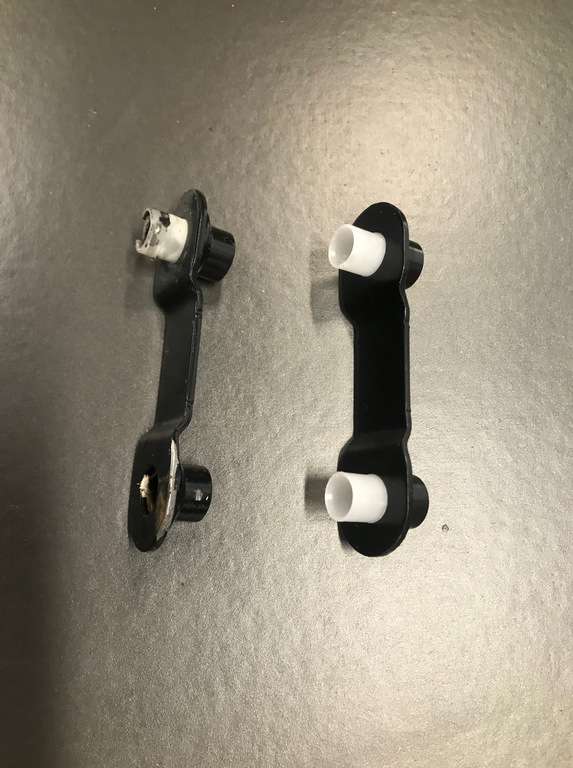
One of these threaded brackets then goes into the holes from below (old on left, new on right):

sHT50M.jpg

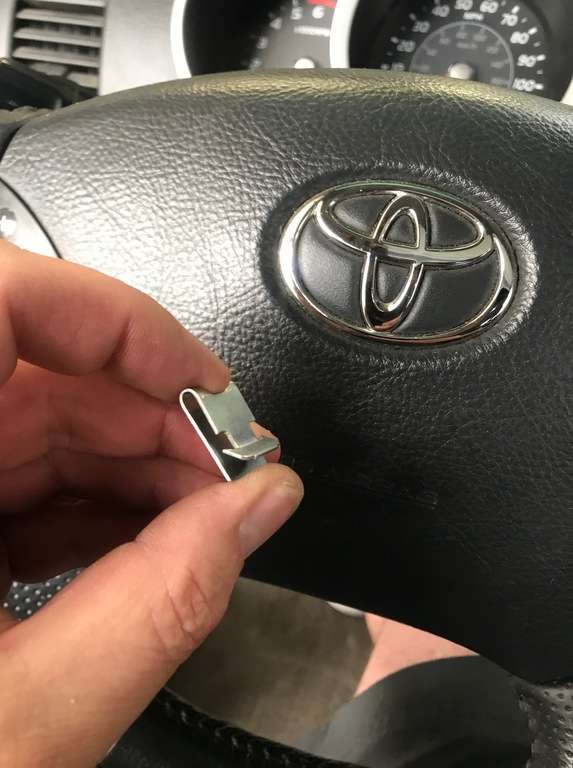
The bracket is supposed to be held in place with one of these clips:

iBhR4Q.jpg

Once I pulled the headliner down, I learned that two clips were completely missing (driver's front and passenger rear), the passenger front clip was almost off its bracket, and only the driver's rear clip was in place the way it was supposed to be. :ybrick:

When I installed the new brackets, I put a drop of silicone on the clips to make sure they stay in place!

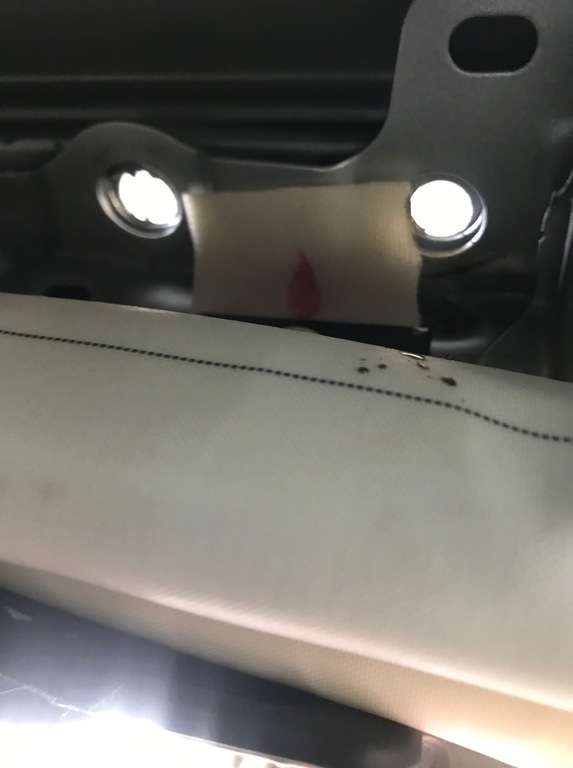
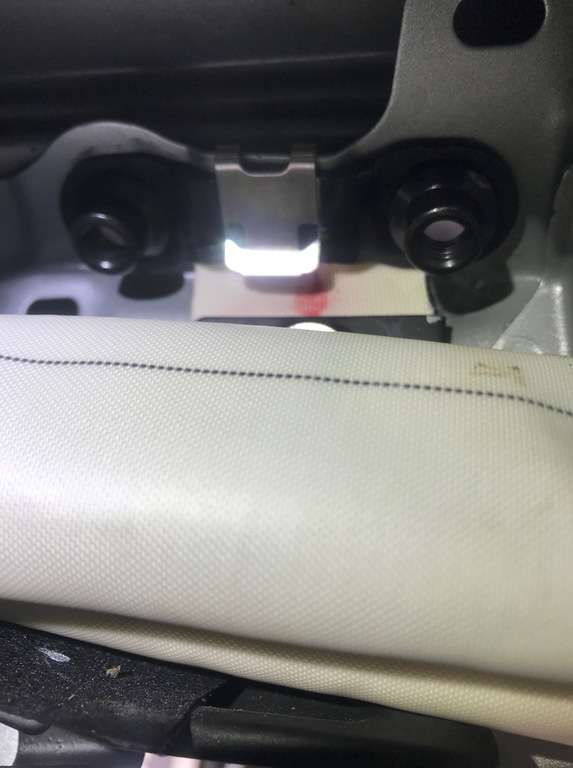
View from below showing the holes and the side curtain air bag.

DNVmXn.jpg

And the new bracket and clip securely in place:

Svg23U.jpg

Once the new brackets and clips were installed, I re-installed the roof rack feet before I put the headliner back in place just to make sure there weren't any issues. I ran a nice clean bead of RTV around each white tube and, based on research I did on here, put silicone on the threads of the bolts themselves as well. (One thing I have since learned is that Toyota has little foam rubber washers which should be used instead of the RTV around the white tubes. Next time I guess.)

The rack is now back on and has gone through more and more rain with no further leaks. I'm going to call that problem solved. :biggrin2:

5AdIJJ.jpg
 
Damn those projects that take forever and are lots of work to replace like for like part and when it's all back together no one else will even notice the difference!

In addition to a fan under the carpet I've also started to carry a desiccant bag designed to hang in a closet with clothing. This thing sucks the moisture out of the air and holds it in a pouch below the desiccant, it helped dry my 4runner out after wet carpet on a trip and still using it now to help with moisture control on rainy trips and humidity from sleeping inside the 4runner until it's warm enough to keep windows open for airflow. They are available at any walmart in the closet organization section.
 
Damn those projects that take forever and are lots of work to replace like for like part and when it's all back together no one else will even notice the difference!

In addition to a fan under the carpet I've also started to carry a desiccant bag designed to hang in a closet with clothing. This thing sucks the moisture out of the air and holds it in a pouch below the desiccant, it helped dry my 4runner out after wet carpet on a trip and still using it now to help with moisture control on rainy trips and humidity from sleeping inside the 4runner until it's warm enough to keep windows open for airflow. They are available at any walmart in the closet organization section.

That's a great idea, thank you! I currently have a few desicant bags from various things I've bought which are sitting in a plastic tub under the driver's seat.

I'm going to check out those bags at WalMart. Need to go anyways to pick up some target practice arrows.
 
I tried using a bucket of RV desiccant but it didn't seem to do anything as in it didn't change in weight like I expect it should have if it were absorbing water.

The closet bag as a pro tip can also poke a small hole near the top of the water bladder, drain it and reuse! Yes I'm cheap.
 
So, back in November I took advantage of the Baja Rack group buy and got one of their full length baskets. Between the group buy, military discount, cash discount, and picking it up in person (no shipping), I scored an amazing deal! :biggrin2:


I drove down on a Thursday morning and installed it in Baja Rack's parking lot.


AQzn3E.jpg


vDUFsX.jpg


That said, the install did not go without complications. Whoever the engineer at Toyota is who designed the roof rack mounting points is a guy I'd love to meet just so I could give him a swift kick in the balls. When I removed the stock rack, two of the mounts fell down into the roof liner (you'll see why later). Luckily, I carry a small magnet on an extendable handle in my tool drawer so I was able to retrieve the brackets and mount my rack. However, you are supposed to run RTV around the mounts to prevent leakage and I was not able to do that well (honestly it looked like a drunken third-grader applied the stuff) because I had to hold the mounts in place with needle nose pliers while threading the bolts through the Baja Rack mounting points.


Fast forward a couple of months and SoCal gets hit with more rain than we've had in years. YEARS. Predictably, one morning I got into my 4Runner and was greeted by a wonderful musty smell and a mushy driver's foot-well.


Water was getting in via the driver's side front mount and then running down the A and B pillars and onto the floor. (Good thing my ham radio is not mounted under my seat.) Ughh.


The basic repair plan was to pull up the carpet and dry it out and then pull the headliner down and replace the damn mounting brackets in the roof. I was able to get new brackets and clips from Toyota by the weekend and got a couple of sunny days in a row to make the repairs.


First order of business was to dry everything out. I basically removed the front seats, stripped out everything out from the window line down, peeled back the carpet, and put a fan and a heater on everything. I left it like this for two days while driving the daughter's 4Runner and everything was nice and dry.


FHhVKn.jpg


5qJxqw.jpg


L4BH0K.jpg


13XCEg.jpg


ZnGoTl.jpg


Once everything was dry, it was time to pull the headliner and replace the mounting brackets.


Basically, there are two holes in the roof at each mounting point for the roof rack:


NmydLH.jpg


One of these threaded brackets then goes into the holes from below (old on left, new on right):


sHT50M.jpg


The bracket is supposed to be held in place with one of these clips:


iBhR4Q.jpg


Once I pulled the headliner down, I learned that two clips were completely missing (driver's front and passenger rear), the passenger front clip was almost off its bracket, and only the driver's rear clip was in place the way it was supposed to be. :ybrick:


When I installed the new brackets, I put a drop of silicone on the clips to make sure they stay in place!


View from below showing the holes and the side curtain air bag.


DNVmXn.jpg


And the new bracket and clip securely in place:


Svg23U.jpg


Once the new brackets and clips were installed, I re-installed the roof rack feet before I put the headliner back in place just to make sure there weren't any issues. I ran a nice clean bead of RTV around each white tube and, based on research I did on here, put silicone on the threads of the bolts themselves as well. (One thing I have since learned is that Toyota has little foam rubber washers which should be used instead of the RTV around the white tubes. Next time I guess.)


The rack is now back on and has gone through more and more rain with no further leaks. I'm going to call that problem solved. :biggrin2:


5AdIJJ.jpg


Don’t suppose you have a write up for pulling the headliner and redoing those brackets and clips?

I’m tempted to just do it for good measure and not risk a leak first.


Sent from my iPhone using Tapatalk
 
Don’t suppose you have a write up for pulling the headliner and redoing those brackets and clips?

I’m tempted to just do it for good measure and not risk a leak first.

What you see above is what I have, sorry. To remove the head liner you basically remove all grab handles, then remove the A and B pillar trim pieces and then carefully pull the headliner. I did a Google search and found a couple of threads. It's really pretty easy. The hardest part for me was putting the trim back on over the seatbelt height adjusters. It took me a couple of tries to figure it out.

The clips and brackets are VERY simple. You just stick the bracket into the roof and then the clips hold them in place. Just put a dab of silicone on the clips so they don't slip off over time.
 
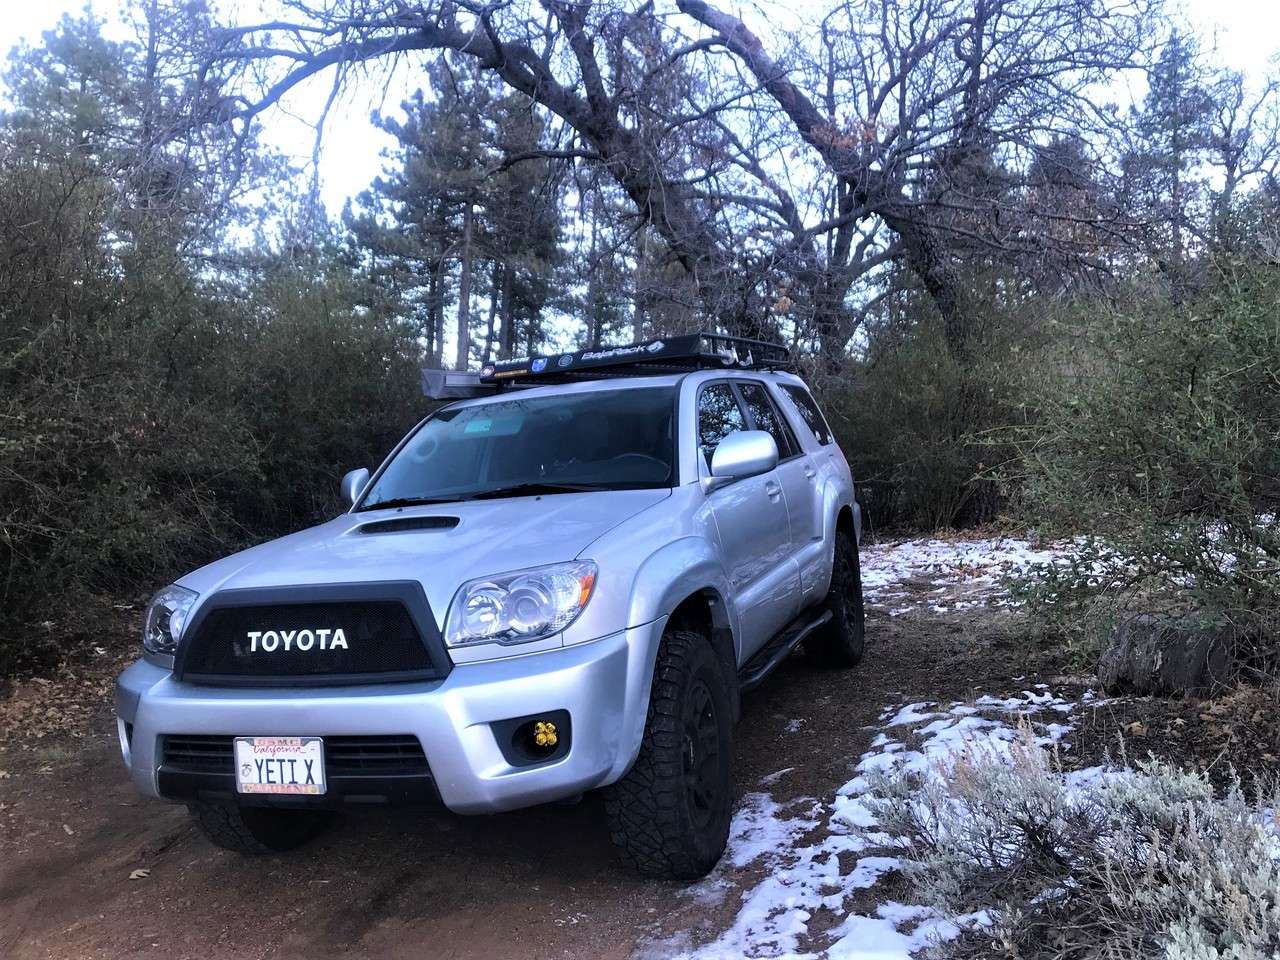
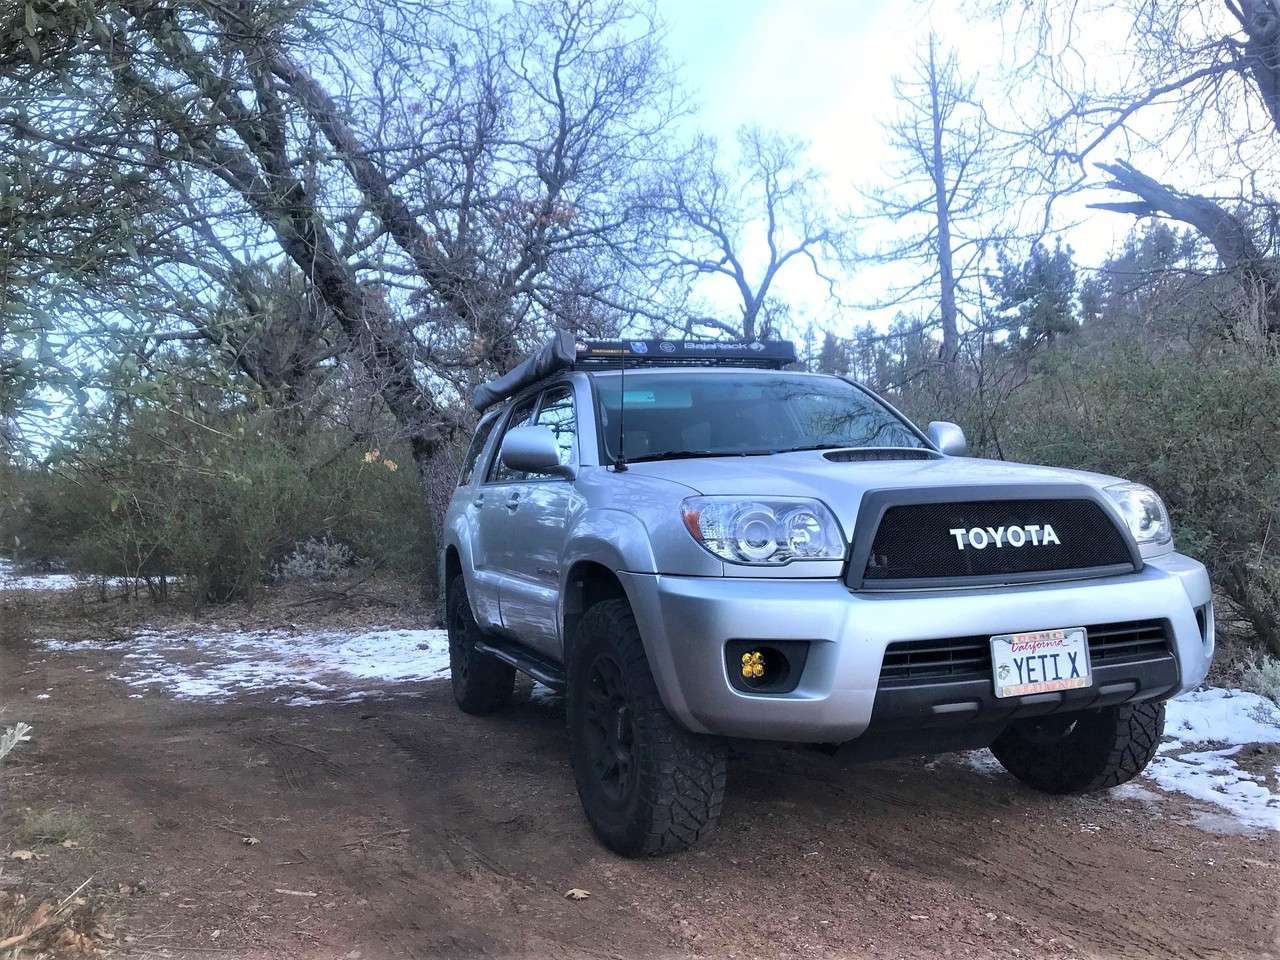
Went up to Julian a couple of weekends ago with my daughter. One of "our" things to do together is get lunch at Miner's Diner and then explore the area. Didn't get into much dirt because of the snow and rain which turned everything to mud and I didn't have anyone else with us, but it was still another great day in the 4Runner!

fL3l8t.jpg


HHjkp9.jpg


(You can see at least a couple of the changes that have been made recently . . . more to come.)​

I like that you added the TOYOTA to your grille. It looks much better than when left empty
 
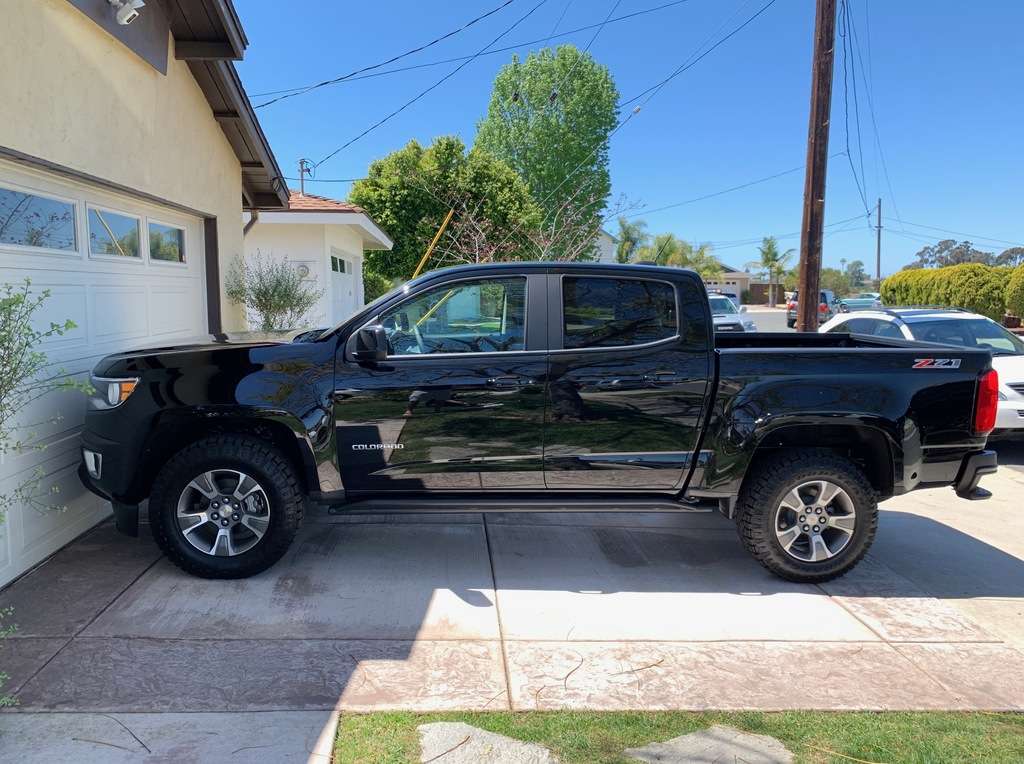
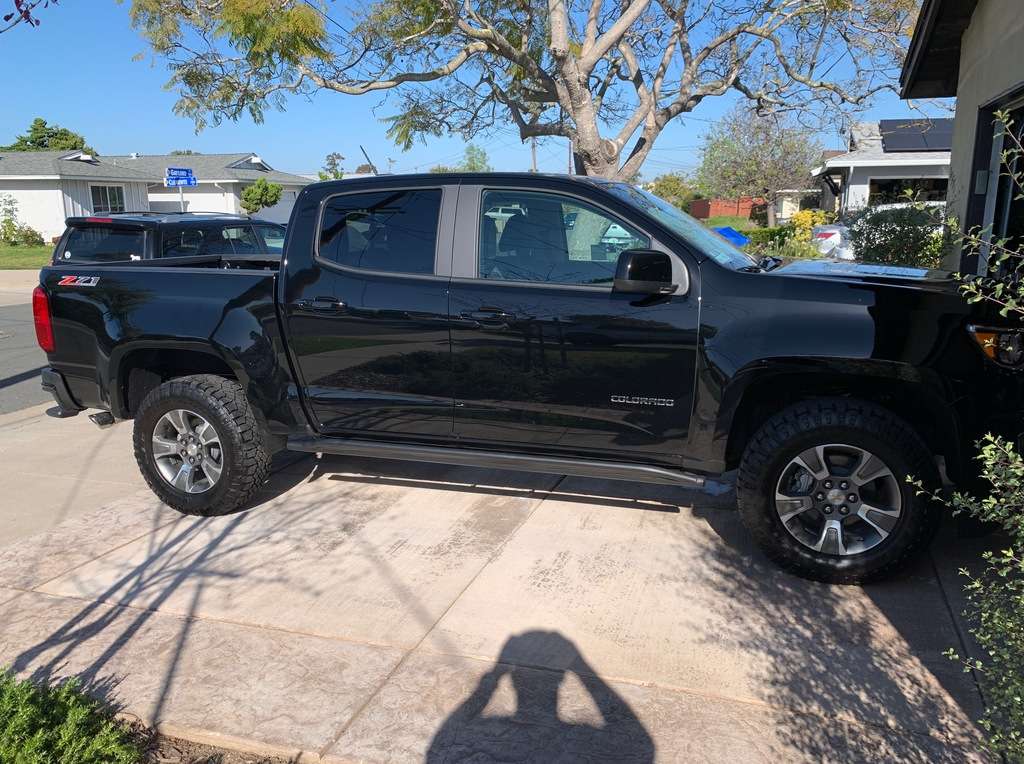
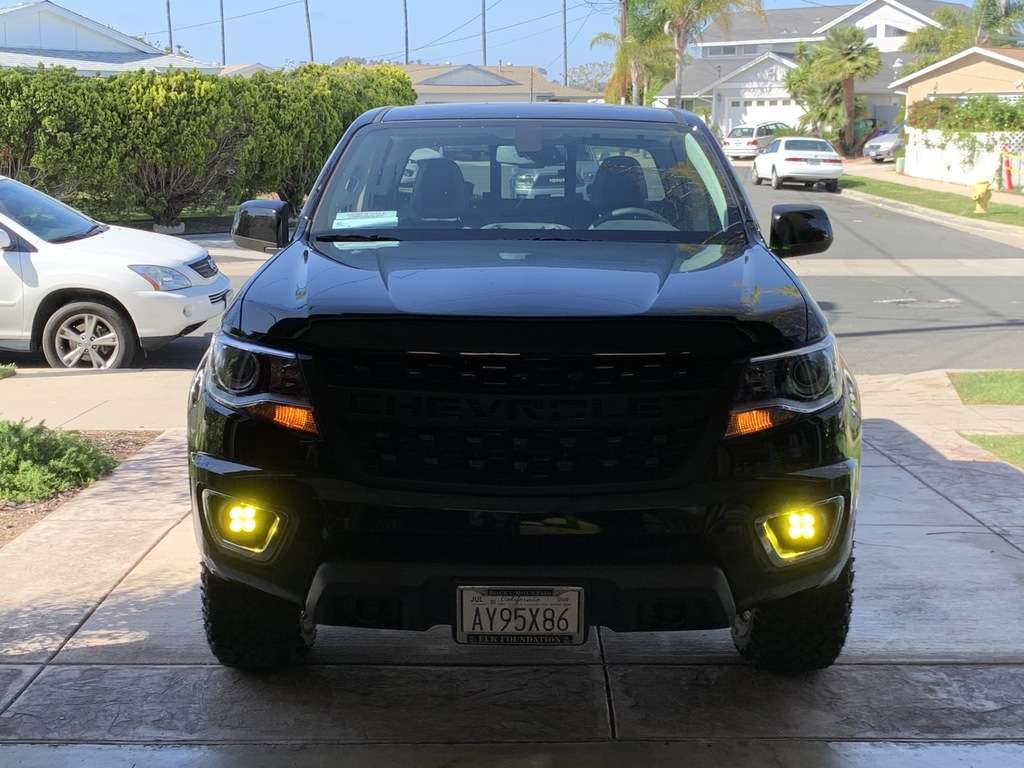
Well, all trips must come to an end and so this one is. I just bought a 2020 Chevy Colorado Z71 Trail Runner. I've been swapping over some of the stuff like the Baja Designs LED fog lights, the ham radio, and the air compressor. Going to keep the new truck more simply (yeah right, if I'm honest) so I get good mileage and don't mess with the warranty. I've wanted something newer, with better technology, and better mileage for a while now and with the insane financing these days, decided it was time.

The good news is that Hank isn't going anywhere! We're going to sell my daughter's 4Runner (2wd V8) and she has Hank. He's a much more appropriate car for her in Colorado. So the ride will go on, just with a different driver.
 
Well, all trips must come to an end and so this one is. I just bought a 2020 Chevy Colorado Z71 Trail Runner. I've been swapping over some of the stuff like the Baja Designs LED fog lights, the ham radio, and the air compressor. Going to keep the new truck more simply (yeah right, if I'm honest) so I get good mileage and don't mess with the warranty. I've wanted something newer, with better technology, and better mileage for a while now and with the insane financing these days, decided it was time.

The good news is that Hank isn't going anywhere! We're going to sell my daughter's 4Runner (2wd V8) and she has Hank. He's a much more appropriate car for her in Colorado. So the ride will go on, just with a different driver.

Great, now swap the V8 in from her old 4Runner and she's set! :lol:
 
Let’s see some photos so we can tell you what to do to it

Here it is in all it's stock glory the day I brought it home:

zczEZE.jpg


fUsCXb.jpg


eBcDtU.jpg


I've already done two of the most important things: removed the front cow catcher air dam and swapped over my BD Squadron Pros:

Z5EfhX.jpg


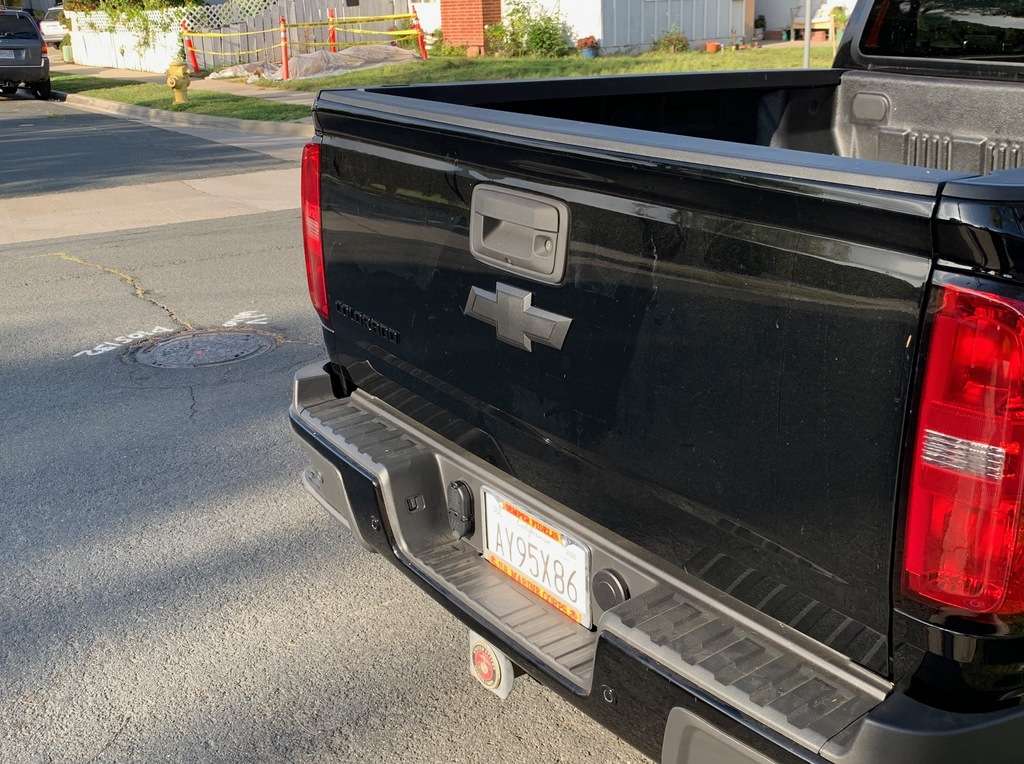
I've also swapped out all the chrome COLORADO badges for black and plastidipped the Bowtie on the tailgate:

3mrrlj.jpg


Spray in bedliner and camper shell go on today.

From there, I need to install the ARB compressor and ham radio and I know I want to give it a mild lift in front just to level it out. Oh, and I plan to install the BD S2 Pros I have had sitting around forever because I was too chicken to drill into Hank's roof. Those will go in the rear bumper for some nice rear lumens. I'm also swapping over the drawers from Hank and making a new platform for them. That may be all I do.


Yeah right . . . :snacker:
 
I know your don’t spend much time with Hank anymore but, im curious, how are you liking the Colorado? I’ve though about buying a gmc/Chevy pick up for a bit now and I really like the design of the 2023 Canyon. Have you had many problems with the power train? Thanks!
 
I know your don’t spend much time with Hank anymore but, im curious, how are you liking the Colorado? I’ve though about buying a gmc/Chevy pick up for a bit now and I really like the design of the 2023 Canyon. Have you had many problems with the power train? Thanks!
Hey there! Hank is actually coming home for the holidays. With my daughter of course!

Knock on wood, I have had zero problems with my Colorado and really like it. I really like the 2023 refresh and if I hadn't heavily modified my Colorado to suit my needs, I would trade it in for one.

If you're curious about my Colorado, here's a link to the build thread: LINK
 

Members online

Forum statistics

Threads
278,316
Messages
3,554,113
Members
248,016
Latest member
Advally Service

Trending content

Back
Top