Borfoo3's '15 TEP-KDSS 'no longer' mild build

I installed the Spidertrax yesterday, very nice quality. I just had new pads and rotors done all the way around so it was a treat to be bolting up to nice clean parts. We don't usually have that luxury here in the salt belt Northeast.

Between the new lift and the spacers the truck is looking good, I just need to do a little trimming to eliminate the rub.
 
I installed the Spidertrax yesterday, very nice quality. I just had new pads and rotors done all the way around so it was a treat to be bolting up to nice clean parts. We don't usually have that luxury here in the salt belt Northeast.

Between the new lift and the spacers the truck is looking good, I just need to do a little trimming to eliminate the rub.

Spacers worsen the rub.. my 285 tires never cleared 100% even with all the tucking/ trimming, especially on the body mount side.

Don't forget to re-torque the spacer bolts to your hub after the first few hundred miles
 
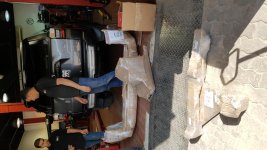
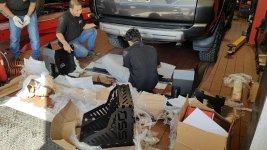
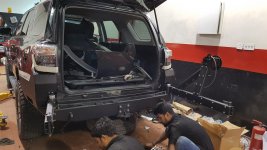
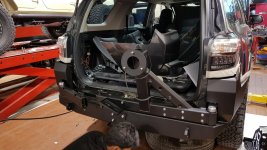
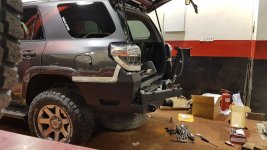
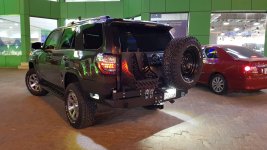
Rear SSO Steel bumper install

As I never really covered this mod, I'll go over the install and my own thoughts on steel bumpers based on my experience so far

I installed the rear bumper on Jan 2017, so close to 3 years now (Nov 2019) and it has definitely been the turning point of this build, both visually and in terms of overall performance.

Pros:
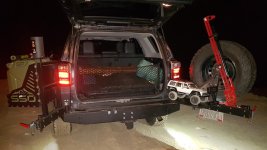
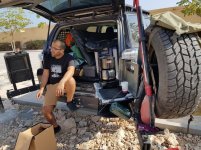
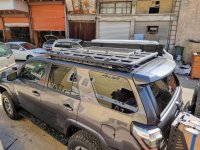
Visually, it's awesome. Definitely has the 'cool' factor, while providing protection, storage for 2 jerry cans, spare tire and hi-lift jack. Mine also has the folding side table which I found useful. The improved clearance from a higher bumper helps the departure angle too.

I use both metal or plastic scepter cans back there on all my trips depending on where I'm going and they fit snug. The hi-lift jack looks nice back there, but has proven to be useless as I've only used it once in 3 years. The spare tire is an excellent spot to hang the trasharoo

Cons
I have learned that when it comes to actual use, a steel bumper is not for everyone. The 3 points I'll talk about are: Price, Weight/ Performance impact, and Practicality.

1- Price: Its expensive. And you will need to upgrade your suspension to handle all that weight hanging in the back, so more $$$ needed

2- Weight/ Performance impact: You are pulling around a couple hundred lbs of steel back there. Plus two full cans and the spare. Acceleration, fuel economy, and braking distance naturally take a big hit on the slowrunner. Offroad, especially sand, you will notice the difference as the rear sinks in quick.

3- Practicality: as with any mod, there's a sacrifice for your gains. Opening the rear hatch is now a 3 step vs 1 step process, and depending on your parking angle it could be annoying to stay open. We don't have much rain or snow, but I do see some signs of rust especially where the jerry cans sit and rub around. The hinges need to be cleaned and lubricated, and metal rattling is something you get used to from everything being shaken on corrugations or bumps. I only broke the hi-lift jack top mounting point, and SSO was kind enough to send the replacement. The folding tray will interfere with the hatch opening, and has cought some debris a few times while closed which rubbed some paint off the rear hatch door.

Overall I do love the extra storage and practical uses from it, but would probably consider going aluminum or a lighter option if I had the chance to do it again.

Pics for ya

 

Attachments

  • 1.jpg
    1.jpg
    141.3 KB · Views: 596
  • 2.jpg
    2.jpg
    143.6 KB · Views: 610
  • 4.jpg
    4.jpg
    135.7 KB · Views: 641
  • 5.jpg
    5.jpg
    142.9 KB · Views: 597
  • 6.jpg
    6.jpg
    138 KB · Views: 583
  • 7.jpg
    7.jpg
    137.5 KB · Views: 603
  • 8.jpg
    8.jpg
    136.7 KB · Views: 601
  • 9b.jpg
    9b.jpg
    142.2 KB · Views: 598
Hey All,

Edit: 06-08-2019: It's been a few year's worth of evolution, so I updated the title of the thread to reflect my progress. As always, I will be updating all links on this 1st post for easy reference. Enjoy!

Any chance to get your photos in post #1 working again?
 
KING Suspension install + JBA UCA + extended brake lines and notes

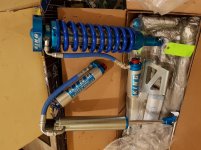
November 2017 - Documenting the upgrade from bilstein 6112/5160 to the KING setup. Basic info for the KINGs:

Part numbers:
Front coilover (650lb spring option)
#25001-243A-650
Rear shocks:
25001-279A-EXT

Options / setup notes:
- Compression Adjusters: yes, all sides
- Option - extended travel shocks
- Front Spring rate: 650lb - to handle the front added weight from: aluminum TRD skid, dual battery setup in engine bay
- Preload: none, except for few threads on pass. side to correct lean
- Height increase: ~3" lift,
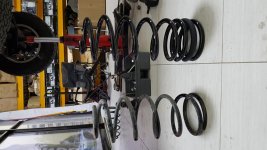
- Rear coil: swapped the Wheelers (from my post #55) for Icon 3" Overland dual rate springs and kept the hydraulic bump stops. This is mainly to handle the extra weight that accumulated in the rear of the vehicle (steel bumper, 2x jerry cans, rear metal top shelf and Rago molle side mounts, + typical cargo and stuff packed)

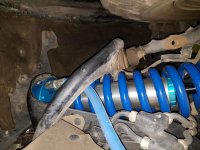
Install notes: Since I got the extended travel versions, this required a front UCA replacement as stock one was touching the coil on full droop. Went with JBA front UCA mainly for the ball joint (I didn't want the noise and maintenance of the other joints) as I believe even the stock joints are plenty strong for off-road use. Also threw in some extended Wheeler's brake lines (front and back) for safe measures.. Front compression adjusters are always at full soft and rears are cranked to 18 clicks to control the weight. I tend to crank up the rears 2 or 3 clicks when fully loaded for a trip.

Ride notes: Ride is firm and confident, but not harsh. Almost 4 years since the install and I'm still amazed how fast I can drive over things while staying composed and under control! It became a bad habit at this point.. as I eventually had to replace the LCA bushings due to excessive wear (and clunk noises). However, if you never plan on adding weight up front, better go with the standard (550lb) spring rate on the coilover for a softer ride.

Mandatory pics:
pic 1- wheelers vs icon overland coils free length
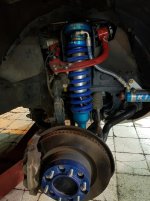
2- new KING suspension
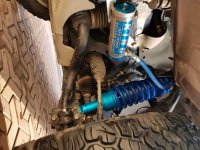
3- installed with stock UCA
4- stock UCA rubbing coils
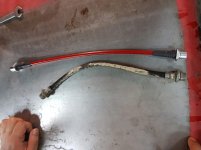
5- Extended SS brake lines vs stock
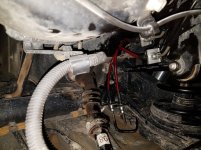
6- Extended SS brake lines installed
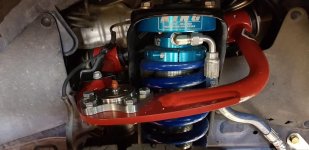
7- JAB UCA installed
8- JBA UCA grease zerk
 

Attachments

  • pic1.jpg
    pic1.jpg
    136.9 KB · Views: 322
  • pic2.jpg
    pic2.jpg
    133.3 KB · Views: 319
  • pic 3a.jpg
    pic 3a.jpg
    134.6 KB · Views: 323
  • pic 4a.jpg
    pic 4a.jpg
    134.8 KB · Views: 333
  • pic 5.jpg
    pic 5.jpg
    123.7 KB · Views: 328
  • pic 6a.jpg
    pic 6a.jpg
    137 KB · Views: 326
  • pic 7.jpg
    pic 7.jpg
    101.6 KB · Views: 319
  • pic 8.jpg
    pic 8.jpg
    67.9 KB · Views: 320
Last edited:
Redarc BCDC + Solar Panel

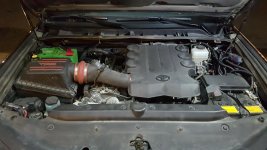
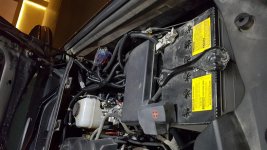
Another post in the build.. this time upgrading the dual battery wiring and isolator/ charger

Old Setup:
WirthCo 1213.1241 20092 Battery Doctor 125 Amp/150 Amp Battery Isolator
Optima Bluetop D34M - 55Ah
2nd battery wiring: Mixed wiring types as the build was put together.. several issues with wires throughout the years.
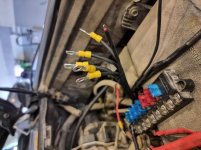
Blue Sea Systems ST Blade ATO/ATC Fuse Blocks

New setup:
Redarc BCDC 1225D charger (DC-DC charger)
Optima Bluetop D34M - 55Ah
Blue Sea Systems ST Blade ATO/ATC Fuse Blocks
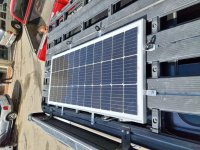
100 watt Solar Panel (Chinese - Sun Shine brand)
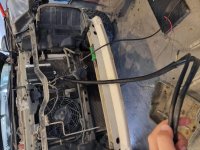
Complete new wiring for all 2nd battery connections - Marine 6awg for engine bay wires to/from charger and batteries w/40 amp fuses. 1.5mm wires for roof lights, and 2.5mm wires for fridge outlets at the back.


Old vs New setup differences observed:

The 2 main drivers for this upgrade (more like an overhaul actually) were:
1- constant issues with the roof light wiring. Eventually, non of the roof lights were working anymore.
2- Poor charging of the AGM battery from the isolator, as the voltage was relatively low. Most probably due to bad ground/ Earth connections, or the isolator getting worn out (extreme hot summers and poor wiring don't help) but I'm no expert on this.

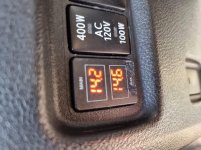
I've always kept an eye on both Main and Aux battery voltages during trips and check on those a few times a week. I was shocked to see +14v after all was done! Finally, the Optima is getting the charge it needs. Steady state voltage remains around 13.2v which is perfect.

Solar input was the icing on the cake, especially for those running fridges like I do. The Redarc BCDC gives Solar input priority before drawing power from the alternator, which saves load/ stress on the vehicle charging system and provides charge to Aux battery even while the vehicle is off.

Here's some of the pics on the install process and final result. Can't wait to see how this setup performs on our next trip:
 

Attachments

  • b0.jpg
    b0.jpg
    135.9 KB · Views: 271
  • b2.jpg
    b2.jpg
    140.5 KB · Views: 278
  • a1.jpg
    a1.jpg
    130.4 KB · Views: 272
  • d0.jpg
    d0.jpg
    135.8 KB · Views: 278
  • f1.jpg
    f1.jpg
    133.9 KB · Views: 282
  • d3s.jpg
    d3s.jpg
    140.6 KB · Views: 270
  • f2s.jpg
    f2s.jpg
    140.6 KB · Views: 294
Ride notes: Ride is firm and confident, but not harsh. Almost 4 years since the install and I'm still amazed how fast I can drive over things while staying composed and under control! It became a bad habit at this point..

Fun thread to read, great evolution!

So I was thinking of adding Icon hydraulic bump stops to my rear springs. My rig is a daily driver/mall runner, but when I go on trails I like to go fast (22 TRD Pro, Eibach pro spring upgrade, JBA UCAs, Sumo Spring bump stops front/rear). Outside of your Kings, how much credit do you give your Icons for your “fast over things” capability? Thanks for any guidance.
 
Fun thread to read, great evolution!

So I was thinking of adding Icon hydraulic bump stops to my rear springs. My rig is a daily driver/mall runner, but when I go on trails I like to go fast (22 TRD Pro, Eibach pro spring upgrade, JBA UCAs, Sumo Spring bump stops front/rear). Outside of your Kings, how much credit do you give your Icons for your “fast over things” capability? Thanks for any guidance.

Think of the Icon bump stops as more of your suspension's 'last resort' where you've already chewed up most of your up-travel.

In stock-ish suspension setup, that is not hard to do. So you will engage the Icons frequently..

In KINGs (or high-end suspension in general) you reeaally have to be going "fast and heavy loaded" to chew up all the up-travel to engage (and feel) the Icons in action.

Biggest plus of the Icons vs rubber or poly bump stops like Sumo, wheeler's...etc. is how nice they rebound after engagement.. you don't feel that harsh 'kick-back' as they smoothly return back to place.
 

Members online

No members online now.

Forum statistics

Threads
278,312
Messages
3,554,083
Members
248,016
Latest member
Advally Service

Trending content

Back
Top