runnyrunnerton
New member
This is my first attempt at a write up so easy on the flames. I'm happy to follow up with additional pics if necessary.
I searched everywhere and could not find a write up for anyone removing their limited flares with intent to reinstall them. Thus i researched and broke some parts to bring this to you.
Keep in mind:
1. I am self taught
2. I have steel bumpers and dont have pics of the front and rear bumper mounted flares.
What you need:
Pliers, phillips scew driver, electric drill, wire cutters for stubborn rivets, rivet gun, soft hands. 10 mm deep socket.
part numbers.
90-90467036 - blue clips
90-90467037 - red clips
you need more reds than blue buy about 2.5 to one. I bought 20 of each, i have 10 blues left and 4 reds but i was careful with removal. These dudes add up quick.
I could remove and install them in a few hours but the painting cannot be rushed nor can bracket repair which is what drove me to do this in the first place.
I needed to stop the rattling flares and the rhino lining route is not for me.
Step one: Rear flare

there are two rivets holding the bottom of the fender to the frame and 4 plastic clips holding the top of the fender to the body. I removed the rivets CAREFULLY with a drill. A 1/4" bit will knock them out.
Once the rivets are out open the door and tug on the plastic. Pull it straight out. The plastic clips slide into the fender plastic from the side but fit into he body from straight on. So dont twist it or you will break clips.

On the body the clips are here

Step two: Rear Door
The rear door has one more step to it. The interior clips do not want to release on their own. The clips are $1.57 each. That's not much unless you realize here are 29 clips....per side. Yeah you want to save them.
Pull up on the interior handle cover thing, be firm, i will come out. Unscrew the three screws with the red arrows. the two green arrows are plastic toyota factory rivetts on the inside of the door. dont get creative here, punch the center of them in 1/8" with a small screwdriver, they will release and slide right out.

When the screws are out, grab the junk holder on the bottom and tug firmly away from the door. (Brace the door with your opposite hand to prevent head injury and excessive swearing) it will begin to pop free. There are only a few plastic snaps holding it in there.
The door latch handle is clipped to the interior of the door, once the screw is removed push it toward the engine compartment.


It will click out, just pull it toward you gently to free it from the door mold, DO NOT TRY AND REMOVE IT.
Take the now free interior door molding lift it up slightly to free it from the window track, and rotate it counter clockwise 90 degrees. Pull it free from the door fishing the door latch through the opening as you go.
Don't forget to pry up the window switch and UN-clip it from its harness.


Now drill out the three rivets. Purplish pink dots. Pry the molding from the rear outward. I did this in short tugs to minimize clip damage. With the fantastic view you now have of the inside of your door panel, take a pair of pliers and squeeze the teeth of the clips from the inside of the door. They should release and the panel will come free.

Step three: Front door
Remove the interior door panel. The process here is identical to the rear door save the following: The exterior cladding is hooked to the door via 10mm bolt shown in orange. The window controls must be poppoed up in the order shown as the tabs will break if you do it backwards. The toyota plastic rivets are in different locations. You need to remove the speaker if you want to save clips. All of this is easy. Remove everything, gently pry of the plastic from rear to front using plyers t release the clips from th inside as you go.

On to the rocker panel. The easy panel. On the bottom it has 7 plastic screw rivets. Lefty loosey righty tighty. The rocker has two exterior mounted bolts one mounted vertically near he rear door and one mounter horizontally under the front door. Unscrew them. Be prepared to break clips here. Start from the font of the vehicle and pry the rocker guard OUT from the vehicle and slightly down. The plastic rivets on the bottom will give you hell but trust me. Your goal is to get the rocker out and of the guide bracket. I forgot to take pictures but this part seemed simple enough. Don't bend the guide, the guide supports the rocker panel, your clumsy friends use the rocker panel as a jack stand for dragging they-re brainless asses in and out of your seats. No support behind the panel leads to them falling right through it and claiming ignorance, meanwhile your out $$$$ for a new panel and new guides. The guides are strong, just dont be a douche here.
The front fender.
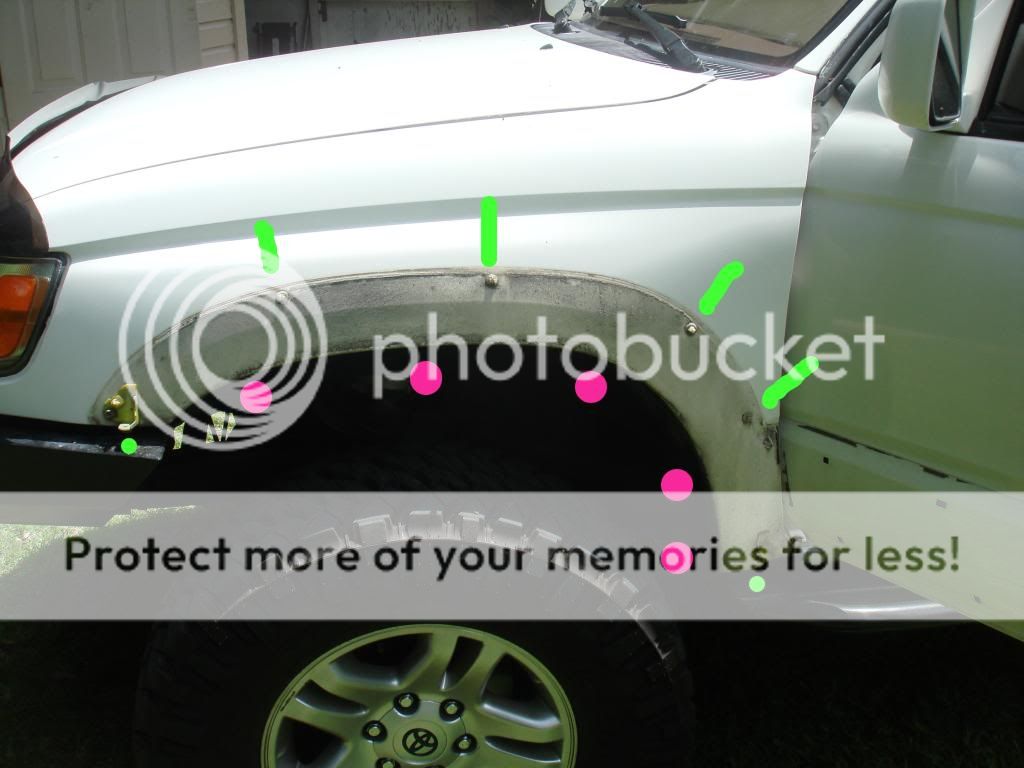
Easy. Remove the bolts. Pink. Drill out rivets. Green. gently pry away from clips. Orange.
Flip over the door panels. See that 3M tape? Yeah it needs to come off. I used 3M remover i bought at napa and a screw driver. After refitting this i realized you ned to get some not all of this crap off, it did not appear to make a difference and i spent hours removing this stuff from one side and gave it the old college try on the other side. no difference in fitment.
Sands, Prime. Paint. Clear. Buff. this is not a paint write up


I bought some plastic cement 2 part epoxy from Lowes to glue on and or repair damaged clip brackets. It needs to sit 24 hrs so give it time to set. It melts the plastic pretty good so its a one shot deal, dont rush it.

Installation. Reverse of the removal process with these quick tips. I used duplicolor vinyl paint to change my gaskets from gray to black. I have no idea if this is good or bad but it beat $40 per gasket from Toyota part sales.
All the panels click back into place FIRST. No screws or tape until the SOB clicks in and holds square. Then screws, then tape. its plastic not steel, bear down on it and it will break.

Buy new 1/4" plastic rivets for the rocker panels at autozone. They are around $13for the whole vehicle and the ones you have are shot, trust me buy 16 or more, i broke some new ones too.
I used black rtv gasket to reattach the rubber gaskets to the panels for 2 reasons. It dries black and it will peal off when it dries with no mess.
I also left puled the #m red backing back just enough to hang outside the panel when i was popping the panels back on. This way when you have all the snaps snapped, you just pull and it sticks the panel in pace as oposed to reapplying the tape three times and haveing panels sit oddly.

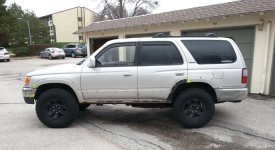
Before:

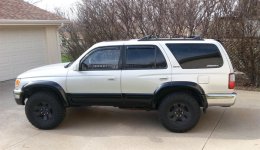
After:

I searched everywhere and could not find a write up for anyone removing their limited flares with intent to reinstall them. Thus i researched and broke some parts to bring this to you.
Keep in mind:
1. I am self taught
2. I have steel bumpers and dont have pics of the front and rear bumper mounted flares.
What you need:
Pliers, phillips scew driver, electric drill, wire cutters for stubborn rivets, rivet gun, soft hands. 10 mm deep socket.
part numbers.
90-90467036 - blue clips
90-90467037 - red clips
you need more reds than blue buy about 2.5 to one. I bought 20 of each, i have 10 blues left and 4 reds but i was careful with removal. These dudes add up quick.
I could remove and install them in a few hours but the painting cannot be rushed nor can bracket repair which is what drove me to do this in the first place.
I needed to stop the rattling flares and the rhino lining route is not for me.
Step one: Rear flare

there are two rivets holding the bottom of the fender to the frame and 4 plastic clips holding the top of the fender to the body. I removed the rivets CAREFULLY with a drill. A 1/4" bit will knock them out.
Once the rivets are out open the door and tug on the plastic. Pull it straight out. The plastic clips slide into the fender plastic from the side but fit into he body from straight on. So dont twist it or you will break clips.

On the body the clips are here

Step two: Rear Door
The rear door has one more step to it. The interior clips do not want to release on their own. The clips are $1.57 each. That's not much unless you realize here are 29 clips....per side. Yeah you want to save them.
Pull up on the interior handle cover thing, be firm, i will come out. Unscrew the three screws with the red arrows. the two green arrows are plastic toyota factory rivetts on the inside of the door. dont get creative here, punch the center of them in 1/8" with a small screwdriver, they will release and slide right out.

When the screws are out, grab the junk holder on the bottom and tug firmly away from the door. (Brace the door with your opposite hand to prevent head injury and excessive swearing) it will begin to pop free. There are only a few plastic snaps holding it in there.
The door latch handle is clipped to the interior of the door, once the screw is removed push it toward the engine compartment.


It will click out, just pull it toward you gently to free it from the door mold, DO NOT TRY AND REMOVE IT.
Take the now free interior door molding lift it up slightly to free it from the window track, and rotate it counter clockwise 90 degrees. Pull it free from the door fishing the door latch through the opening as you go.
Don't forget to pry up the window switch and UN-clip it from its harness.


Now drill out the three rivets. Purplish pink dots. Pry the molding from the rear outward. I did this in short tugs to minimize clip damage. With the fantastic view you now have of the inside of your door panel, take a pair of pliers and squeeze the teeth of the clips from the inside of the door. They should release and the panel will come free.

Step three: Front door
Remove the interior door panel. The process here is identical to the rear door save the following: The exterior cladding is hooked to the door via 10mm bolt shown in orange. The window controls must be poppoed up in the order shown as the tabs will break if you do it backwards. The toyota plastic rivets are in different locations. You need to remove the speaker if you want to save clips. All of this is easy. Remove everything, gently pry of the plastic from rear to front using plyers t release the clips from th inside as you go.

On to the rocker panel. The easy panel. On the bottom it has 7 plastic screw rivets. Lefty loosey righty tighty. The rocker has two exterior mounted bolts one mounted vertically near he rear door and one mounter horizontally under the front door. Unscrew them. Be prepared to break clips here. Start from the font of the vehicle and pry the rocker guard OUT from the vehicle and slightly down. The plastic rivets on the bottom will give you hell but trust me. Your goal is to get the rocker out and of the guide bracket. I forgot to take pictures but this part seemed simple enough. Don't bend the guide, the guide supports the rocker panel, your clumsy friends use the rocker panel as a jack stand for dragging they-re brainless asses in and out of your seats. No support behind the panel leads to them falling right through it and claiming ignorance, meanwhile your out $$$$ for a new panel and new guides. The guides are strong, just dont be a douche here.
The front fender.
Easy. Remove the bolts. Pink. Drill out rivets. Green. gently pry away from clips. Orange.

Flip over the door panels. See that 3M tape? Yeah it needs to come off. I used 3M remover i bought at napa and a screw driver. After refitting this i realized you ned to get some not all of this crap off, it did not appear to make a difference and i spent hours removing this stuff from one side and gave it the old college try on the other side. no difference in fitment.
Sands, Prime. Paint. Clear. Buff. this is not a paint write up


I bought some plastic cement 2 part epoxy from Lowes to glue on and or repair damaged clip brackets. It needs to sit 24 hrs so give it time to set. It melts the plastic pretty good so its a one shot deal, dont rush it.

Installation. Reverse of the removal process with these quick tips. I used duplicolor vinyl paint to change my gaskets from gray to black. I have no idea if this is good or bad but it beat $40 per gasket from Toyota part sales.
All the panels click back into place FIRST. No screws or tape until the SOB clicks in and holds square. Then screws, then tape. its plastic not steel, bear down on it and it will break.

Buy new 1/4" plastic rivets for the rocker panels at autozone. They are around $13for the whole vehicle and the ones you have are shot, trust me buy 16 or more, i broke some new ones too.
I used black rtv gasket to reattach the rubber gaskets to the panels for 2 reasons. It dries black and it will peal off when it dries with no mess.
I also left puled the #m red backing back just enough to hang outside the panel when i was popping the panels back on. This way when you have all the snaps snapped, you just pull and it sticks the panel in pace as oposed to reapplying the tape three times and haveing panels sit oddly.

Before:

After: