 06-19-2015, 12:22 AM
|
#1
|
 |
Member
|
|
Join Date: Apr 2015
Location: HTX
Posts: 348
Real Name: Bump
|
|
|
Member
Join Date: Apr 2015
Location: HTX
Posts: 348
Real Name: Bump
|
Cargo LED Lighting Actually Done Right
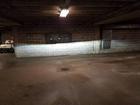
Last night I made the decision to make the first move towards ripping out panels inside my new 4Runner...couldn't wait more than 2 months, so I decided it was time.
I installed some flush mount LEDs in the upper corners of my cargo area panels to give a little more light while still maintaining a professional appearance. This is not my first electrical modification to a vehicle, so I've done something like this before, but on a Civic. Moving on...
First, I apologize that I don't have a ton of pics, my hands were dirty and I was just wanted to get it done:
1) I popped out the panel covering the access to the taillights.
2) pulled out the hooks where you would attach the grocery net thing, then unscrewed the screw behind that "plug"
3) to get the upper panels off, you have to pull on the lower portion of the cargo paneling first. It is best to grab and pull hard where I am holding on in the picture. Will work for both sides.
This is where it gets tougher, and I don't have pictures...:
4) open the liftgate, remove the OEM hatch lights, then on the right side (as you look at the liftgate from the rear) is a slot designed for you to insert a panel tool or a flat screwdriver to begin the popping off of the panel. Don't be afraid here, PULL HARD to get it started. Then gradually work your way around and it will begin coming off.
5) Once that is off, disconnect the clip for sound and remove the left rear speaker (as you look into the cargo area from the rear) by removing three screws holding it to the liftgate.
6) PRO TIP** - Remove the left hand grip on the bottom of the liftgate by reaching in through the speaker hole and squeezing on the inside of the grip. This will allow you to see directly into a critical area for the installation.
7) A previous post I read said to roll your window down before doing this install. I would recommend rolling the window down ONLY for the liftgate panel removal. After removing that if you roll up the rear window it drastically increases the area which you have to work in the liftgate.
8) I used a normal wire coat hanger from the dry cleaners to fish through the wire channel. You can see the white wire curving into the abyss in one of the attached pictures. This took some time. To tell you how I got it through I reached one hand through the speaker hole (actually fit up to my elbow in the area), and the other hand in through the liftgate light hole to guide the wire. This is the most tricky part of the mod because you're pushing wire into the whole open area beside the window and aiming for a tiny hole at the top of the liftgate. Brutal...
9) Once that hanger was successfully fished through, I used a butt connector to crimp my connecting wire to the hanger to pull back through. Worked like a charm!
****Continuing below....
__________________
2015 Magnetic Gray Trail Premium - Build Thread: https://www.toyota-4runner.org/5th-g...ight=mbumpus11 <<<--- click that to see what I've done
|

|
 Reply With Quote Reply With Quote
|
|
06-19-2015, 12:24 AM
|
#2
|
|
Member
|
|
Join Date: Apr 2015
Location: HTX
Posts: 348
Real Name: Bump
|
|
|
Member
Join Date: Apr 2015
Location: HTX
Posts: 348
Real Name: Bump
|
10) Once the connecting wire was through the proper channel, I curved it around the existing wire loom so that it wouldn't be in the way of the window when rolling up and down. I also took out the three retainer clips in the headliner so that I could access the inside of that area.
11) unscrewed the mounting plate for the rear speaker to access the rubber grommet instead of boring through the grommet. Folded my new wire into that grommet and reinstalled the mounting plate. You can see the wire coming out of the rubber grommet in an attached picture.
12) After this I connected male/female spade connectors to the ends of the wires and made it to where I can quick disconnect if I ever have to take these lights out/change them and prevent myself from having to redo the entire process.
13) Another tricky part: fishing the rest of the wire through the rubber tubing to allow the wire into the headliner area. You kind of have to wiggle it around to make it get through.
14) Connected male/female spade connectors to the wire, and twisted my wires together for each of the individual LEDs so that I have one main connection.
15) The flush mount LED bulbs are 11mm, so I drilled a 7/16" hole in my upper rear cargo paneling to hold the bulbs. I did have to detach one stock wire point on the passenger side to make the panel fit back in completely, but it was moving one set of three wires to the right about .5" and it was super easy.
16) When I had previously thought about this mod, I anticipated having to solder the connections onto the OEM liftgate contact points. However, there is room to take out the lightbulb, fit the wires under the contact points of the festoon bulb, and when you reinstall the festoon bulb it holds the wire very securely. SO securely that I actually had the light housing dangling by those wires for a moment as I reinstalled the liftgate paneling.
17) buttoned everything back up and took the final pics. You can see these pics attached as well.
I believe this is a very clean way to install additional cargo lighting without sacrificing a clean look in the interior and there are absolutely zero wires exposed. Not only that, but it can all be operated by turning the driver's side liftgate light on/door/off and they behave accordingly.
I'm very pleased with how it all turned out, and hopefully it will help someone else in the future that doesn't want wires exposed/a temporary appearance.
__________________
2015 Magnetic Gray Trail Premium - Build Thread: https://www.toyota-4runner.org/5th-g...ight=mbumpus11 <<<--- click that to see what I've done
|
|
|
Reply With Quote
|
|
06-19-2015, 08:40 PM
|
#3
|
|
Member
|
|
Join Date: Sep 2014
Location: Louisiana
Posts: 344
|
|
|
Member
Join Date: Sep 2014
Location: Louisiana
Posts: 344
|
I was skeptical at first but those look great!
|
|
|
Reply With Quote
|
|
06-20-2015, 10:27 AM
|
#4
|
 |
Elite Member
|
|
Join Date: Mar 2010
Location: Illinois
Posts: 6,046
Real Name: Um, Phil?
|
|
|
Elite Member
Join Date: Mar 2010
Location: Illinois
Posts: 6,046
Real Name: Um, Phil?
|
Very nice. That's how it should be from the factory.
__________________
2010 Blizzard Pearl SR5/P - traded
2018 Superwhite SR5/P ... IS350 retrofit.
|
|
|
Reply With Quote
|
|
06-20-2015, 10:29 AM
|
#5
|
 |
Member
|
|
Join Date: Nov 2014
Posts: 470
|
|
|
Member
Join Date: Nov 2014
Posts: 470
|
do you have a link for the lights you used? also can you post a pic up close of the lights but turned off? thanks!
__________________
Car History from 1st to Present: -1997 Mustang V6 (Sold); -1999 Chevrolet Blazer (Sold); -2001 Chevrolet Silverado Z71 (Sold); -1999 Chevrolet Z28 Camaro (Sold  ); 1982 Jeep CJ-7; 2014 Trail 4Runner
The creator of the "TRAIL" badge
http://www.toyota-4runner.org/5th-ge...blem-made.html
|
|
|
Reply With Quote
|
|
06-20-2015, 11:03 AM
|
#6
|
|
Member
|
|
Join Date: Apr 2015
Location: HTX
Posts: 348
Real Name: Bump
|
|
|
Member
Join Date: Apr 2015
Location: HTX
Posts: 348
Real Name: Bump
|
Quote:
Originally Posted by Ezlife45

I was skeptical at first but those look great!
|
Quote:
Originally Posted by philsey
Very nice. That's how it should be from the factory.
|
Thanks guys!
Quote:
Originally Posted by On Point
do you have a link for the lights you used? also can you post a pic up close of the lights but turned off? thanks!
|
Oznium is where I got the lights: Flush Mount LED Bolt
I've been an Oznium fan for years...Phil takes care of any question you have and is very quick to respond.
For the options of the exact LED bolt I chose: Cool White, Aluminum, 11mm, Silver, With Lens
Pics are attached...sorry about the messy garage in the last one! But you can see that they are almost invisible, and look like a very small button. People never look back there anyway, but I really am pleased with how the whole project ended up!
__________________
2015 Magnetic Gray Trail Premium - Build Thread: https://www.toyota-4runner.org/5th-g...ight=mbumpus11 <<<--- click that to see what I've done
|
|
|
Reply With Quote
|
|
06-21-2015, 07:04 AM
|
#7
|
|
Member
|
|
Join Date: Nov 2010
Location: Southeast FL
Posts: 576
|
|
|
Member
Join Date: Nov 2010
Location: Southeast FL
Posts: 576
|
That really brightens that area up! Great job, thanks for the how-to!
|
|
|
Reply With Quote
|
|
06-21-2015, 11:26 AM
|
#8
|
|
Member
|
|
Join Date: Feb 2015
Location: Socal
Posts: 113
|
|
|
Member
Join Date: Feb 2015
Location: Socal
Posts: 113
|
Great job, i was thinking about doing the same but the lights i had replaced in the hatch illuminated way passed the cargo area.
|
|
|
Reply With Quote
|
|
06-21-2015, 02:26 PM
|
#9
|
|
Member
|
|
Join Date: Apr 2015
Location: HTX
Posts: 348
Real Name: Bump
|
|
|
Member
Join Date: Apr 2015
Location: HTX
Posts: 348
Real Name: Bump
|
Quote:
Originally Posted by krans
Great job, i was thinking about doing the same but the lights i had replaced in the hatch illuminated way passed the cargo area.
|
I had a couple of ideas that would've done the same thing, but that's ultimately why I opted for the 1w LED bolt that I bought. Just bright enough, and and with the lens on it you can angle the beam a little better than just flooding the whole area if you were to not get the lens, that is.
I had also thought about adding another couple of lights just behind the rear seat along the wheel wells, but after seeing how these work I don't think I need to do those.
Even with the rear seats folded down it lights only the cargo area, which I am pleased. I can send pics of that tonight if you'd like to see what it looks like
__________________
2015 Magnetic Gray Trail Premium - Build Thread: https://www.toyota-4runner.org/5th-g...ight=mbumpus11 <<<--- click that to see what I've done
|
|
|
Reply With Quote
|
|
06-21-2015, 03:09 PM
|
#10
|
 |
Senior Member
|
|
Join Date: Feb 2010
Location: Bay Area, CA
Posts: 3,454
Real Name: Mike
|
|
|
Senior Member
Join Date: Feb 2010
Location: Bay Area, CA
Posts: 3,454
Real Name: Mike
|
Well done. The lighting in the back has been a big complaint of mine. Seeing how cheap these LEDs are, well, I have them on order.
Thanks for the write up.

|
|
|
Reply With Quote
|
|
06-21-2015, 04:49 PM
|
#11
|
|
Member
|
|
Join Date: Apr 2015
Location: HTX
Posts: 348
Real Name: Bump
|
|
|
Member
Join Date: Apr 2015
Location: HTX
Posts: 348
Real Name: Bump
|
Quote:
Originally Posted by mikey's2010SR5
Well done. The lighting in the back has been a big complaint of mine. Seeing how cheap these LEDs are, well, I have them on order.
Thanks for the write up.
|
When you get to installing if you have any questions feel free to PM me. It's reasonably straightforward, but I'm willing to help however I can. And as always, don't forget to share your finished product!
__________________
2015 Magnetic Gray Trail Premium - Build Thread: https://www.toyota-4runner.org/5th-g...ight=mbumpus11 <<<--- click that to see what I've done
|
|
|
Reply With Quote
|
|
06-21-2015, 05:02 PM
|
#12
|
|
Member
|
|
Join Date: Apr 2015
Location: HTX
Posts: 348
Real Name: Bump
|
|
|
Member
Join Date: Apr 2015
Location: HTX
Posts: 348
Real Name: Bump
|
Quote:
Originally Posted by mikey's2010SR5
|
Looking back through, I don't think I explained number 16) very well.
See attached picture for where I have the wire leads connecting to the stock light housing.
Better explanation:
1) remove the clear covering
2) remove bulb
3) feel slack in the metal contacts
4) where the contact bends as it meets the plastic, THAT is where I inserted the wire leads
5) set wires
6) reinstall bulb
7) your contact is secure and holds the wires via the pressure exerted from the bulb being installed
Good luck!
__________________
2015 Magnetic Gray Trail Premium - Build Thread: https://www.toyota-4runner.org/5th-g...ight=mbumpus11 <<<--- click that to see what I've done
|
|
|
Reply With Quote
|
|
06-27-2015, 03:48 PM
|
#13
|
 |
Member
|
|
Join Date: Feb 2014
Location: Cleveland, TN
Posts: 98
Real Name: Dave
|
|
|
Member
Join Date: Feb 2014
Location: Cleveland, TN
Posts: 98
Real Name: Dave
|
Finished this mod today. Due to my third row, and seatbelts in the pillars, I mounted the LED lights in the headliner. Easy to do. i ran the wire through the rubber wire bundle on the driver side of the hatch, using 16 ga. speaker wire. The toughest part was running the wire through the hatch. I used a wire tie, and wire tie mounting pad to secure the wire on the inside of the door frame to minimize the chance it might catch in the window. i did not remove the trim panels. I pulled the three clips holding the headliner up in the back and worked through there. I used a long straight pin, marked with the light body length, and poked through the headliner to ensure there would not be a clearance issue with the wires or connectors along the roofline. Then I drilled the holes. Used a metal plate up behind the headliner to ensure I didn't drill anything important.
__________________
2019 GX460, Nebula Pearl. 2014 LE, Mag Gray (sold).
Stable mates: 2020 Subi Ascent Limited, 2021 TRD O/R Premium Black
Last edited by sntryplt; 06-27-2015 at 03:57 PM.
|
|
|
Reply With Quote
|
|
06-27-2015, 06:19 PM
|
#14
|
|
Senior Member
|
|
Join Date: Feb 2010
Location: Bay Area, CA
Posts: 3,454
Real Name: Mike
|
|
|
Senior Member
Join Date: Feb 2010
Location: Bay Area, CA
Posts: 3,454
Real Name: Mike
|
Quote:
Originally Posted by sntryplt
Finished this mod today. Due to my third row, and seatbelts in the pillars, I mounted the LED lights in the headliner. Easy to do. i ran the wire through the rubber wire bundle on the driver side of the hatch, using 16 ga. speaker wire. The toughest part was running the wire through the hatch. I used a wire tie, and wire tie mounting pad to secure the wire on the inside of the door frame to minimize the chance it might catch in the window. i did not remove the trim panels. I pulled the three clips holding the headliner up in the back and worked through there. I used a long straight pin, marked with the light body length, and poked through the headliner to ensure there would not be a clearance issue with the wires or connectors along the roofline. Then I drilled the holes. Used a metal plate up behind the headliner to ensure I didn't drill anything important.
|
I was thinking of putting mine in the headliner too. We will see come the next few days when I get mine installed.
|
|
|
Reply With Quote
|
|
06-29-2015, 06:07 PM
|
#15
|
|
Member
|
|
Join Date: Apr 2015
Location: HTX
Posts: 348
Real Name: Bump
|
|
|
Member
Join Date: Apr 2015
Location: HTX
Posts: 348
Real Name: Bump
|
Quote:
Originally Posted by mikey's2010SR5
I was thinking of putting mine in the headliner too. We will see come the next few days when I get mine installed.
|
Had a chance to install em yet? Looking forward to seeing how yours turns out!
__________________
2015 Magnetic Gray Trail Premium - Build Thread: https://www.toyota-4runner.org/5th-g...ight=mbumpus11 <<<--- click that to see what I've done
|
|
|
Reply With Quote
|
| Thread Tools |
|
|
| Display Modes |
Rate This Thread |
 Linear Mode Linear Mode
|
|
 Posting Rules
|
You may not post new threads
You may not post replies
You may not post attachments
You may not edit your posts
HTML code is On
|
|
|
|


