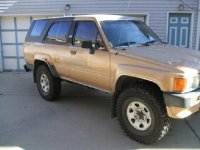
1989 4Runner rebuild

boscounderfoot

New member
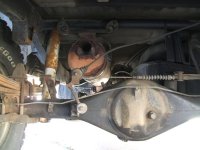
I've got an '89 V6 4runner and was wondering if anyone has replaced the 3rd members with those from a 92-95. I found a 94 parts vehicle that came stock with 488's from the factory and was thinking of swapping the whole 3rd member in the front and rear. Any ideas?

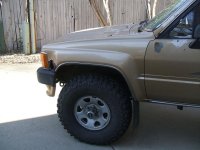
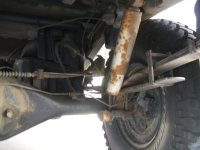
The truck is currently stock, although I just replaced the tires with 33/10.50BFG MT's. I also just received my OME suspension the other day, ( Dakar rear leaf springs and torsion bars, along with Bilstein 5100 shocks ). Doing the math, 410 stock gears and 225/75 stock tires works out to 480ish gearing with the 33's. Has anyone done this before?

Pictures to follow, and thanks in advance for the help.
 
Register to hide this ad
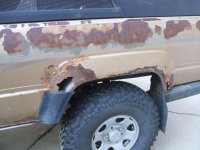
New pics of "rust runner"

Yes they are swappable, yes 4.88 is the correct ratio for 33's if you have a manual trans.

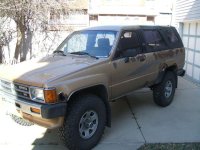
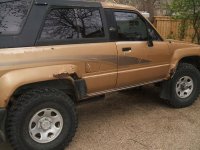
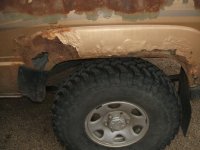
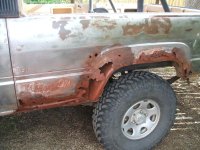
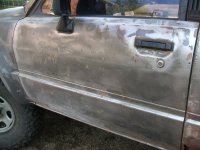
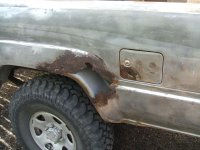
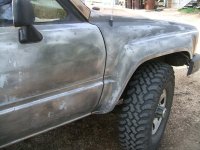
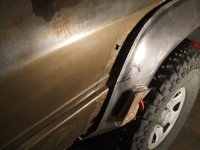
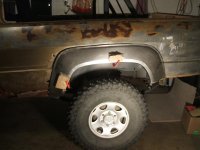
Yes, it is a manual transmission. I enclosed a couple pictures of the rusty runner before any work has been done. I want you guys to see what she looks like prior to the facelift. This thing came with a stack of receipts from all the work that's been done....All the way back to 1992. PO kept it up mechanically, and the interior is in really nice shape. The cigarette lighter even works. Too bad the body didn't fair as well. But who can ***** for $850. I went down to a Toyota specific boneyard and picked up both fenders. There is a lot of cancer on both quarters, so I'm going to weld in some new skins. Time to bust out the MIG!

I got the 33's at 4wheel Parts of all places, $645.60 out the door for 4 with mount, balance and tax. I bought a fifth tire on Craigslist for $100, it was brand new, dude never mounted it. The wheels were also a $50 Craiglist find. The new heavy rated OME Dakar springs and torsion bars showed up the other day. $484 with shipping from 4x4 Connection and of course the requisite torsion bar hardware from Toyota for $21.

The ultimate goal is to have a very capable (not extreme) 4runner on a $5000 budget. That includes ALL taxes, shipping, labor, etc. I know that my time isn't free, so the fact that I'm performing all of the labor is a little tricky to estimate and attach a dollar figure to.......But I enjoy doing this work and really love the truck, so I won't be looking at it as a chore. It's going to be interesting to see if this project can actually be done for $5000 total. I'll keep you informed on that one.

Well guys, thanks for this site. You rule!!! Enjoy the pics and I'll keep updating as things get done.
 

Attachments

  • 4run.JPG
    4run.JPG
    47.2 KB · Views: 3,694
  • forunner 001.jpg
    forunner 001.jpg
    62.6 KB · Views: 3,016
  • forunner 002.jpg
    forunner 002.jpg
    60.6 KB · Views: 2,706
  • forunner 003.jpg
    forunner 003.jpg
    49 KB · Views: 2,681
  • forunner 004.jpg
    forunner 004.jpg
    56.9 KB · Views: 2,599
  • forunner 005.jpg
    forunner 005.jpg
    73.2 KB · Views: 4,430
Last edited:
quick update.......Just sold the stock wheels and tires for $80 and the rear step bumper for $50.

I also plan on getting a little return from the metal recycler. I'll have quite a bit of left over steel from the donor quarters, and also the old diffs and body panels. Every little bit helps........And I'm not cheap, just thrifty!
 
Last edited:
Good luck with the build I can't wait to see more of it :)

If you need parts I have stuff left over from my rebuild:thumb3:
 
Good luck with the build I can't wait to see more of it :)

If you need parts I have stuff left over from my rebuild:thumb3:

Thanks to everyone regarding the information thus far on project "Rusty Runner". I start fall semester exams next week and will have 5 weeks before spring semester starts to get a lot of work done. Right now, I have Fluid Mechanics, Dynamics and Strength of Materials on my mind. :nerd:

Quick question regarding a separate posting.........Fault code 21 is the o2 sensor isn't it? My exhaust is completely shot, I am already planning on replacing the cat and exhaust, so I need to double check that code definition before I start ordering more parts.

Thanks in advance and Happy Thanksgiving to everyone. Be safe and try not to eat too much!
 
So did you ever replace the diffs? You kinda got off-subject.

I just did mine (89) via the same year donor (94 I think). The only thing that I had any issues with was the ADD assembly on the left side (driver's) of the front diff. If your donor has this feature - which I'll bet it does - all you have to do is unbolt it from the diff (once it's all removed from the donor), pull it off with an axle puller, replace the seal that applies to a non-ADD diff ($5 tops), bolt YOUR axle assembly on and install. This will be the most difficult part of the job... The rear is a breeze.

Pull the back wheels off. Remove the drums. Disconnect the brake lines. This would be a good time to blow out all the old brake fluid front and back and replace with new synth fluid since you'll be bleading everything anyway. Then remove the Four bolts on the axle side of the wheel assembly and slide the whole assembly out away from the diff just enough to remove and replace. Piece-o-cake. Reverse sequance.

And while you're under there dikin around. This would be a good time to extend you diff breathers up so to prevent water getting in during those deep crossings. You can get the later model hose fittings for diffs from toyota for nearly nothing to run your hose and breather cap somewhere up high. Both diffs have this settup. It's a cheap bit of prevention.
Good luck,
 
Last edited:
Update of progress

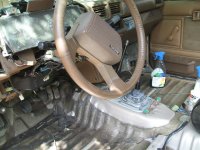
Been a hectic couple of months with school but the 4runner is completely stripped, new front fenders are in, rear suspension ( minus shocks ) is done, the interior was gutted, scrubbed and is in the process of being put back together. Also in the process of wiring up the new heated seats, audio and lights. Ordered the rear quarter panels from Wolf Steel in Quebec, waiting patiently with welder at the ready.....Paint supplies are coming as well, a single stage, acrylic-urethane, antique gold metallic.........Check out the pictures, more to come......
 

Attachments

  • 4runnerbuild1 001.jpg
    4runnerbuild1 001.jpg
    98.7 KB · Views: 3,345
  • 4runnerbuild1 002.jpg
    4runnerbuild1 002.jpg
    70.5 KB · Views: 2,658
  • 4runnerbuild1 003.jpg
    4runnerbuild1 003.jpg
    100.8 KB · Views: 2,429
  • 4runnerbuild1 006.jpg
    4runnerbuild1 006.jpg
    80.5 KB · Views: 2,481
  • 4runnerbuild1 008.jpg
    4runnerbuild1 008.jpg
    80.3 KB · Views: 2,374
  • 4runnerbuild1 009.jpg
    4runnerbuild1 009.jpg
    89.5 KB · Views: 2,394
Last edited:
cant wait ..
VERY interested in your "time spent" installing/filling/bodyworking these panels .. please keep track of this
and lots of pics please !!!!

.
 
End of July update

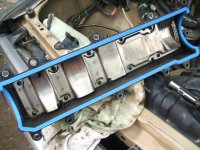
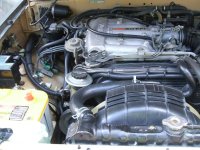
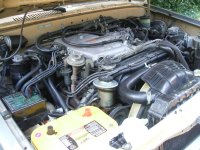
Well, progress has been steady......slow but steady. I just finished cleaning up the nastiest engine I've worked on in a while. The valve covers were leaking so badly that the truck smoked and the engine bay was coated in years of oil and grime. As you 3.0 guys know, changing them is a pain in the butt. The guy who supposedly changed these in the past, didn't actually do his job to standard. There was RTV everywhere and he had overtightened the cover bolts so severely that one actually snapped on me while trying to loosen it. :ybrick: And let's not forget to mention the upper intake plenum bolts that didn't receive anti-seize upon reassembly.....One of those broke as well!!! :dammit:
A quick trip to the hardware store cost $30 for 22 valve cover bolts with washers, the 8 assorted nuts, bolts and washers for the plenum and the tap & bit to drill out the lower manifold bolt. It took me all day but I got both cover gaskets changed and the intake plenum reassembled. I was also able to change out the faulty throttle position sensor while I had the throttle body off. The job sucked but I did the work correctly and cleaned everything as I went.
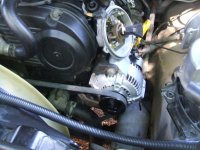
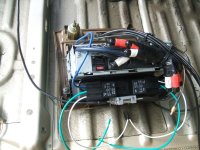
The next day I installed the 130 amp alternator I got from Maniac Electric Motors and built the auxiliary power cable that runs from the alternator directly to the Optima. I used 4 ga. Monster Cable with an in-line 150 amp fuse for the power cable and changed out the main battery cables for new 2/0 on both power and ground. I also ran the power leads for the heated seats, Hella 500's and the audio system. I'll take a few pictures of the whole audio package before I install it tomorrow. It turned out real nice, I installed the switches, relays, and aux fuse block together in one unit for a cleaner approach.
Tomorrow's task is to complete the interior wiring and get the carpet and seats installed. I'm leaving the rear carpet, seats and trim panels out until the rear panels are replaced....(They're STILL not here yet, it's been 2 weeks). Well, that's it for now.........I'll update again when the interior is finished and everything is buttoned up. More pics to follow as I get them downloaded.
 

Attachments

  • 4runnerbuild1 001.jpg
    4runnerbuild1 001.jpg
    93.6 KB · Views: 2,211
  • 4runnerbuild1 035.jpg
    4runnerbuild1 035.jpg
    92.3 KB · Views: 2,225
  • 4runnerbuild1 036.jpg
    4runnerbuild1 036.jpg
    78.6 KB · Views: 2,237
  • 4runnerbuild1 042.jpg
    4runnerbuild1 042.jpg
    77.3 KB · Views: 2,734
End of the week update

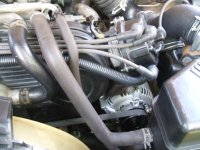
I had a pretty productive week. Buttoned up the engine compartment, completed all of the electrical, installed the home-made bikini top (Jeep Wrangler part, cost $32 total), put the front portion of the interior back in and cranked her up. No problems, no nothing. It started right up and the idle settled right down to 800ish, nice and smooth....Gotta love new throttle position sensors!!
No electrical gremlins to sort out, everything worked perfectly, and the "check engine" light hasn't relit. I'm very psyched about that!

Tomorrow I'm going to remove the lower/shortest overload spring from the OME leafs, the ride is just too harsh and the rear end is a little too high for my tastes. I also want to get started on the front bumper/winch mount fabrication work. The replacement body panels finally showed up from Wolf Steel, they look decent but will require a bit of finessing. Unfortunately, I am moving on the 20th, so those wait until I get settled in the new garage.

I'll post some updated pics tomorrow or Sunday to show you guys the progress, and if anyone is interested in my cheap bikini top design, I'll post some detailed pics and instructions. I did mine differently than the other threads, and it is a lot simpler and cleaner looking in my opinion.
 
Last edited:
Progress report.....COOL!

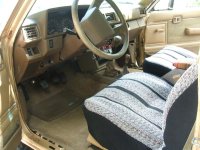
Check out the pictures of the recent stuff to be completed. The audio package with switches, relays and fuse block for the heated seats and Hella 500's just prior to installation in the dash. It worked out really well and there were no fitment problems at all. As you can see, the interior turned out really nice, I even replaced the torn console lid cover with new foam and fabric. I tossed in a couple shots of the engine bay completely finished. No more oil drippage from the leaky valve covers (aka fire hazard), and the electrical is complete. It really is a lot nicer to work on a clean engine!
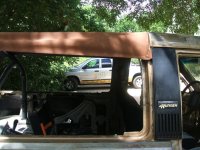
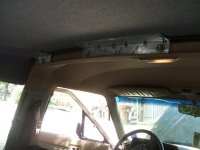
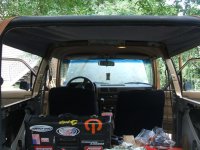
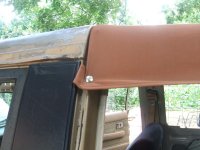
The next few shots are the bikini top. I made the brackets out of 3x3 heavy gauge flashing and drilled them to use the hard top mounting holes. The only holes that had to be drilled into the truck were for the two snaps and they're only 3/64". The initial highway test yielded no flapping problems and the snaps stayed. If anyone is interested, I can give you more explicit instructions on the install........but I still have to cut back and paint the bracket so mine isn't even done yet.
 

Attachments

  • 4runnerbuildaugust12 005.jpg
    4runnerbuildaugust12 005.jpg
    96.9 KB · Views: 2,134
  • 4runnerbuildaugust12 008.jpg
    4runnerbuildaugust12 008.jpg
    94.9 KB · Views: 2,162
  • 4runnerbuildaugust12 010.jpg
    4runnerbuildaugust12 010.jpg
    97.4 KB · Views: 2,127
  • 4runnerbuildaugust12 011.jpg
    4runnerbuildaugust12 011.jpg
    110.3 KB · Views: 2,139
  • 4runnerbuildaugust12 013.jpg
    4runnerbuildaugust12 013.jpg
    98.6 KB · Views: 5,120
  • 4runnerbuildaugust12 014.jpg
    4runnerbuildaugust12 014.jpg
    62.1 KB · Views: 2,173
  • 4runnerbuildaugust12 015.jpg
    4runnerbuildaugust12 015.jpg
    94.3 KB · Views: 2,075
  • 4runnerbuildaugust12 016.jpg
    4runnerbuildaugust12 016.jpg
    75.8 KB · Views: 2,059
Last edited:
Front bumper and winch mount

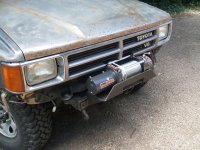
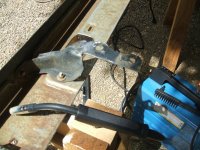
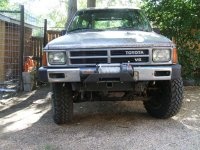
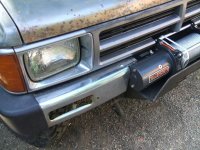
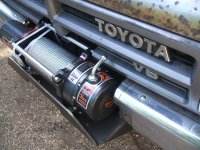
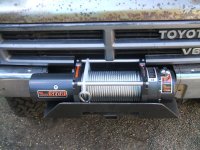
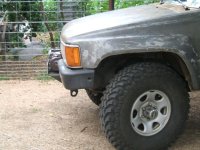
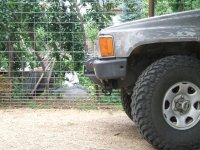
Here are some shots of the progress on the bumper/winch mount. I blindly ordered the winch mount from Low Range OffRoad and am pretty impressed with it. The only problem with it so far is one of their holes is a little off, but I'll fix that when I take it back apart to paint. I like the winch tucked back in like I have it now, but that meant modifying the grille.......and then there was the question of the rest of the bumper and I also needed a mounting point for the lights. I decided to try modifying the stock front bumper to work with the winch and mount. I had to cut a little here and there, and I f'd up and cut the wrong side of one bracket and had to weld it back together but other than that, it turned out pretty cool...........and it didn't cost me anything. I have about 4 hours total time into the whole bumper thing so far and it should only take me about another hour to fine-tune.

I really like the somewhat stock appearance of the front-end, and I'm also digging the approach angle.......Enjoy the pics, more to come later.
 

Attachments

  • 4runnerbuildaugust12 021.jpg
    4runnerbuildaugust12 021.jpg
    111.1 KB · Views: 1,329
  • 4runnerbuildaugust12 023.jpg
    4runnerbuildaugust12 023.jpg
    111.5 KB · Views: 1,165
  • 4runnerbuildaugust12 028.jpg
    4runnerbuildaugust12 028.jpg
    133.9 KB · Views: 1,340
  • 4runnerbuildaugust12 029.jpg
    4runnerbuildaugust12 029.jpg
    112.8 KB · Views: 1,233
  • 4runnerbuildaugust12 030.jpg
    4runnerbuildaugust12 030.jpg
    107.6 KB · Views: 1,144
  • 4runnerbuildaugust12 031.jpg
    4runnerbuildaugust12 031.jpg
    96.5 KB · Views: 1,205
  • 4runnerbuildaugust12 032.jpg
    4runnerbuildaugust12 032.jpg
    88.1 KB · Views: 1,151
  • 4runnerbuildaugust12 033.jpg
    4runnerbuildaugust12 033.jpg
    122.5 KB · Views: 1,164
Quarter panel installation

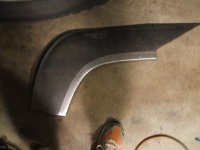
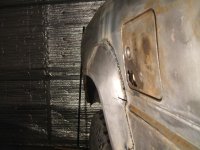
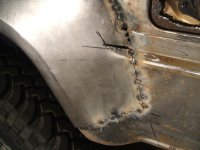
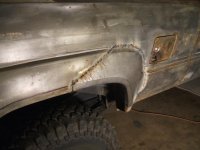
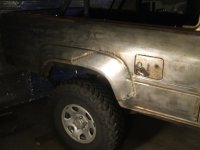
Well, I got moved into the new house and got the garage squared away, so I finally had some time to start on the rear quarters. I ordered both wheel arches and the driver side panel behind the door. Long of the short, don't buy these if your panel is too far gone. The Wolf Steel parts are OK if all you need to do is patch, that's it. I finished the passenger side patch and it came out OK, once I dress the spot welds and glaze the area, it will look great. Not too bad for 4 hours.........That included mocking the panel, scribing, cutting out the rusty area, cutting the panel, clamping and welding. I would guess another 2 hours for prep and that side will be ready for primer.

Check out the pics....even with the machine as low as it would go, still had a few burn-throughs. :happens:
 

Attachments

  • 4runner body panel installation 001.jpg
    4runner body panel installation 001.jpg
    51.3 KB · Views: 1,140
  • 4runner body panel installation 002.jpg
    4runner body panel installation 002.jpg
    49 KB · Views: 1,079
  • 4runner body panel installation 004.jpg
    4runner body panel installation 004.jpg
    87.7 KB · Views: 1,099
  • 4runner body panel installation 005.jpg
    4runner body panel installation 005.jpg
    67.4 KB · Views: 1,148
  • 4runner body panel installation 007.jpg
    4runner body panel installation 007.jpg
    58 KB · Views: 1,218
Driver side panel mock-up

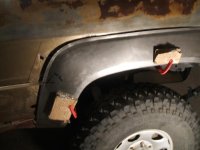
Here are a couple of pictures showing the driver side getting mocked and traced. With these panels, you measure and mock several times before putting the grinder to them. This side should be a lot more difficult than the passenger side but it's pretty straight forward none the less......I'll post again once I get this side buttoned up.
 

Attachments

  • 4runner driver side body panel installation 001.jpg
    4runner driver side body panel installation 001.jpg
    56 KB · Views: 1,382
  • 4runner driver side body panel installation 002.jpg
    4runner driver side body panel installation 002.jpg
    65.2 KB · Views: 1,090
  • 4runner driver side body panel installation 004.jpg
    4runner driver side body panel installation 004.jpg
    60.4 KB · Views: 1,116
Thats gonna look alot better than before. I want some sides from slacker, but the shipping is rediculous to ohio. Are you using flux cored wire? What are you gonna do with the holes in your rockers?

Dustin
 

Members online

Forum statistics

Threads
278,307
Messages
3,554,054
Members
248,016
Latest member
Advally Service

Trending content

Back
Top