Red Leader
New member
Hey guys,
A while back when I was shopping for 4runners I took a look at one and it had vent windows. Was told it was a pretty rare feature. I ended up not buying that one and found another one (my baby ). I forgot about the vent windows. Fast forward to a week ago. I was in the junkyard looking for a rear tire carrier swing off a 90-91 and lo-and-behold, I found a 4runner that had vent windows.
Not knowing anything about them, I decided to snag them and do a conversion.
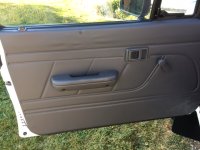
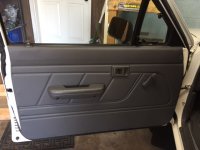
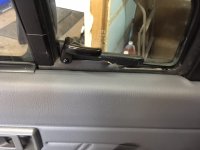
So, what is the difference between a solid window and a vent window?
Here is a solid window 4runner -

And here is a vent window 4runner -

So why a vent window conversion? I found a lot of reasons.
-rare
-different
-fun to learn something about the vehicle
-cheap change
-better airflow
That last one is probably the biggest reason for me. Before I purchased my 4runner, it had had an A/C delete, so honestly getting some higher airflow through vent windows sounded very practical to me and very desirable.
Now, what are some possible negatives to the conversion?
-Reports of whistling/air coming in
-Possibility for more leaks
-If your window breaks, you're a little more in trouble trying to find a cheap replacement
I don't know if it is possible to cut window glass, but if so, one might be able to convert a solid window to a shortened vent window. I'm not too worried about the last one, because if anything happens to the vent window setup, I have my solid window take-offs as a backup.
How easy is this conversion? On a 1-4 star rating, I would rate it a 1 star. It will take you a few hours, but it is not difficult. Honestly, the hardest part of the conversion will be actually finding a set of split-windows.
Here are some practical things to know before starting:
-The conversion works. The doors have a very slight difference, but the difference can be modified or left alone and overcome.
-You can convert some of your existing trim pieces. It is easiest to get all the trim pieces from around the window when you find the windows, but you can make the bottom pieces from your old ones if you need to.
-If you already have manual windows, your solid window regulator will work. I cannot speak to an electric-to-manual window conversion feasibility, but I assume that if you can get your windows a crankin', you can get them a ventin'.
-You will need the small C-channel metal strips that connect the bottom of the window to the window regulator. The ones between the two windows are different.
-You do need to modify your interior door trim panel slightly if you want to reuse it.
How about the cost of a vent window conversion?
The cost varies, depending on how many parts you get and where you get them from. I picked up mine at a pull-n-pay yard. Total was $54.
Here is how I rate the cost -
$$$$ - you are made of money so you just pull the entire doors and the conversion is real easy for you
$$$ - you get every single part, except the door shell - that includes the 2-piece windows, all the surrounding trim pieces, the window regulators (which are different) and the accompanying interior trim panels. You also pull the door-mounted mirrors.
$$ - you get the windows and all surrounding trim pieces, including the one trim piece on the interior that hooks to the interior door panel. This is what I did.
$ - you are a cheapskate and/or your junkyard charges you up the wazoo for every nut and bolt so you grab the windows and the upper trim piece only.
So, with all that said, lets get started!
Here is the project vehicle -

Here are the conversion pieces -

Here are the tools that I used. Main tools are a phillips screwdriver, something to pry stuff with, and a 10mm socket of some sort -

First, you'll need to take off the interior trim panel. There are probably better tutorials out there, but I'll include what I did.
Take off your window roller. Using the FSM as a guide, the rag trick works great -


Remove the screw from the door handle -

To disengage the handle from the panel, slide the handle forward (toward front of vehicle). It will pop out of place.
Pop off the handrest screw covers -

Unscrew the two screws -

There are two kinds of plastic fittings that hold the door in place. One kind looks like it has a little button in the center - if you push it, it disengages the clip and you can pull it out. The other kind is shaped like a phillips screw. Even if you screw it out, it may not come out. I had to turn them out and yank them at the same time.
Once you get those all out you can start yanking the panel at the edges of the sides and the bottom -

The panel hooks around the door on the top ledge, so lift it straight up, then rotate it almost 90 degrees to get the door handle to fit through -

This picture shows my coin holder pulled, but I don't think you have to pull it.
Remove the plastic -

The corner trip piece hooks on the bottom and attaches with a divot piece about 2/3s of the way up. Pry the top away, then pull up and out -

Take a look at what you've done -

Now, remove the two bolts that hold the window (at the bottom) to the regulator armature and let the window drop down inside the door -
A while back when I was shopping for 4runners I took a look at one and it had vent windows. Was told it was a pretty rare feature. I ended up not buying that one and found another one (my baby
). I forgot about the vent windows. Fast forward to a week ago. I was in the junkyard looking for a rear tire carrier swing off a 90-91 and lo-and-behold, I found a 4runner that had vent windows. Not knowing anything about them, I decided to snag them and do a conversion.
So, what is the difference between a solid window and a vent window?
Here is a solid window 4runner -
And here is a vent window 4runner -
So why a vent window conversion? I found a lot of reasons.
-rare
-different
-fun to learn something about the vehicle
-cheap change
-better airflow
That last one is probably the biggest reason for me. Before I purchased my 4runner, it had had an A/C delete, so honestly getting some higher airflow through vent windows sounded very practical to me and very desirable.
Now, what are some possible negatives to the conversion?
-Reports of whistling/air coming in
-Possibility for more leaks
-If your window breaks, you're a little more in trouble trying to find a cheap replacement
I don't know if it is possible to cut window glass, but if so, one might be able to convert a solid window to a shortened vent window. I'm not too worried about the last one, because if anything happens to the vent window setup, I have my solid window take-offs as a backup.
How easy is this conversion? On a 1-4 star rating, I would rate it a 1 star. It will take you a few hours, but it is not difficult. Honestly, the hardest part of the conversion will be actually finding a set of split-windows.
Here are some practical things to know before starting:
-The conversion works. The doors have a very slight difference, but the difference can be modified or left alone and overcome.
-You can convert some of your existing trim pieces. It is easiest to get all the trim pieces from around the window when you find the windows, but you can make the bottom pieces from your old ones if you need to.
-If you already have manual windows, your solid window regulator will work. I cannot speak to an electric-to-manual window conversion feasibility, but I assume that if you can get your windows a crankin', you can get them a ventin'.
-You will need the small C-channel metal strips that connect the bottom of the window to the window regulator. The ones between the two windows are different.
-You do need to modify your interior door trim panel slightly if you want to reuse it.
How about the cost of a vent window conversion?
The cost varies, depending on how many parts you get and where you get them from. I picked up mine at a pull-n-pay yard. Total was $54.
Here is how I rate the cost -
$$$$ - you are made of money so you just pull the entire doors and the conversion is real easy for you
$$$ - you get every single part, except the door shell - that includes the 2-piece windows, all the surrounding trim pieces, the window regulators (which are different) and the accompanying interior trim panels. You also pull the door-mounted mirrors.
$$ - you get the windows and all surrounding trim pieces, including the one trim piece on the interior that hooks to the interior door panel. This is what I did.
$ - you are a cheapskate and/or your junkyard charges you up the wazoo for every nut and bolt so you grab the windows and the upper trim piece only.
So, with all that said, lets get started!
Here is the project vehicle -
Here are the conversion pieces -
Here are the tools that I used. Main tools are a phillips screwdriver, something to pry stuff with, and a 10mm socket of some sort -
First, you'll need to take off the interior trim panel. There are probably better tutorials out there, but I'll include what I did.
Take off your window roller. Using the FSM as a guide, the rag trick works great -
Remove the screw from the door handle -
To disengage the handle from the panel, slide the handle forward (toward front of vehicle). It will pop out of place.
Pop off the handrest screw covers -
Unscrew the two screws -
There are two kinds of plastic fittings that hold the door in place. One kind looks like it has a little button in the center - if you push it, it disengages the clip and you can pull it out. The other kind is shaped like a phillips screw. Even if you screw it out, it may not come out. I had to turn them out and yank them at the same time.
Once you get those all out you can start yanking the panel at the edges of the sides and the bottom -
The panel hooks around the door on the top ledge, so lift it straight up, then rotate it almost 90 degrees to get the door handle to fit through -
This picture shows my coin holder pulled, but I don't think you have to pull it.
Remove the plastic -
The corner trip piece hooks on the bottom and attaches with a divot piece about 2/3s of the way up. Pry the top away, then pull up and out -
Take a look at what you've done -
Now, remove the two bolts that hold the window (at the bottom) to the regulator armature and let the window drop down inside the door -