
i purchased a '99 limited w/ 210k back in November. knew the UBJs were trashed as both boots were damaged and i heard a noise from the drivers side and driving didn't feel planted. i am not a seasoned mechanic by any means, but i have installed drop bracket lifts, complete rear suspension setups and even do the LED swaps in the 05+ tacoma clusters, but i was a little timid tackling this job after reading the handful of good posts. i rented the tools to attempt it myself, but also picked up a 35mm socket just in case i got in a bind and needed to remove the spindle and have them pressed in.
well all i have to say after doing both yesterday...this was so easy!!! i am now ashamed how timid i was before hand. the key to the entire thing was the "4WD ball joint adapter set" from o'reilly's. i have read that vatozone doesn't carry this extra set, so i made sure to rent my tools from o'reilly's. because of doing this so easily, i thought i would do a little mini writeup of how i did them both in under 3 hours (it was my first time...lay off!!!) to maybe help others.
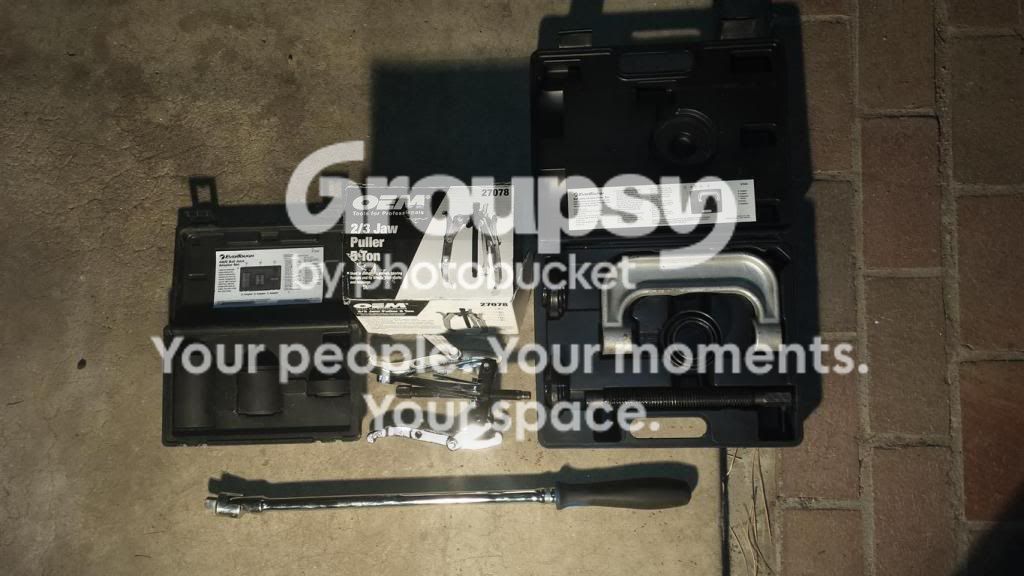
besides standard 10mm, 12mm, 19mm, 21mm and 22mm sockets and a 4-1/2" grinder w/ cutoff wheel, here is a picture of the only tools i needed to complete the job.
Tools
4wd ball joint adapter set (o'reilly's 67048)
3 jaw 5ton puller (vatozone 27078)
Ball joint removal setup (o'reillys 67045)
24" 1/2 drive breaker bar
tools required
cut ball joint (i used a 4-1/2" grinder w/ a cutoff disc)

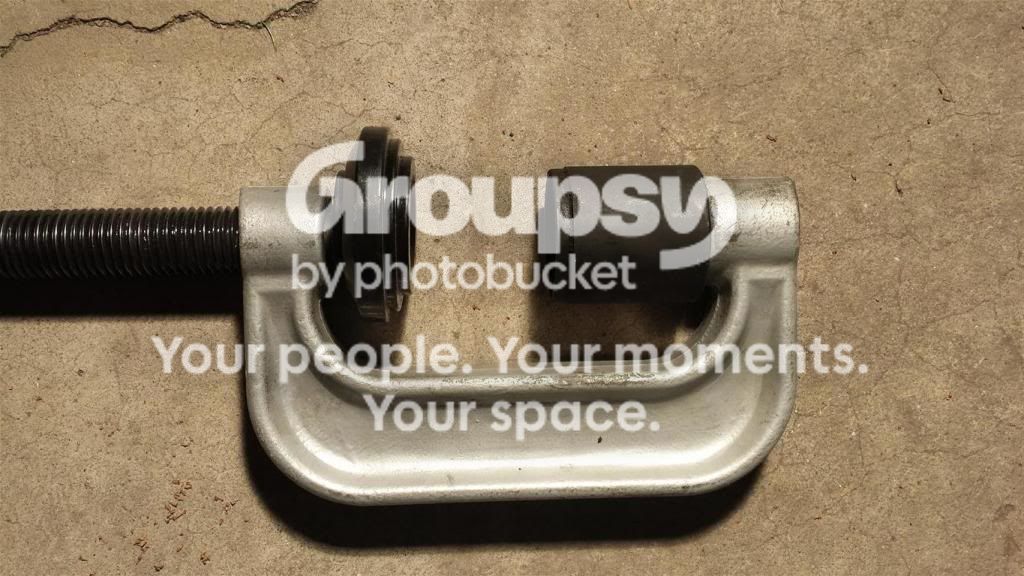
removal setup (ball joint press, press plate from ball joint press, "B" adapter).
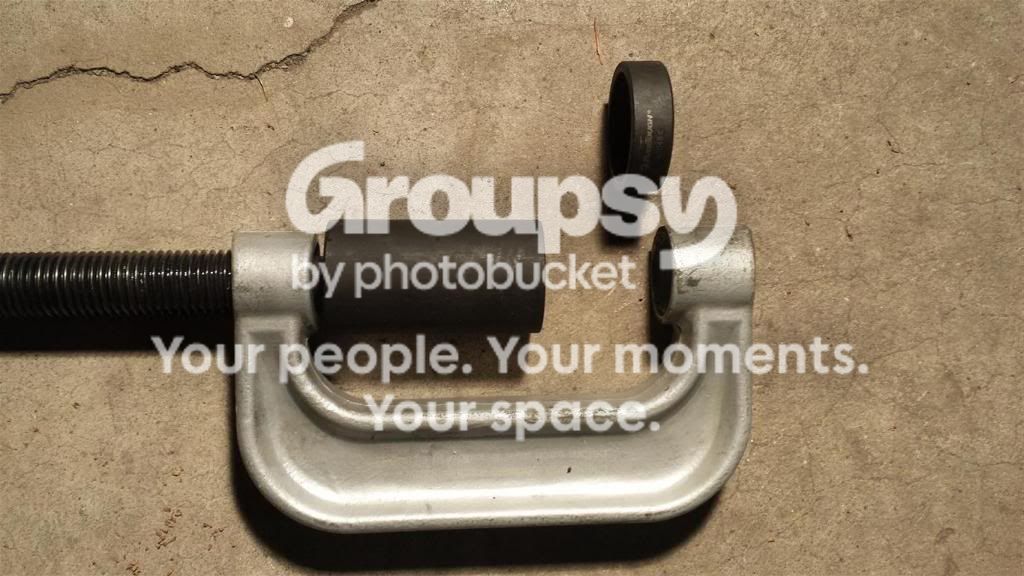
installation setup (ball joint press, "A" adapter, "C" adapter or piece of thick steel). one side i placed a piece of this steel on the bottom of the ball joint, the other side i used the "C" adapter. the "C" adapter will work, but after doing both, i prefer the metal piece on the bottom.
my process (after truck is properly on a jack stand and tire removed):
1) unbolt the two 10mm and one 12mm bolts holding the ABS sensor to the spindle. unclip from lower mount so that this line will not stretch in the below steps.
2) remove castle nut and press ball joint from UCA with the 3 jaw 5ton puller.
3) tie up the spindle so that it will angle out just enough so that the screw of the ball joint press will be accessible just outside the fender well
4) setup BJ to be pressed out. remove the boot and snap ring and cut as shown in the picture above.
5) set up the BJ press for removal as show in the above picture, again with the screw facing up just outside the fender well
6) use the 24" cheater bar and press the BJ out.
7) clean up the spindle in preparation for the new BJ to be pressed in
8) place new BJ in the spindle and setup the press for installation as shown above
9) take care to ensure everything is lined up for a square press in of the new BJ
10) use the 24" cheater bar and press the BJ in.
11) install snap ring and fill boot w/ grease as instructed. install boot and secure as instructed.
12) attach UCA to BJ w/ castle nut and tq to spec. (i believe its 80#, but others can comment and i will edit if necessary.) install cotter pin.
13) reinstall all the ABS just you removed in step 1.
14) install tire, tq lugs and remove truck from jack stand.
15) pat yourself on the back for tackling the infamous UBJ replacement!!
hope this helps others. again, this was the way i did it that worked great for me, but as always, follow at your own risk.
well all i have to say after doing both yesterday...this was so easy!!! i am now ashamed how timid i was before hand. the key to the entire thing was the "4WD ball joint adapter set" from o'reilly's. i have read that vatozone doesn't carry this extra set, so i made sure to rent my tools from o'reilly's. because of doing this so easily, i thought i would do a little mini writeup of how i did them both in under 3 hours (it was my first time...lay off!!!) to maybe help others.
besides standard 10mm, 12mm, 19mm, 21mm and 22mm sockets and a 4-1/2" grinder w/ cutoff wheel, here is a picture of the only tools i needed to complete the job.
Tools
4wd ball joint adapter set (o'reilly's 67048)
3 jaw 5ton puller (vatozone 27078)
Ball joint removal setup (o'reillys 67045)
24" 1/2 drive breaker bar
tools required
cut ball joint (i used a 4-1/2" grinder w/ a cutoff disc)
removal setup (ball joint press, press plate from ball joint press, "B" adapter).
installation setup (ball joint press, "A" adapter, "C" adapter or piece of thick steel). one side i placed a piece of this steel on the bottom of the ball joint, the other side i used the "C" adapter. the "C" adapter will work, but after doing both, i prefer the metal piece on the bottom.
my process (after truck is properly on a jack stand and tire removed):
1) unbolt the two 10mm and one 12mm bolts holding the ABS sensor to the spindle. unclip from lower mount so that this line will not stretch in the below steps.
2) remove castle nut and press ball joint from UCA with the 3 jaw 5ton puller.
3) tie up the spindle so that it will angle out just enough so that the screw of the ball joint press will be accessible just outside the fender well
4) setup BJ to be pressed out. remove the boot and snap ring and cut as shown in the picture above.
5) set up the BJ press for removal as show in the above picture, again with the screw facing up just outside the fender well
6) use the 24" cheater bar and press the BJ out.
7) clean up the spindle in preparation for the new BJ to be pressed in
8) place new BJ in the spindle and setup the press for installation as shown above
9) take care to ensure everything is lined up for a square press in of the new BJ
10) use the 24" cheater bar and press the BJ in.
11) install snap ring and fill boot w/ grease as instructed. install boot and secure as instructed.
12) attach UCA to BJ w/ castle nut and tq to spec. (i believe its 80#, but others can comment and i will edit if necessary.) install cotter pin.
13) reinstall all the ABS just you removed in step 1.
14) install tire, tq lugs and remove truck from jack stand.
15) pat yourself on the back for tackling the infamous UBJ replacement!!
hope this helps others. again, this was the way i did it that worked great for me, but as always, follow at your own risk.


