4RunAmok

4RunAmok

New member
4RunAmok '06 Sport Edition 4WD Build

Our old 1999 4Runner SR5 4WD, sold to a co-worker..
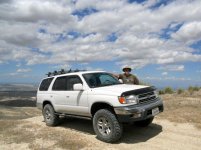
carrizo.jpg
We bought it in 2000 with 61,000 miles on it, sold it in 2015 with 271,000 miles.

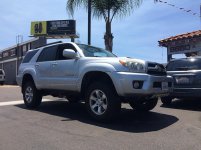
Just hours after making the sale, we picked up our next 4Runner, and hit the closest trail!
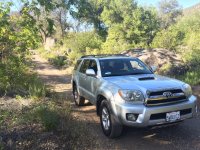
Photo Apr 12, 4 53 54 PM.jpg

Completed so far (in order of completion):
  • BFG KO2 265/70r17
  • Complete Interior LED Swap
  • Dual USB Port, Toyota Fit, next to the DAC switch
  • JA's Foglight mod
  • 2014 Scion FRS Touchscreen Head Unit
  • Icon Stage II (2.5 Coil-overs, Tube UCA's, 2.5 CDC Rear Shocks, Icon "Expo" 3in Rear Springs)
  • Goose Gear 3-drawer system
  • Cascadia Vehicle Tents Mt. Thielsen Hmm their photo looks familiar
  • LivingOverland H2O System (Onboard running water!)
  • Pelfreybilt Offroad 4th Gen Sliders with Kickout[/URL]
  • Prinsu Design Studios 4th Gen Full Length Roof Rack
  • Wilson Electronics Cellphone Booster
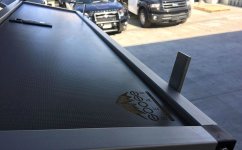
  • ShadyBoy Awning
  • Puma Air Compressor ***DIED a horrible death, cheap chinese junk***
  • Pelfreybilt 06-09 Aluminum Bumper
  • CBI Rear Bumper ***REMOVED and went back to stock***
  • SPOD Bantam
  • Engel 45L 12v Fridge
  • OffRoad Only LiteSPOTS Rock Lights

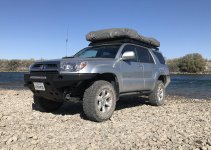
How she's sitting today
20171015 edited.jpg
 

Attachments

  • carrizo.jpg
    carrizo.jpg
    47.1 KB · Views: 2,434
  • Photo Apr 12, 4 53 54 PM.jpg
    Photo Apr 12, 4 53 54 PM.jpg
    141.3 KB · Views: 2,413
  • 20171015 edited.jpg
    20171015 edited.jpg
    138.2 KB · Views: 834
Last edited:
Register to hide this ad
nice 2000 runner and sounds like she served you well- congrats on the new one..you have some awesome gear to go on her

so im guessing you will have this one till '30?? : P
 
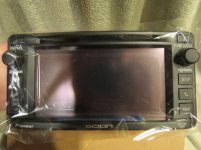
It's here!

FRS Stereo.jpg

All I need to do now is gather all the adapter cables, the USB and Mic cables, and begin installing.
 

Attachments

  • FRS Stereo.jpg
    FRS Stereo.jpg
    72.5 KB · Views: 2,251
I posted this in the FRS Radio thread, but I'll put it here too.

After receiving the expensive Scion USB cable for the touchscreen radio, and realizing I couldn't just plug in a USB device into it without modification, I went to ebay looking for the harness cable that is supposed to plug into the Scion USB cable. I assume that this cable is probably part of the vehicle wiring harness and is routed to where the actual USB port is.

My intention isn't to put the USB in the center console, I'd rather mount my phone on the dash, and just plug in directly.

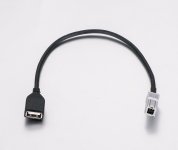
My search lead me to this cable, which has a traditional USB plug, rather than the proprietary plug on the Scion cable.

cable.JPG

I hope it works like it should. If it does, I'll get to return the $65 cable, and be much happier with this $14 solution.
 

Attachments

  • cable.JPG
    cable.JPG
    40.5 KB · Views: 2,304
I received all the adapter cables today. I couldn't wait until I received the alternate USB cable, and I installed the radio tonight.

Everything went pretty smooth, aside from it being 90° and cramped up in my carport with a car next to me, keeping me from opening the door all the way, but I work in worse conditions in our shop without A/C in San Diego summers.

All features seem to be working pretty well, the iPhone 5S paired pretty easily, and I particularly like how the steering wheel controls work in Pandora as well.

I was pretty excited to find out the built in voice control button works for dialing the phone!

Now I need to add and test the alternate USB cable, and purchase the phone controls and install them.

Having had bluetooth hands free via Alpine in my 1999 4Runner, I really missed the feature and being legal here in CA!
 
Lets see, we bought the 4runner in April, the lift was purchased about 3 weeks after that, early May. It's been riding around in the back of the 4runner until today!

Props to The Truck Shop on Miramar in San Diego! They did a great job at a competitive price, and had me out the door just after 1pm! Even having to deal with the XREAS system!

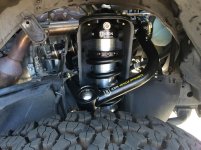
Icon Stage II, around 3"
lift.jpg

2.5 Coil-overs, and tubular steel upper control arms
lift1.jpg

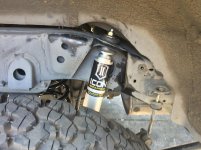
2.0 Rear shocks, Icon 3" Coil springs
lift2.jpg

The ride is SO much better than the XREAS, which I was worried I might miss, it really is a nice system, very strong performance for road handling, unfortunately very poor for any decent offroading. I don't miss it one bit. The front end is still very stout. I retained my sway bar, might remove it someday, but most likely not. Body roll isn't my thing. I'll be getting the kit to lengthen the rear sway bar links in the not too distant future.

So super happy to finally have this completed. It was just dead weight in the back!
 

Attachments

  • lift.jpg
    lift.jpg
    86.3 KB · Views: 2,094
  • lift1.jpg
    lift1.jpg
    92.5 KB · Views: 2,076
  • lift2.jpg
    lift2.jpg
    83 KB · Views: 2,046
Last edited:
Nice!

I'd spring for the dust caps for the top of the UCAs if you plan on romping in Borrego. Keeps the sand from collecting there and wearing out the ball joint too fast.

Also, if you didn't already, go by ORW and buy some rubber boots for the rear shocks. The amount of dirt and rocks that get thrown at the rear shocks is amazing. It'll pit your shock shaft and cause the seals to wear prematurely.

Couple of easy/low cost things that'll extend your rebuild times tremendously!
 
Nice!

I'd spring for the dust caps for the top of the UCAs if you plan on romping in Borrego. Keeps the sand from collecting there and wearing out the ball joint too fast.

Also, if you didn't already, go by ORW and buy some rubber boots for the rear shocks. The amount of dirt and rocks that get thrown at the rear shocks is amazing. It'll pit your shock shaft and cause the seals to wear prematurely.

Couple of easy/low cost things that'll extend your rebuild times tremendously!

Excellent observations and ideas. The caps are already ordered. I honestly thought they were in the box. Interestingly, the rear shocks came with boots.

I'm considering the neoprene covers for the front coil-overs. They probably won't hurt, dunno if they'll help keep them in better shape.
 
Excellent observations and ideas. The caps are already ordered. I honestly thought they were in the box. Interestingly, the rear shocks came with boots.

I'm considering the neoprene covers for the front coil-overs. They probably won't hurt, dunno if they'll help keep them in better shape.


Lift looks GREAT! There is an ad on Craigs selling the same set-up and I've been tempted to get it. Love the look of the lift and factory rims with the BFG's, such a good combo !
 
lift look great!

love the dinosaur pic due to the fact that Jarassic World just came out and i said in the movie theather that a 4 runner would have been perfect in that eniviroment :D
 
Current photo updated... Not much going on lately.

Working in the vehicle wiring business can be a drag at times, at the end of the day, I don't feel much like wiring enough to start my own projects. The long days at work in the heat aren't helping.

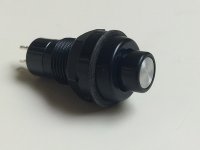
But I have started some prep work on some small projects. I've decided that I want the courtesy lights in the doors to be "optional". So I picked up some small switches that I'll be putting in line with the power wire on those little lights.

Photo Jun 30, 8 19 46 PM.jpg

I've already swapped them out for LED lights, which increased the brightness. Anyone who's camped knows lights draw bugs, so in an effort to minimize that, these small switches will be installed next to the light itself, and I'll leave the lights off until I need them.

I'm also planning on getting Switch Pro's next generation product when it comes out, to handle a small light bar on the front, rock lights, internal accessories, etc.

I also plan to have the rock lights come on with the dome light. So if I hit the unlock on my key fob, the rock lights will operate on the same timer.

Cool stuff planned :)
 

Attachments

  • Photo Jun 30, 8 19 46 PM.jpg
    Photo Jun 30, 8 19 46 PM.jpg
    45 KB · Views: 1,855
Looks great. Do you know what your ground to fender measurements are? If not can you grab them when you have a chance?
 
Looks great. Do you know what your ground to fender measurements are? If not can you grab them when you have a chance?

I did take some, at the same time I took comparative measurements of the Goose Gear 4Runner, since we have the same lift, but different tires, but I don't recall the results and I didn't write them down.

I'll grab a tape and get some measurements.
 
Goose Gear

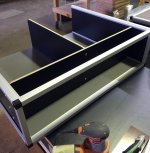
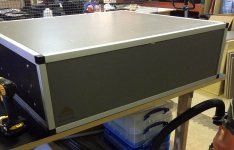
I do wire work for Goose Gear, so instead of building my own cabinet like I did for my 3rd Gen 4Runner, I collaborated with Goose Gear's Brian and Matt to build a drawer system for my 4th Gen. Which means I got to do a significant portion of the construction myself!

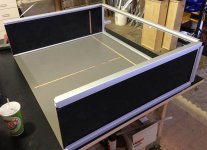
I began cutting extrusion pieces while Brian did the CNC work on the wood. Shortly after, assembly began

01.jpg

Interior walls fit into dado's cut into the walls, floor and ceiling, where they are glued and screwed into place

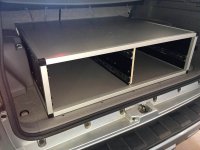
02.jpg

Drawer slides installed, Test fit of the box was a success

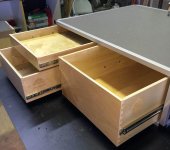
03.jpg

Time to get the drawers installed

04.jpg

No detail left out, the drawers (if large enough) get the Goose Gear logo laser etched on the sides

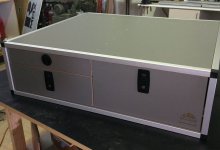
05.jpg

Drawer faces and latches installed, we're almost finished

06.jpg

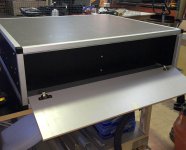
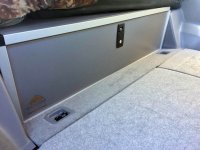
The front side of the box that will be hidden when the rear seats are in their normal position has it's own compartment for...storage...

07.jpg

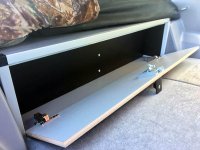
Hidden hinges allow this to open downward

08.jpg

Don't tell anyone about this hidden gem though, k?
 

Attachments

  • 01.jpg
    01.jpg
    133.5 KB · Views: 3,035
  • 02.jpg
    02.jpg
    125.1 KB · Views: 2,718
  • 03.jpg
    03.jpg
    127.3 KB · Views: 2,745
  • 04.jpg
    04.jpg
    112.6 KB · Views: 2,717
  • 05.jpg
    05.jpg
    116.4 KB · Views: 2,533
  • 06.jpg
    06.jpg
    106.6 KB · Views: 2,537
  • 07.jpg
    07.jpg
    114.3 KB · Views: 2,475
  • 08.jpg
    08.jpg
    122.9 KB · Views: 2,778
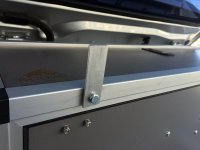
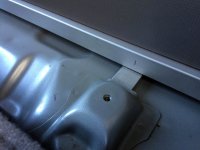
My intention here so far has been to accomplish a "drill-less" install. One that uses existing body features/holes, while avoiding straps and turnbuckles.

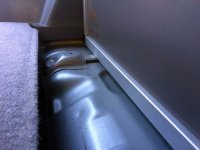
With the trim piece behind the rear seats removed, it reveals the D-ring mounts, which have a couple raised areas under it. Perfect for wedging in a small mounting tab.

09.jpg

10.jpg

With two tabs installed, time to fit it into place

11.jpg

12.jpg

The trim piece needed 3 inches removed from it to fit in place, and snug up against the cabinet, a quick run through the table saw to get rid of that extra material, and the fit was perfect

15.jpg

The door works as intended

16.jpg

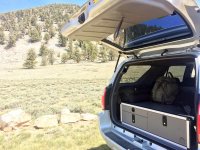
And some gratuitous out in the wild shots, backdrop compliments of the Ancient Bristlecone Pine Forest

13.jpg

14.jpg

I'm almost finished with the dril-less install, the front of the box is very secure using the factory D-Ring mounts, so I'm going to do almost the same thing with the rear D-Ring mounts. It would be nice to be able to remove this box without any tools, with the front of the box simply wedged in place like it is, that may be within reach.
 

Attachments

  • 09.jpg
    09.jpg
    89.9 KB · Views: 2,621
  • 10.jpg
    10.jpg
    110.7 KB · Views: 2,435
  • 11.jpg
    11.jpg
    112.5 KB · Views: 2,495
  • 12.jpg
    12.jpg
    114.7 KB · Views: 2,502
  • 13.jpg
    13.jpg
    149.5 KB · Views: 2,441
  • 14.jpg
    14.jpg
    142.5 KB · Views: 2,420
  • 15.jpg
    15.jpg
    131.9 KB · Views: 2,499
  • 16.jpg
    16.jpg
    126.1 KB · Views: 2,483
Beautiful drawers, man! Building some wood ones myself this next week, and now I have more front attachment options. Super clean!
 

Members online

No members online now.

Forum statistics

Threads
278,304
Messages
3,554,041
Members
248,016
Latest member
Advally Service

Trending content

Back
Top