4X4LABS DIY Rear Bumper new version.

having fun

New member
There is a link on 4x4labs.com to a DIY on IH8MUD.COM.

[MENTION=47269]Darklight[/MENTION] Also has a install help write up on a prefabbed bumper also, on 120 form.

I still have problems adding links to post, so if anyone else wishes to add them, much appreciated.
This write up is just some additional info for anyone that is going to do this kit. Just saving some others time on putting this together. As he told me when I picked this up, I would have to fiddle with it a bit and he seemed confident I wouldn't have a problem.

As long as you have some though on for site putting things together, this shouldn't be a problem for you.
Tools used.... Welder, grinder, air cut off wheel, rasp for drill, portable band saw, and 2 squares.... And a lot off muscle on and offing.

If you have any questions, feel free to hit me up.
 
Last edited:
Register to hide this ad
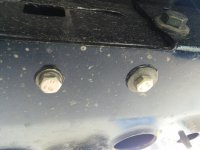
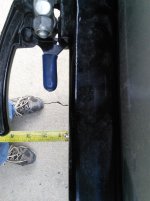
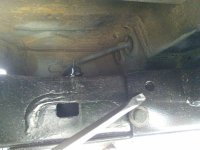
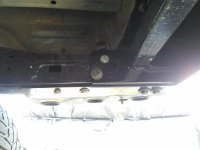
These 2 bolt holes don't have any nuts on the inside of the frame. The holes are 1/2". I took some grade 8 nuts and welded them to a flat washer. Bolt them on and you can weld the nut/washer to the inside frame.
IMG_20160118_131446.jpg

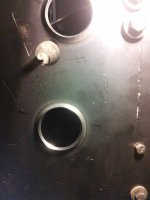
These 2 holes will need to be reamed open a little to bolt on.
IMG_20160118_131526.jpg

This is highly suggested, when I bolt the 2 sides on and attached the main bumper piece on by tacking. I pulled it off and did a full weld.
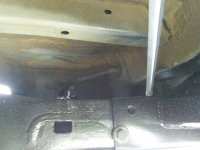
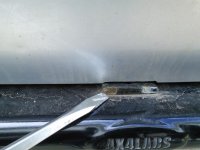
When going to re install to continue, the sides where pushed to tight against the frame. Used a porta power to spread the frame to slide the bumper on and put a thick flat washer in between the frame and side. Screw driver shows the area.
So put a washer between there and bolt the sides down before tacking the main rear bumper piece on.

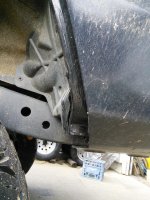
You can obviously see the body mount hole needed some attention. Reamed it open also.
IMG_20160118_131509.jpg
 

Attachments

  • IMG_20160118_131446.jpg
    IMG_20160118_131446.jpg
    135.3 KB · Views: 2,808
  • IMG_20160118_131526.jpg
    IMG_20160118_131526.jpg
    135 KB · Views: 2,948
  • IMG_20160118_131509.jpg
    IMG_20160118_131509.jpg
    136.8 KB · Views: 2,685
  • IMG_20151016_211927.jpg
    IMG_20151016_211927.jpg
    145.3 KB · Views: 2,497
Last edited:
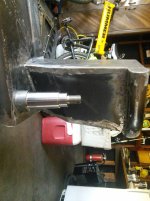
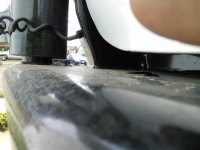
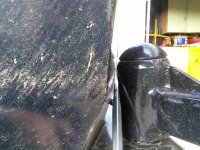
I cut this pin at a 45* angle on the bottom after figuring out how much to remove.

IMG_20151111_104608.jpg

You need to mount the swing arm housing to the pin. When I used the suggested 3/4" height in the other write up, I notice the stopper pin wasn't going to fit in there. So I set the stopper on the bumper and put a Dime on top of it and set the housing on it and turned the nut so my angle cut made contact with the bumper on the inside after squaring 2 sides of the housing.
IMG_20160118_143321.jpg
 

Attachments

  • IMG_20160118_131732.jpg
    IMG_20160118_131732.jpg
    140.9 KB · Views: 2,449
  • IMG_20151111_104608.jpg
    IMG_20151111_104608.jpg
    136.4 KB · Views: 2,754
  • IMG_20160118_143321.jpg
    IMG_20160118_143321.jpg
    140.1 KB · Views: 2,495
Last edited:
/\ on the above photo you can see how close my swing housing is to the back piece, I grinded a rounded top to not touch it any more. This isn't going to be a problem for you as long as you don't put this together before the pin is installed. Install your pin first, I wanted my inner side flush with the tailgate,and did a molding weld/ grinding to mine to look like a 1 piece.


With your pin installed and housing bolted on, put your side piece on that sits to your tail gate.
You can trim/cut this piece off on the side to give the lower picture piece room for your swing arm housing.
IMG_20160118_131820.jpg

This piece come taller and wider for you to cut to fit.So use it for a guide when trimming the side piece to gain clearance for your swing arm housing and then you can cut it down.
IMG_20160118_131855.jpg
 

Attachments

  • IMG_20160118_131820.jpg
    IMG_20160118_131820.jpg
    136.7 KB · Views: 2,872
  • IMG_20160118_131855.jpg
    IMG_20160118_131855.jpg
    138.1 KB · Views: 2,492
Last edited:
I wanted my set up tight along the body, so I set the arms up 3/8" past the bumper line. This put me at 1/4" off the door. You might want to install the bumper to set up the arms for distance.
IMG_20160118_132337.jpg

Also when installed on your ride, set!the stopper on the bumper and open the door. Make sure it won't hit it in position and mark it for welding.
[attached]187645._xfImport[/attach]

The gussits you see in the other pictures on the swing arms does NOT come with the kit. I did this for personal preference.
 

Attachments

  • IMG_20160118_132337.jpg
    IMG_20160118_132337.jpg
    137.5 KB · Views: 2,369
  • IMG_20160118_131916.jpg
    IMG_20160118_131916.jpg
    135.9 KB · Views: 2,485
Last edited:
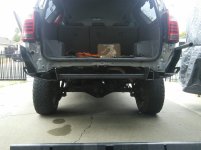
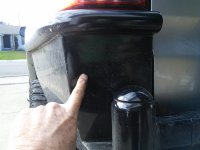
As you notice, I haven't done anything with the pinch welds yet as I will be going BIGGER on the tires. And not sure if I will have to cut off some of the wheel well section of the bumper.
If your good with what you have, I would get some flat stock and weld it at a 90* angle on the edge. Trust me, if you hit anything including snow banks, the sides will move/bend in and upward. So give yourself some clearance on the pipe and body line also.
IMG_20160118_131625.jpg

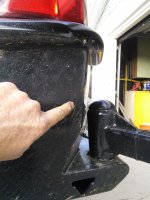
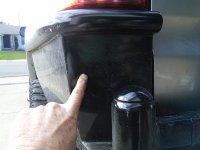
When you put this bumper together, look behind this plate on the bottom. It will have a triangle section that will trap water and debris. I drilled a hole for drainage.
IMG_20160118_131855.jpg
 

Attachments

  • IMG_20160118_131625.jpg
    IMG_20160118_131625.jpg
    136.4 KB · Views: 2,476
  • IMG_20160118_131855.jpg
    IMG_20160118_131855.jpg
    138.1 KB · Views: 2,356
Last edited:
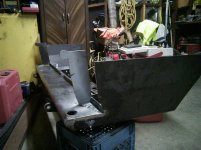
Man this is great! It's funny i was just about to reply to you on my build about this and then i saw this thread:thumb:Great stuff man this is going to help a lot come build time! I was just emailing back and forth with Luke last week about this kit. He said he's got most of the pieces in stock to ship most of the time. I'm planning on ordering it this spring after i do my re gear and locker, can't wait:hungry:

Ps. I'll probably be PM'ing you like crazy come build time lol
 
Kuddos to you for taking he time for the write up. Something I noticed on The way the bumper is mounted to the frame. There should have been a 1/4" thick L type bracket with nuts welder to it. After you line up where the two side frame holes go and drill them out. Those brackets slip inside the frame then the bumper is attached to the them. There is also one long metal arm that slides into the frame and is attached further back on the bottom of the frame. That hole needs to be drilled out to. Using the bumper as a template. Attach it to the two existing stock holes for the tow hitch. Then mark where the one additional hole goes on the bottom and the two on the side of the frame. Then drill holes and remove bumper. Slide the metal brackets inside the frame. You have to fiddle with them. It's can be a pain. Then put the bumper up and bolt it to the frame using the 3 holes in the bottom and the two in the inside frame rails.


Bobby


These 2 bolt holes don't have any nuts on the inside of the frame. The holes are 1/2". I took some grade 8 nuts and welded them to a flat washer. Bolt them on and you can weld the nut/washer to the inside frame.
View attachment 187598

These 2 holes will need to be reamed open a little to bolt on.
View attachment 187599

This is highly suggested, when I bolt the 2 sides on and attached the main bumper piece on by tacking. I pulled it off and did a full weld.
When going to re install to continue, the sides where pushed to tight against the frame. Used a porta power to spread the frame to slide the bumper on and put a thick flat washer in between the frame and side. Screw driver shows the area.
So put a washer between there and bolt the sides down before tacking the main rear bumper piece on.

You can obviously see the body mount hole needed some attention. Reamed it open also.
View attachment 187601
 
Kuddos to you for taking he time for the write up. Something I noticed on The way the bumper is mounted to the frame. There should have been a 1/4" thick L type bracket with nuts welder to it. After you line up where the two side frame holes go and drill them out. Those brackets slip inside the frame then the bumper is attached to the them. There is also one long metal arm that slides into the frame and is attached further back on the bottom of the frame. That hole needs to be drilled out to. Using the bumper as a template. Attach it to the two existing stock holes for the tow hitch. Then mark where the one additional hole goes on the bottom and the two on the side of the frame. Then drill holes and remove bumper. Slide the metal brackets inside the frame. You have to fiddle with them. It's can be a pain. Then put the bumper up and bolt it to the frame using the 3 holes in the bottom and the two in the inside frame rails.


Bobby


Some things have changed with his new design I presume. I noticed awhile back after you got yours and I started in wanting a DYI bumper if out there is when I hit Luke up. He took my name and # as he didn't have any for our models at the time. So 10 months later, I get a email saying he had a few kits. He told me they acquired a gen4 and used it for a mock up so he can make it a DYI kit with some changes.

When I went up to him to p/u the kit, he put this one together for me. So I presume he did away with a few things as to put together.

If you don't mind posting up a photo of the mounting/ bolt setup as you speak we can compare the differences. Thanks.
 
This is the complete mounting/ bolt setup as they are in his new design. No additional holes to be drilled.

IMG_20160214_154839.jpg
 

Attachments

  • IMG_20160214_154839.jpg
    IMG_20160214_154839.jpg
    135.9 KB · Views: 3,775
For sure. Luke is a pretty knowledgable guy, some sort of Jedi Toyota dude. Pretty sure he uses the inside bracket for all the bumpers to sandwich the frame between the bumper and the bracket. It reinforces everything together. Unless e did away with them?

I don't have a picture of the brackets but below shows the mounting points.


The two in the side of the frame are already there they just needed to be opened larger for the 1/2" hardware. The one furthereat away needed to be drilled. Brackets where used on all of those.

Bobby
 
Something others can ask Luke if purchasing or make one themselves. So far I haven't seen a need for it, but, I haven't taken a bottom out hit or rear shot YET. Just a side snow bank shots.
 
Did you add the internal gusset to the area under the tail light? I know mine has one.
Mine also has a 1/4" thick strip outlining the side wing in the wheel well. Kind of where the stock mudflap was. It is recessed in slightly. Along where the pinch weld is. That really stiffens up the side wing. Just food for thought since you welded the kit yourself. The bumper is extremely stout and can take a a hit in some rocks without worry. :boink:

Picture is worth a thousand words, lol.


Bobby
 
There wasn't any gussits for that area, at least didn't have any in the kit. Here's the sides mounted and it extends farther out the back to mount the main back shell. The inner side has a notch in the rear piece that it slides into.
There was no pieces for the wheel well like yours and what I was referring to adding. My sides, I didn't flex them out away from the body much. Keeper it even with the body lines on the upper sides. This is probably why mine sits right to the inner body near the wheel side, this I will have to beat in a little to put inner pieces on so I can still remove the bumper.

mikey's2010sr5 has one of these also, do believe the 1st gen5 and Luke did his at his shop.
I do believe his sits tight on the body, not sure if his has the pieces on the wheel well.

IMG_20151017_104557~2.jpg

IMG_20151103_184359~3.jpg
 

Attachments

  • IMG_20151017_104557~2.jpg
    IMG_20151017_104557~2.jpg
    134.8 KB · Views: 1,956
  • IMG_20151103_184359~3.jpg
    IMG_20151103_184359~3.jpg
    136.7 KB · Views: 1,269
Last edited:

Interesting, mine sticks out a good 1-1.5" away from the tail lights and sides as well. I know when I flex out the rear the body and bumper flex and move as well semilar to the front bumper. That is why there is a small gap around the rear on mine. Something to keep an eye on.
 

Members online

Forum statistics

Threads
278,312
Messages
3,554,087
Members
248,016
Latest member
Advally Service

Trending content

Back
Top