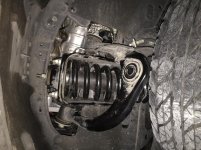
5100 no compresser Install issue

Mowgli

New member
I'm trying to install a set of 5100 set at 2.5 and am having issues getting the bottom of the shock to mount back into the lower control arm. Im using the method where you push down on the lower controll arm to get the mounts to match up but I can't seem to get it low enough. Is there a trick to this


The methods I am using

http://www.toyota120.com/forum/showthread.php?t=3358

http://www.toyota-4runner.org/5th-g...%92s-ideas-since-mid-2010-a-6.html#post754964


Also the front shock do they not come with the new rubber mounts for the top? Or do you just reuse your old betas washers and rubber bushings
 
Register to hide this ad
unbolt your upper a arm joint and separate the ball joint up there from the spindle.. it'll help you go lower
 
The lower control arm is already disconnected from the axle in this method so I don't see how that would change anything. I could be wrong though. Please advise
 
The problem is that the lower control arm is very hard to move because of the rubber bushings.

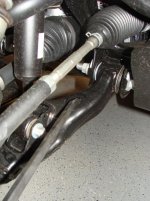
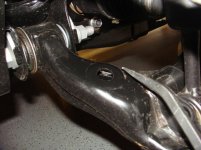
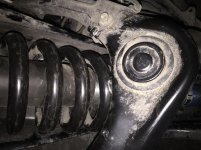
I used a long prybar in one of the LCA holes and actually sat on it and bounced it up and down while lining up the lower shock hole with a punch.

Here's some pics of the hole I used...

DSC05129.jpg

DSC05130a.jpg

If doing the install by yourself(like me) wedge a hunk of 2x4 between the lower control arm and the bumpstop after you pry it down as far as you can. This gives you hands free room to work.

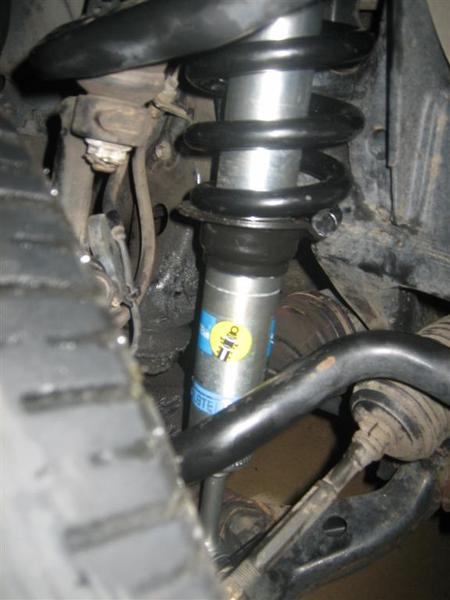
When you install the 5100's, place just the spring in place first by feeding it up between the swaybar, tie rod and CV. THEN feed the shock body, the same way, through the coil spring. At that point you can properly orient the spring on the bottom perch and the top cushion. Trying to fight the entire assembly at once is a PITA.

Use that prybar to help locate the bottom shock bolt and a long punch to line up the hole (from the backside)so you can feed the bolt through the hole. It will be under slight pressure (from the lower control arm pushing up on it) so it doesn't just slide into place. This part gets easier with practice, unfortunately. Took me 30 minutes first time- after 3 installs I did it in 3 minutes LOL.

As a last resort you can loosen the LCA bolts and it will swing down freely. Just mark (with a sharpie) where your alignment cams are located before you loosen it up. That way you can get the alignment close.

You can get it in there without loosening those bolts though! It's not that hard once you figure it out.

Good luck!- Feel free to PM me if you are still stuck- I've done it this way 3 times now.
 

Attachments

  • DSC05130a.jpg
    DSC05130a.jpg
    94.2 KB · Views: 692
  • DSC05129.jpg
    DSC05129.jpg
    115.4 KB · Views: 700
Last edited:
unbolt your upper a arm joint and separate the ball joint up there from the spindle.. it'll help you go lower

The lower control arm is already disconnected from the axle in this method so I don't see how that would change anything. I could be wrong though. Please advise

Actually it won't because the upper arm limits the down travel, not the lower.

His LCA arm is free to move all the way down but the tight bushings are holding it up as stated above.

Just wanted to clear that up.:D
 
I did this method on my Tacoma and the trick to getting the LCA to drop low enough was to loosen the 2 bolts holding it to the frame. The install on the 4Runner maybe different though.
 
I've use a brace on inner fender plus bottle jack to push down the a-arm. Not super safe, but works like a charm.
th
 
Last edited:
I've use a brace on inner fender plus bottle jack to push down the a-arm. Not super safe, but works like a charm.
th

I did the same thing although I don't have a picture. It did pop out a few times until I got the placement right

I just disconnected my upper control arm and the sway bar end link. After that everything flexed pretty easy.

All bad advice for what the OP is asking.

The lower control arm is ALREADY DISCONNECTED FOM THE UPRIGHT in the method he is using.

What al of you guys are suggesting simply won't matter in this instance. It will make zero difference. Sorry.
 
Last edited:
Huge problem now. I installed the shocks but now the front end is so high the upper control arms are hitting the springs. What happened here
 
take a picture of the lower spring purch, the black round seat that is holding the bottom of the spring.. like the pictures [MENTION=50444]RaptorRunner[/MENTION] posted I have a feeling you slid it on upside down.
 
Thank guys. Sure did put it on upside down. That explain why it was so hard to install. I did drive it around the block a few times like that is there any chance I damaged anything? I have since test drive it after correctly doing it and it feels a little twitchy. Could that just be alignment now?
 
Thank guys. Sure did put it on upside down. That explain why it was so hard to install. I did drive it around the block a few times like that is there any chance I damaged anything? I have since test drive it after correctly doing it and it feels a little twitchy. Could that just be alignment now?

Glad you got it figured out. I doubt anything was damaged beyond cosmetic blemishes on the coils. I've put 10,000 miles on mine (part of which was a cross-country move with a large trailer through the Rockies) after installing the cups backwards the first time. If anything on mine fails, you'll be the first to know.

The twitchy feeling will likely be fixed with an alignment. Tell the shop to max out the caster (around +2.5 with stock UCAs, +4 is preferred).
 
How where you able to drive it that much? I had so many bangs and creaks just driving around the block a few times?

I'm more worried about how much I had to push the lower control arms down to install the shock. I had it pushed almost strait down to get the shock to fit since I had it set at 2.5. Any chance I damagged that or anything I the new shocks
 

Members online

Forum statistics

Threads
278,309
Messages
3,554,070
Members
248,016
Latest member
Advally Service

Trending content

Back
Top