

dlongoria3880
New member
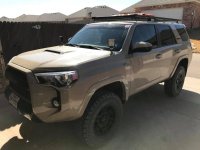
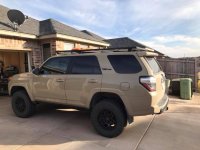
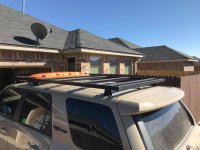
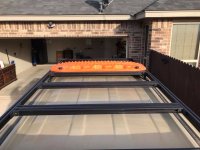
Roof racks! Definitely one of the coolest accessories for our 4Runners! There are so many options now. Each has there own different features and specialties, but in the end it all comes down to how each person wants to use it. I have been working to design and build a roof rack since my first 5th Gen back in 2010. EMT conduit was my first thought, it did not turn out to well. But I still attempted it. I didn't get in a big hurry after the first trial, but rather set out to find a universal material to make a roof rack out of Now, years later my research and designing has all come together. This is a roof rack that is ALMOST all DIY. 80/20 T-slot extruded aluminum (aka - the industrial erector set) is very lightweight and in my opinion very strong. 80/20 also offers so many options, it makes it really easy to make a rack all your own. Plus adding on to it is easy. Overall this rack has cost me around $750. Which I have thought, oh I could have bought one for that much, but I feel that this has way more versatility. The mounting feet were the biggest challenge to begin with, and the roof rails (factory mount spots) not being parallel. After looking at multiple other mounts, I came up with what I needed, drew it up and took it to a local machine shop. I have these drawings and can send them if anyone is interested. These mounting feet cost $175 to have made at the local machine shop. The next thing I had to find a solution for was the spacers. I have the "drawer of misc parts", so I started digging through it and found 8 black plastic spacers that an 8mm bolt just happened to fit perfectly through. The spacers came with some TV wall mounts I had purchased! We will see how they hold up. Although, I bet you can find spacers pretty easy. I have seen them on here made out of oval'd pipe. These were the two biggest challenges to getting this made. Now that it is complete, I am just adding to it. With the way I have the front light bar mounted, it whistled in oncoming wind. I have bought slot filler pieces that have stopped this. I hope to have a RTT mounted to it this summer as I feel it will be a good test of the rack's overall strength. I have crawled up on it and rocked the runner side to side and transferred my weight (230 lbs) between the crossbars. The crossbars, mounting points, and rack all stayed solid. This is a 100% self designed roof rack, as are the mounting brackets. I understand that there may be flaws in some of the parts, but I am willing to see what this thing will do as is. I will continue to post about issues that may arise. So with that being said, enough of reading, on to the most important part. The pictures!
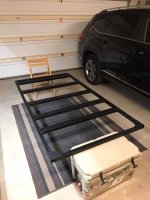
All assembled.
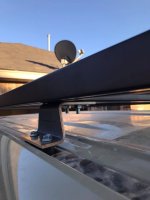
Bolted on with 5/16" carriage bolts for test fit. These fit in the slot and hold
when tightening down on them.
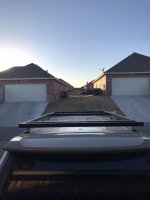
Test fit.
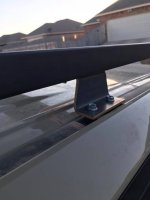
Mount before paint.
More pictures and comments to follow.
All assembled.
Bolted on with 5/16" carriage bolts for test fit. These fit in the slot and hold
when tightening down on them.
Test fit.
Mount before paint.
More pictures and comments to follow.
Attachments
-
 assembled.jpg70.7 KB · Views: 29,440
 -
 just bolted on.jpg40.6 KB · Views: 18,197
 -
 raw support.jpg34.3 KB · Views: 21,222
 -
 test 1.jpg40.7 KB · Views: 15,351
 -
 d side.jpg59.7 KB · Views: 14,590
 -
 b side.jpg66.7 KB · Views: 15,514
 -
 back dr finished.jpg77.9 KB · Views: 20,290
 -
 up top.jpg75.9 KB · Views: 21,889


