Adding hardwired automatic LED light inside center console

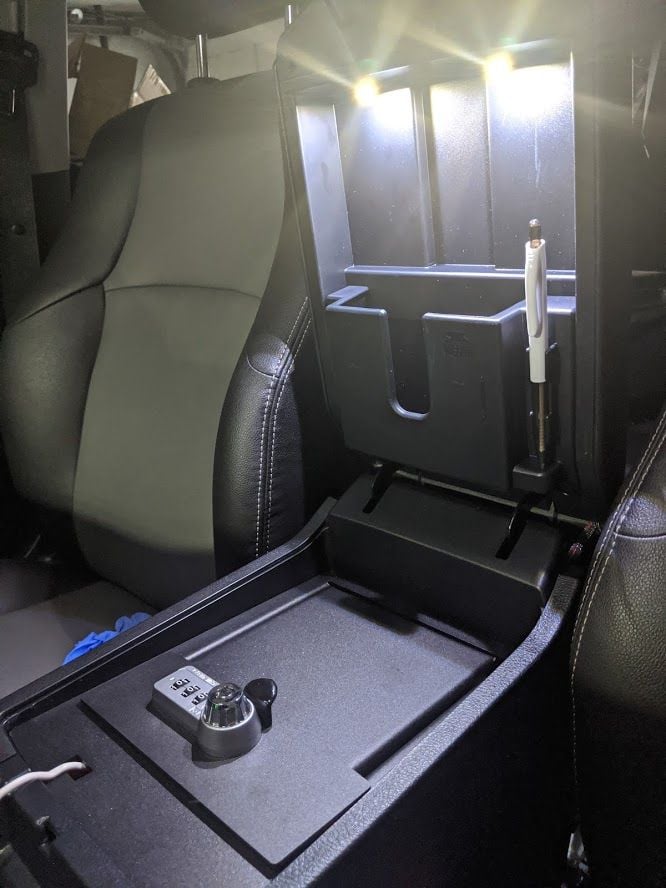
Added a hardwired light inside my center console storage box....

Thanks for this great idea. I’m really pleased with how it turned out. Here are a few of my tweaks to your design.

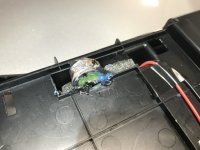
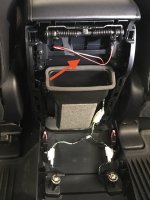
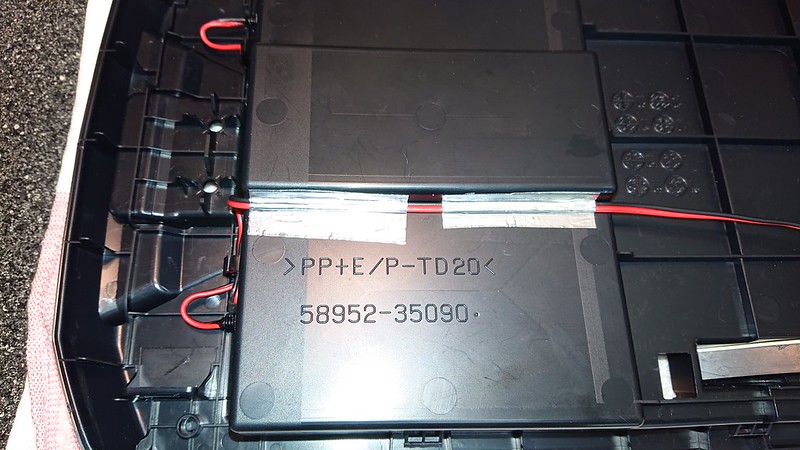
For the switch I first tried to devise a way to use a mechanical limit switch but couldn’t find a clean way to do it. So I took apart an old Leviton household power switch, the illuminated kind that used a small drum of mercury for silent operation, and soldered leads to it. I had to cut out a little of the plastic recess in the console lid to get it to fit snuggly. It’s kind of a heavy item so I put some foam under it and glued it all to keep it in place.

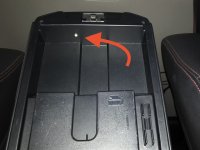
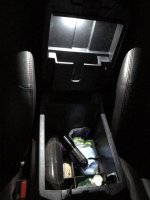
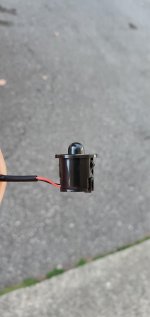
The LED I used was a cool white 1W 6mm Oznium bolt, installed offset from the center of the lid. I didn’t want a lot of light to shine out while driving at night, and this LED puts out enough to nicely light up the interior of the console box.

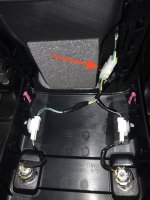
I installed a connector in the power leads for easy removal of the lid for any service or future mods.

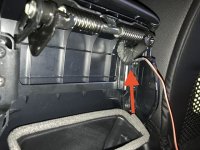
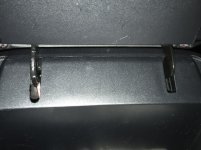
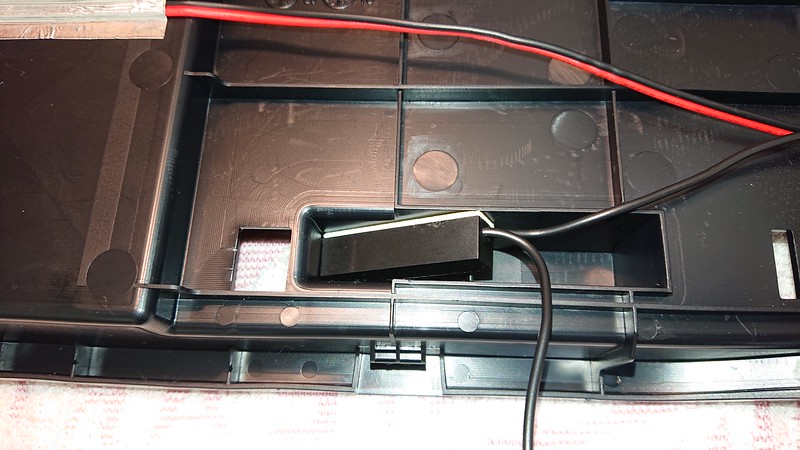
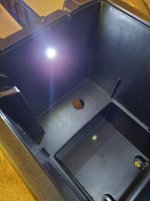
When routing the power cord and taping it over the hinge bracket edge I noticed that if was a tight fit, so I enlarged the receiver hole with a round file.

To keep the power cord from flexing too much I taped up an edge to create a service loop to minimize wire bending.

It’s working well, let there be light!
 

Attachments

  • 74CF519B-1591-43ED-B185-743F5811475D.jpeg
    74CF519B-1591-43ED-B185-743F5811475D.jpeg
    88.6 KB · Views: 1,161
  • 0E912FD2-800C-41FA-8FE7-2E1ECAC99C3F.jpeg
    0E912FD2-800C-41FA-8FE7-2E1ECAC99C3F.jpeg
    82.6 KB · Views: 1,269
  • 57FEC070-47EF-47BA-A3CD-5BA12E103A8D.jpeg
    57FEC070-47EF-47BA-A3CD-5BA12E103A8D.jpeg
    95.3 KB · Views: 1,353
  • 3BC511E6-4FFB-453B-B8B4-87A4A34BFD45.jpeg
    3BC511E6-4FFB-453B-B8B4-87A4A34BFD45.jpeg
    111.5 KB · Views: 1,514
  • 2581B9DB-35AA-4B49-949B-C67A328A995A.jpeg
    2581B9DB-35AA-4B49-949B-C67A328A995A.jpeg
    94.3 KB · Views: 1,165
  • 4BE7D4CB-52E0-4DAE-959C-01E2B8FF09AD.jpeg
    4BE7D4CB-52E0-4DAE-959C-01E2B8FF09AD.jpeg
    90.1 KB · Views: 1,296
  • 6520710F-3675-42FB-B95C-D6773A52FE87.jpeg
    6520710F-3675-42FB-B95C-D6773A52FE87.jpeg
    83.8 KB · Views: 1,600
Thanks for this great idea. I’m really pleased with how it turned out. Here are a few of my tweaks to your design.

For the switch I first tried to devise a way to use a mechanical limit switch but couldn’t find a clean way to do it. So I took apart an old Leviton household power switch, the illuminated kind that used a small drum of mercury for silent operation, and soldered leads to it. I had to cut out a little of the plastic recess in the console lid to get it to fit snuggly. It’s kind of a heavy item so I put some foam under it and glued it all to keep it in place.

The LED I used was a cool white 1W 6mm Oznium bolt, installed offset from the center of the lid. I didn’t want a lot of light to shine out while driving at night, and this LED puts out enough to nicely light up the interior of the console box.

I installed a connector in the power leads for easy removal of the lid for any service or future mods.

When routing the power cord and taping it over the hinge bracket edge I noticed that if was a tight fit, so I enlarged the receiver hole with a round file.

To keep the power cord from flexing too much I taped up an edge to create a service loop to minimize wire bending.

It’s working well, let there be light!

Great job on your install! Glad it worked out for you as well!
 
My take on the LED center console mod

I tackled this project today. I did the dual-LED version with 6mm LED bolts.

Parts:
  • Oznium 6mm cool white LED bolts (2)
  • InstallBay IBMS-3 mercury tilt switch
  • Cable clips from Amazon

49967653233_b04372b0a4_c.jpg


49968431757_84c60fa40e_c.jpg


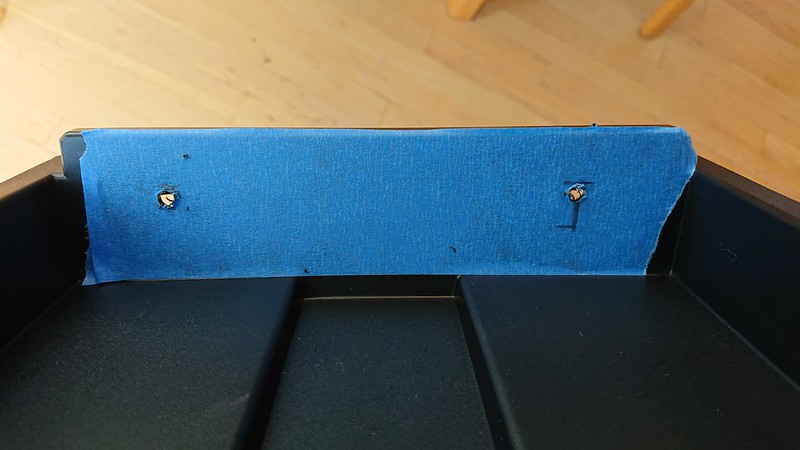
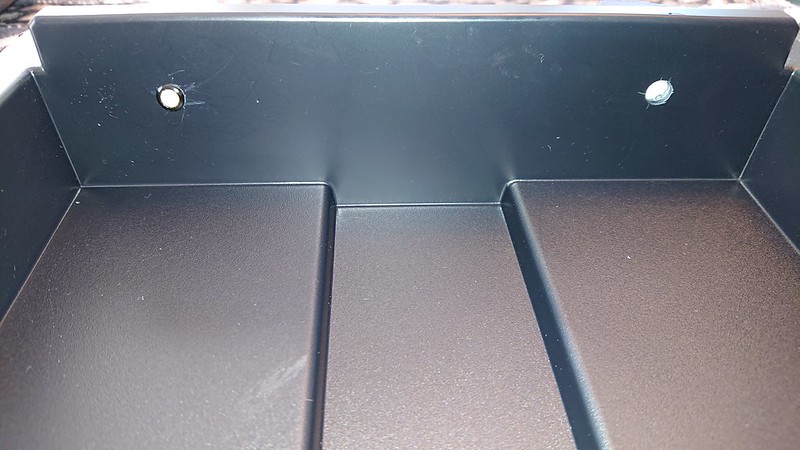
First, careful measuring for the holes. My holes are positioned like daytonaviolet's, but a little bit "higher" to move them more toward the center of the center console abiss. Drilled from the inside.

49968431162_94a5e90b30_c.jpg


49968431152_e1c358a6da_c.jpg


49967653523_206bb50a5b_c.jpg


Mounting the LED bolts:

49968165546_e518da0081_c.jpg


I chose to run a single pair of wires down the lid to the tilt switch to minimize the amount of material. I "T" soldered the two LEDs together in the gap between them:

49967653793_204da55a73_c.jpg


49967654173_cd7f7e5380_c.jpg


I'm using aluminum tape, which I've found holds up better at high cabin temperatures than electrical tape:

49968432092_4c6702b9de_c.jpg


Tilt switch mounted at an angle like emmantik figured out is necessary. This one comes with its own double-sided mounting tape:

49968166171_b33bd80e3d_c.jpg


I'm letting the tilt switch control the ground, and the power is coming from the parking light/dash light circuit. This way the new LEDs only come on when the parking lights are on, and only when the center console lid is raised. And this is important...the whole project MUST be done on a zebra-print towel on the kitchen table. Otherwise, it won't work. All wiring run and taped down:

49968166531_b5b0ee57d5_c.jpg


49968432642_3491e995e8_c.jpg


Wire exiting the hinge slot, with braided sleeve for protection (and good looks):

49968166726_3711f5b0c3_c.jpg


HD090 2-pin connector added for modularity. The harness side (truck side) of the wiring runs toward the shifter just like the rear-seat USB ports do. Ground goes to a bolt inserted into an unused stock threaded hole near the parking brake bracket, and power comes from one of the dark green wires that run along the passenger side of the inside of the center console near the shifter:

49968432932_fafdba2eb8_c.jpg


The finished product, ready to reinstall into the truck:

49968167081_53fcbfe322_c.jpg


I mounted the LED bolts flush with both plastic "nuts" on the back side, for a professional finished look:

49967654708_abb75e0421_c.jpg


Thanks to emmantik for the excellent detailed writeup for taking everything apart, and for the original concept.
 
I tackled this project today. I did the dual-LED version with 6mm LED bolts.

Parts:
  • Oznium 6mm cool white LED bolts (2)
  • InstallBay IBMS-3 mercury tilt switch
  • Cable clips from Amazon

49967653233_b04372b0a4_c.jpg


49968431757_84c60fa40e_c.jpg


First, careful measuring for the holes. My holes are positioned like daytonaviolet's, but a little bit "higher" to move them more toward the center of the center console abiss. Drilled from the inside.

49968431162_94a5e90b30_c.jpg


49968431152_e1c358a6da_c.jpg


49967653523_206bb50a5b_c.jpg


Mounting the LED bolts:

49968165546_e518da0081_c.jpg


I chose to run a single pair of wires down the lid to the tilt switch to minimize the amount of material. I "T" soldered the two LEDs together in the gap between them:

49967653793_204da55a73_c.jpg


49967654173_cd7f7e5380_c.jpg


I'm using aluminum tape, which I've found holds up better at high cabin temperatures than electrical tape:

49968432092_4c6702b9de_c.jpg


Tilt switch mounted at an angle like emmantik figured out is necessary. This one comes with its own double-sided mounting tape:

49968166171_b33bd80e3d_c.jpg


I'm letting the tilt switch control the ground, and the power is coming from the parking light/dash light circuit. This way the new LEDs only come on when the parking lights are on, and only when the center console lid is raised. And this is important...the whole project MUST be done on a zebra-print towel on the kitchen table. Otherwise, it won't work. All wiring run and taped down:

49968166531_b5b0ee57d5_c.jpg


49968432642_3491e995e8_c.jpg


Wire exiting the hinge slot, with braided sleeve for protection (and good looks):

49968166726_3711f5b0c3_c.jpg


HD090 2-pin connector added for modularity. The harness side (truck side) of the wiring runs toward the shifter just like the rear-seat USB ports do. Ground goes to a bolt inserted into an unused stock threaded hole near the parking brake bracket, and power comes from one of the dark green wires that run along the passenger side of the inside of the center console near the shifter:

49968432932_fafdba2eb8_c.jpg


The finished product, ready to reinstall into the truck:

49968167081_53fcbfe322_c.jpg


I mounted the LED bolts flush with both plastic "nuts" on the back side, for a professional finished look:

49967654708_abb75e0421_c.jpg


Thanks to emmantik for the excellent detailed writeup for taking everything apart, and for the original concept.

Glad it worked out for you as well! Clean install! I like how you protected the wires. I should've done the same!
 
I had done this awhile back, and now found this thread .. may as well add my version as well.
No drilling required.

Parts used:
Little Dot SMD LED Accent Light (from superbrightleds)
Mercury tilt switch
3M cloth harness tape, double sided pressure tape, vinyl electric tape
super glue


<blockquote class="imgur-embed-pub" lang="en" data-id="a/PJsREiq"><a href="//imgur.com/a/PJsREiq">No drill - micro - ultra bright console LED - 4runner</a></blockquote><script async src="//s.imgur.com/min/embed.js" charset="utf-8"></script>
 
Last edited:
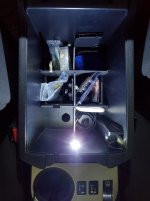
I had an extra LED bolt so decided to add a second light inside the console. Turns on and off with the original LED.
 

Attachments

  • 2.jpg
    2.jpg
    120.8 KB · Views: 531
  • 1.jpg
    1.jpg
    131.7 KB · Views: 517
Nice update, and thanks again for this thread, I did this mod almost 2 years ago now and it's still one of my favorite subtle mods that I've done. I honestly forget it's there most of the time, but it's great to have at night

img_20200514_174211_81a46ed4cbe505cdef9b86a360369f655c02a1bc.jpg
 
i was able to finish this project up today. instead of using the tilt switch, i opted for a magnet switch.

i put the electrical side of the magnet switch above the rear vents and put a couple neodymium magnets in the arm rest to activate it.

had to drill 1 hole where the armrest meets the rear of the center console to fit the electrical side of the magnet switch.

now when i open my armrest to a certain degree, the light comes on... similar to what the tilt switch would have accomplished
 
i was able to finish this project up today. instead of using the tilt switch, i opted for a magnet switch.

i put the electrical side of the magnet switch above the rear vents and put a couple neodymium magnets in the arm rest to activate it.

had to drill 1 hole where the armrest meets the rear of the center console to fit the electrical side of the magnet switch.

now when i open my armrest to a certain degree, the light comes on... similar to what the tilt switch would have accomplished

Would love to see some pics if you have any!
 
Would love to see some pics if you have any!

sure thing but i didn't take pictures as i was making this up. just went out to snap a couple that were easier to take.

i didn't take a picture of the wiring from the LEDs through the armrest. i used a couple of the LED strip light clips that you see in these pics and just cut a bit of the plastic out to route the wiring where necessary. i followed most of the original wiring routes you see in this thread..

i also used a neodymium magnet with enough strength to activate the switch and just taped in into place inside the armrest, right above where the electrical side is in the center console

this is the electrical side of the magnet switch.. might retape the wiring with some hockey tape.
zGFu4ET.jpg


behind the center console
9Uag0D6.jpg


lrlOsRQ.jpg
 
sure thing but i didn't take pictures as i was making this up. just went out to snap a couple that were easier to take.

i didn't take a picture of the wiring from the LEDs through the armrest. i used a couple of the LED strip light clips that you see in these pics and just cut a bit of the plastic out to route the wiring where necessary. i followed most of the original wiring routes you see in this thread..

i also used a neodymium magnet with enough strength to activate the switch and just taped in into place inside the armrest, right above where the electrical side is in the center console

this is the electrical side of the magnet switch.. might retape the wiring with some hockey tape.
zGFu4ET.jpg


behind the center console
9Uag0D6.jpg


lrlOsRQ.jpg


So there is a magnet inside the armrest?
 
Does anybody have a simple wiring diagram? I have drilled the holes and installed the LEDs and realized I don't know how to wire the LEDs to the switch and to the power source. I have 2 LEDs drilled in and 1 tilt switch. Prob should have asked this before taking apart everything
 
I ended up switching the tilt switch for a push in type switch like this.
 

Attachments

  • switch.jpg
    switch.jpg
    93.8 KB · Views: 297
  • switchinuse.jpg
    switchinuse.jpg
    135.6 KB · Views: 298
Last edited:
Good job! I'm about to do this but am wondering why even incorporate a shut off switch at all, these lights are meant to be constant run and they don't get hot or draw anything, why not leave it on all the time there is switched power?
 
Good job! I'm about to do this but am wondering why even incorporate a shut off switch at all, these lights are meant to be constant run and they don't get hot or draw anything, why not leave it on all the time there is switched power?

Yeah you can totally do that as well! There is no right or wrong way to do it. Whatever suits you the best. I personally didn't want to have a light on all the time when it's not in use. Would rather have it on only when I need it. That's just me but feel free to make it how you like.
 
Last edited:
Good job! I'm about to do this but am wondering why even incorporate a shut off switch at all, these lights are meant to be constant run and they don't get hot or draw anything, why not leave it on all the time there is switched power?
They are pretty bright, I know I wouldn't want that light glowing under my center console while I'm driving. I love this mod, just my 2 cents
 

Members online

Forum statistics

Threads
278,305
Messages
3,554,044
Members
248,016
Latest member
Advally Service

Trending content

Back
Top