Advice requested from those of you who have mounted tires & balanced wheels at home

Status
Not open for further replies.
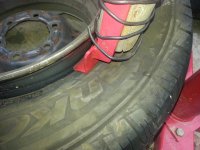
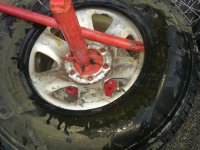
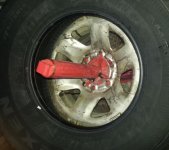
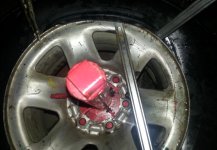
The stronger wedge plus the 90 degree angle allowed me to apply enough force to finally pop the inside-rim bead of the admittedly strong 108T tire sidewall.
 

Attachments

  • 05_finally_popped_the_lower_bead.jpg
    05_finally_popped_the_lower_bead.jpg
    62.5 KB · Views: 1,274
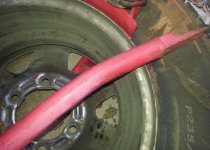
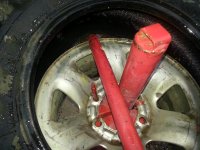
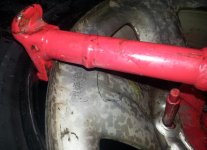
Only after I popped the underside tire bead did I try to remove the lever arm, where I found that it bent at about a 10 or 15 degree angle. It took that much force, but you have to also realize that this harbor freight metal is soft as rubber.
 

Attachments

  • 06_bent_tire_iron.jpg
    06_bent_tire_iron.jpg
    58.8 KB · Views: 935
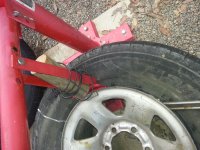
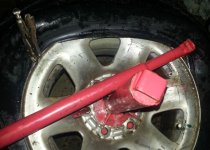
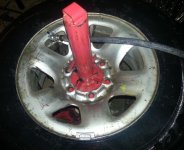
After straightening the bent tire iron as much as I could, and after moving the clovis pin to the center hole to get more of an angle, and using a tire iron to keep a depressed bead down, I easily popped the upper bead.
 

Attachments

  • 07_moving_bolt_holes_and_popping_upper_bead.jpg
    07_moving_bolt_holes_and_popping_upper_bead.jpg
    82.3 KB · Views: 1,570
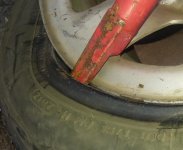
Placing the tire iron flat step with the step side up, allowed me to start spinning the top bead off the wheel rim without lubrication:
 

Attachments

  • 08_using_the_right_edge_and_up_of_the_tire_iron.jpg
    08_using_the_right_edge_and_up_of_the_tire_iron.jpg
    54.4 KB · Views: 1,411
Last edited:
Adding dish detergent helped a lot to spin the top bead off, where I'd say it's a requirement to have lubrication but everything gets slippery, even the tools, so try to keep it off the tools.
 

Attachments

  • 09_adding_dish_detergent_and_water_helped.jpg
    09_adding_dish_detergent_and_water_helped.jpg
    74.4 KB · Views: 1,394
You repeat the process for the lower bead, with the tire iron again going in step-side up as in the first bead.
 

Attachments

  • 10_tire_iron_goes_step-side-up_for_the_bottom_bead.jpg
    10_tire_iron_goes_step-side-up_for_the_bottom_bead.jpg
    69.1 KB · Views: 931
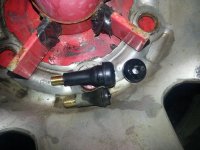
Once the tire was off the rim, I cut off the old 1-1/4 inch tire valve from the underside with a utility knife, where the old valve was in surprisingly good shape, so I might have kept it had I not wanted to test out the 4-way valve-seating tool.
 

Attachments

  • 11_cut_off_the_old_tire_valve.jpg
    11_cut_off_the_old_tire_valve.jpg
    67.5 KB · Views: 816
After lubricating the new 1-1/2 inch valve with dish soap, I threaded on the 4-way tool and pulled it through so easily that it was shockingly simple.

Later you'll see I have a much better idea for a 4-way tool that I already have in my compressor toolbox, so I never needed the 4-way tool in the first place, but I didn't realize that until later.
 

Attachments

  • 12_install_new_valve_with_4way_tool.jpg
    12_install_new_valve_with_4way_tool.jpg
    59.3 KB · Views: 835
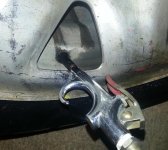
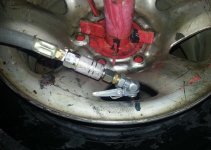
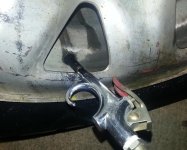
Only later, when I was filling the tire with air, did I realize that a handy tool for pulling the valve would have been my compressor football/soccer-ball needle-valve tool, with the needle valve removed, which spins onto the valve threads with ease and which has a nice trigger handle to grab onto so that the valve can be pulled into place.

But I didn't think of this at the time I was seating the first valve, so, it's just a lesson learned for the future, and for someone else who happens to read this for hints on how to do the job without that silly 4-way valve seating tool (which is never needed).
 

Attachments

  • 13_install_new_valve_with_soccer_ball_filling_handle.jpg
    13_install_new_valve_with_soccer_ball_filling_handle.jpg
    80.9 KB · Views: 828
The bottom bead of the new tire went on 3/4 of the way by hand, and then with a two-foot tire iron, the last quarter went on relatively easily.
 

Attachments

  • 14_the_bottom_bead_goes_on_easily.jpg
    14_the_bottom_bead_goes_on_easily.jpg
    63.1 KB · Views: 1,125
It's important to remember to flip the tool and set the hook side appropriately because you're not going to seat the top bead unless you have the tool oriented this way exactly.
 

Attachments

  • 15_the_tool_has_to_be_flipped_for_the_top_bead.jpg
    15_the_tool_has_to_be_flipped_for_the_top_bead.jpg
    55.5 KB · Views: 862
You'll want to ensure you seat the bead at the tire-valve first because that last quarter gets dicey where you have to use the most strength in the whole job, and where a slippery bar gets obnoxious.

I had to vise grip the end of the bar that I was holding because it kept twisting off the bead but with vise grips, it was manageable.

At the very least, you'll want to use vise grips to hold the slippery upper bead from slipping off as you try to force the last 1/4 of the upper bead onto the rim.
 

Attachments

  • 16_the_last_quarter_of_the_top_bead_is_harder.jpg
    16_the_last_quarter_of_the_top_bead_is_harder.jpg
    64.2 KB · Views: 902
This is the point where you're extremely glad the tool is firmly bolted to cement, as the force is as much as you can give it.

Even so, I found I had to ditch the slippery but huge red pry bar and resort to two 24-inch tire irons to leverage the remaining upper bead over onto the wheel rim.
 

Attachments

  • 17_tire_irons_help_with_the_last_quarter_of_the_top_bead.jpg
    17_tire_irons_help_with_the_last_quarter_of_the_top_bead.jpg
    56.1 KB · Views: 1,141
It's at this point, before you fill the tire with air, that you line up the red dot to the match-mounting marks, or, the yellow dot to the valve stem (if there is no red dot) or if there is a red dot but no match mounting marks, then you line up the red dot to the valve stem.

After doing that, I first removed the inner valve stem of the Schrader valve and tried to use my latching air chuck, but without the valve stem, the darn chuck wouldn't pass any air.
 

Attachments

  • 18_the_latching_chuck_would_not_let_air_in_without_the_valve_stem.jpg
    18_the_latching_chuck_would_not_let_air_in_without_the_valve_stem.jpg
    65.6 KB · Views: 966
Last edited:
It was dark and drizzly when I just decided to put the valve stem back in and put the latching chuck back on (although later I found a neat trick that I will try with the next tire).

It turns out that having the valve stem in or out really made no difference whatsoever, it seems, with respect to getting the air inside and getting the bead to seat.

The trick to seating the bead is really to have two hands free to hold the tire edges and jiggle, wiggle, coerce, tug and jerk the tire as it's loose when you're trying to get the bead to seat.

Once you get the tire in a certain position, you can just feel it starting to blow up, where it seats and finally pops a few times as you work up the pressure to 40, 50, and 60 psi.

 

Attachments

  • 19_latch_chuck_with_valve_stem_in_place.jpg
    19_latch_chuck_with_valve_stem_in_place.jpg
    67 KB · Views: 916
Further proof that the silly 4-way tool is worthless is the fact that it doesn't have a pin for letting the air out of the valve to drop the pressure down from 60 psi back to 40 where it belongs.

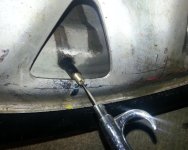
Rummaging around in my compressor kit, I found this needle-valve which is normally used to inflate footballs and soccer balls, but which deflates the tire without sharp points like those that are on the silly and useless 4-way tool.
 

Attachments

  • 20_dropping_the_pressure_back_to_40_psi.jpg
    20_dropping_the_pressure_back_to_40_psi.jpg
    63.6 KB · Views: 836
It was at this point that I realized that the football/soccerball inflator handle can be used for the next tire to inflate the tire quickly without the schrader valve being in place, so I will try it this way on the next tire to see if it works.

(It may require a third hand to press the trigger, but I can probably wire the trigger pressed because both hands will be needed to coerce the tire into momentarily seating while the air is filling it up.)
 

Attachments

  • 21_idea_for_inflating_tire_without_schrader_valve.jpg
    21_idea_for_inflating_tire_without_schrader_valve.jpg
    73.6 KB · Views: 756
At this point it's time to make two checks of the valve stem.
  1. Ensure the red (radial runout) dot is at the valve stem
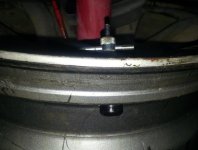
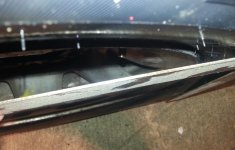
  2. Ensure with a straight edge that the valve doesn't stick out past the rim

Since it was dark, I didn't bother looking for match mounting marks on the old rim, so, I simply lined up the red dot with the tire valve since the red dot indicates the tire's high point for radial runout and radial force variation, which takes precedence over the yellow dot which indicates the tire's light spot which would have been paired with the valve stem on the wheel which is the wheel's heavy spot had the red dot not existed.
 

Attachments

  • 22_red_dot_next_to_valve_stem_and_ruler_on_rim_for_valve.jpg
    22_red_dot_next_to_valve_stem_and_ruler_on_rim_for_valve.jpg
    45.7 KB · Views: 1,898
I left the tire outside, at 42psi, where I will check it in the morning before starting to balance it.

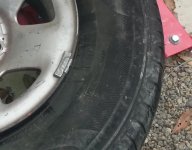
One question is what tool you use to remove the old clip on wheel weights?
 

Attachments

  • 23_remove_old_clip_on_wheel_weight.jpg
    23_remove_old_clip_on_wheel_weight.jpg
    54.6 KB · Views: 1,152
UnderFire said:
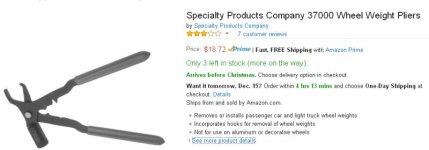
Thanks for that advice on the wheel weight pliers that the pros use.

UnderFire said:
But a hammer and a small/sharpish punch will work fine, just tap it under the edge of the clip and pry the weight off.

Thanks for that advice that a hammer and pick of some sort will work fine.

Since I'm not going to be doing this often, that makes sense not to have to store yet another single-purpose tool in my already very crowded toolbox.
 

Attachments

  • wheel_weight_pliers.jpg
    wheel_weight_pliers.jpg
    29 KB · Views: 709
Status
Not open for further replies.

Members online

No members online now.

Forum statistics

Threads
278,315
Messages
3,554,125
Members
248,016
Latest member
Advally Service

Trending content

Back
Top