
You are using an out of date browser. It may not display this or other websites correctly.
You should upgrade or use an alternative browser.
You should upgrade or use an alternative browser.
ANTMAN'S Thread
- Thread starter Antman
- Start date

LakeRunr
Member
...drummer Neil Peart died Tuesday January 7th. “The Professor” - one of the most influential rock drummers of all time.
The best drummer of all time, period. Neil "played" the drums like an instrument, not just a rythm-keeper for the song. He was a huge part of why Rush, with only 3 members, made music that was as good or better than bands of 5 or 6.
I saw Rush in concert a couple of years ago. Glad I did.

Cymon
New member
Those of you that got to know me a bit know that I am a HUGE Rush fan. I’m 50 and have been listening to them for basically all my life. Seen them in concert a ton. Even happened upon their tour busses one time on interstate 95 with Neil’s motorcycle trailer in tow...
They just released that drummer Neil Peart died Tuesday January 7th. “The Professor” - one of the most influential rock drummers of all time.
Very sad.
This will be my last post.
Thank you! :fish2: :first:

t0y0ta4R
New member
Those of you that got to know me a bit know that I am a HUGE Rush fan. I’m 50 and have been listening to them for basically all my life. Seen them in concert a ton. Even happened upon their tour busses one time on interstate 95 with Neil’s motorcycle trailer in tow...
They just released that drummer Neil Peart died Tuesday January 7th. “The Professor†- one of the most influential rock drummers of all time.
Very sad.
This will be my last post.
Bummer and I just found your oil post. :biggrin2: I don't know you personally but best of luck with your future endeavors and thanks for all that you have contributed on the forum as it looks to be significant.
Probably my favorite Rush song:
Rush - Tom Sawyer :guitar3: :cheers:
https://www.youtube.com/watch?v=auLBLk4ibAk
Last edited:
** THE $25 Awning Project (oh yeah.).
OK----This is a little silly, I admit. But- when an ARB awning costs around $200, and daycare is costing me over $1000 per monthyou can see how this makes perfect sense, at least for now.
I'll save the "Honey I would reaaally like..." conversations for something I can get more use out of.
Price List:
3 qty 10'x1/2" steel conduit ($2 each)...................$6.00
2 qty 1/2" conduit elbows ($3 each)......................$6.00
1 qty 6"x8" tarp (bonus 2 pack at the Depot!).........$6.00
1 qty pack of strap ties ......................................$1.00
1qty roll of poly rope ..........................................$3.00
1 qty can of black spray paint .............................$3.00
Grand total of $25 bucks.
Here's the stuff!
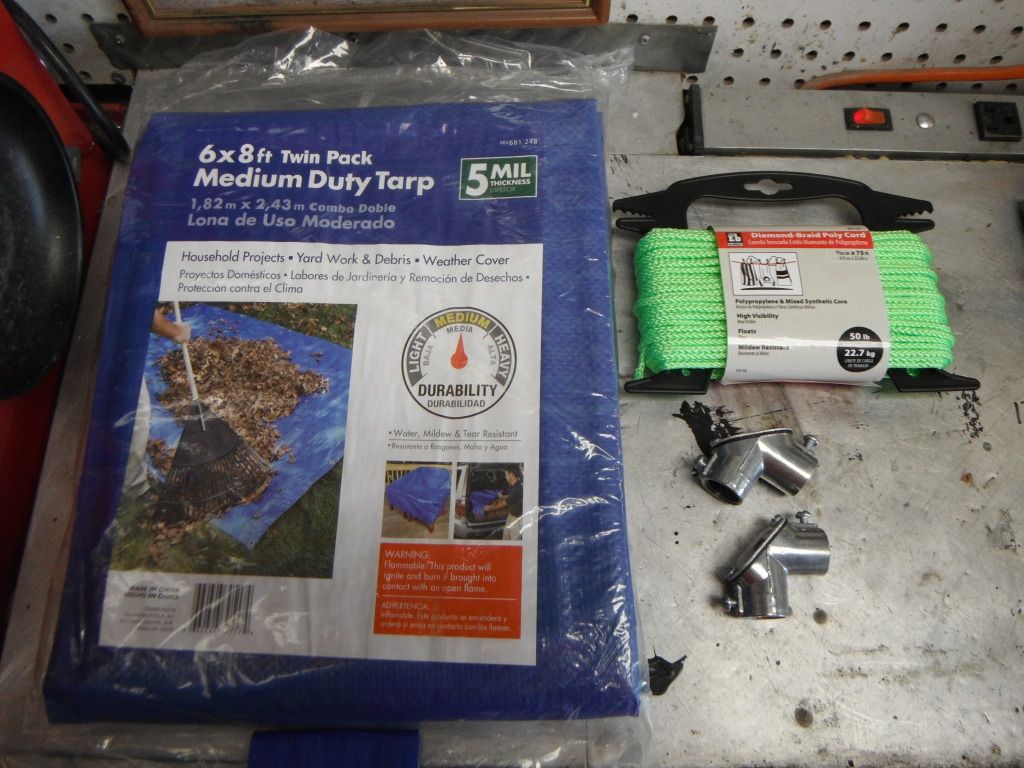
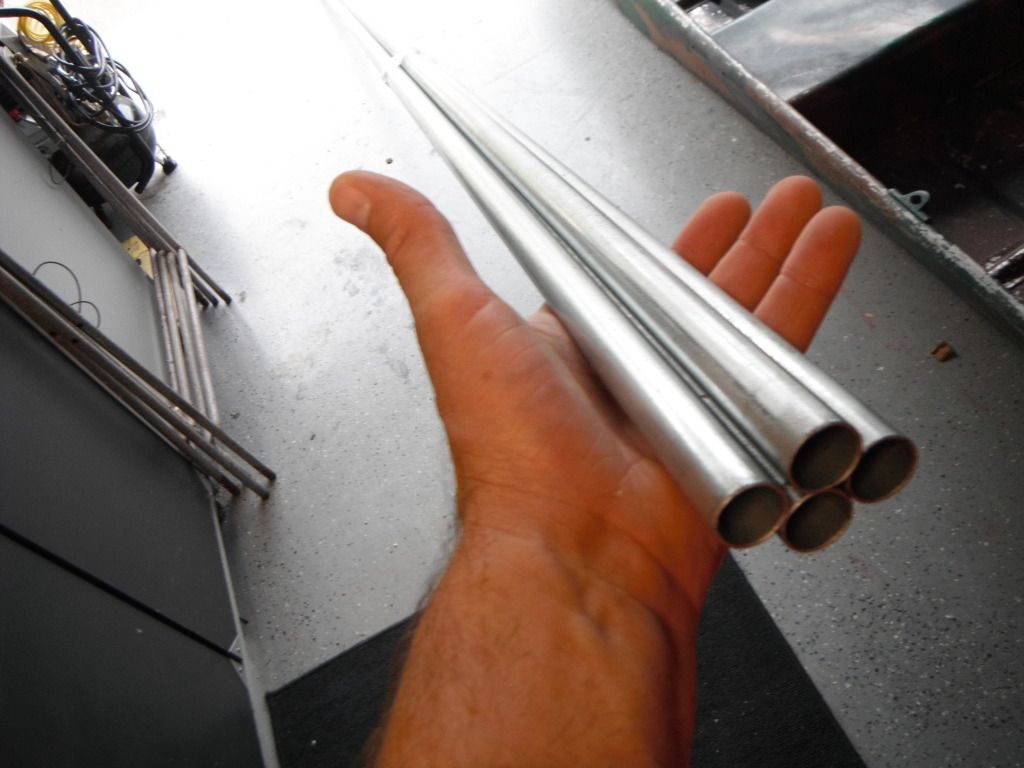
Because I used a genuine tubing cutter for the conduit I feel like I can get rid of a few ghetto points.(?)
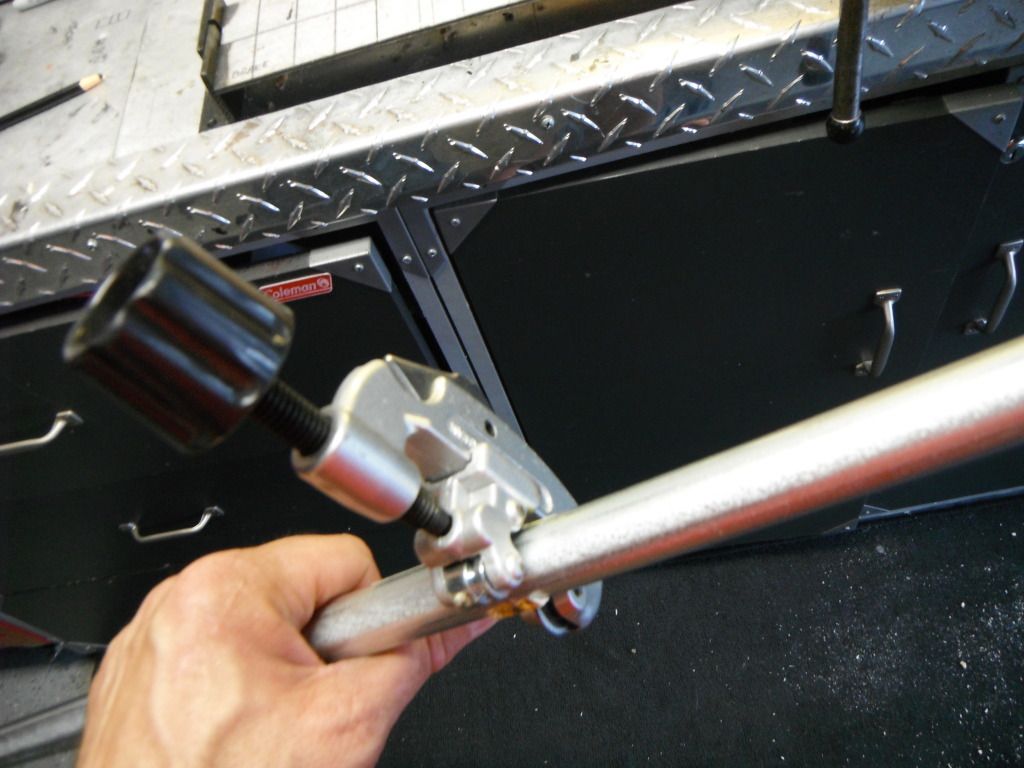
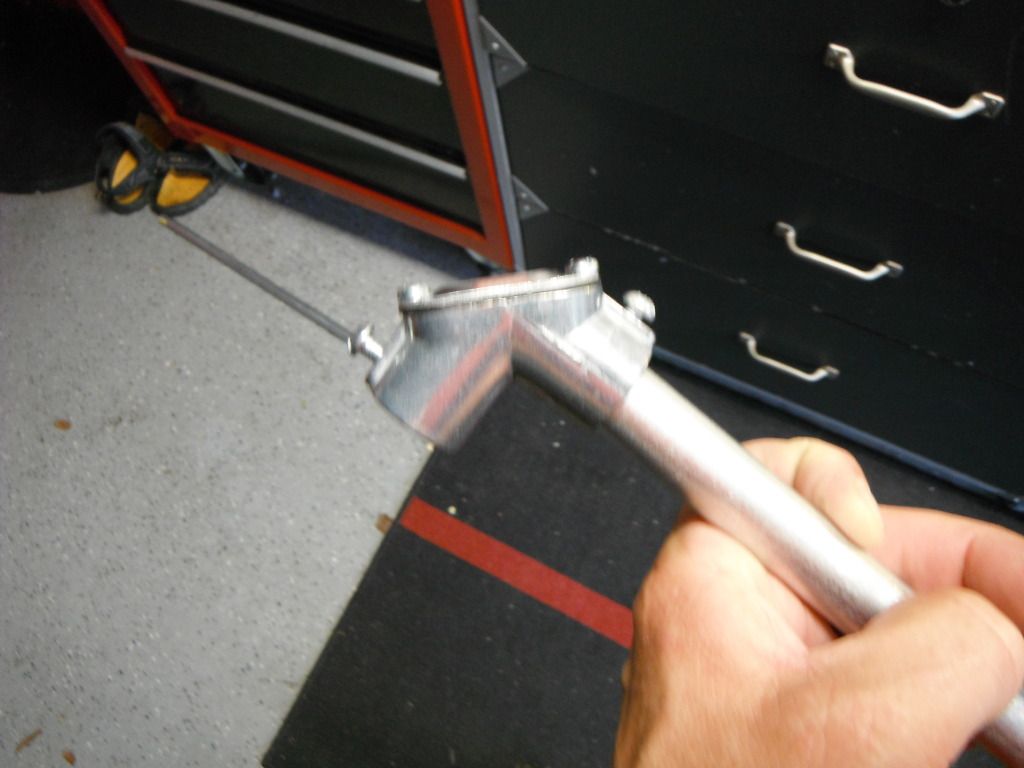
Here is a closeup of one of the 90' elbows. Even though the screw gets it pretty tight I used some stick epoxy in the hole to keep it together...forever.
Hint-By placing the conduit on the ground you can be sure both ends are facing exactly the same way.
Here she is in all her $25 glory. Setup takes all of 5 minutes tops, and it rolls up into itself easily.
The lines make it surprisingly sturdy, even in a light wind, but it's not exactly the perfect storm shelter. Great for shade, light rain, and to keep everything dew-free in the morning. I can open all the doors too.:trophy:
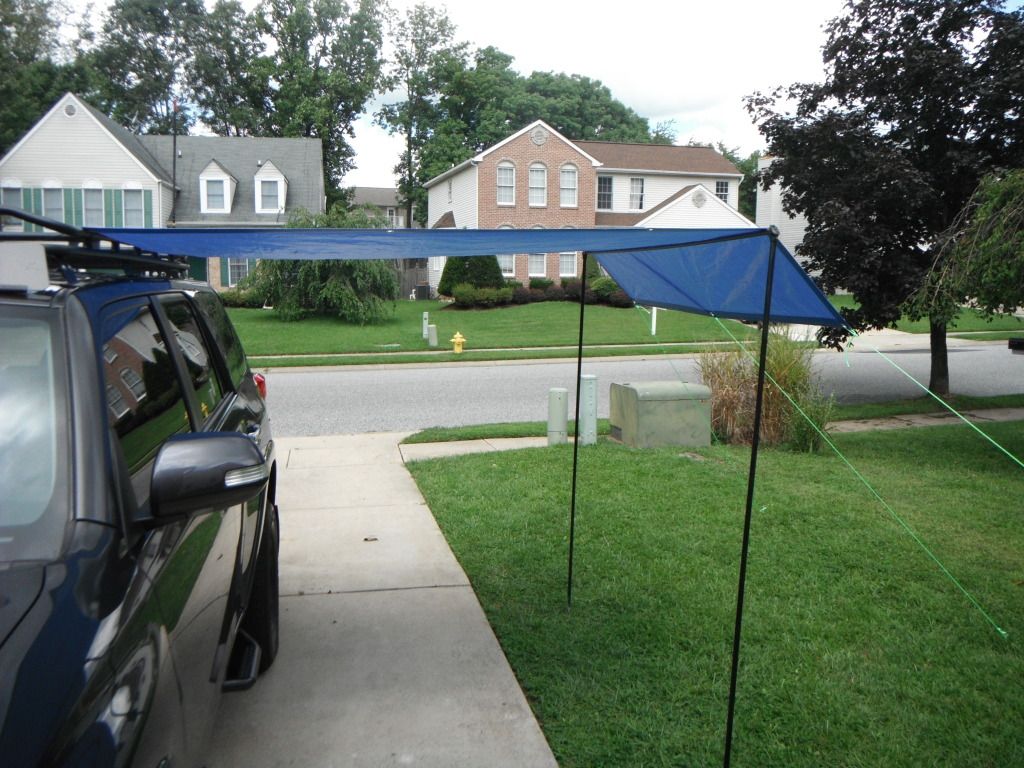
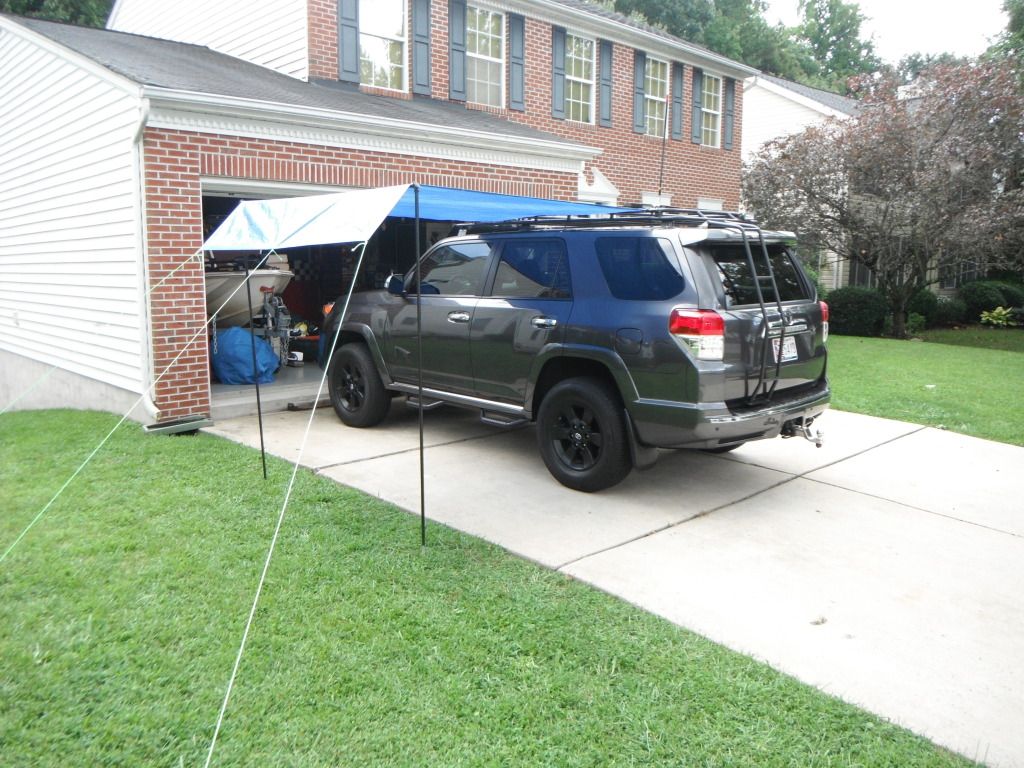
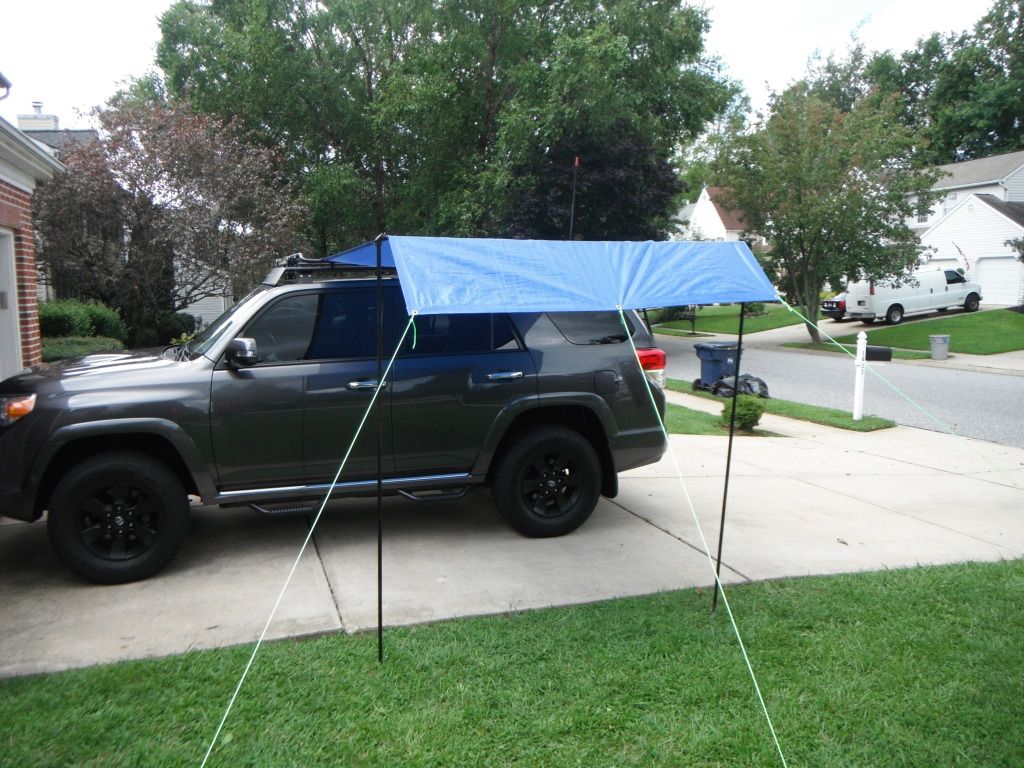
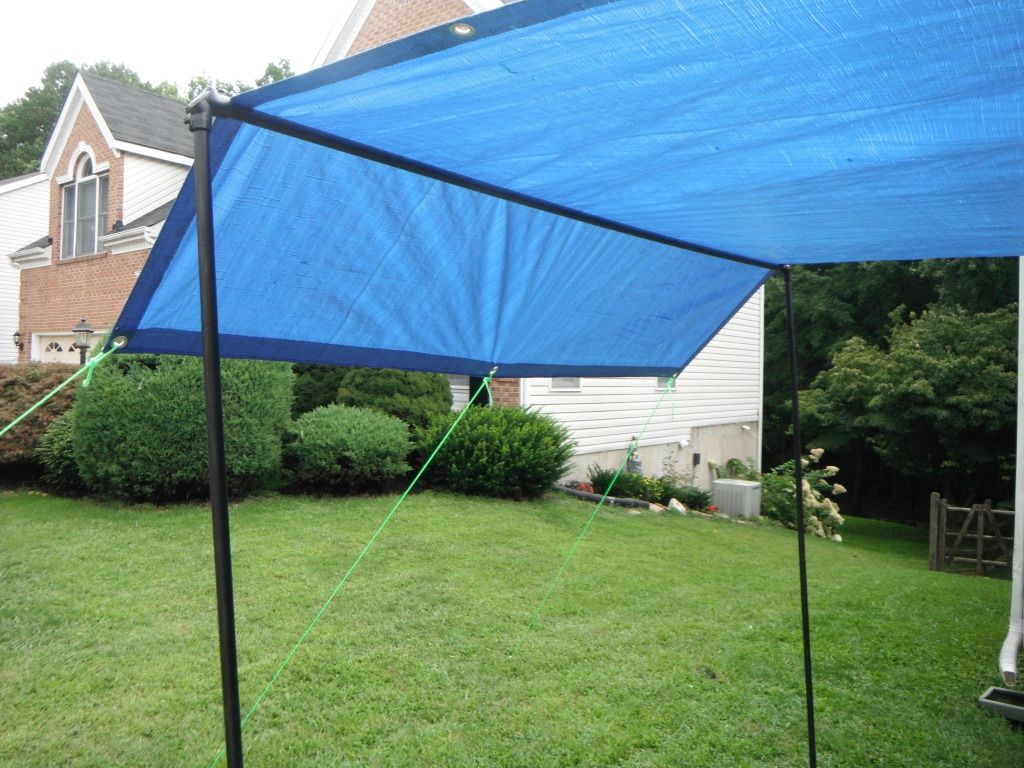
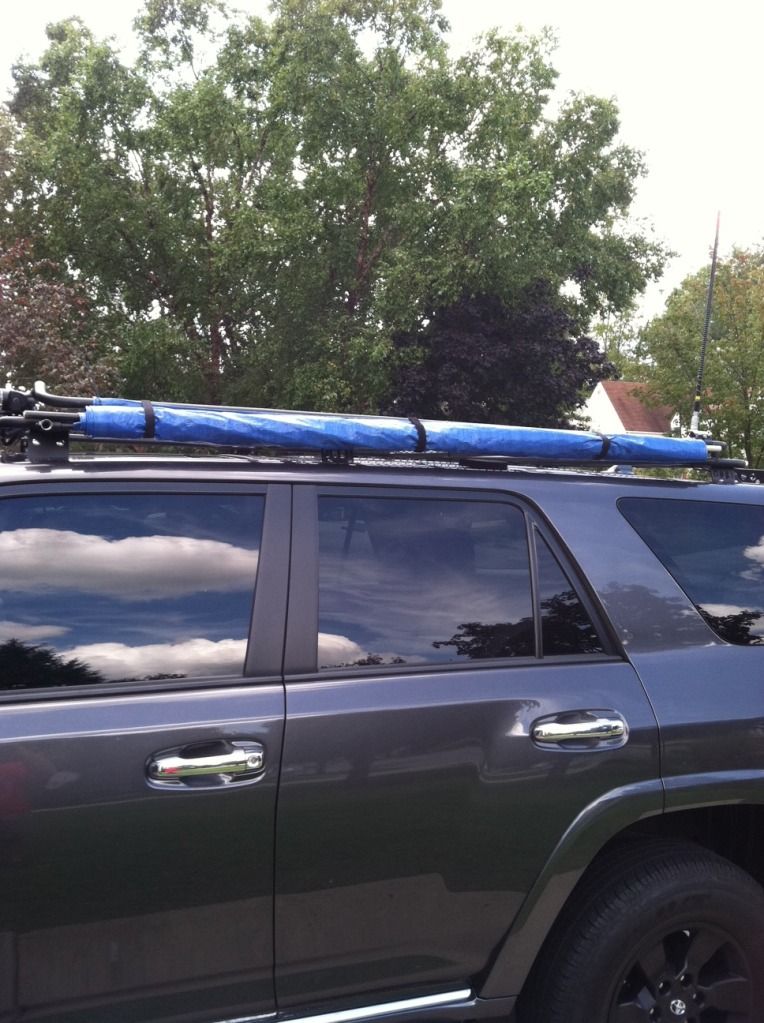
Go ahead and laugh, I don't care. Chances are, I have an awning for camping- and you don't.
Happy Modding!

Love this idea, thanks for the inspiration

ElectroBoy
Banned
Those of you that got to know me a bit know that I am a HUGE Rush fan. I’m 50 and have been listening to them for basically all my life. Seen them in concert a ton. Even happened upon their tour busses one time on interstate 95 with Neil’s motorcycle trailer in tow...
They just released that drummer Neil Peart died Tuesday January 7th. “The Professor” - one of the most influential rock drummers of all time.
Very sad.
This will be my last post.
Sad news indeed.
Listening to the Rush tribute program on Sirius XM Deep Tracks ch 027.
ANTMAN MOD #5
12V Outlet Mod.
This mod allows you to use your factory 12V outlet in two different ways via a switch. The outlet will either function exactly like it does now, meaning 12v power during ignition-on only, or 12v power all the time, your choice. I find it most useful for charging my phone overnight, or charging my GPS for the return trip home…
Hi, do you know if it would be possible to use one of the empty switch slots to use an OEM style button for this mod?
Something like this?
12 Volt 3amp ON-OFF Toyota OEM Replacement Push Switch with LED NEW GREEN lights -Air On Board
stay_tuned
New member
ive gone through trying the anytime fog light a few times on my 2018 and i can get everything minus finding the white and silver wire. I found one that i thought it was way at the bottom but when turning on the fogs nothing happens.
Anyone have a better picture of where i can find the correct wire i need to tap into?
Thanks
Anyone have a better picture of where i can find the correct wire i need to tap into?
Thanks

2112 R
New member
Those of you that got to know me a bit know that I am a HUGE Rush fan. I’m 50 and have been listening to them for basically all my life. Seen them in concert a ton. Even happened upon their tour busses one time on interstate 95 with Neil’s motorcycle trailer in tow...
They just released that drummer Neil Peart died Tuesday January 7th. “The Professor” - one of the most influential rock drummers of all time.
Very sad.
This will be my last post.
We will miss your presence and contributions to the forum and will miss Neil on the skins. Rock on man
:rockon:
brockleigh
New member
ANTMAN MOD #4 and 4.1
Independent Fog-Light Mod- using the factory switch.
Antman and readers,
New 4Runner owner and forum lurker here. I just completed Antmans foglight mod in my 2016 4Runner Trail. Well... almost competed. I have my instrument cluster on my work bench.
Here I sit all broken hearted, came for 4.1 but it isn't done!
I chickened out... does anyone know of anyone who has completed this mod with a later 5th gen OR for funsies tore-down their instrument cluster?
How the hell do you get behind the dials? I had the glass off and the back off. The whole circuit board on the back is connected with one ribbon cable but the obvious choice of attack is through the front as you would need to remove the dials before you could remove the circuit board. Dials or plastic circles, how do ya lift em?
Before someone asks, yes, I want it. Antman can't be the only one to wield the LED.
...
For anyone else wondering if 4.0 works as written. Yes :cheers:, it does. Takes about 2 hours. ... Longer if you take your instrument panel out go inside and write a post about how you need to call home to mamma cause your just too scared to pull on some plastic.

BenderRodriguez
New member
I've been a lurker for a long time, and have gotten so much great info from this thread! Thanks for everything Antman!
I did the cupholders 1st, cause duh, and went with a size bigger - Amazon.com: Genuine Beckson Black Plastic Cupholder Inserts With 4 Bottom Drain Holes (2 Pieces): Automotive
These are big enough to hold a can with a coozie, larger water bottles, travel mugs, etc. There's plenty of room in the bumper cover. I'm hoping to try out the awning for next season. Thanks again!
I did the cupholders 1st, cause duh, and went with a size bigger - Amazon.com: Genuine Beckson Black Plastic Cupholder Inserts With 4 Bottom Drain Holes (2 Pieces): Automotive
These are big enough to hold a can with a coozie, larger water bottles, travel mugs, etc. There's plenty of room in the bumper cover. I'm hoping to try out the awning for next season. Thanks again!
FiReBReTHa
New member
ive gone through trying the anytime fog light a few times on my 2018 and i can get everything minus finding the white and silver wire. I found one that i thought it was way at the bottom but when turning on the fogs nothing happens.
Anyone have a better picture of where i can find the correct wire i need to tap into?
Thanks
[MENTION=228353]stay_tuned[/MENTION] did you ever figure out which wire it was? I'm under dash and a test probe dealing with same problem!
stay_tuned
New member
[MENTION=228353]stay_tuned[/MENTION] did you ever figure out which wire it was? I'm under dash and a test probe dealing with same problem!
unfortunately not i was never ever to find the right wire after docking around with it for a few weeks i ended up buying the britebox harness that accomplishes the same thing.
but since then ive moved onto a taco
i still have the harness sitting in my shed and am willing to sell it if your interested
FiReBReTHa
New member
ANTMAN MOD #4 and 4.1
Independent Fog-Light Mod- using the factory switch.
Antman and readers,
New 4Runner owner and forum lurker here. I just completed Antmans foglight mod in my 2016 4Runner Trail. Well... almost competed. I have my instrument cluster on my work bench.
Here I sit all broken hearted, came for 4.1 but it isn't done!
I chickened out... does anyone know of anyone who has completed this mod with a later 5th gen OR for funsies tore-down their instrument cluster?
How the hell do you get behind the dials? I had the glass off and the back off. The whole circuit board on the back is connected with one ribbon cable but the obvious choice of attack is through the front as you would need to remove the dials before you could remove the circuit board. Dials or plastic circles, how do ya lift em?
Before someone asks, yes, I want it. Antman can't be the only one to wield the LED.
...
For anyone else wondering if 4.0 works as written. Yes :cheers:, it does. Takes about 2 hours. ... Longer if you take your instrument panel out go inside and write a post about how you need to call home to mamma cause your just too scared to pull on some plastic.
[MENTION=598098]brockleigh[/MENTION]
I just noticed that you said you have a 2016!
Can you please take a photo of the wire you tapped for the fog light feed. My attempts failed on my 2014 because of lacking the white with silver circles.
Sorry if I pinged you already on this, been begging wherever I can to get help with this!
FiReBReTHa
New member
i still have the harness sitting in my shed and am willing to sell it if your interested
If I really cant nail this I may have to talk to you about it. Now My DIY sense needs to be fulfilled in success or complete failure first!

jblawrence25
New member
Thank you [MENTION=65614]Antman[/MENTION] for the rocker trim mod walk through. It was a bit intimidating the first cut but it turned out great.


Sent from my iPhone using Tapatalk
Sent from my iPhone using Tapatalk
jblawrence25
New member
Mod completion and success
I performed this mod on my 2013 4Runner last night. Super easy to follow and i have always been afraid of electrical work because it confused me. Thank you for the write up, I can now operate my Diode dynamic SS3's independently and with brights on.
One wire will go to a ground (doesn't matter which, but I used the black one). Here is a good ground…This is a metal dash support behind the lower panel you have pulled off. This will be very evident when you have it apart...
View attachment 46612
The other wire (brown) will go to the relay you are about to mount. Attach a female spade terminal to the brown wire and connect it to relay terminal#86 (more on this in a minute)
This is a standard relay – don’t get all worked up- it’s easy to hook this up. Relay's are like heavy duty switches that are controlled by, in this case, another switch. This will enable your lights to work without burning up your factory fog-light switch! The relay can mount here, right above the ground location.
I used a j-nut behind the metal dash support, and a screw to secure the relay.
View attachment 46613
View attachment 46614
<O</O
You will also need 2 mini-fuse taps (unless you want to cut more wires…). You can get these at any auto-parts store. Make sure you install two 15a fuses in each one! (buy fuses when you buy the taps, factory fuses won't fit!) Make sure you read the included instructions- these need to be installed correctly to properly protect the circuit. This is very important!
View attachment 46615
These minitaps will plug directly into your fusebox in the following locations: lower right (FOG FR 15A), and upper right (P/OUTLET 15A).
View attachment 46616
Attach some wire to each of the supplied connectors on the minitaps, and feed the wires to your relay location. Attach some female spade connectors and plug them into the relay:
Your relay will have numbered attachment terminals. The minitap from the FOG FR will plug into terminal #87. The minitap from the P/OUTLET will plug into terminal #85.
One more connection to make! The lead that you tapped into the White fog-light wire. Attach a female spade to this, and connect it to the relay terminal#30.
Sounds confusing- but very simple. Here is a wiring diagram I drew up for you guys (and girls!):
View attachment 46617
<O
This is what you end up with.
Fogs only
View attachment 46618
Hi-beams with fogs
View attachment 46619
<O
Oh yeah- one other thing. If you want to control the fogs at any time, regardless of ignition “on”, only use 1 minitap connected to the FOG FR circuit, and connect this lead to both relay location #87, and #85. Don’t get mad at me if your battery dies… :)
****** KEEP READING TO SEE HOW I LIT UP THE FOG LED...
I performed this mod on my 2013 4Runner last night. Super easy to follow and i have always been afraid of electrical work because it confused me. Thank you for the write up, I can now operate my Diode dynamic SS3's independently and with brights on.

Titanpat57
Senior Member
So this waterhead finally got out thrown out of the Chevy forums from what I understand,,,and may be back in a Toyota (Celica) again....I for one can't wait to hear this horse's arse bloviate about how wonderful and smart he is (f'in gag me) and awesomely cool his mods are ...stay tuned...Mr. Wonderful (laughing my ass off) may be back to have his fanboys circle the wagons....
Attachments

Reata
New member
So this waterhead finally got out thrown out of the Chevy forums from what I understand,,,and may be back in a Toyota (Celica) again....I for one can't wait to hear this horse's arse bloviate about how wonderful and smart he is (f'in gag me) and awesomely cool his mods are ...stay tuned...Mr. Wonderful (laughing my ass off) may be back to have his fanboys circle the wagons....
OMG, who is that guy? Howdy Titan, how the heck are you? Is that Antman in the flesh in that photo?
Similar threads

- Replies
- 0
- Views
- 268

- Replies
- 0
- Views
- 2K

- Replies
- 2
- Views
- 3K

- Replies
- 13
- Views
- 3K


