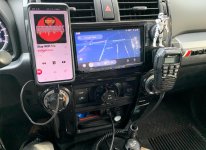
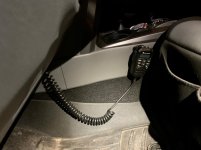
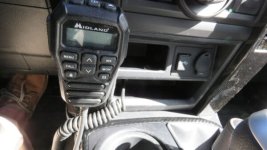
I installed mine under the center console just the right of the cup holder. I used velcro to attached it. the mic i ran a cat 7 cable to dash with female connector so I don't need to leave it attached all the time. I put this on bottom right of steering wheel as i had an open spot there. for my antenna, I installed it on my SDHQ ditch light bracket and it works great.

You are using an out of date browser. It may not display this or other websites correctly.
You should upgrade or use an alternative browser.
You should upgrade or use an alternative browser.
Anyone install a Midland MXT275 in a 5th gen?
- Thread starter rob_dixon
- Start date

WanderlostOverland
New member
I was actually impressed and inspired by your video. That's probably where I'll put mine. Not sure I'm going to worry about the extra USB port. I'm not above using a cubby space if I need to (I used the ashtray area in a 2nd gen for the CB I installed in it) but your idea doesn't take any visible space. I love keeping the interior clear of extra stuff as much as possible!
Thanks!!!

rob_dixon
New member
I liked the way wanderlust overland did it but that is indeed overkill and it occurs to me the wire would still be in the way of your center cupholders and storage.
Ended up putting it under the dash, easily mounted and cant be seen. I fed the power to the rear passenger 12v under the mat. Scroll for video.
Midland in a 4runner - Album on Imgur
<blockquote class="imgur-embed-pub" lang="en" data-id="a/jYDGPnD" ><a href="//imgur.com/a/jYDGPnD">Midland in a 4runner</a></blockquote><script async src="//s.imgur.com/min/embed.js" charset="utf-8"></script>
Ended up putting it under the dash, easily mounted and cant be seen. I fed the power to the rear passenger 12v under the mat. Scroll for video.
Midland in a 4runner - Album on Imgur
<blockquote class="imgur-embed-pub" lang="en" data-id="a/jYDGPnD" ><a href="//imgur.com/a/jYDGPnD">Midland in a 4runner</a></blockquote><script async src="//s.imgur.com/min/embed.js" charset="utf-8"></script>

SpeedyKevin
New member
I liked the way wanderlust overland did it but that is indeed overkill and it occurs to me the wire would still be in the way of your center cupholders and storage.
Ended up putting it under the dash, easily mounted and cant be seen. I fed the power to the rear passenger 12v under the mat. Scroll for video.
Midland in a 4runner - Album on Imgur
<blockquote class="imgur-embed-pub" lang="en" data-id="a/jYDGPnD" ><a href="//imgur.com/a/jYDGPnD">Midland in a 4runner</a></blockquote><script async src="//s.imgur.com/min/embed.js" charset="utf-8"></script>
Looks clean! May end up going this route!

Rogue_Runner77
New member
I just installed this last week.I am thinking the head unit can fit perfectly in the dash space right above the front cup holder.
Photos of your setup?
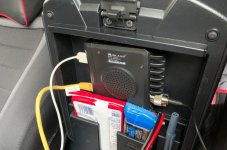
I like that I can take the unit out easily and use it in other vehicles. I didn't need the Aux/USB port so I got a CAT5 extender so it looks a bit more finished.
Attachments
SpeedyKevin
New member
I just installed this last week.
I like that I can take the unit out easily and use it in other vehicles. I didn't need the Aux/USB port so I got a CAT5 extender so it looks a bit more finished.
Damn thats clean! nicely done!

jrandom
New member
I installed one last summer. Certainly not as convienent to move as [MENTION=150115]Rogue_Runner77[/MENTION].
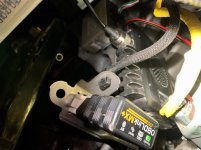
I fastened the bracket above the OBD port. The plug I simply ran above the vents to the glove box and utilized the unused cig lighter. I fastened the handset cable to the edge near the vent so it stays out of the way, I like the discreteness. I can transfer it, less the antenna in ~5 mins. The location is really decent for hearing both speakers. Sh!tty cell phone pics below:
I fastened the bracket above the OBD port. The plug I simply ran above the vents to the glove box and utilized the unused cig lighter. I fastened the handset cable to the edge near the vent so it stays out of the way, I like the discreteness. I can transfer it, less the antenna in ~5 mins. The location is really decent for hearing both speakers. Sh!tty cell phone pics below:
Attachments
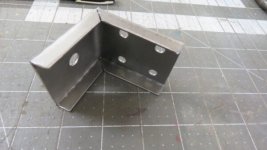
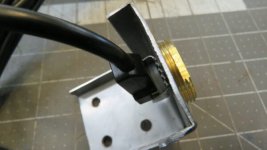
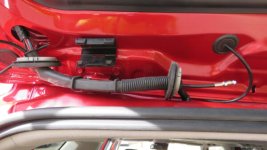
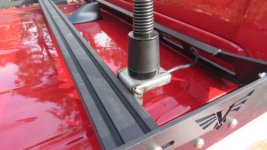
In the process of installing my MXT275 I started working on the antenna mount. Because I have a Victory roof rack that uses 80/20 railing I decided to to create a mount that would attach to the side of a rail. It's attached using t-nuts, and the cable is routed through the back hatch and inside of the rubber wiring loom. The nice thing about the MXTA24 cable is that it has a small end that fits through spots that a standard UHF connector will not.
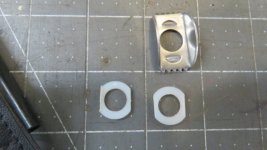
Had to get a couple of nylon washers and file the sides in order to get the spacing right. Without those, the center post of the mount is too high, and the antenna won't screw down all the way to the base.
Now to actually work on the interior... But at least things are functional.
Had to get a couple of nylon washers and file the sides in order to get the spacing right. Without those, the center post of the mount is too high, and the antenna won't screw down all the way to the base.
Now to actually work on the interior... But at least things are functional.
Attachments
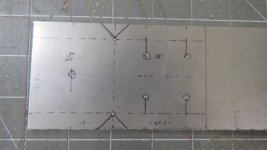
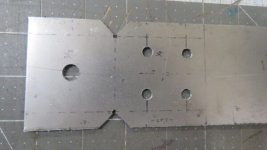


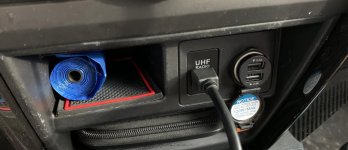
Well, I finally finished my install. I used the void in the center console, as described by Wanderlost Overland, but I changed the mounting points for the connectors to a different location. I went with the low cubby in front of the shift lever. The 3 foot cable lengths that they had spec'ed in their YouTube posting were long enough to reach.
Other changes I made - I vampire-tapped the auxiliary power socket that runs to the center console. Adding a power distribution system is on my list of things to do real soon now...
Part of the decision on the connector location was driven by thoughts on where the Mic Cord would have the least conflicts with coffee cups. And since I'm also considering that cubby for a set of rocker switches, the connector could easily be moved forward at that time. But all also admit that since cutting these holes will be the first non-reversible mod, I wanted to go for an unobtrusive spot...
I'm not sure how or what I was measuring when I thought that this would work (as shown in the first picture). If anybody else tries this, do not place them as shown there!! The air duct behind that piece was much wider, and closer than I realized.
I wound up moving the RJ-45 plug to the far left, and even then had to apply significant Dremel-tool and X-acto knife surgery to the plug. I moved the USB power port to the far right, and turned it sideways to ensure no conflict.
All of this required a healthy application of epoxy to hold the RJ45 in the new position, since I'd carved away extra plastic, and black duct tape to cover up the empty space. Images of the results of that carnage are further down.
I'm happy with the end result. And, happily, the evidence of this experiment is hidden away where it can't be seen.
Other changes I made - I vampire-tapped the auxiliary power socket that runs to the center console. Adding a power distribution system is on my list of things to do real soon now...
Part of the decision on the connector location was driven by thoughts on where the Mic Cord would have the least conflicts with coffee cups. And since I'm also considering that cubby for a set of rocker switches, the connector could easily be moved forward at that time. But all also admit that since cutting these holes will be the first non-reversible mod, I wanted to go for an unobtrusive spot...
I'm not sure how or what I was measuring when I thought that this would work (as shown in the first picture). If anybody else tries this, do not place them as shown there!! The air duct behind that piece was much wider, and closer than I realized.
I wound up moving the RJ-45 plug to the far left, and even then had to apply significant Dremel-tool and X-acto knife surgery to the plug. I moved the USB power port to the far right, and turned it sideways to ensure no conflict.
All of this required a healthy application of epoxy to hold the RJ45 in the new position, since I'd carved away extra plastic, and black duct tape to cover up the empty space. Images of the results of that carnage are further down.
I'm happy with the end result. And, happily, the evidence of this experiment is hidden away where it can't be seen.
Attachments
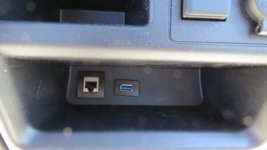
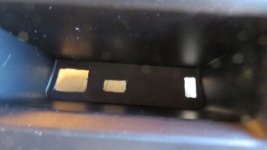
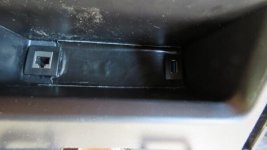
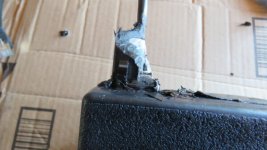
I mounted both my GMRS and CB in my center console. This includes the mic spliters for dual access. Plenty of space.
Dades Bluegirl build
Dades Bluegirl build
Where do you put your big gulp???Finally got around to installing the Midland MXT275 MicroMobile Two-Way GMRS Radio (thanks to Mark at Wanderlost Overland for the review: YouTube). Mounted mine on the Rago Center Console Bridge (drivers side), and ran the power cord plug to the vacant socket in the backseat area of the center transmission console (keeping the radio completely removable/portable). Mounted the Midland optional 6db gain whip antenna to the top of the Gobi Stealth roof rack using a Rhino-Rack Folding Aerial Bracket (still got to get the rig in the garage folks), on the passenger side directly above the slider kick-out so it can be easily reached to fold up/down. Keep in mind that you will be required to obtain an FCC license to operate this radio.
Midland MXT275 Radio: MXT275 MicroMobile(R) Two-Way Radio | Midland USA
Midland MXTA26 6db Gain Whip Antenna: MicroMobile(R) MXTA26 6db Gain Whip Antenna | Midland Radio
Midland MXTA24 Low Profile Antenna Cable: MicroMobile(R) MXTA24 Low Profile Antenna Cable | Midland Radio
Rhino-Rack Folding Aerial Bracket: #43196 - Folding Aerial Bracket | Rhino-Rack

Mudhorn
New member
Anyone using the Ghost Antenna with the MXT275?
MicroMobile(R) MXTA25 3dB Gain Ghost Antenna | Midland Radio
MicroMobile(R) MXTA25 3dB Gain Ghost Antenna | Midland Radio
Anyone using the Ghost Antenna with the MXT275?
MicroMobile(R) MXTA25 3dB Gain Ghost Antenna | Midland Radio
I am using the ghost antenna


Sent from my iPhone using Tapatalk
rob_dixon
New member
Anyone using the Ghost Antenna with the MXT275?
MicroMobile(R) MXTA25 3dB Gain Ghost Antenna | Midland Radio
I got it. Works well. Put it on the A-Pillar, although I learned from a guy who knows what he was talking about the way radios and attenaes work that Midland is "stretching" the actual specs a bit.

The_Reaper
New member
I am using the ghost antenna
Sent from my iPhone using Tapatalk
I like where you mounted your ghost antenna, was the 12ft cable long enough or did you have to extend it? If you did extend it did that effect the performance? I was going to mount mine on the rear of the rack the route the wires back to the center console, but I don't think I can do that without extending the cable and I'm not sure that recommended.
Antenna wire path
Hey guys,
I am thinking about getting a MXT275 and putting it in my center console.
What is the best way to get the antenna cable out of the truck? I know there is a grommet in the passenger side of the firewall since I used it for my OEM audio install but I don't see me passing another cable thru there.
If it helps, I am thinking of temporarily mounting it on my hood with the magnetic base. I will only be using it once in a while so I am looking for the easiest way.
Thanks
Colt
Hey guys,
I am thinking about getting a MXT275 and putting it in my center console.
What is the best way to get the antenna cable out of the truck? I know there is a grommet in the passenger side of the firewall since I used it for my OEM audio install but I don't see me passing another cable thru there.
If it helps, I am thinking of temporarily mounting it on my hood with the magnetic base. I will only be using it once in a while so I am looking for the easiest way.
Thanks
Colt
Mudhorn
New member
What is the best way to get the antenna cable out of the truck? I know there is a grommet in the passenger side of the firewall since I used it for my OEM audio install but I don't see me passing another cable thru there.
Firewall on driver or passenger side is your best option. Some of the antenna cables disconnect on the end to make running the wire a lot easier. I always do the coat hanger trick.
I liked the way wanderlust overland did it but that is indeed overkill and it occurs to me the wire would still be in the way of your center cupholders and storage.
Ended up putting it under the dash, easily mounted and cant be seen. I fed the power to the rear passenger 12v under the mat. Scroll for video.
Midland in a 4runner - Album on Imgur
<blockquote class="imgur-embed-pub" lang="en" data-id="a/jYDGPnD" ><a href="//imgur.com/a/jYDGPnD">Midland in a 4runner</a></blockquote><script async src="//s.imgur.com/min/embed.js" charset="utf-8"></script>
Okay, it took me a minute to figure out what you did. Simple and Brilliant!
Your solution works perfectly for me since I will keep the mic in my center console 95% of the time and just plug it in when I need it. The unit is tucked up and out of the way but easy to get at when needed.
Couple of questions:
1. Are those threaded washers?
2. Did you use washers on the other side as well?
3. Do you happen to have a parts list of the hardware you used?
Colt
Similar threads
- Replies
- 3
- Views
- 3K

- Replies
- 2
- Views
- 484


