Awesomesauce0528 Build Thread

awesomesauce0528

New member
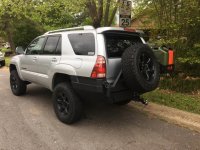
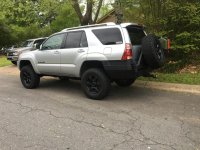
How she currently sits​

Been a long time lurker of this site due to a friend that is a member of this site (llennium) that got me interested in 4Runners. Well I was finally able to sell my truck and get a 4Runner this past week on 1/5/16. I bought a 2004 Sport Edition 4Runner 4wd with 128,000.

Here's some pics from the day I got her
Of course I already had major plans for her and within the next couple days I ordered the toytec ultimate lift and some 275/70r17 BFG KO2s. With the help of llennium, I was able to install the lift in a day on 1/13/16. The next morning I had an appointment to get the new wheels mounted and balanced and an alignment. Here she is after the new wheels and alignment.

Suspension
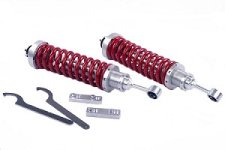
Bilstein 5100 Front Coilovers
Fox 2.5 Rear Shocks
Metal Tech 3" Heavy Duty Long Travel Springs
Toytec/Bilstein Adjustable Coilovers
Toytec Swaybar Relocates
Extended Stainless Rear Brake Lines
Wheelers Offroad SuperBump Bumpstops
Total Chaos Upper Control Arms
Extended Rear Swaybar Links

Armor
Demello 3 Hoop Front Bumper
CBI Offroad Rear Bumper and Tire Carrier
Prinsu Designs Roof Rack
RCI Front Skid
RCI Sliders

Lighting
2x Hella 700FF Driving Lights
2x Baja Designs Squadron-R Sport LEDs
2x Ebay Led Ditch Lights
40" Morimoto XTorch light bar
4300k XenonDepot Xtreme Phillips HIDs

Wheels
275/70r17 BFG KO2(01/16-2/17)
17x8.5 Fuel Vectors
285/75r17 Nitto Ridge Grappler(02/17-present)

Miscellaneous
Weathertechs Front and Rear
06-09 Headlight Swap
Satoshi Grille
Plasti Dipped Emblems
CBI Ditch Light Brackets
VIAIR Constant-Duty On Board Air System
Custom Overhead Switch Panel

Electronics
JL Audio 10W3v3 Sub
Kicker CX600.1
Cobra 75 WXST
3' Firestik Antenna
Firestik Antenna Spring
Firestik Fire Ring Coax Cable
Kenwood DDX773BH
Metra Axxess ASWC-1 Steering Wheel Interface
Front and Rear Cameras
Bussmann 15401 Accessory Relay Box
 
Last edited:
Register to hide this ad
A couple days ago I ordered a rear bumper with swing out from CBI, should be here in about a month. Also over spring break I plan to sand blast my rims because the clear coat on them is peeling. I'll be painting them rattle can black. Hopefully I'll have them done around the middle of next week. I'll update with pics of them when I'm done.
 
Last edited:
Earlier this week I had time to sandblast and paint the wheels on the 4runner. After trying to sandblast the clear coat on one of the wheels off for an hour and not getting even halfway done I decided I needed a faster way to do this and found aircraft stripper. I used some aircraft stripper to get most of the clear coat off of the wheel. I then used the sand blast machine to get the rest off and give it a uniform texture. I used 2in1 etching primer from rustoleum and rustoleum satin black paint to paint the wheels. I also picked up some black spline drive nuts for the wheels. Here's the outcome
 
Last edited:
About a month ago I also got some 06-09 headlights off ebay for $160 and I picked up some of the headlight filler plates and painted them myself.
 
Last edited:
Just got conformation that my CBI rear bumper with swingout will be here tomorrow. :party:
I opted not to have it powdercoated and save some money and paint it myself.
Will post pics when I get it in tomorrow.
 
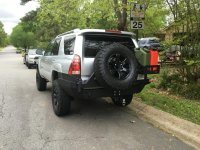
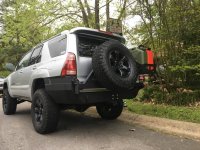
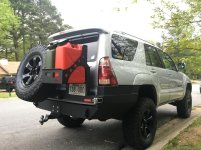
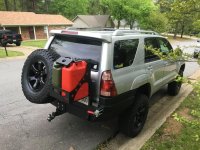
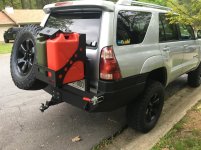
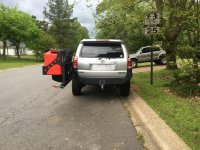
Well I got the CBI bumper all painted up and installed. Of course it took longer than expected due to a few bumps in the road. The truck lived the first 7 years of its life up north with salty winter so the frame and everything else has some rust on it that I've been slowly but surely taking care of. Well this rust caused a few bolts to seize up and I ended up breaking the head off of one bolt and breaking the nut welded to the inside of the frame loose on another. Eventually I got the bumper on.
Here are a few pics from the process:
Painting the bumper

Bumper off

Base bumper on

Bumper with swingout

Of course I finished up at night and couldn't get any good pics because of it. I will get more pics tomorrow in the daylight and post them.
Overall I'm very happy with the bumper. The only thing I have to complain about is the lack of instructions and a few bolts that were not included with the bumper, although CBI was very helpful when I had questions so it's all good. With the stock bumper on, I was sitting at about 40 3/4" on both sides. With the bumper and swingout on I'm sitting at about 39 2/3" on both sides, although these measurements were takin on a slanted driveway. I will update with more accurate measurements once I'm able to measure on a flat surface. I still have some tweaking to do the the bumper that I will mess with this weekend and I also ordered some Metal Tech 3" Long Travel Heavy Duty springs for the rear in anticipation of the rear bumper.
 
Last edited:
I was able to get better pics of the actual bumper installed today. I also ordered a CB radio. I got the Cobra 75 WXST on amazon for what I thought was a great price at $75 and a 3' firestik, antenna spring, and a coax cable with the fire ring. Should get all that in and setup sometime next week.
 

Attachments

  • IMG_0139.jpg
    IMG_0139.jpg
    139.7 KB · Views: 1,416
  • IMG_0140.jpg
    IMG_0140.jpg
    139.5 KB · Views: 1,446
  • IMG_0141.jpg
    IMG_0141.jpg
    137.3 KB · Views: 1,428
  • IMG_0143.jpg
    IMG_0143.jpg
    139 KB · Views: 1,435
  • IMG_0147.jpg
    IMG_0147.jpg
    138.4 KB · Views: 1,457
  • IMG_0148.jpg
    IMG_0148.jpg
    138 KB · Views: 1,446
  • IMG_0149.jpg
    IMG_0149.jpg
    138 KB · Views: 1,427
  • IMG_0154.jpg
    IMG_0154.jpg
    138.8 KB · Views: 1,456
Last edited:
I got the metal tech springs in yesterday and was able to install them that evening. The install was fairly easy and straight forward. So far I love the springs. I went from right at 39" on both sides to 40 1/2" from ground to fender on both sides. One of the main things that pushed me over on these springs vs the icon 3" overland springs is that the metal tech springs have designated driver and passenger side springs to compensate for the driver side lean and so far they have done a good job of that.
For the install, I was only able to jack up one side at a time which led to a good photo.

While I had the wheels off and waiting for the UPS man I decided to get rid of some of the rust and get some undercoating to prevent more rust. Just doing some preventative maintenance.
The driver side spring was about about an 1 1/2" taller than the toytec super flex HDs I had on, and the passenger side was only about 3/4"-1" taller. I mistakenly only took pics of the driver side spring compared to the Toytec Superflex HDs.

Here is an after shot

After driving on them for about 100 miles and over a few speed bumps around the neighborhood I am thoroughly impressed with how well they handle the bumper.
 
Last edited:
That is exactly what i needed to see. I am about to pull the trigger on the CBI but have been worried about installing it with my Superflex Springs and having it sag too much. Did you order your Metal Tech 3" Long Travel Heavy Duty springs from Metal Tech or another source?
 
Last edited:
That is exactly what i needed to see. I am about to pull the trigger on the CBI but have been worried about installing it with my Superflex Springs and having it sag too much. Did you order your Metal Tech 3" Long Travel Heavy Duty springs from Metal Tech or another source?

The rear end did sag significantly with my superflex hds. I ordered the Metal Tech springs directly from metal tech.
 
Well I actually got to put my bumper to use this weekend and went camping in the Ouachitas with a few friends. Here are a few pics from this past weekend.
Breaking in the new springs


The camp site we stayed at was right by a creek and I was actually able to hammock over the creek and it was awesome. The fallen tree made it easy to go out to the hammock and get in without getting wet.

And of course I had to get some good pics of the 4runner before we left camp

Airing up
 
Last edited:
That's a great looking 4Runner, and a heck of a hammock site too! Are your 5100s set at the top up front? How are your CV angles? Thanks for the inspiration, great photos.
 
Well I actually got to put my bumper to use this weekend and went camping in the Ouachitas with a few friends. Here are a few pics from this past weekend.
Breaking in the new springs
IMG_0210_zps5tuu0rl5.jpg~original

IMG_0213_zpskp0bvqdw.jpg~original

IMG_0212_zpsqy1h4cqj.jpg~original

The camp site we stayed at was right by a creek and I was actually able to hammock over the creek and it was awesome. The fallen tree made it easy to go out to the hammock and get in without getting wet.
IMG_0223_zps0d2vjyon.jpg~original

Here's a few other pics from around the campsite. Off to the right behind the other silver 4runner is the creek I hammocked over.
IMG_0225_zpsgxevg00g.jpg
IMG_0224_zpsefgnvves.jpg~original

IMG_0226_zpsk1d6whi8.jpg~original

Here's some more pics just throughout the day on some trails
IMG_0215_zpskusahcp0.jpg~original

IMG_0217_zpsec3jdgnp.jpg~original

IMG_0204_zpsrokk6y1j.jpg~original

IMG_0206_zpsqqrzbezs.jpg~original

And of course I had to get some good pics of the 4runner before we left camp
IMG_0247_zpsxoflf9xv.jpg~original

IMG_0248_zpsncjqbi9u.jpg~original


Links aren't working for me
 
That's a great looking 4Runner, and a heck of a hammock site too! Are your 5100s set at the top up front? How are your CV angles? Thanks for the inspiration, great photos.

Thanks! The 5100s up front are on the lowest setting because they came with a coilover kit with an adjustable collar for lift. That collar sits on the lowest perch of the shock and you tighten or loosen that collar to achieve the lift desired
image.jpeg

As for the cv angles. Not horrible but not great. I'll get some pics for you tomorrow.
 

Attachments

  • image.jpeg
    image.jpeg
    20.9 KB · Views: 583

Members online

Forum statistics

Threads
278,309
Messages
3,554,071
Members
248,016
Latest member
Advally Service

Trending content

Back
Top