Bawlzdeep in this Build

Got the URD Short Shifter in with a Marlin Crawler bushing. Shifts were cut in half, I love it. Got the tunnel all sealed back up and not a moment to soon. I need to make a cool shift boot at some point too.
10676143_10204058966945800_9146218114999856297_n.jpg


Cuz this showed showed up from Stock Interiors. Shipped for $210 with the extra sound deadening insulation. Basically the whole point of putting carpet back in it. Nice and quiet now!
10649975_10204058967185806_7273138009406723210_n.jpg

10805604_10204062484753743_3833065796950054038_n.jpg

10419609_10204062484993749_612113306716334859_n.jpg


Lots of trimming but it was so worth it.

10603507_10204064138955097_6254550678552754317_n.jpg

1530325_10204064139115101_7333553634583218258_n.jpg

10599581_10204064139475110_3960081363128278585_n.jpg


Got a new 170amp alternator and the projectors in the mail today. Alternator is going in tomorrow. Might get started on the lights. Definitely not a project that I will be rushing.

10413352_10204075127469803_724842767099212894_n.jpg
 
Thanks man. I always have to have some sort of project to work on. This has been one of my favorites! :biggrin1:
 
Cool! Looks like the terminator.

Nailed it! I was actually planning on the dual halo look but that's not what I got. These are actually referred to as "Demon eye" not "Dual Halo" which are awesome cuz you can have the dual halo and demon eye. Maybe on my next retrofit.

terminator_gen.jpg
 
Got my tank mounted. I'm loving the tank. Filled eight 35" tires from 5-40psi in about 20min with the regulator set at 150psi.
10426208_10204246740360018_6145135435126305081_n.jpg

10001301_10204246739960008_3185071320060743050_n.jpg


My buddy gave me his old 1st gen roll bar. I've been wanting one since I put the seats in. It' will give me something solid to mount the shoulder harnesses to. I'll attach some other cool stuff to it soon.


Getting it to fit a 3rd gen is the funnest part. I lopped off the normal 2" from the front tubes and it fit right in. That wasn't where I wanted it though. I want it as far forward as possible which meant hacking of the rear legs too. with it sitting where it is, I can retain the air tank mount and my sub.

It's a work in progress...

No fit
10301186_10204288910014233_5098234994219130225_n.jpg


Hack of 2" and it slides right in
1975129_10204289637232413_4990072867385358602_n.jpg


Driver's side is stuck but the passenger side had another 4" till it contacts the wheel well. The Wheel wells differ from side to side due to the fuel tank fill neck.
10858645_10204289637472419_6276691434375762781_n.jpg

10858640_10204289638152436_928021610319558065_n.jpg


Tried just cutting the driver's side but was still a few inches short of touching the back seats.
10857839_10204289638512445_2523261475817581485_n.jpg

10422276_10204289638392442_3545891990315062795_n.jpg


Lopped off the passenger side and pulled it parallel with the front to clear the sub box. It's sitting where I want it. Just have to make the driver's side match and get some new feet plates made. They're going to be thicker than stock and I'm going to plate the outside of the fender as well.
10849720_10204289750875254_9053040591532675765_n.jpg

10850247_10204289751155261_867691876520866266_n.jpg

10155540_10204289751635273_5910516156794529775_n.jpg
 
I meant to, then my PC's hard drive $hit the bed. I lost most of the pics but here's what I have left.

First - Determine what you want from your projectors.

- Halos? Dual Halos? Demon Eyes? Colors....

- HID Specs - 35W? 55W? Temps vary from around 3000k-1200k

I decided on white halos with red demon eye. Kit claims to be "Dual Halo" but it is not. And for the HIDs I went 6000k and 55w. These were the default options but there are more combos available to suit your taste.

Item Specifics:

Angel Eye Color Options: White(Default)/Red/Blue/Yellow/Green/Purple
Devil Eye Color Options: Red(Default)/Blue/Green
Color Temperature Options: 4300K(Amber)/6000K(Pure White -- Default)/8000K(Bluish White)
Fitting: Fits 99 percent of vehicles! (Fits: H1/H7, H3, H4, 9004/9007, 9005/9006, H10, H11/H13, D2S/D2R)

My kit - 3" Universal Bi Xenon HID Headlights Projector Kit Halo Angel Devil Eye AC 55W | eBay

What's in the box
10887410_10204348613866792_6901932019625373579_o.jpg


Test all the bulbs with any 12V source.

Removing and prepping head light housings

10847907_10204348548545159_8471276813778347178_n.jpg


Pull the grill, then corner marker lights and the thin metal shrouds under the headlight housing.

Remove the four 10mm bolts/nuts securing the headlight. (keep a hand on the housing before you remove that last one so it doesn't fall) Disconnect you headlight bulb and remove it from the housing.

Separating glass from housing

10888611_10204348548745164_5882627088614015702_n.jpg


Separate housing from adjustment bracket. Remove 4 metal spring clamps. Preheat oven to 270deg and pop the housings in there for 7min. After that, remove with gloves and using a screwdriver to start with SLOWLY start prying the glass from the housing. Try not to make a mess with the molten butyl rubber, especially inside the housing. It gets everywhere!

Prep for paint (optional)

10847907_10204348548985170_1940693962226898196_n.jpg


Sand all of the chrome out with fine steel wool. Anything heavier will leave scratches in the plastic housing and you WILL see them. Your hand will probably get a lil sore during this stage. I used an ice cold standard 12oz aluminum container to mitigate my frustration then continued.

Before moving on to installing the backinging plate, trim out a small hole for the 3 sets of wires to run through (halo ring, demon eye and hi/low actuator). Otherwise you will end up like me and end up cutting a hole big enough for the plugs to have to fit through.

Backing Plate install

10498657_10204348884873567_7659603662770018743_o.jpg


The projector housing slides through this and the nut is tightened on the back to secure it. The plate fits VERY snugly and will take some precision tapping to get it seated properly.

The key way should be set to the 12 o' clock position. Before tapping it in place, set the wires in the grove that you just cut and make sure that they won't get pinched. Use a big socket to tap the plate down flush. The tabs might be stubborn, use a flat head to get them down. The tighter this plate fits, the more secure your housing will be. Be careful as to not bend the plate, you want the projector housing to sit perfect in the head light housing. Remove the nut from the projector threads, insert the threads through the plate and tighten the nut by hand.

You will notice a couple small holes that would allow moisture and debris into the housing if not sealed. Up to you how you'd like to solve this but I used JB-WELD QUICK. It blocks the holes and adds some extra security to the plate. This is a permanent method. The compound is still runny so I used some metal tape to block the holes as much as possible then gobbed the JB over the top of it. Don't get any on the threads of the projector, it will have to be free for level adjustment later.

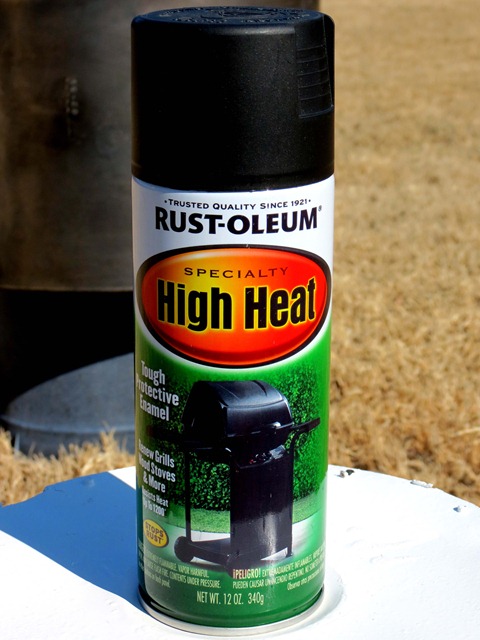
While it cures, use masking tape over the projector (whatever you don't want paint on). Wipe the surface down one final time a apply a couple light coats of plastic primer then your paint.

I used

AU_PlasticPrimer_White_12oz_L.jpg

then
high%252520heat%252520rustoleum%252520style%252520with%252520cents_thumb%25255B3%25255D.jpg


Notice, I had not cut the small hole for the wires...woops
1507571_10204348549305178_1326081705028298771_n.jpg


Wiring and Test fit

Now's a good time to wire and test fit your kit.

Set the adjustment screws in the bucket to about 1/2 and pop the housings back together.

The HID kit is plug and play. The hi/low wire goes to the main harness included. The halos and demon eye LEDs have to run through the supplied inverters. I spliced mine into my running lights.

Once you get the HID's fired up, you can start leveling the cut-off line. Don't worry about adjusting the light housings yet. make sure your truck body is sitting level and the buckets securely bolted back in place and flip on the HIDs. Loosen the backing nut just enough to be able to rotate the projector. Level them and tighten the nut to secure them.

The thread quality is not the greatest and I had no intention of ever removing these. Once I was happy with the level of the cut-off beam, I resorted to more JB-Weld to permanently secure the projector to my housing. I'm rougher than most on their rigs and they haven't loosened up on me yet.

Re-seal the head light

It is suggested to apply an extra bead of butyl rubber. $25 for a roll. Stretch a thin bead in the crease where the glass contact. Clean the glass and housing one last time. Place glass on housing and put it in the oven for 7min at 270. Keep the small plastic plugs and wires from contacting any metal surfaces, they will melt, try wrapping in tin foil. Remove again with gloves and press the glass and housing together evenly by hand. Use large pliers to pinch near spring clamp locations and pop the clamps on.

Now the fun part, connect the wiring and adjust the housings to align the lights. It is a pain in the arse. Took me several tries and test drives.

Good luck

1475976_10204276328099693_8268989279815256583_n.jpg


1957947_10204278444672606_6382055157050768863_o.jpg
 
Got rid of the redonculus blue bulbs in the gauge cluster. Went with a more "classy" white. Now I gotta figure out the hvac controls and all the other bulbs in the interior.
1618579_10204350291548733_6280170013847807825_n.jpg

10805745_10204350291788739_2541077336702491272_n.jpg

10868033_10204350291988744_5404004989457293077_n.jpg
 
So today started with me noticing that one of my temporary LED light bar brackets has lived up to its temporary status....broke. Then I somehow ended up with the winch and bumper off too. Gonna strip the rust and bed liner off the bumper and take the winch all apart, clean and reassemble with new grease.

Florida rust finally caught up with me
10906222_10204426313289229_7800818008228705523_n.jpg


Winch is 5yrs old now and really doesn't like to be pulled out by hand. Found a tread about the XRC winches that said the grease that they come with is more like glue. Pretty spot on. I believe it was rendered from tree sap. It's a messy job but if you can take apart a puzzle and put it back together, go for it. I also took the electric motor apart and hit the brushes with some sand paper. Other than that, the electrical portions were all good.

10885119_10204426313489234_2642981572107480069_n.jpg

10885592_10204426313809242_8004882120392035336_n.jpg


Stripped
1465393_10204438698438850_4654347338370711953_n.jpg


Light bar brackets cut, fitted and welded
10175081_10204438698638855_9138738072185945640_n.jpg


Something to wash the primer down with
10888706_10204438698758858_2225189060285728101_n.jpg


All back together like new.
1480558_10204442474933260_5947407627066760899_n.jpg
 
tranny swap

HI awesome rig. Im just starting one ad picked up a complete 4runner to do a manual swap. was hoping you could share how to trick the tranny into thinking its in neutral. thanks
 
Got an early model roll bar from a friend that cut the mounting plates for me too. If you ever run into a guy named Ryan Apple out of Grass Valley, he's cool as $hit and can set you up.

Cut the feet to fit but it took up too much space. Blocked off the sub and air tank.
10362931_10204664418881720_8308730621769451310_n.jpg

10947159_10204664419081725_7189875820565576267_n.jpg

And I'd like to have it as forward as possible. Decided to cut the rears to fit the tubs.
1779914_10204664419481735_4690615639413530754_n.jpg

10933800_10204664419641739_430457064431558435_n.jpg

10959482_10204664419841744_978505893516981341_n.jpg

Ended up building a new sub box in the process since the old one was just a good template. And moved the 4x amp.
10931413_10204602600576301_5186342558746174441_n.jpg

Filled in a bunch old holes and showed the kids what the bright light really was.
10933851_10204613276803200_601647617200721706_n.jpg

Feet welded and cleaned, not gonna show the nasty welds of my $100 flux core machine but it will hold. Good penetration is guaranteed.
10427303_10204637818536728_4095300420186819687_n.jpg

10945575_10204637818416725_6718513712053999434_n.jpg

1521522_10204650316329165_2263802559243114982_n.jpg
 
Stereo upgrade time.

Out with the old
10447805_10204753949199922_7695818734294466986_n.jpg


In with the new
1517810_10204753949599932_5178733633284949880_n.jpg

10407613_10204753949759936_2691580223949899039_n.jpg


New JBL on th eleft vs the old Sony on the right
10417739_10204826585175776_3136730295633711265_n.jpg

10959719_10204826584815767_6034148534358463935_n.jpg


Sounds a bit better. The old deck was iPod only, which works but it's a PAITA to bring the iPod inside and load songs to iTunes then to the iPod.... bluetooth straight from my Galaxy Note is so much easier. Still have the iPod hooked up as well, just in case. You can't trail ride without tunes!

As for the sub... the Sony is best with a 2.1 cu ft sealed box. The one I built is a little less than 1 cu ft. This new JBL is made for 1 cu ft, takes near the same power but had an even lower frequency range for that looooow bass.
 

Forum statistics

Threads
278,312
Messages
3,554,089
Members
248,016
Latest member
Advally Service

Trending content

Back
Top