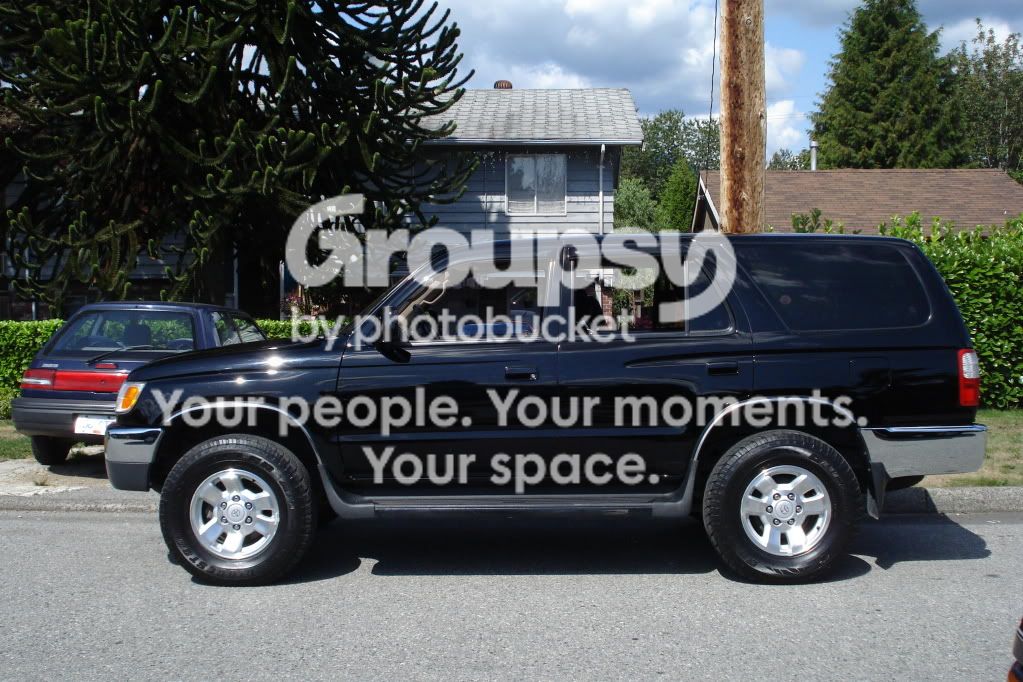
Blcktpgsr's '97 transformation

Looking at the list of models from the Ebay listing...it appears like there's not one specified for VZN-185/4Runner or KZN-185/Surf...As far as rear axle kits, bearing or otherwise...there shouldn't be any difference between the two.

Since you're in Aus., I'd look into inquring with RoughTrax, they'd be able to verify for your specific needs.
 
Hey Ervin,

Hope all is well with you. Just had a quick question for you - how did you run your wires for the roof top lights into the engine bay? I've been doing some research and have seen a couple different methods of doing this. You've been running your roof lights for a while so I assumed if anyone would have had any issues with the wiring from roof lights by now, it would be you. I look forward to your advice!

PS - I looked through the earlier pages of your thread where you installed them and saw no mention of the wiring. Maybe you mentioned it later but your build thread is a massive piece of literature. I apologize if I missed a discussion somewhere!

Thanks.
 
Hey Ervin,

Hope all is well with you. Just had a quick question for you - how did you run your wires for the roof top lights into the engine bay? I've been doing some research and have seen a couple different methods of doing this. You've been running your roof lights for a while so I assumed if anyone would have had any issues with the wiring from roof lights by now, it would be you. I look forward to your advice!

PS - I looked through the earlier pages of your thread where you installed them and saw no mention of the wiring. Maybe you mentioned it later but your build thread is a massive piece of literature. I apologize if I missed a discussion somewhere!

Thanks.

All is well man, thanks....just kinda busy at the moment but aside from that, everythings peachy.

Yeah, the roof rack lighting was one of the very first mods I did so I regret to say that there was never any mention of the process.
:whipping2
Anyway, from the engine bay, the wirings ran thru the big rubber grommet where the hood latch cable and some engine bay fuse box wires feed through. Use some coat hanger and carefully poke thru the grommet til you have enough room for your wirings.

Once under the dash, fish the wires thru to the drivers side A-pillar all the way to the headliner. You will need to remove the drivers side sun visor and the front door/pillar upper trim piece beforehand ofcourse. From there exit the wires from under the roofrack front end cap, or caps if you find it necessary to use both sides to accomodate the wires to be used, depending on the number of lights you want to mount on the rack.

Just pop the rail end caps and pry out the cover plug hidden underneath..the rest is pretty much straightforward from there. What I did was drill holes into that plug about the same size of wires I used which was 4- 16ga each side and individually feed each wires thru. I figured the tighter the holes, the less chance of water leakage. Be liberal with your silicone and fill the plug to water seal it. Same goes for the actual end caps where I had to drill holes for the wires to come out of- just inline with the rack rail trench.

This method is probably the most stealthiest way to hide your roof light wirings and to this day, I haven't had any issues of any sort...sweet!
Do let me know if there's any confusions or clarifications you need adressed anytime bud.
 
Last edited:
Recently I was showing someone an early post from your build thread and noticed the Runner when you first got it. Then looked at where it sits today, hope you don't mind me scavenging your pics (didn't find a good current profile pic).:doh: Great work man looking forward to more.

truck008.jpg~original


7_zps75aaa787.jpg~original
 
All is well man, thanks....just kinda busy at the moment but aside from that, everythings peachy.

Just pop the rail end caps and pry out the cover plug hidden underneath..the rest is pretty much straightforward from there. What I did was drill holes into that plug about the same size of wires I used which was 4- 16ga each side and individually feed each wires thru. I figured the tighter the holes, the less chance of water leakage. Be liberal with your silicone and fill the plug to water seal it. Same goes for the actual end caps where I had to drill holes for the wires to come out of- just inline with the rack rail trench.

Well Ervin, I'm glad all is well and I just hope you have some free time this summer to, I dunno, meet me and Vic at Whipsaw? lol

Yah I was just after how you got the wires into the roof. I see some people running them into the rear hatch wiring grommet but that is a LONG detour for the wires. You and 4ever4Running went into the roof rack end caps. I may do this as well. Thanks for the explanation, perfect!
 
Well Ervin, I'm glad all is well and I just hope you have some free time this summer to, I dunno, meet me and Vic at Whipsaw? lol

Yah I was just after how you got the wires into the roof. I see some people running them into the rear hatch wiring grommet but that is a LONG detour for the wires. You and 4ever4Running went into the roof rack end caps. I may do this as well. Thanks for the explanation, perfect!

Yeah blcktpgsr actually helped me out when I was installing my roof lights and he was the one who told me about the end cap idea. More info/pics about how I ran my wires can be found here: http://www.toyota-4runner.org/accessories/121387-yakima-loadwarrior-build.html.
 
Now let's go do something which we can call............"mod"!
This is gonna be a long haul write-up so stick around. You just might learn something:jk:

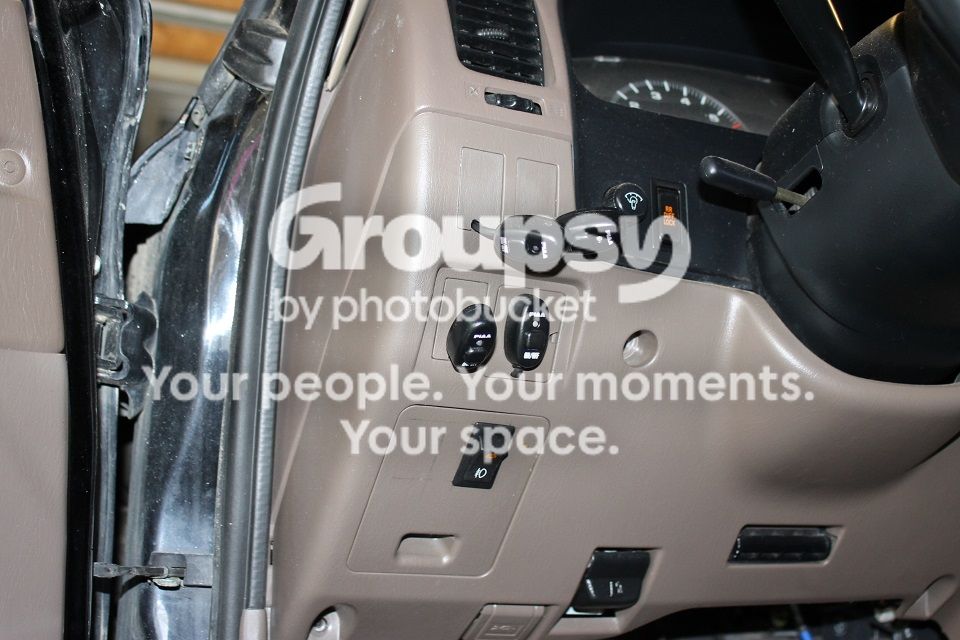
...Well i've been thinking about merging all my switches and possible future ones into one location. This would include my Back Window, ECT and Diff Lock, add to that some Winch controls and my lighting switches. Mine are currently down to the left of the steering at the moment( can't be too proud of that pretty pic there), and if I was planning on having more than 10 possible switches in one location, well i'd be better off looking for an alternative.
84-1_zpsa665636b.jpg~original


Given the limited setting in the 4Runner, I was determined that the best place for a bank of switches would be up on the headliner.

All was set only to find that the 4Runners headliner was comprised of irregular angles and contours and simply laying down a base for the switch pod wasn't gonna cut it. It just isn't gonna hug the headliner flat. My take on that was to lay down mats of fiberglass to conform and follow the shape needed. First I covered the headliner with some green masking tape
for the resin to adhere to. Removing the headliner would be an option allowing you to work on the floor more conveniently while fiberglassing, but I didn't bother with that unnecessary step.

I did 3 layers of 8oz fiberglass from end to end. First layer. Initially, I wanted to incorporate the FMU with the whole switch pod and make one long unit but opted on the modular 3 piece design.
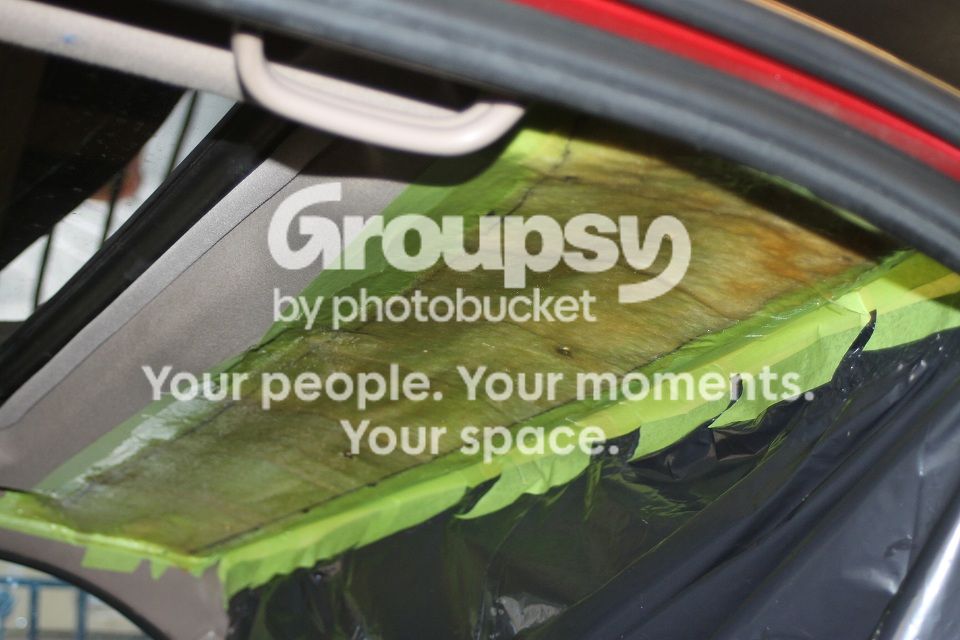

Fiberglass base after splitting in half and mocked up to see fit.


After that's done, it was time to tacle the actual switch pod housing. For that I used the shape of my FMU shell case and just make a mold out of it. To begin with, I used some plaster to create the overall shape of the shell, let it cure and harden and I've got my mold.


With the positive mold ready, fiberglass followed. I needed to make atleast 4 of those shells, 2 each on either side of the FMU. Here's a pic of those glassed shells fused together. Remember that headliner base I made in the beginning?? It's also fused with the casings with more fiberglass.

8-6_zps41520302.jpg~original


Both sides done with one being primered. Since the surface was almost smooth, I only needed a few touches of body filler to finish 'em off.
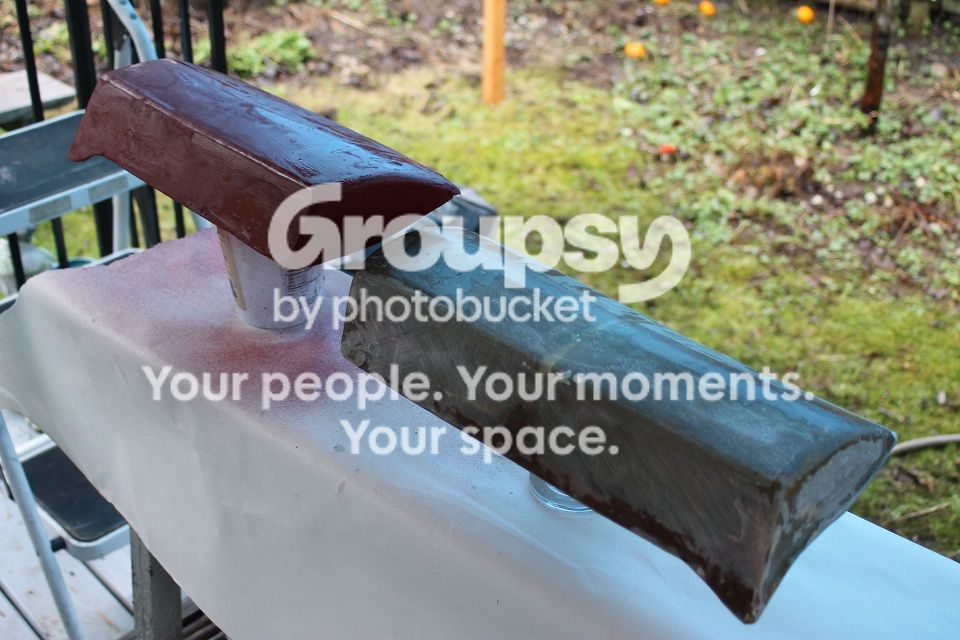

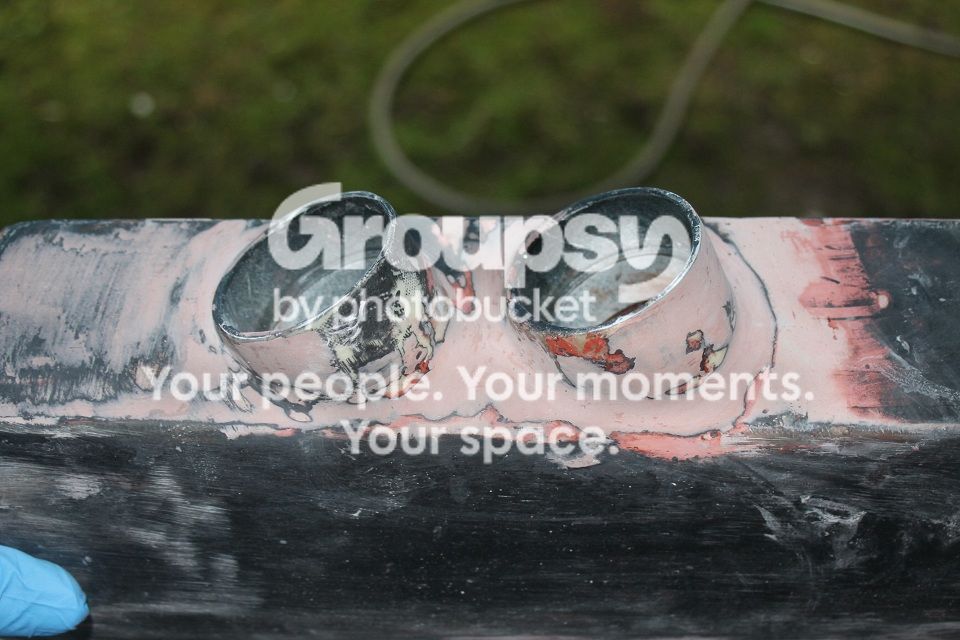
My project would also involve some gauges from AEM(voltage & trans) so for those I had to make pods to enclose them in as well. Went to the hardware store and bought some 2 1/8" abs tubings. Long story short....more glassing, bondo'ing and sanding. The gauges are gonna be on the passenger side so in order to have a better visual of the readings, I directed the orientation of the pods to face the driver.

Ready for priming

For the cover, I chose synthetic leather vinyl in black to match the dash trims in the 4RUnner. The FMU was also covered in the same fashion.
The pods are done.

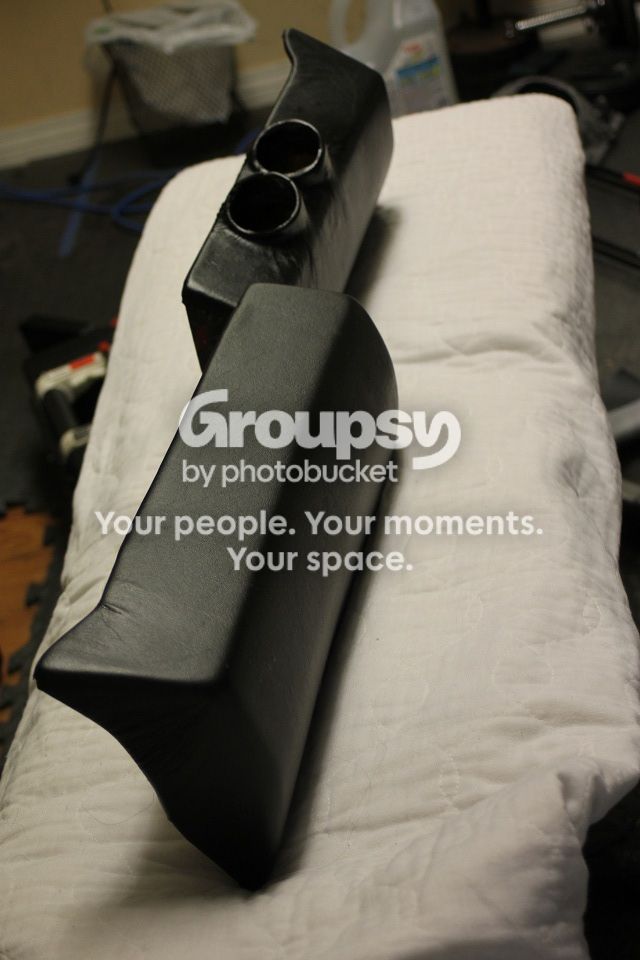

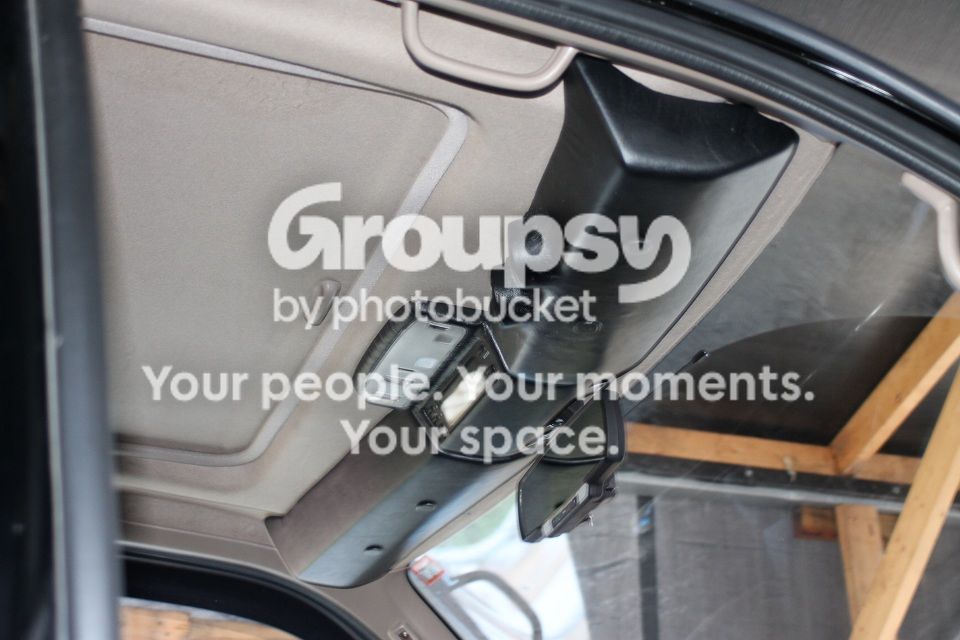
Here's a good side shot of the passenger pod indicating the irregular shape of the headliner the base needs to conform to in order to hug it flat. Drivers side is exactly identical.


To attach the pods onto the headliner, I made a flatbar with 3 bolts welded on and slip them inside. This shows the bolts sticking out with the middle one holding it secure in place.
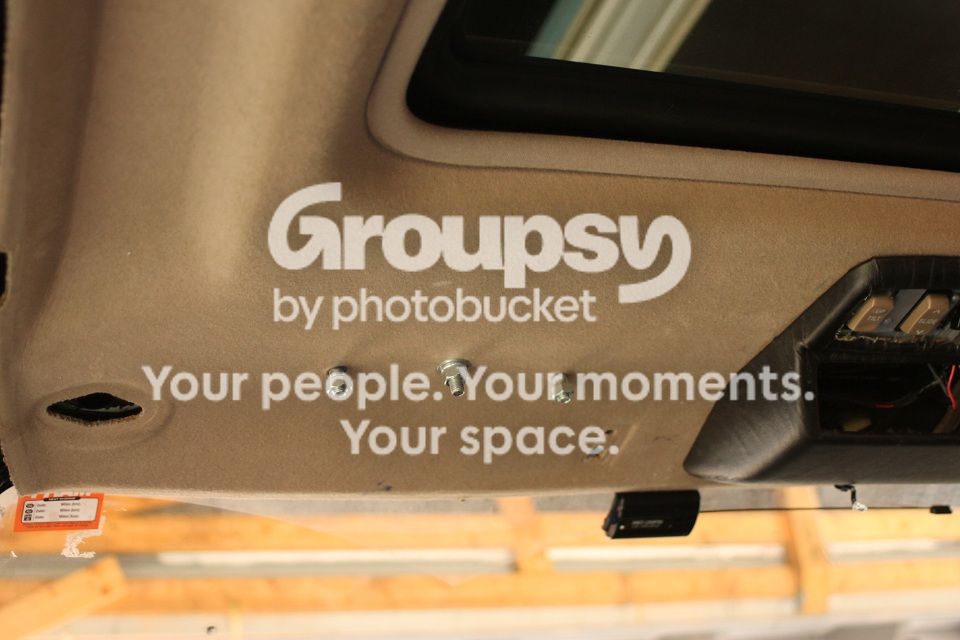

I drilled thru & thru holes on the pods and covered the bottom holes with plugs which are also covered in black vinyl. Now it's just a matter of bolting up the pods and on I go.
 
Last edited:
Continuing....

Holy mayhem! I would have a total of 12 switches so a whole bunch of wiring needs to be run. Got them all labeled up as I go.


So I basically just drilled another hole on the back of the switch pod for the wirings, switch holders on the front and began wiring 'em up. I got abit carried away with it and forgot to make a few shots in between.


14 strands of 16 ga and 6- 18 ga wires for a total of 20 wires were used to run all the switches including two ground wires, switched +12v and dash light circuit wire.

Thought you wouldn't ask? .....the a-pillar and cover trim just doesn't have enough room to cram up that many wires to make 'em all fit. I'm already using that space to run my roof light wirings so how'd I do it?

Here's how. I took the a-pillars and modify them to basically fit atleast a 1" diameter of wiring combined. Simple enough? Yes it was. all I needed to make was another mold and give the a-pillar a wiring super busway.

Took a 2" round stock and chopped it in half, fiberglass 3 layers over it on the a-pillar. Once hard, I removed the molded piece from the a-pillar and cut away the flat section of it. Now we all know that fiberglass doesn't stick to plastics, so to mate the new mold with the a-pillar, I used a heavy duty vinyl spray to do the job. Again I used a color matched vinyl to cover the entire trim piece.


Comparison of the old and the new, red color is primer.


Looking at the new a-pillar. See any exposed wires, no?


And here's how they look like looking at the front.


I ordered the Contura II's from Jim at OTRATTW, nice guy to deal with by the way. Also I decided on making my own labels for them using my Brother P-Touch label maker... The dual windowed rockers are for the WINCH's "in" & "out" and the BACK WINDOWS "up" & "down" buttons. Unfortunately, OTRATTW don't carry these rockers so for those of you interested, let me know where to order them.


Here's the solenoids guts while noting my observations regarding the controls for the in-cab switches for the winch.

There are 4 wires in behind the controller plug, 12v, grnd, in and out. The blue wire in the solenoid controls the "reel out" function and the white wire is for the "reel in".

I elected to get the 12volt source inside the cabs fuse box for the Master switch and just tapped into the 15amp ACC using an add-a-fuse..Surely you can also use the same 12volt inside the solenoid itself if you wish to do so.

Also for the momentary switch, you can use any switch of your choice, I just happened to have the Carling ones in hand..


For the inquisitive minds.......:playball:
 
Last edited:
and on...

Some photo feast.


Green is with the dash on and amber is the switch on indicator.

13-4_zps5171a95b.jpg~original


The stock sun visors were then replaced with a clip-on type ones. They came in a smoked tinted version but upon using them, I found them to be too translucent and I still get blinded by the sun. I simply painted them using some plastic primer, flat black paint and then some matte clear to protect them from scratches.


For the rest of switch pod pics, click on the link below.
http://s384.photobucket.com/user/sovietcraft/library/Switch POD
 
Last edited:
Arrrrg! Why am I always two steps behind you? jk

That really turned out great. Congratulations.

Question: Do you ever feel that the switches are too low/close to you, and "in your face" while driving?
 
Jeez. Wow is all I have to say about that. :thumb3:. If I ever have enough lights to need that many switches I might just have to attempt something like this.
 
:jaw: that setup has so much win its not even funny! Very nice work!

:rockon: Too much work and thinking went into that mod it's not exactly amuzing...glad it's over and happy you like it.:bounce:

Alright! Now that you have a production mold you can sell them. I will be first in line!

I don't know man, I wasn't exactly planning on mass producing them to make any profit from it, just one of those i gotta do mods more like....... besides that's what the write-up is for...:lol:

It's a definite head scrather at this point.


Arrrrg! Why am I always two steps behind you? jk

That really turned out great. Congratulations.

Question: Do you ever feel that the switches are too low/close to you, and "in your face" while driving?

Honestly, not not at all man, they aren't exactly in my line of sight to even be called distraction. I'm about 5'10 and they're still above my head......In my normal comfortable seated position, my eyes are about 20" away from the switches so plenty of space in between. Tilt your visors about 2" down and thats how low they are from the ceiling.

The only time I get really distracted while driving at night is when I can't help myself looking at them to be dazzled by them, lol but otherwise they're not "in your face" close at all.

Also the light emmited by those green LED's are more like a diffused dull neon color so they're not overly bright. They-don't-shine-up-your-face-green!

Thanks...and GL with yours as well
 
Last edited:
wow man, you do some sick work!! Just when I thought you couldn't possibly top yourself, you go and do it again! That is one 'triple awesome' display, between the two pods, the bank of switches, and the Hilux FMU! That has got to be the sickest display/control/info panel I have seen in a 4Runner or just about any vehicle, hands down!

Again, awesome work, Ervin! Glad you're part of the 3rd gen crowd :) I can't wait to see what else you do!
 

Members online

No members online now.

Forum statistics

Threads
278,312
Messages
3,554,083
Members
248,016
Latest member
Advally Service

Trending content

Back
Top