Blcktpgsr's '97 transformation

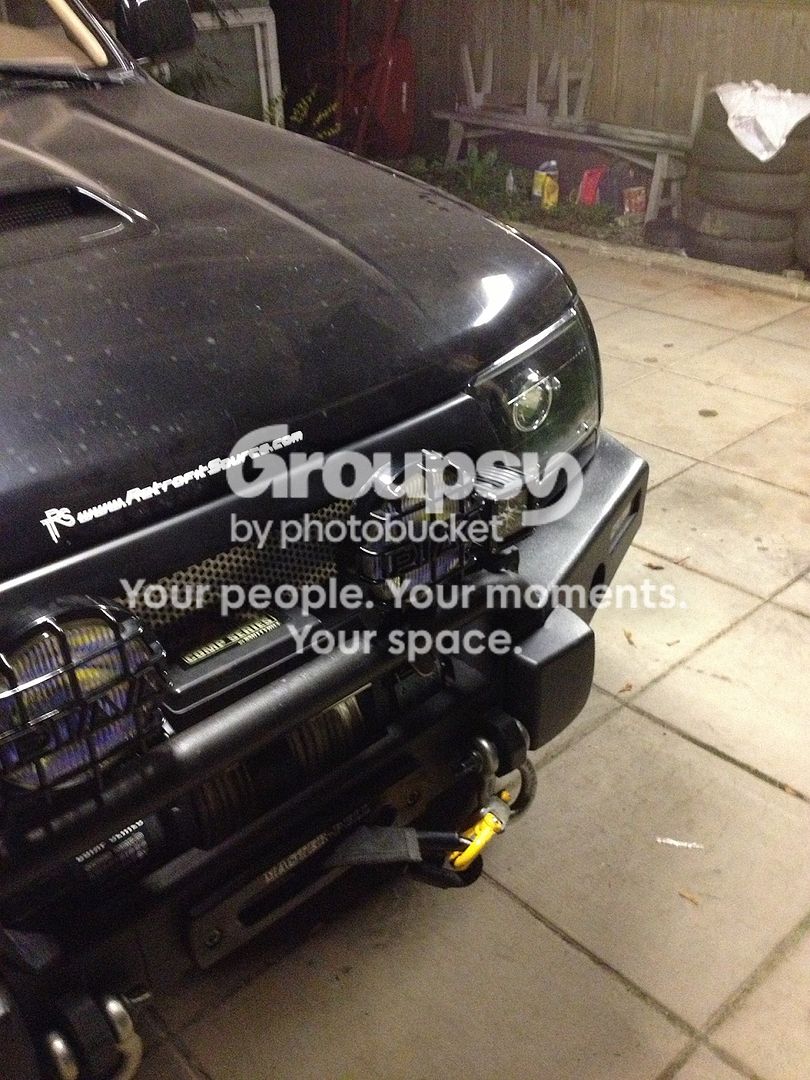
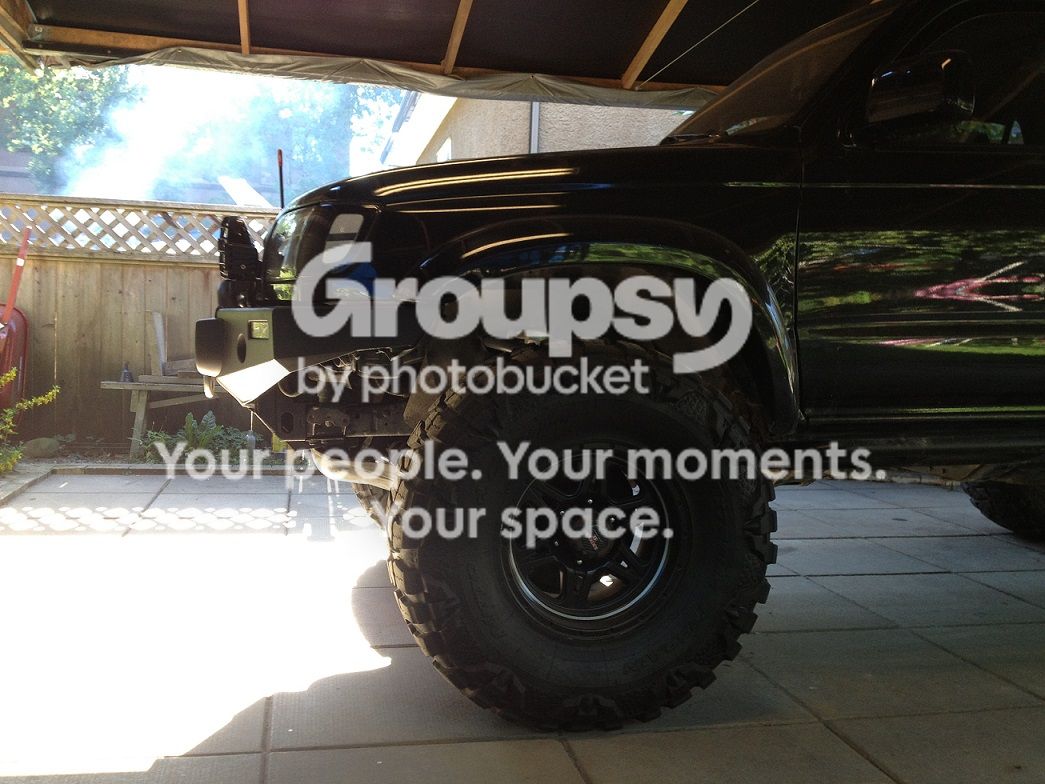
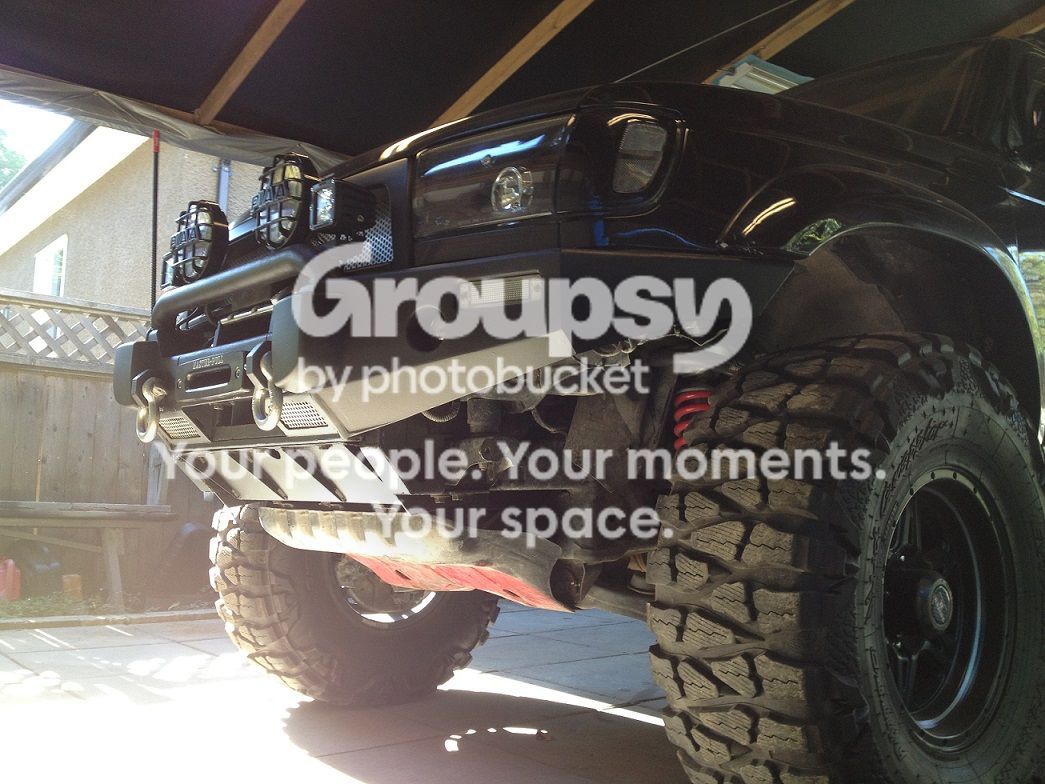
My ARB bumper underwent another surgery. By that, i mean it is now much slimmer in it's overall design. The depth and thickness of the bumper is very much comparable to it's counterpart..Infact it looks alot smaller.

Basically to make the bumper shorter, I needed to shorten up the length of the brackets by about 2"+/-. I eliminated the wavy sections of the brackets to make that happen. Just so everyone's clear, I've had that part braced up to begin with for the purpose of winching so the whole airbag compliance argument was never there from the start. Maybe i'm paranoid about it, but that's the way i've had it from the get go. Coincidentally, the 2" of depth removed, proved to be just perfect just right before my Smitty winch hits the rad vertical support.
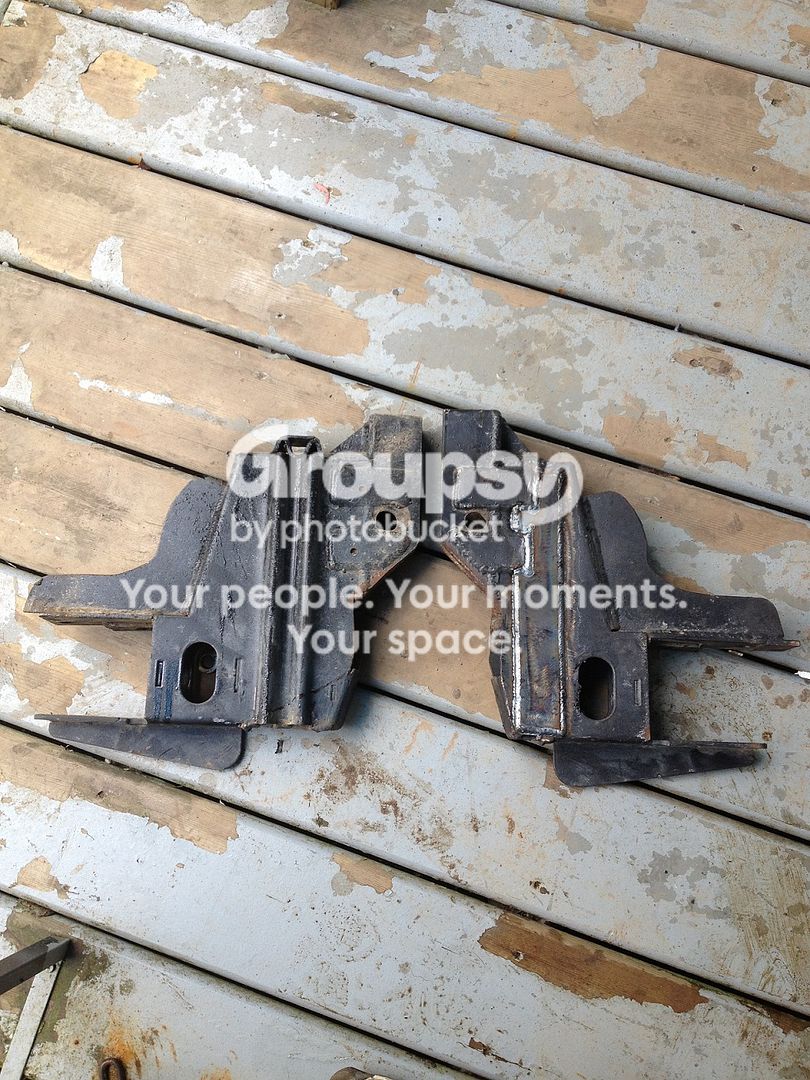

I uded a 3/16" plate and welded the two parts together and at the same time added more bracings on the other side of the brackets.

Here's a profile shot of the shortened bumper..I played with the notion of putting extra tubings atop the bumper in front of the headlights shown in this photo, but ultimately decided against it.

And there's a reason why in a minute.
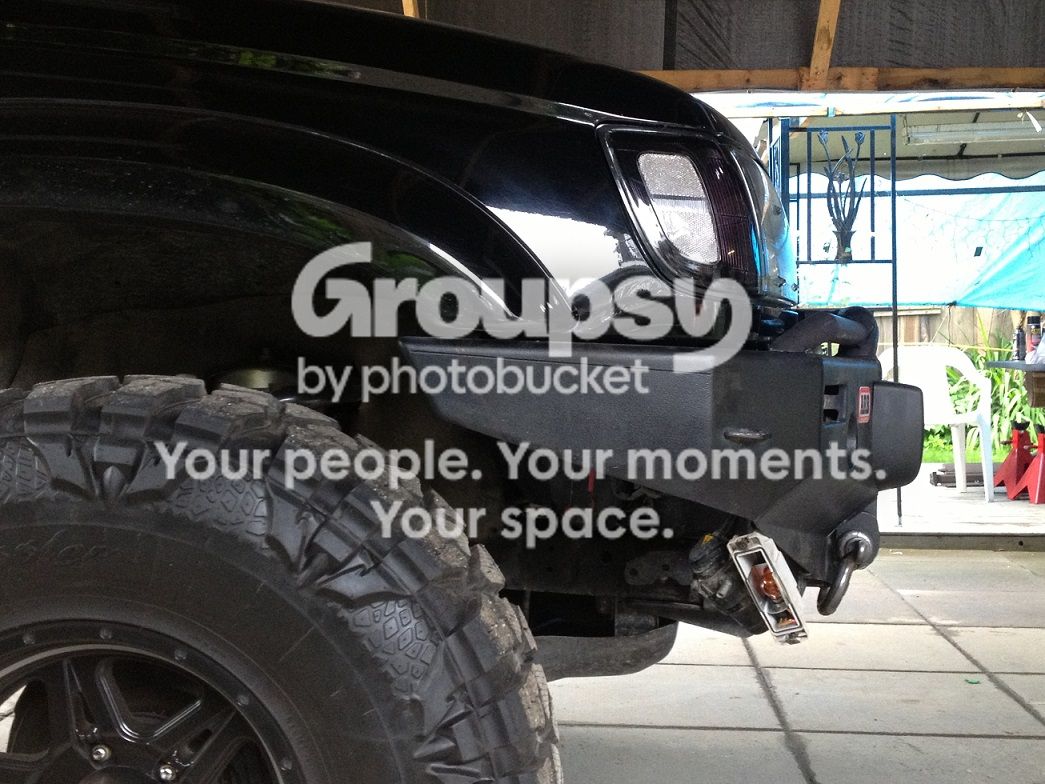

I went all out and scrapped the corners plates making the bumper from a 3 sided to a 2 sided design, also I flared it out to make the bumper meet the wider SR5 flares.
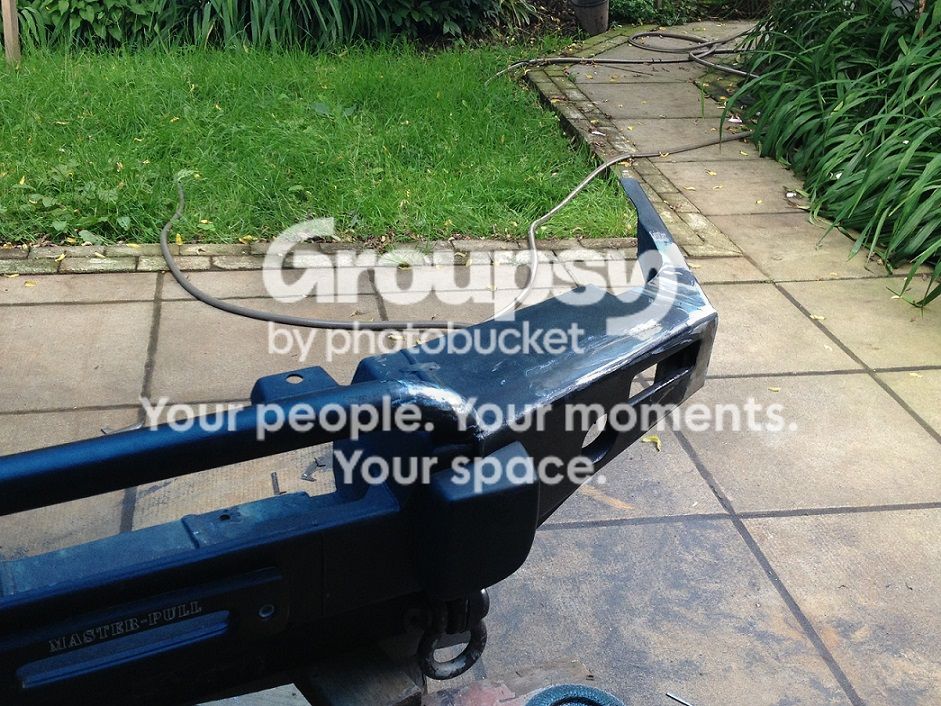

Braced up the straightened side of the bumper from the inside with a 4mil 1 1/4 round stock.
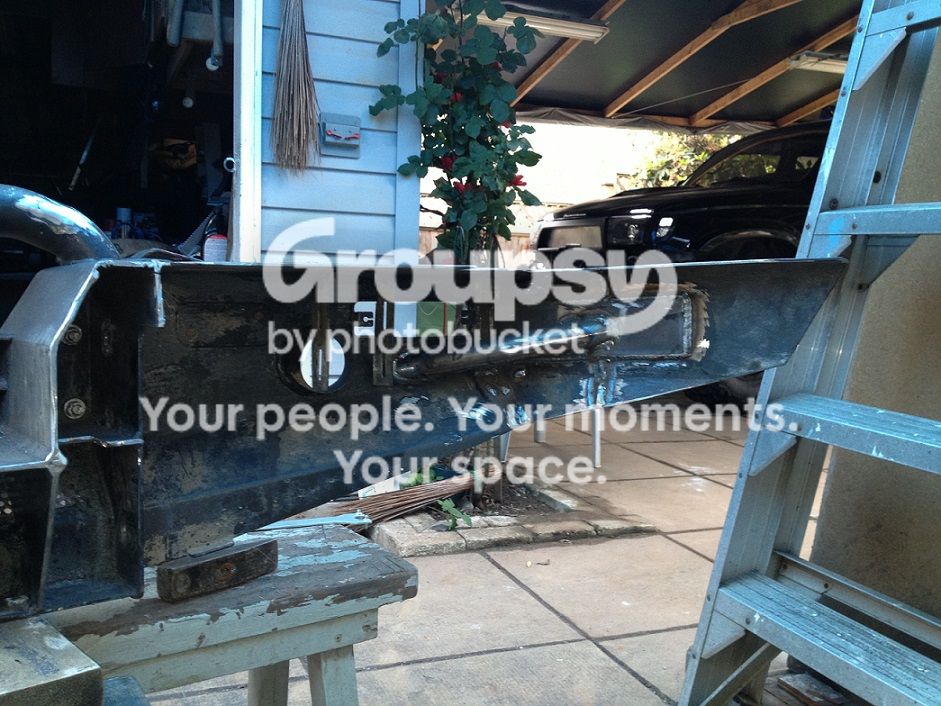

Why stop there?
Part of the whole remodeling of the bumper was to make it look more sleeker and slimmer like I mentioned. So apart from just making the bumper shorter in depth, I must also make it thinner in height. That meant choppin' up the whole bottom section which would include the clevis points.

Yikes!

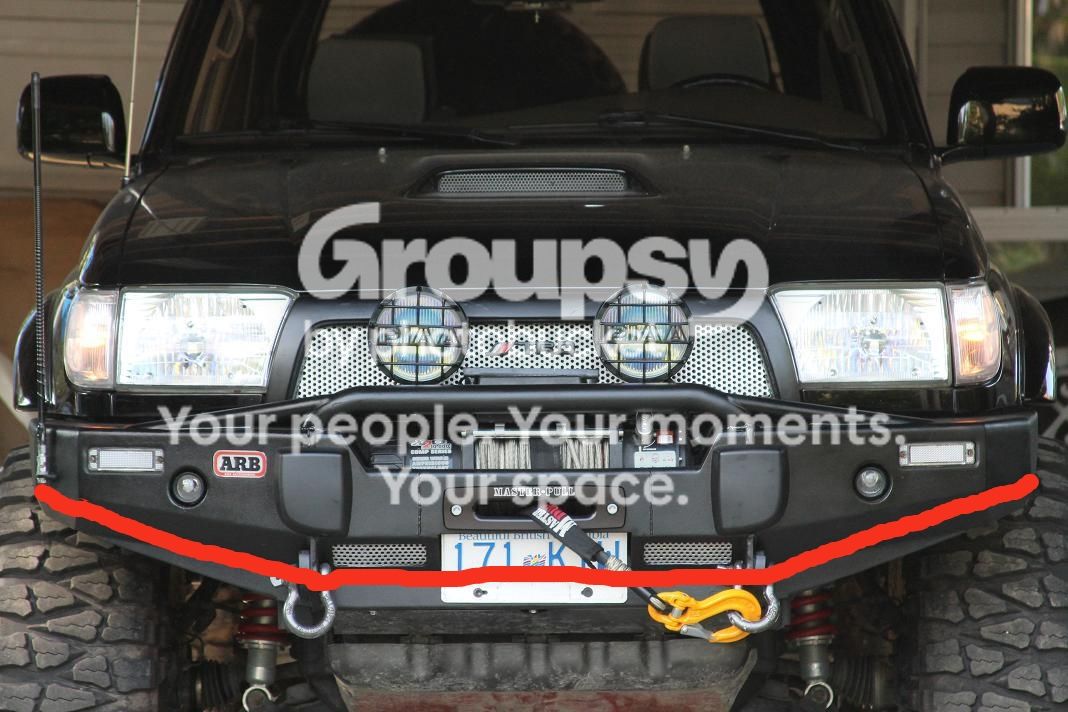
Here's my crude representation of where the chopping starts, from the bottom of the red line down to everything else inside the bumper.

I needed to incorporate the new clevis points somewhere on the bumper, and for that, I bought a pair of 3"x5" cold rolled steel. I also didn't have access to a drill with an oversized mandrel + a drill bit, so i had the machinist bore a 15/16" hole for the shackle instead.
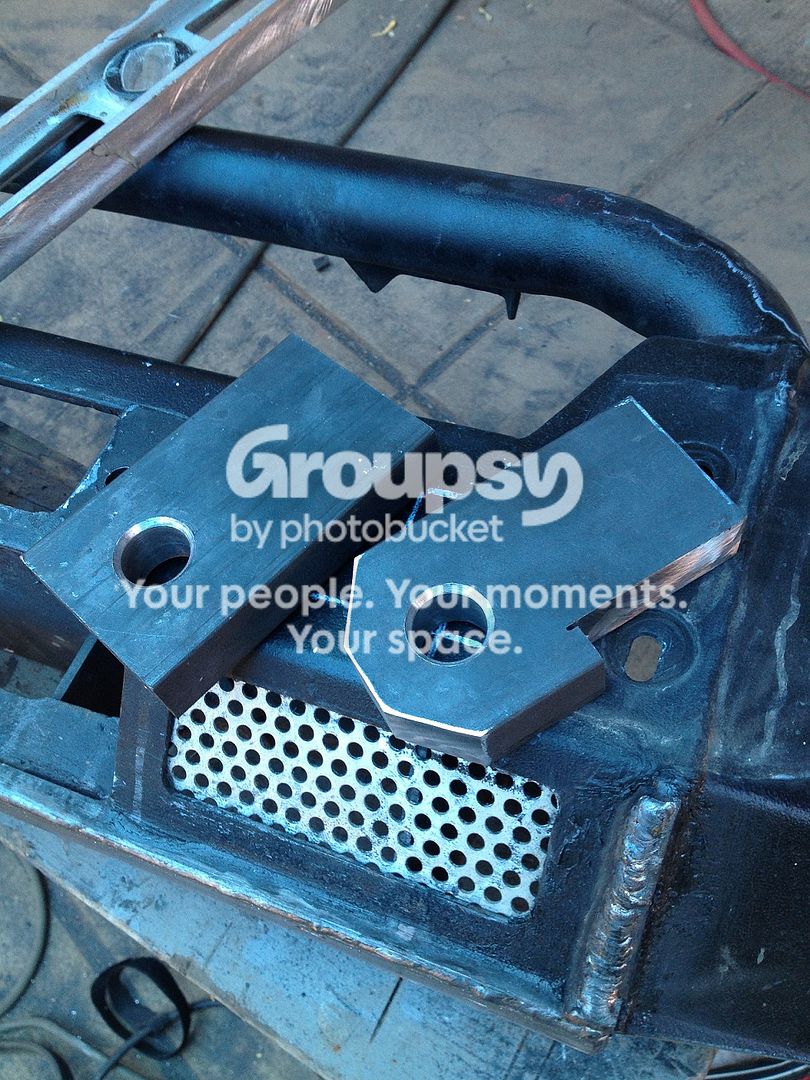

The placement of the new clevis shackle mount was essentially vital and I had just the right spot for each of them. Long story short, these clevises were welded at the front, back, on the winch' platform and on the secondary vertical support I previously integrated...all tied in with the main bumper core support piece. The length of the clevis bar was just shy of the where the winch sits.
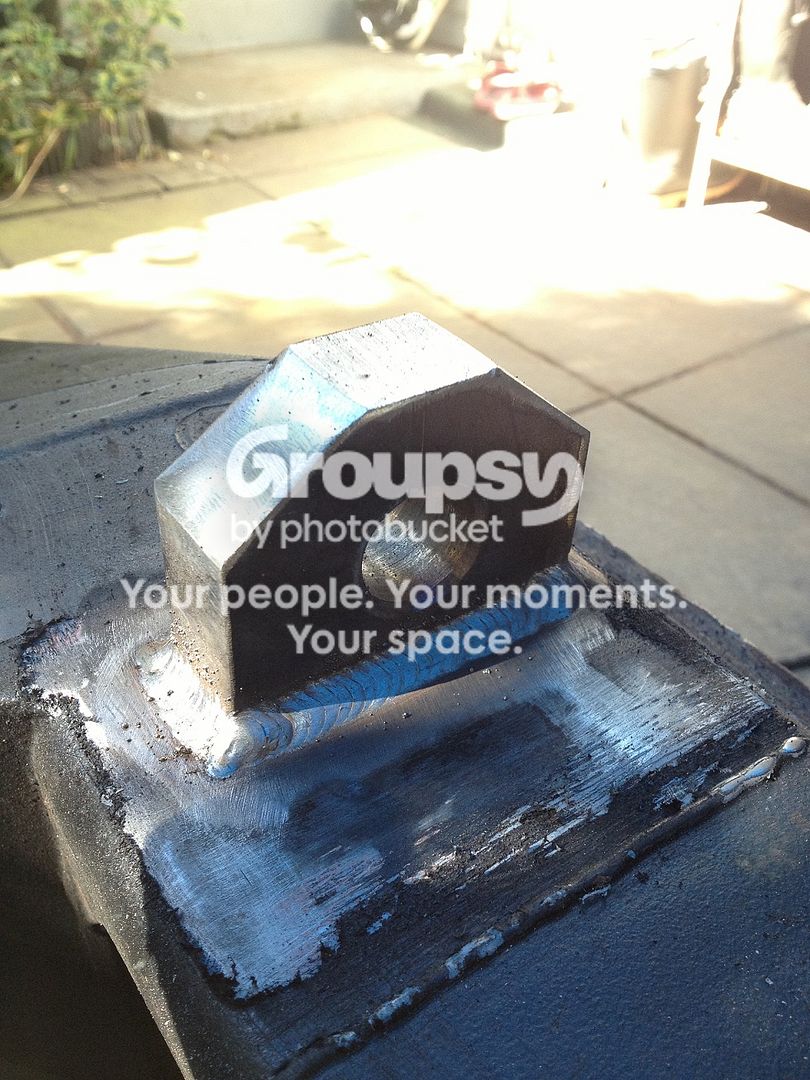

All ready for paint.
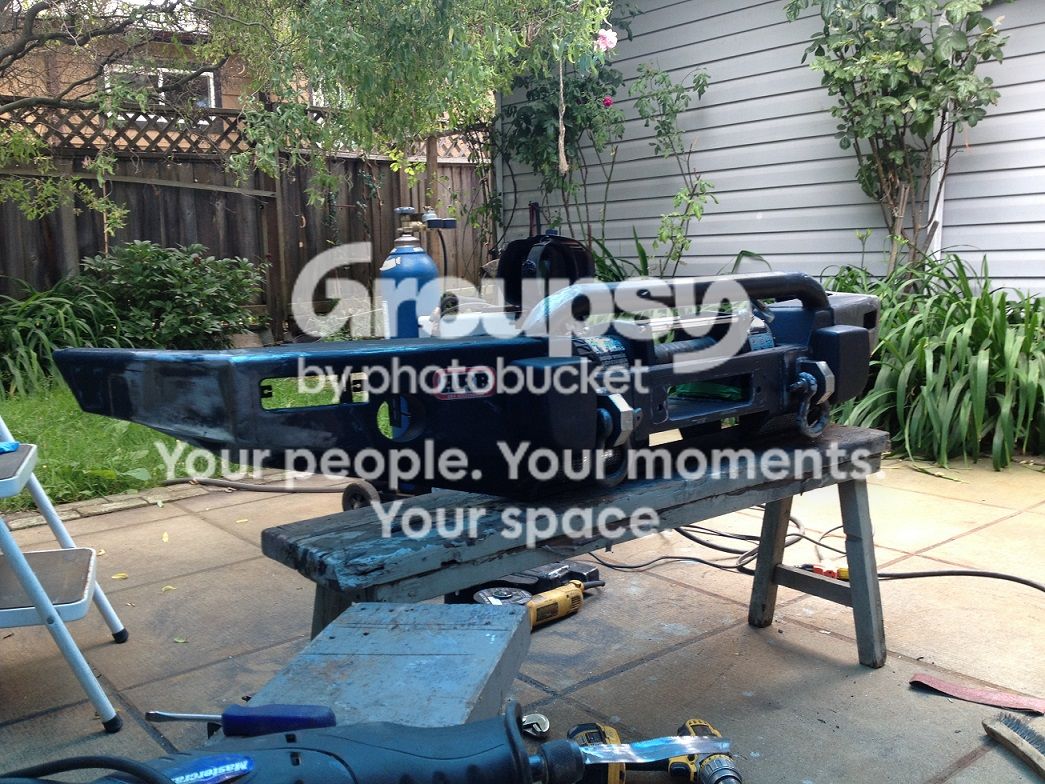

Shorter..

Thinner..

..and sleeker!
 
Last edited:
Oh yah...got the new rack.


The newly re-designed ARB next to Outdoor Logic Bumper + the Gobi rack.


Bonus pics from our wheeling Monday. martin1991911 from Alberta came to town and I just had to show him some good wheeling spots.


D amphibious runner.


Last edited:
Oh man, that is seriously a bad ass transformation of the portly ARB bumper. Cudos to you and your constant ingenuity. Are your Mud Graps siped?
 
Oh man, that is seriously a bad ass transformation of the portly ARB bumper. Cudos to you and your constant ingenuity. Are your Mud Graps siped?

Yes they are.. I siped them last winter and what a difference they made in the snow. The tires aren't chunking either despite being subjected to different rocky terrains . I'm happy!

Cheers!
 
Damn dude the bumper came out great! I was worried there for a minute as I was reading your first post... I was like, "Oh shit he neutered it!!!" but it looks clean :thumb3: Great work as always.

I too, have been wondering if you might have rolled the truck down a cliff and died or something LOL you disappeared for a bit, the forum was having withdrawals.
 
Based on how many pictures of that bumper there is I'm guessing someone is proud of their work. Deservedly so. Looks great!
 
wow... just wow.... that thing looks like such a beast!

Thanks man.

Damn dude the bumper came out great! I was worried there for a minute as I was reading your first post... I was like, "Oh shit he neutered it!!!" but it looks clean :thumb3: Great work as always.

I too, have been wondering if you might have rolled the truck down a cliff and died or something LOL you disappeared for a bit, the forum was having withdrawals.

More like a slimdown. she's getting outta shape man.

:lol:A lot has happened the last few months, family related issues and such so I have been absent for awhile.. But that's no excuse for being inactive and for that I apologize....cool?

Based on how many pictures of that bumper there is I'm guessing someone is proud of their work. Deservedly so. Looks great!

Heck yah. I wanted to make sure all angles are covered for you guys, and besides I have to make up for missing out for a few months by dumping a bunch of good 'ol photos.

Thanks everyone for the continued support!:yo:
 
Been awhile Kuya, lol. Why haven't you just made your own bumper yet? haha.
Looking good as always!
Ps, how did the guy with the grey sport mount his sport skid plate?
 
Ho lee geez, I'm so glad I asked. So sexy. :girl:

:D I would have eventually post 'em all up anyway.. but I guess it's better sooner than later.


nice man bumper looks clean i might have to do this to mine later

Unfortunately, the mod wasn't intended towards the general population except guys who have ARB bumpers lol...You should do it, so take precedence before someone does it:rockon:


Been awhile Kuya, lol. Why haven't you just made your own bumper yet? haha.
Looking good as always!
Ps, how did the guy with the grey sport mount his sport skid plate?

I asked myself that...Why go through all the trouble when I could just design my own to my personal likings. Well to simply answer that, I already purchased the ARB long before I even knew how to even lay down a bead of weld. Plus I love tweaking stuff up.:nod:

As far as the skid plate under the Silver Ltd., that is something I would need to get back to you about...I'm not so sure, but by pure guessing, it's no more than a fabbed up bracket system holding it.

Thanks guys!
 
Haha yeah, I figured as much, I'm still kinda torn between 5.29 gears and 4.88s, I'm not so sure what to go with. I have my bumper waiting for me back home can't wait to put it on.
 
It was time I did something to armorize the underside of the 4Runner, so I went ahead and built an IFS and belly pan out of 3/16 steel. This was before the trip we made to Whipsaw on August 16-18, and I wasn't sure how the trails were. So i said better be sure than sorry. Besides, my transfer case cover, front crossmember had some scrapes and gouges being up that high, let alone the front skid.....No more!


Rad guard made from some aluminum sheet!


...Just a week ago, I also started designing a rear plated bumper after taking a hit on my stock ones.

1.5x3x.250 rectangular tubing cut to follow curve of the 4runner. Setting to tack on top of the frame brackets that were made to fit a 1.5" BL.


After notching the .250 walled tubing to accept the hitch receiver.


6" Shackle mount welded in & out.


Rounded top edges to match the front bumper.


Fast forwarding....Bedlined!


The bumper weighed in at 107 lbs. Materials used varied from 1/4" thick plates for frame mounts, some 3/16" plates for overall cover and gusseting, 1.5"x .125 tubing for side bumper support and 1/8" plate for the filler plate, etc etc!
Hardwares used are 1/2" grade 8 rated. I'm just over 30 lbs from the old bumper and hitch combined.


The rest of the documented pics are found thru these Photobucket links....thanks!

Skid Platessss Photos by blcktpgsr | Photobucket
Rear Bumper Photos by blcktpgsr | Photobucket
 
Last edited:

:thumb3: Nice work, man!

Those pics look familiar. Especially those gussets in front of the oil drain hole.

P5112888_zps21c48196.jpg~original


P5112939_zps565d8fad.jpg~original
 

Members online

Forum statistics

Threads
278,311
Messages
3,554,082
Members
248,016
Latest member
Advally Service

Trending content

Back
Top
