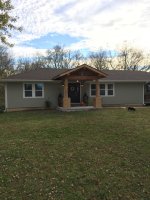
Blind Squirrel brewery build

Next time come to the San Diego brew fest. Much much shorter lines, all out doors.

Your house looks awesome. Keep up the good work.

One of my good friends that I never get to see anymore due to distance lives in KC.
 
Looking good! Slate finish on the appliances? Wish I'd known about that before now, I think it would go good in our kitchen. We went with black, and never again... cannot keep it clean! Finger prints/smears everywhere, even if you never touch it! lol Maybe in 10 years or so when these quit I'll look into that.

Mmmmm... beer... :beer:
 
Thanks for the positive feedback! Yeah, the slate appliances are pretty cool. The one negative is the pull handles are stainless....:wacko: So you still have to wipe those down from time to time. But what are you going to do.
 
Word. I am putting the same stuff down in my master bath in 2' lengths gray color and the 4' and 6' weathered colors in the entry rooms. Should look sharp.
 
Is that flooring you put down in the main room tile that looks like hard wood?

Nope, I thought about doing that stuff tho. I am planning on running hydronic underfloor heating throughout the whole house and that tile would be great for distributing the heat. The flooring I used is 12mm laminate flooring. really durable and looks like real wood @1.99 per foot.

TrafficMASTER Colfax 12 mm Thick x 4 -15/16 in. Wide x 50-3/4 in. Length Laminate Flooring (14.00 sq. ft. / case)-FB4838CWI3436RE - The Home Depot

The house had some cheap looking laminate that I pulled up and sold for $1 a foot on craigslist...lol.

The tile in the bathrooms is kind of like what you are talking about. The only negative about those kind of tiles is how far you are supposed to overlap the joints. They say on the box you should not break the tile at more than like 20%, where most tile you break the joints at 50% or so. Not sure why, but I followed their directions.
 
Last edited:
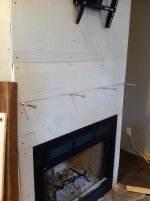
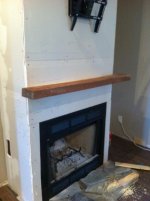
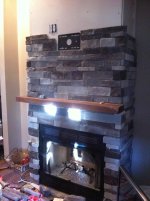
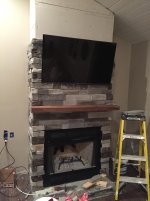
Started on the fireplace this week. It takes a while to put up, but we are happy with the results. We wanted the mantel to just "float" there so I had to come up with a way to mount it. I decided on using lag bolts and to drill 6 inch deep holes for the mantel to slide on. Filled the holes with liquid nail and toenail the bottom with a few deck screws, that thing is not going anywhere.

IMG_1663.jpg

IMG_1665.jpg

IMG_1680.jpg

IMG_1684.jpg
 

Attachments

  • IMG_1663.jpg
    IMG_1663.jpg
    144.9 KB · Views: 218
  • IMG_1665.jpg
    IMG_1665.jpg
    149.1 KB · Views: 215
  • IMG_1680.jpg
    IMG_1680.jpg
    136 KB · Views: 217
  • IMG_1684.jpg
    IMG_1684.jpg
    126.4 KB · Views: 223
For a "brewery," there aren't many posts about beer . . . . :pout:

Just kidding. It depends on your distance and viewing angle, but you may start to get neck strain with your TV that high. It looks great otherwise. I'm looking for ways to bring faux stone into my house as well.

Keep up the good work!
 
I know.... not much happening on the beer front right now. Well aside from drinking a bunch of it.

The bottom of the tv is just under 6 foot off the ground and our couches are 9 or 10 feet back. It doesn't feel like you are looking up while you watch.

My neck feels fine after watching the Chiefs game yesterday. How does your ass feel? :wacko:
 
Last edited:
Well if you do tire of the viewing angle there are companies out there that make "pull down" mounts that are really nice.

I installed one of these at my buddies place, he loves it.

TV Mount for Flat Screens Over-The-Fireplace | MantelMount

ETA: Also, did you cut the bolt heads of those lags? We've done a ton of floating reclaimed barn beam mantels at work lately using this very method. Construction adhesive and voila, we cut the bolt heads though with an angle grinder.
 
I installed one of these at my buddies place, he loves it.

TV Mount for Flat Screens Over-The-Fireplace | MantelMount

ETA: Also, did you cut the bolt heads of those lags? We've done a ton of floating reclaimed barn beam mantels at work lately using this very method. Construction adhesive and voila, we cut the bolt heads though with an angle grinder.

That mount looks pretty cool, I still have 6 inches or so that I can lower mine with the mount I have if needed. No, I did not cut the heads off. With the mantel pushed all the way up against the wall it seemed really sturdy, looking back I see why you would cut them off for more support. I filled the holes with liquid nail, and liquid nailed the mantel to the wall. Also I used a couple deck screws to toenail the bottom of the mantle to the studs. That made it level, but again cutting the heads off is what I would do if I would do it again.
 
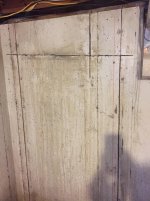
Finally, the work is done upstairs...the wife is happy...back on track to actually build my brewery. So the brewery is going in an addition that was added on the house but the basements were never connected. I was very close to buying a "rock boss" from stihl to cut the doorway myself but decided to get a few bids from local guys to come and do it for me. The rock boss looks really cool, but super expensive compared to the cost for the professionals to do. I made the right decision, that would have been a ton of work to do it myself. It took them about 2 hours to cut it with hydraulic powered saws so my house doesn't smell like a two stroke motor.

Here are the cuts in the 8 inch thick wall.

IMG_0164.jpg

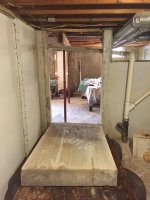
They had the idea for me to have the wall fall on tires so the floor doesnt get messed up. Worked really well. The beam you see now was not attached to the concrete wall... it is now attached to that new header.

IMG_0165.jpg

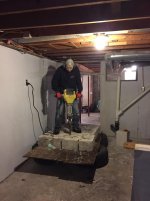
This thing is fun to do for a while, but not for a living. Estimated weight of that slab is around 2k lbs. It now lives in the creek that runs through my backyard.

IMG_0166.jpg

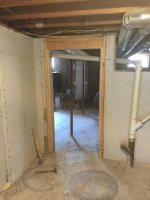
Finish door with header, this will be the "secret passageway".

IMG_0171.jpg

Working on the lay out tonight and hope to get her framed this week. Depending on my work schedule.
 

Attachments

  • IMG_0164.jpg
    IMG_0164.jpg
    133.4 KB · Views: 176
  • IMG_0165.jpg
    IMG_0165.jpg
    128 KB · Views: 173
  • IMG_0166.jpg
    IMG_0166.jpg
    111.3 KB · Views: 169
  • IMG_0171.jpg
    IMG_0171.jpg
    129.9 KB · Views: 178
Last edited:
Holy.. 7 months have gone by, you'd think I'd have more updates.... Lake time gets in the way now that the weather is good. Got a good amount of work done, but still lots to go.

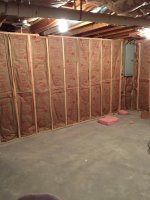
Got the brewery framed in and insulated.

brew3.jpg

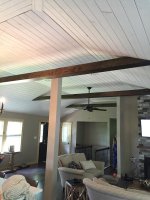
Added faux beams in the living room

brew.jpg

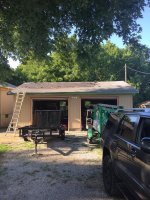
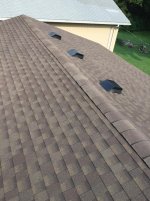
Put a new roof on the garage.

roof1.jpg
roof2.jpg

So instead of wiring and finishing just the brewery, on the other side of the wall is more basement that I am going to finish at the same time. Adding to more delays in getting the brewery finished. I have it blue printed out and ready to build, it will be cold soon enough... then I can get back to work.
 

Attachments

  • brew.jpg
    brew.jpg
    126.5 KB · Views: 152
  • brew3.jpg
    brew3.jpg
    131 KB · Views: 191
  • roof1.jpg
    roof1.jpg
    140.6 KB · Views: 151
  • roof2.jpg
    roof2.jpg
    136.3 KB · Views: 148
Finally, the wife signed off on me starting to work on the brewery!!! :whipping2 Last update on what I have done to the house that doesn't involve my brewery..I promise

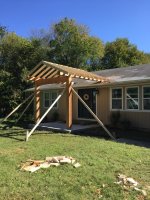
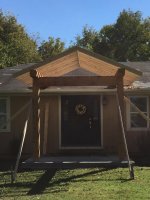
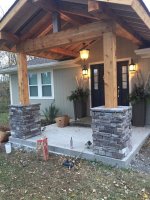
Almost done with the new entry

11.jpg
12.jpg
h1.jpg

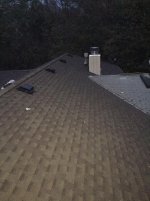
Finished re-sheeting and roofed the whole house. Photo is of in progress of course

h2.jpg

Painted the whole house...

h3.jpg

All that's left before I start on the brewery again is the floor for the entry. I have the material ready to roll for this weekend. :girl:

19.jpg
 

Attachments

  • h1.jpg
    h1.jpg
    127.9 KB · Views: 137
  • h2.jpg
    h2.jpg
    125.6 KB · Views: 144
  • h3.jpg
    h3.jpg
    132.7 KB · Views: 141
  • 11.jpg
    11.jpg
    133.4 KB · Views: 178
  • 12.jpg
    12.jpg
    130.9 KB · Views: 175
  • 19.jpg
    19.jpg
    142.5 KB · Views: 129

Members online

Forum statistics

Threads
278,309
Messages
3,554,075
Members
248,016
Latest member
Advally Service

Trending content

Back
Top