Budget Build Thread

SunnyMcBlock

New member
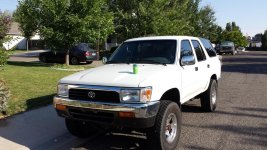
I bought this 94 almost a year ago as a "beater" camping rig. Then the modification bug hit me. My goal is to build a competent camping, adventuring rig on a budget and learn some new wrenching skills in the process. I don't want to be dumping thousands into this rig because, in all honesty, its 20 years old and has 215,000 miles on it.

Stats:
1994 SR5, 22re, 5spd

Mods to date:
Dual batteries
Cone Air filter
Custom push bar
22in LED light bar
Cobra CB
Rancho 5000 shocks and Moog Springs

Planned Mods:
Inverter
custom roof rack
more lights
whatever else I can justify

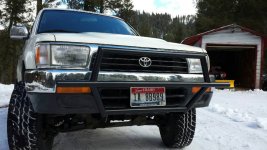
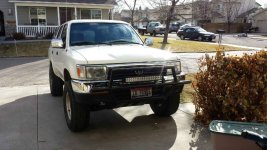
The day I brought it home. I felt pretty lucky to find a Second gen with a 22re in such good shape.

More to come on this thread soon.
 

Attachments

  • 1st.jpg
    1st.jpg
    108.2 KB · Views: 1,383
Register to hide this ad
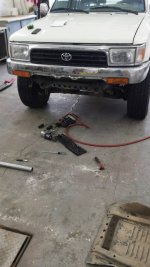
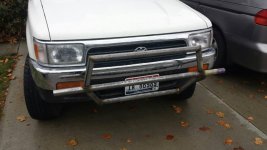
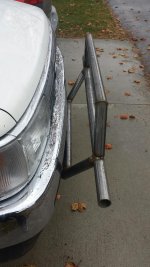
First thing I wanted to get done was a push bar, bull bar type of set up. I was pretty unimpressed with that was out there to purchase and thought it would be a fun project to tackle. I've seen some really cool "home made" bumpers on these forums so i figured... why not? I started out with a plan to build a bar that looked similar to the front of 2014 Baja 4runner. Lofty goal, not quite met. Turns out bending pipe is hard. Keep in mind i have Zero experience with this sort of fabrication.

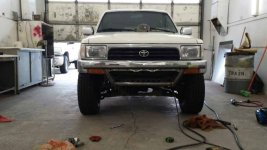
Started off stripping the valance panel and skid plate to find some mounting points.
t4r.jpg..

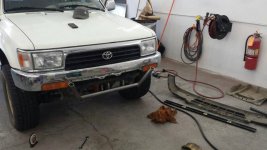
Used 1 3/4 steel, here mocking it up with some magnets.
t4ra.jpg

I mounted a 1/2in plate to the existing threaded points on the frame and welded the first tube to that and built up from there.
t4rb.jpg

Once the welding was all fished it was a little wobbly. Fabbed up a couple of 5/8ths inch plates that are welded directly from the ends of the bottom tube to the stock recovery loops. Used a torch to cut holes in the plates so I could still hook up to them.
t4rc.jpg
20131201_131632.jpg

Here it is after powder coating.
t4rd.jpg
 

Attachments

  • t4r.jpg
    t4r.jpg
    59.6 KB · Views: 1,341
  • t4ra.jpg
    t4ra.jpg
    55.4 KB · Views: 1,382
  • t4rb.jpg
    t4rb.jpg
    55.7 KB · Views: 1,325
  • t4rc.jpg
    t4rc.jpg
    54.1 KB · Views: 1,322
  • t4rd.jpg
    t4rd.jpg
    78.8 KB · Views: 1,327
  • 20131201_131632.jpg
    20131201_131632.jpg
    137.9 KB · Views: 1,313
Last edited:
Man, you got the golden nugget of 2nd gens! 22re and 5 speed is where it's at! Looks like a nice truck!

Thanks man! I agree. It popped up on craigslist locally and I called the guy within a half hour of him posting it. Didn't even haggle on the price even tho it was way over book... You just can't find them. I lucked out.
 
So I decided I needed Dual Batteries. Going into this I knew next to nothing about electricity. 50% of the time I put the AAs in the TV remote upside down. Friend of mine had them put into his TACO by a local 4X4 shop and it is a very nice setup. However it cost him about 1/3 the blue book value of my 4Runner. There had to be a better way. So I decided to educate myself and after hours and hours of internet searches and reading I felt pretty confident I could set this up myself.

I decided to go with a solenoid style isolator that was wired to close when the ignition was on. The idea being that both batteries charge when the rig is running and when its not running the aux battery is isolated. Then I'll run all my accessories off of the primary battery, saving the aux for emergency starting only. In theory if I run my battery down too far to start the rig, as long as there is enough juice left to engage the solenoid, the 4Runner will draw from the aux battery to start and bing bang boom... I'm not stranded.

What I used was a 200amp Solenoid, 0/2 Wire, and 2 200amp fuses. I just used plain old car batteries, nothing fancy. I know there are much better Deep cell batteries but remember I'm on a budget.

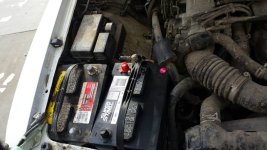
The biggest struggle was finding a spot for the extra battery. There isn't much room under the hood but I really didn't want to sacrifice cargo room in the back or deal with running heavy gauge wire all over the place.

Figured I could relocate the windshield washer reservoir and put them right there side by side. That was horse scat.
batt.jpg

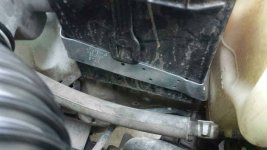
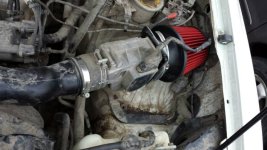
What I really wanted to do was but the Aux batt where the factory air box was... but the factory air box was there... so I came up with a pretty simple plan. Auto zone hoses and the smallest cone filter I could find.
batta.jpg

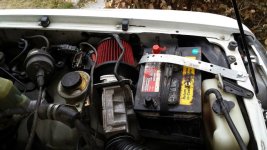
After some cussing and banged knuckles I finally got the thing in there. Notice my supper fancy strapping to hold it in place.
battb.jpg

Second strap holding it in place
battc.jpg

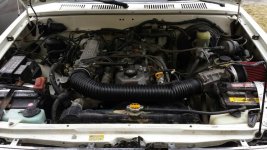
overview of under the hood before wiring in he solenoid and fuses.
battd.jpg

Finally all the fuses and the solenoid wired in and working like a champ.
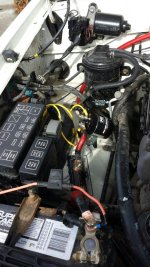
batte.jpg

Not necessarily professional but then again i'm not too ashamed to open my hood. Total cost was around $250 including a $100 battery and some various wire crimps and other tools i needed. I haven't run my battery dead yet so i can't say that it will work as planned. But I can tell you via voltage meter that both batteries are charging... so there is that.

 

Attachments

  • batt.jpg
    batt.jpg
    68.9 KB · Views: 1,310
  • batta.jpg
    batta.jpg
    63.9 KB · Views: 1,365
  • battb.jpg
    battb.jpg
    71.9 KB · Views: 1,260
  • battc.jpg
    battc.jpg
    50.6 KB · Views: 1,257
  • battd.jpg
    battd.jpg
    78.3 KB · Views: 1,260
  • batte.jpg
    batte.jpg
    84.4 KB · Views: 1,261
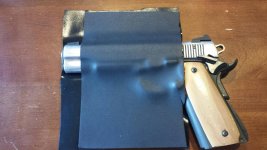
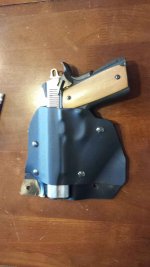
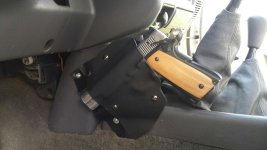
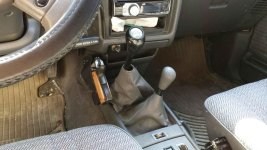
This is kind of an unusual accessory for this forum but I thought some of you might find it interesting. I'm licensed in Idaho to carry a concealed weapon and I take my pistol with me most places. I wanted a secure, safe and accessible place to keep it in my 4Runner. So I went to work making a holster I could mount up.

Started with 2 pieces of Kydex and baked them in the toaster oven for a couple minutes. Once it was pliable I used 2 pieces of foam to begin to form the holster.
20131013_131144.jpg

After some forming with the heat gun, some trimming and some Chicago screws its starting to take shape.
20131013_143207.jpeg

Mounted up. It is bolted to the metal frame behind the trim but i didn't need to drill new holes.
20131013_145033.jpg
20131013_145152.jpg
Gotta love Idaho!
 

Attachments

  • 20131013_131144.jpg
    20131013_131144.jpg
    137 KB · Views: 1,374
  • 20131013_143207.jpeg
    20131013_143207.jpeg
    56.5 KB · Views: 1,310
  • 20131013_145033.jpg
    20131013_145033.jpg
    134 KB · Views: 1,268
  • 20131013_145152.jpg
    20131013_145152.jpg
    137.9 KB · Views: 1,249
Next, after some not so subtle hinting, I received a generic 22in LED light bar for christmass. It's no ridged industries but it seems to be high quality. The only thing I wasn't impressed with was the quality of the lens. I feared a well places road pebble would probably crack it. My solution was to cover the lens with clear vinyl, the type that might be used as an invisible bra on the front of a car. Once it was applied you couldn't even tell it was there and I was happy with the added protection.
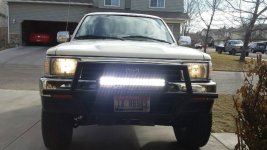
Light bar mounted up.
t4re.jpg

Here it is before i wired it in but I touched the bare wires directly to the battery just to see it shine! That is with the high beams.
t4rf.jpg

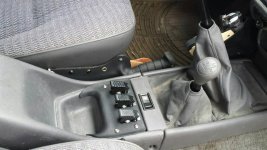
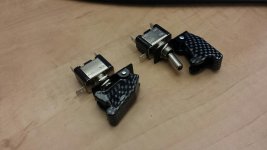
Next I went to work trying to figure out a good place for the on/off switch inside the cab. Found these 20amp switches on amazon for $3 apiece and couldn't resist.
20140121_145354.jpg

After some thought I decided to try and build a switch panel in my center console. I only needed 1 switch at the time but figured I might as well install a few all at once for inevitable future accessories.

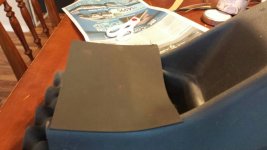
More Kydex is in order. This stuff is awesome and has endless uses.
switch.jpg

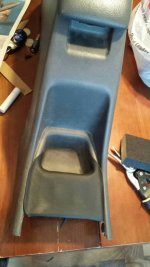
Getting pretty close with the forming. Using a heat gun and patience.
switcha.jpg

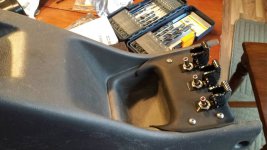
Here it is bolted in with 3 switches installed.
switchb.jpg

And installed back in the truck. Notice I had to relocate my rear window switch to a forward spot. There was already a blank there with a change holder of sorts. If you have a second gen odds are you know what i'm talking about.
switchc.jpg

It was a very tight fit beneath the center console for the wires to attach to the switches and some bending of the switch prongs was required. The switches are pretty heavy duty so i was able to bend the prongs without worrying too much about breaking them. The plan is that the 2 blank switches will someday soon operate lights mounted to a roof rack... someday...
 

Attachments

  • t4re.jpg
    t4re.jpg
    85.1 KB · Views: 1,880
  • t4rf.jpg
    t4rf.jpg
    69.1 KB · Views: 1,240
  • 20140121_145354.jpg
    20140121_145354.jpg
    133.3 KB · Views: 1,293
  • switch.jpg
    switch.jpg
    45.2 KB · Views: 1,296
  • switcha.jpg
    switcha.jpg
    57 KB · Views: 1,226
  • switchb.jpg
    switchb.jpg
    63 KB · Views: 1,236
  • switchc.jpg
    switchc.jpg
    71.5 KB · Views: 2,156
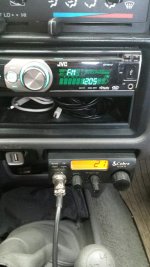
Decided on a whim that i needed a CB. I bought a Cobra 19 DXIV, a 4ft fire stick antenna and all the trimmings off amazon. I also decided I needed a PA speaker, because of reasons. Total ran me about $120 shipped.

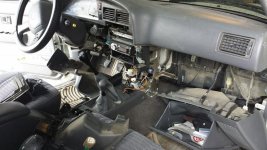
There are already a couple really good write ups out there about installing mini CBs in the ashtray slot. That's what I did so I won't go into in-depth detail, I'll just post a couple pics for prosperity.

Problem with removing the center piece of the dash to get to the ashtray is that you need to(unless there is a trick i don't know of) basically pull the whole freaking thing apart.
CB.jpg
Here it is installed.
20140520_120435.jpg
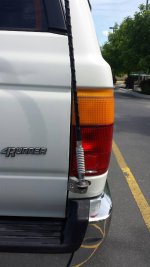
and the fire stick
20140520_122108 (1).jpg
20140520_122113.jpg
This is a great way to install a small CB if you want to keep your dash looking fairly clean. However it is kinda a pain because you have to take the whole dash apart to get to the wires in the back of the CB. All around I am glad I hooked this up. The PA has been way more fun than it should be. The CB is useful however it isn't very powerful. It's really only good for line of sight and about 200yards. I don't know much about CB's but I've tuned my antenna and still its just weaker than I expected. Oh well.
 

Attachments

  • CB.jpg
    CB.jpg
    59.9 KB · Views: 1,223
  • 20140520_120435.jpg
    20140520_120435.jpg
    137.2 KB · Views: 1,250
  • 20140520_122108 (1).jpg
    20140520_122108 (1).jpg
    132.7 KB · Views: 1,259
  • 20140520_122113.jpg
    20140520_122113.jpg
    134.4 KB · Views: 1,322
The CB is useful however it isn't very powerful. It's really only good for line of sight and about 200yards. I don't know much about CB's but I've tuned my antenna and still its just weaker than I expected. Oh well.

I've been eyeballing the Cobra 19 because of it's small size and small price tag... it sounds like you wouldn't recommend it though? I know others on here have had good luck with it... any ideas, [MENTION=92250]Robmills72[/MENTION]?
 
I've been eyeballing the Cobra 19 because of it's small size and small price tag... it sounds like you wouldn't recommend it though? I know others on here have had good luck with it... any ideas, [MENTION=92250]Robmills72[/MENTION]?

You know I have read good reviews on it. I've never had a CB before so i'm afraid I have nothing to compare it to. It works. It is fine for talking to your biddies on the trail or on the freeway. Maybe it's just my wishful thinking that it was more powerful.
 
You know I have read good reviews on it. I've never had a CB before so i'm afraid I have nothing to compare it to. It works. It is fine for talking to your biddies on the trail or on the freeway. Maybe it's just my wishful thinking that it was more powerful.

Did you get the antenna mount on Amazon as well?
 
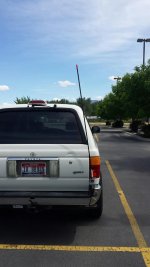
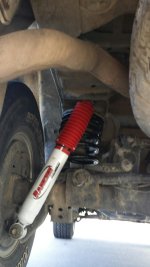
Latest "mod" was Rancho 5000 shocks all the way around and Moog springs. Of course I was coveting the OME setup but $700 vs $240 was the deciding factor. My shocks and springs were in such bad shape it probably wasn't even safe to be driving the things around. First impression on the new suspension is that they ride like a freaking dream. Comfy yet firm. I'm worried it will be a little too soft once its loaded with camping gear but it is still a huge improvement. Again with this one there have been a ton of write ups on this and install was a cinch so i won't go into detail. Just a couple pictures.
20140520_122150.jpg
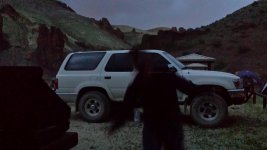
Before. I was trying to take a pic of the GF last weekend on a little camping trip, she's blurry but it turned out to be a pretty decent "before" picture to show the extent of the sag. (on the 4runner of course)
20140517_213553_LLS.jpg
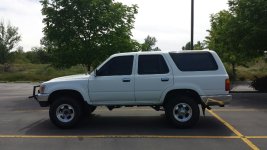
and lastly today with the new springs and shocks. I measured 20 1/2in from the ground to just in front of the rear wheel well before the install and 21 3/4in after. The front was also raised up 1in(my shocks were that blown). I was a little disappointed I didn't get the some spring spacers as well but after a strait on side look at the rig I am happy with the rake.
20140520_122125.jpg
 

Attachments

  • 20140520_122150.jpg
    20140520_122150.jpg
    124.3 KB · Views: 1,211
  • 20140517_213553_LLS.jpg
    20140517_213553_LLS.jpg
    127.7 KB · Views: 1,314
  • 20140520_122125.jpg
    20140520_122125.jpg
    138.7 KB · Views: 1,227
Did you get the antenna mount on Amazon as well?

Here is everything I needed for the install. I picked it all up off Amazon.

-Cobra 19DXIV 40 Channel Mobile Compact CB Radio

-FireStik MK-204R Adjustable SS Door Jamb Antenna Mount Mini-Kit

-Firestik SS-3H Heavy Duty Stainless Steel Antenna Spring

-Firestick II 4 feet Tunable Tip - Black

-PYLE PSP8 All Weather 5-Inch Trumpet Speaker
 
Here is everything I needed for the install. I picked it all up off Amazon.

-Cobra 19DXIV 40 Channel Mobile Compact CB Radio

-FireStik MK-204R Adjustable SS Door Jamb Antenna Mount Mini-Kit

-Firestik SS-3H Heavy Duty Stainless Steel Antenna Spring

-Firestick II 4 feet Tunable Tip - Black

-PYLE PSP8 All Weather 5-Inch Trumpet Speaker

Perfect! Thank you!
 
I ordered everything you listed last night! lol

That's awesome. Just 2 tips. If you can run a dedicated wire all the way from your battery to your CB. I originally had mine spliced into the cigarette lighter and there was an obscene amount of electrical interference and noise. For the antenna cable I just ran it under my carpet all along the passenger side and then behind the trim in the back. The only trouble I ran into was feeding the cable out of the vehicle. I finally ran it through the grommet that the taillight cluster goes through. With a dremel tool I gently carved away a little groove in the bottom of the taillight housing so the wire could run out and the housing could still bolt up flush. I didn't have to remove much and I was careful not to go all the way through so I wouldn't compromise the waterproof nature of the housing. Hope that makes sense haha.
 
That's awesome. Just 2 tips. If you can run a dedicated wire all the way from your battery to your CB. I originally had mine spliced into the cigarette lighter and there was an obscene amount of electrical interference and noise. For the antenna cable I just ran it under my carpet all along the passenger side and then behind the trim in the back. The only trouble I ran into was feeding the cable out of the vehicle. I finally ran it through the grommet that the taillight cluster goes through. With a dremel tool I gently carved away a little groove in the bottom of the taillight housing so the wire could run out and the housing could still bolt up flush. I didn't have to remove much and I was careful not to go all the way through so I wouldn't compromise the waterproof nature of the housing. Hope that makes sense haha.

Great advice! Thank you for sharing!
 

Members online

Forum statistics

Threads
278,305
Messages
3,554,041
Members
248,016
Latest member
Advally Service

Trending content

Back
Top