Build Thread

josh.bunch

New member
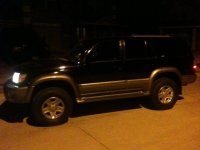
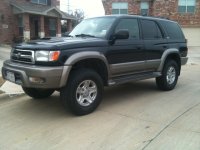
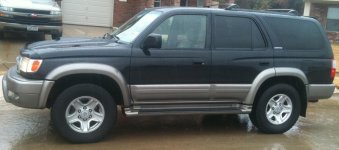
I'm going to document my build thread here. It's going to be a slow process, but I hope to include lots of pictures. I am a visual learner and I can hopefully help a few others out. Here are the current specs:

V6 3.4 L
4x4 Electronic Locking Diff
4.56 Gear Ratio
142 K Miles
Limited Sports Edition


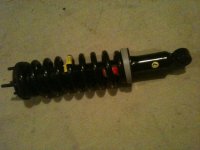
Already have purchased and ready to install Daystar 2.5 lift, Toytec 1' Diff Drop, Monroe QuickStruts, and Monroe Sensatrac Rear Shocks.

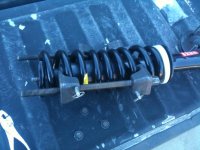
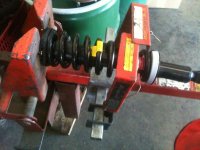
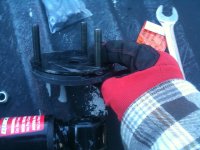
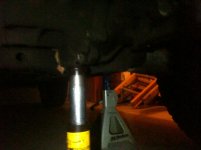
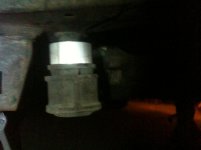
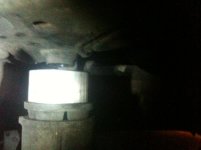
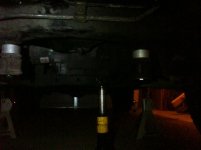
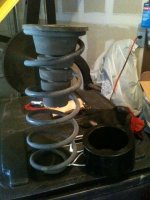
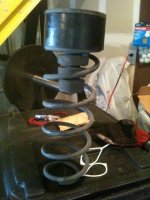
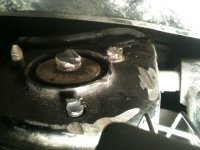
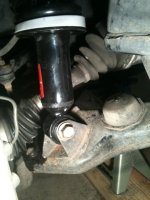
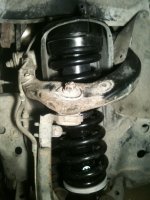
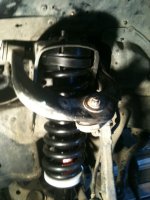
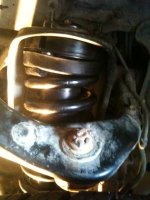
I bought the Quickstruts so that I wouldn't have to compress the coil springs while replacing the struts and installing the spacer lift. That didn't work out so well since you need the longer bolts when installing the spacers. I tried using the Auto Zone spring compressors but those are garbage. Luckily I have a mechanic that I use pretty often for my F-250 and he let me use his spring compressor which made things simple.
 

Attachments
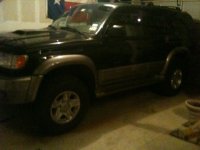
  • 4runner stock.jpg
    4runner stock.jpg
    91.5 KB · Views: 3,228
  • compression 1.jpg
    compression 1.jpg
    133.1 KB · Views: 3,133
  • compression 2.jpg
    compression 2.jpg
    135.8 KB · Views: 3,128
  • longer bolts.jpg
    longer bolts.jpg
    133.1 KB · Views: 3,108
  • quickstrut.jpg
    quickstrut.jpg
    138.5 KB · Views: 3,203
Last edited:
Register to hide this ad
Tried to install the diff drop tonight and couldn't get the S.O.B. bolts off. I'm going to find a hollow steal pipe tomorrow and slide it over my socket wrench and torch the hell out of that bad boy. Ill let you know how that whole thing works out.
 
Tried to install the diff drop tonight and couldn't get the S.O.B. bolts off. I'm going to find a hollow steal pipe tomorrow and slide it over my socket wrench and torch the hell out of that bad boy. Ill let you know how that whole thing works out.

I've used a big wrench as a breaker bar on the end of my ratchet when I didn't have anything else handy.. probably not the best idea, but it got the job done.
 
Very nice 4runner! It came from the factory with 4.56 gears?

So says the dealer. This site and a few others confirmed it. http://home.4x4wire.com/erik/diffs/

I knew already this truck was made for the son of an owner of a Toyota dealership in Lawrence Kansas so I guess he ordered top of the line. It apparently was his daily driver for 75K miles before he sold it to the girl I bought it from.


I guess the only way to tell is take it apart and count the teeth but who wants to do that?
 
Last edited:
I've used a big wrench as a breaker bar on the end of my ratchet when I didn't have anything else handy.. probably not the best idea, but it got the job done.

I went and bought a 25' break bar from Freight Harbor today. Worked like a charm. Just had to put my back into it a little. Gotta love cheap tools.
 
I'm hoping I can find a shop around here to compress my coils and assemble my struts. I'm definitely not using the death trap AutoZone compressors. If I can't find someone to do it for a reasonable price around here I'll just buy one of the clamshell compressors.

Nice looking rig. One of my favorite color combos. :)
 
Im installing the spacers this weekend and new tires to come shortly. I see many on here have 285-75-16 (33's) and some have 265-75-16 (32's). Most all of you that have the 285-75-16 have a custom front bumper and rubbing is not a problem. The question I have is this... will 285-75-16 fit with a stock bumper. I will upgrade my bumper at some point but dont have the $$ yet. I want sliders first. Will I need to install wheel spacers with these tires? BTW it's a daystar 2.5 lift and they say a maximum 32 in tire.

If wheel spacers will prevent rubbing I want to have them installed at the same time as the tires/alignment.

I realize some post say this is a maybe issue, but I was seeking some real life feedback and I will take with that what it is.

On an unrelated note this was happening to me this morning. :toilet: minus the blood.
 
The question I have is this... will 285-75-16 fit with a stock bumper. I will upgrade my bumper at some point but dont have the $$ yet. I want sliders first. Will I need to install wheel spacers with these tires? BTW it's a daystar 2.5 lift and they say a maximum 32 in tire.

If wheel spacers will prevent rubbing I want to have them installed at the same time as the tires/alignment.

I'm pretty sure you will fit 32.8" size tires with the 2.5" Daystar no problem, but that's not to say it won't be without minor rubbing on the back side of the front wheel well or even on your bumper when wheels are turned.

Just a few minor trimming though, will resolve that issue. If using wheel spacers are necessary, you can always put them on yourself even after the alignment is done.

Here a similar thread on tire fitment on stock wheels.
http://www.toyota-4runner.org/3rd-g...-stock-wheels.html?highlight=285+stock+wheels


On an unrelated note this was happening to me this morning. :toilet: minus the blood.

Geez..I hope you're ok.
 
Last edited:
I'm a novice when it comes to this sort of thing, but I'm definitely a do-it-yourself kinda of guy. This forum is very helpful with many topics, but there are alot of guys on here who know alot about 4runners and trucks in general, and your wealth of knowledge is superbly helpful.

However, for the regular Joe like myself I am going to try to give an accurate account of my experiences with whatever it is I do with my T4R. That way maybe I won't skip steps that seem common knowledge to you experts out there.

A few updates and pictures on the differential drop.
  1. The entire job took my 1.5-2 hours from the time I jacked the truck up to the time I let it down. Including removing and reinstalling the factory skid plates. I did this job solo. I could see cutting the time in half it you did it with a buddy.
  2. I needed a 25' break bar which I got for 12 bucks from Harbor Freight Tools
  3. The instructions were pretty easy from Toytec, however I did have to trim my factory skid in the 2 back bolts to make it fit. No big deal though.

The trickiest thing was maneuvering a pair of vice grips in the top bolt while breaking and reinstalling the new longer bolts.

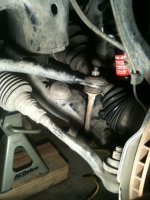
One question I have for you experts... Check out the 3rd picture. The little hump that comes down from the frame...should that concern me with that sitting on the differential spacer and not making 100% contact? It's only making contact with about 50% of the spacer. Will that cause me trouble over time? Should I have grinded that down so that it made 100% contact between the frame and the spacer?

I guess instead of a 1 in differential drop it is really more like 1.5 in drop.
 

Attachments

  • diff drop 1.jpg
    diff drop 1.jpg
    97.3 KB · Views: 3,043
  • diff drop 2.jpg
    diff drop 2.jpg
    85.3 KB · Views: 3,049
  • diff drop 3.jpg
    diff drop 3.jpg
    93.9 KB · Views: 2,981
  • diff drop 4.jpg
    diff drop 4.jpg
    81.3 KB · Views: 2,944
  • diff drop 5.jpg
    diff drop 5.jpg
    116.2 KB · Views: 3,005
Im installing the spacers this weekend and new tires to come shortly.


Life happens and the above quote did not yet. :happens: However the wife is leaving this weekend so I can do whatever I want, and that will be installing the Day Star lift, struts, front coils, and rear shocks. Not sure how long it will take since I will be flying solo but I'll keep you informed.

Do I know how to party or what?!?!? :cheers:
 
Welp, the lift is completed. Lots of sweat, grease, music, but luckily no blood. There is not alot of help out there for installing one of these yourself. Here is the best one I found... Daystar (Spacer) installation on 4Runner with XREAS - Toyota 120 Platforms Forum

It took me about 6.5 hrs yesterday to do the rear. I was doing this solo and for the first time so it was a learning experience. The problem yesterday was when I disconnected the panhard bar it "shrunk" on me. I had to drill a new hole in the frame side to make it fit. I fought that dang thing for 2.5 hrs before I gave up and drilled a new hole. If I had drilled a hole in the axle side it wouldn't have enough meat there to that's why I did that.

Also, PB Blaster is legit. I was jamming to Old Crow Medicine Show while working and over torqued the lower bolt on the shock, and snapped that booger off a 1/4 in inside the housing. I sprayed PB Blaster in there several times over the span of 1.5 hrs and then I took a normal drill bit, switched it in reverse and backed that bad boy out. I was elated!!

rear coil 1.jpgrear coil 2.jpg

After an hour break for dinner I started on the front. I jot it jacked up, tires off, and loosened the sway bars. DO NOT disconnect these. Just loosen them, bc you can't get them back on once the spacers are in. Loosen and then tighten when the spacer are on.

In fact just throw away the directions away as soon as you get them from DayStar. Use these directions from DUHOCKEY...that's all you need. Wish I had gotten them before I was finished.
to get the coilovers out, you undo the sway bar, loosen just the three nuts not the center one. take out the lower shock bolt and then take off the 3 nuts on top. use a bar, put it between the upper control arm into the engine compartment and have someone pull down on it and you should be able to pop them right out.

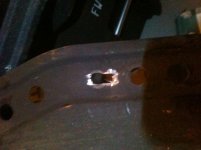
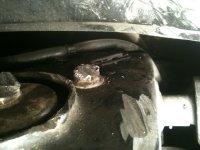
Took me about 4.5 hours today. My big screw up this time was those dang bolts that hold the strut mount at the top. That one in the back was a mother to get out. I stripped it the pieces, then tried to use and angle grinder to cut it off, you can imagine how that worked.
messed up bolt.jpgmessed up bolt 2.jpg

I reached out to the masses but to no avail. I called a welder on Craigslist and he came over, torched the SOB and sent it back to HELL where it came from. From there it was smooth sailing.
Front assembly 1.jpgfront assembly 2.jpgfront assembly 3.jpgfront jacked up.jpg
 

Attachments

  • rear coil 1.jpg
    rear coil 1.jpg
    115.1 KB · Views: 2,947
  • rear coil 2.jpg
    rear coil 2.jpg
    116.5 KB · Views: 3,251
  • messed up bolt.jpg
    messed up bolt.jpg
    99.6 KB · Views: 2,897
  • messed up bolt 2.jpg
    messed up bolt 2.jpg
    94.8 KB · Views: 2,944
  • Front assembly 1.jpg
    Front assembly 1.jpg
    91.8 KB · Views: 2,885
  • front assembly 2.jpg
    front assembly 2.jpg
    108.6 KB · Views: 2,870
  • front assembly 3.jpg
    front assembly 3.jpg
    104.5 KB · Views: 2,856
  • front jacked up.jpg
    front jacked up.jpg
    92.5 KB · Views: 3,150
Last edited:
It would really be helpful and give me piece of mind if some of you self proclaimed experts, guys who have done this before, or someone who wants to be a wise guy would chime in. Take a look at the pictures I posted and tell me if everything looks as though it is where it is supposed to be. Thanks in advance.

front assembly 5.jpgfront assembly 6.jpg

I tried to take a few pictures of the finished product but it was a bit dark. Hopefully I can get some better ones soon.

after lift 1.jpgafter lift 2.jpg

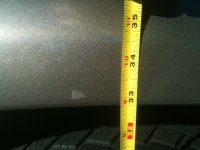
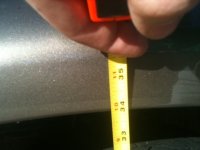
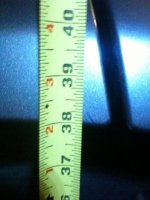
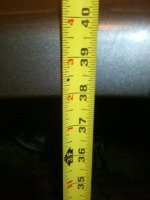
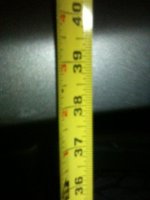
Also here are the before and after measurements...

Before Front:
Before front.jpg

Before Rear:
before rear.jpg

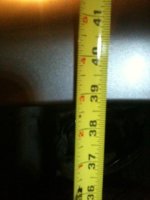
Now for the weird part. My front passengers side sits 3/4 of and inch higher than the front drivers side. Maybe it will settle. Basically I'm sitting 38' all the way around. The front will settle once the new coil springs are broken in.
 

Attachments

  • front assembly 5.jpg
    front assembly 5.jpg
    95.6 KB · Views: 2,870
  • front assembly 6.jpg
    front assembly 6.jpg
    100.4 KB · Views: 2,844
  • after lift 1.jpg
    after lift 1.jpg
    81.2 KB · Views: 2,815
  • after lift 2.jpg
    after lift 2.jpg
    93 KB · Views: 2,855
  • Before front.jpg
    Before front.jpg
    105.5 KB · Views: 2,804
  • before rear.jpg
    before rear.jpg
    67.2 KB · Views: 2,776
Front Passengers:
Front passenger.jpg

Front Drivers:
front drivers.jpg

Rear Passengers:
rear passenger.jpg

Rear Drivers:
rear drivers.jpg

I took it out driving a bit to see how it handled, I got it up to 80 mph and drove 12-15 miles. I measured when I got back home and the front coils had already settled 3/4 of an inch. I expect another 1/2 inch or so.

And I definitely need an alignment. It was a little scary driving with it in the current condition. Hope an alignment will fix things.
 

Attachments

  • front drivers.jpg
    front drivers.jpg
    78.5 KB · Views: 2,754
  • Front passenger.jpg
    Front passenger.jpg
    83.4 KB · Views: 2,763
  • rear drivers.jpg
    rear drivers.jpg
    97.8 KB · Views: 2,768
  • rear passenger.jpg
    rear passenger.jpg
    102.3 KB · Views: 2,750
finally on eh? sounds like u went through alot of trouble. i hope u really enjoy it tho. mine on soon!

the alignment will hopefully fix things up. anytime u mess with the front suspension an aligment is needed
 
In fact just throw away the directions away as soon as you get them from DayStar. Use these directions from DUHOCKEY...that's all you need. Wish I had gotten them before I was finished.

lol, thanks man, Ive done a few of these lifts now, but me and SteezeMcqueen, Ron Helmuth and Sn0wrunner messed around with mine for like 6 or 7 hours on our first try too! LOL

I completely forget cuz my sway bar is off, but someone correct me if Im wrong, but in the pics you put up of your sway bar, is your link on the wrong side of the Tie rod?? Again, Its been so long since Ive had my sway bar on I cant remember exactly, but that pic sent off warning signs.

everything else seems good from the pics.
 
It seems that getting bolts off is a common problem on this 4runner. Are you using any sort of penetrating lubercant beforehand like PB Blaster? That is what I used a day before I lifted mine and it worked well.

Also a minor thing, I have heard that it is better to put the bolt that holds the front shock/coil to the lower control arm with the head facing the rear of the vehicle. I think the reasoning was that the side with the nut was longer and could possible rip the cv boot or something like that.

Enjoy your hard work and take pics to share with us..
 
It seems that getting bolts off is a common problem on this 4runner. Are you using any sort of penetrating lubercant beforehand like PB Blaster? That is what I used a day before I lifted mine and it worked well.

Didn't use it before hand. I will next time.

Also a minor thing, I have heard that it is better to put the bolt that holds the front shock/coil to the lower control arm with the head facing the rear of the vehicle. I think the reasoning was that the side with the nut was longer and could possible rip the cv boot or something like that.

I couldn't fit the bolt in the way it came out, so i trimmed it off and put it in backwards. CV's are safe. You have a good eye.
 
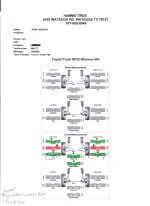
Went and had my alignment Yesterday and while the guys were trying to adjust the bolts between the inner and outer tie rods on the drivers side they broke it. Well almost. I had to go to 2 different parts stores after calling around. One store for the inner, and another for the outter. Set me back $126. Then I needed it done quicker than I usually would have so I took it to my mechanic and he changed it out for me in under 1/2 hour. To get the boot off he put it in a bench vice and used an air chisel the rotate it. after about 10 minutes of struggling I told him to just cut it in half.

Went back to the alignment shop and completed the alignment minus the caster which is 1 degree off on each side. The guy doing the alignment says he adjusted it as much as he could. He says I have to get adjustable UCA's to align everything back up. They don't sell that stuff or install it, so they don't have a dog in the fight, and I don't know any better. Let me know what you think. It doesn't seem to effect the driving what so ever but could effect wear on the tires. I am however pretty religious about getting the tired rotated every 3-5K mile. Every time I change my oil. I got 85K out if my last TOYO's

Alignment.jpg

Also I drilled a hole 3/8 to the middle of the vehicle on the frame side when reinstalling the panhard bar. Apparently this threw things off on the rear end bc, they told be I was going to have to get an adjustable panhard bar to put my truck back in line.

Also does anyone know where I can find an adjustable panhard bar besides from here: 4Runner - Fully Adjustable Trac/PanHard Bar (1996 to 2002) - $175.00 : Sonoran Steel, Sonoran Steel Custom Metal Fabrication L.L.C. Custom Toyota Truck Parts

Seems a little steep. Looks like a good product, I would just like to save some cash. Especially since I'll have to find someone to weld washers over the original holes so it stays put.

after 1.jpg
 

Attachments

  • Alignment.jpg
    Alignment.jpg
    120.9 KB · Views: 1,088
  • after 1.jpg
    after 1.jpg
    103.3 KB · Views: 964
New Rear Coils

Well, as many have learned and posted, I'm done with the spacers. At least the rear spacers. I guess it's more my coils, but whatever. I'm at a -1 rake with 0 lbs load and no passengers.

For now I'm going to keep the front spacer set up since it's really been fine. I'm going to ditch the rear spacers and either go with OME or LC coils. I'm leaning more toward the OME 891 since I won't have to go dumpster diving like I would for the LC. Plus it might save like 50 bucks or less, and I guess my time is worth that.

Any thoughts/ input would helpful. I have read many other threads primarily steezemcqueen's 3rd gen lift thread. My only reserve on the 891 is that several people have said they have trouble with these sagging too. Brian2sun & jsmarine's old rig sticks out the most.

Throw me your 2 cents. I'm looking to do them this weekend so need to move fast.
 

Members online

No members online now.

Forum statistics

Threads
278,304
Messages
3,554,041
Members
248,016
Latest member
Advally Service

Trending content

Back
Top