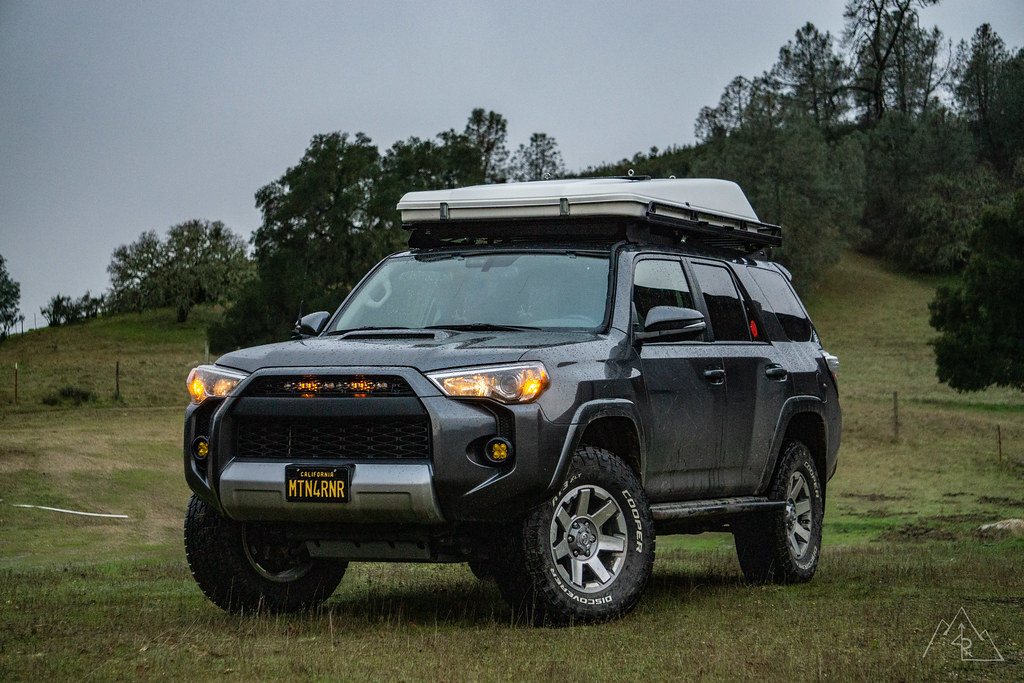
Building, Driving and Adventuring the MTN4RNR

[MENTION=129593]MTN4RNR[/MENTION]

awesome build man and thread man. You've put a lot of work into this. The trip reports are great.

I gotta ask why did you remove the MetalTech Lower links?
 
[MENTION=129593]MTN4RNR[/MENTION]

awesome build man and thread man. You've put a lot of work into this. The trip reports are great.

I gotta ask why did you remove the MetalTech Lower links?

Whew it's been a while since I have been here... Need to update the thread a little bit...


I swapped out the Metal Tech links because I got them second hand and the johnny joints were pretty much toast from the start but I ran them anyways. They were really creaky because of that, and I decided to revert to stock for now. If I bent a stock arm, I will upgrade to a set that has an OEM style bushing like the Reszfab set. The MT's were super beefy, but I haven't needed them yet.
 
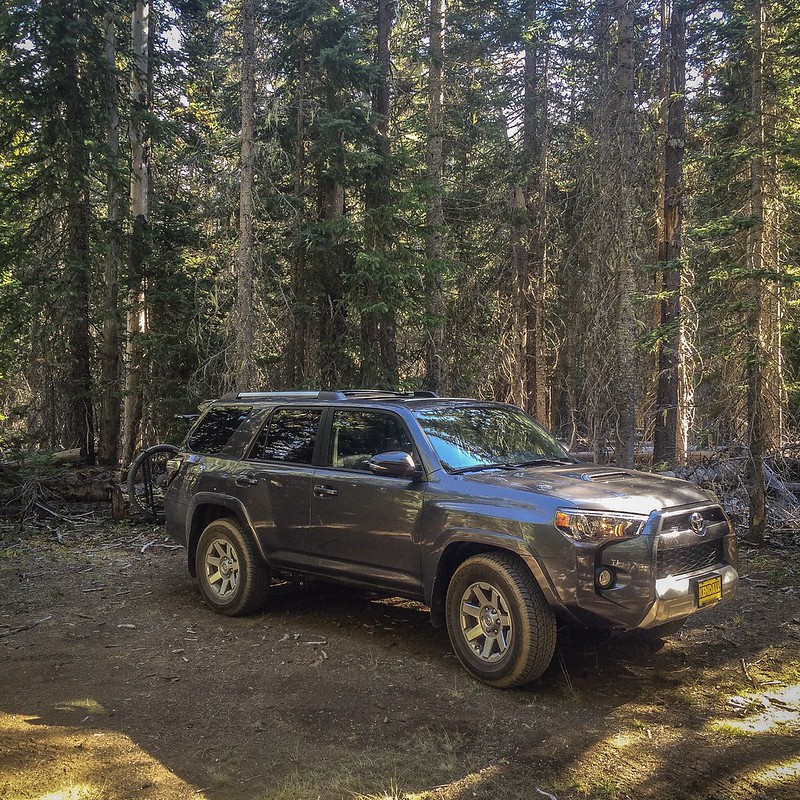
Things are noticeably more fun in thin air. It's where I tend to go to get away from everything. To help get me there, I picked up a 2016 4Runner Trail Premium on a recent trip to Bend, OR. I hadn't intended on buying a truck on the trip, but when the numbers add up sometimes its best to pull the trigger and enjoy it! The overall goal with this build is based on function. I want to make sure that everything added on to the vehicle has an intended purpose or use. This will not only keep my budget in check for the build, but really create something that works well for my intended purpose. Yes, it takes longer to "get there" but in the interim, I am still getting out and enjoying the adventures that the rig can handle under it's given build condition. So follow me on my adventures and take a look at some of the modifications that I do along the way. I'm in it for the long game!

In affiliation with:
Gaia-GPS_Logo-Horizontal_4C.png

Click here for special pricing on your Gaia GPS membership

As it sits: March 2019
46396221814_2175210195_b.jpg


Build Details:

Drivetrain: Stock

Suspension:
- King Shocks 2.5 OEM Performance Series, sans compression adjusters
- Total Chaos uniball upper control arms
- Dobinsons C59-725 KDSS specific rear springs

Armor:
- 4x4 Labs Sliders

Wheels/Tires:
- OEM Trail Edition wheels, Cooper Discoverer AT3 XLT 285/70R17

Vehicle Additions/Modifications:
- 1Up USA bike rack
- The MTN4RNR hatch mod
- Blue Ridge Overland Gear visor organizer
- RAM dash mount for iPad [Nav, weather, topos, etc.]
- Thule rack [transfer from old truck]
- Ruff Tough Kennel (home of the Maeve)
- Custom CA license plate
- LED back-up/license plate lights from [MENTION=12905]XenonDepot[/MENTION]
- HID low beam headlights from [MENTION=12905]XenonDepot[/MENTION]
- LED rear hatch lights from [MENTION=12905]XenonDepot[/MENTION]
- LED fog lamps from [MENTION=12905]XenonDepot[/MENTION]
- LED interior & puddle lamp upgrade from [MENTION=12905]XenonDepot[/MENTION]
- Gobi Ladder
- Differential/E-locker breather mod
- Baja Designs 20" s8 LED bar
- Ellis Precision aluminum transfer case shifter knob
- Baja Designs S2 Pro LED light - The "who needs a hand hold" ...mod
- ARB compressor
- The MTN4RNR 4Runner Platform
- The Blue Ridge Overland Gear Attic
- The Kenwood HAM Radio Installation
- Baja Designs Squadron Pro Fog Light Upgrade
- Baja Designs Hatch Dome Light Upgrade
- Baja Designs S2 Pro Rear Dust Light Upgrade

Communications:
- Amateur Radio License - Technician
- Kenwood TM-V71A Mobile Transreciever
- Kenwood KES-3S External Speaker
- Diamond K400SNMO Antenna Mount
- Comet 18" NMO Antenna
- Yaesu FT-60r (X2)
- Diamond SRH77CA 15" antenna (X2)
- Yaesu MH-34B4B Speaker/Microphone

Mapping/GPS:
- Gaia GPS Pro

Maintenance History:
- 20k --- Air filter (Toyota OEM)
- 25k --- Tire rotation
- 30k --- Tire rotation, engine oil (Toyota 0w-20), cab filter (Toyota OEM), FR/RR diff gear oil (Redline 75W-90), transfer case gear oil (Redline 75W-90)
- 35k --- Driveline lube
- 37k --- Lift installation, alignment, rotation
- 39k --- Engine oil (Toyota 0w-20), driveline lube, air filter (Toyota OEM)
- 40k --- UCA lube
- 43k --- Tire rotation
- 45k --- Needle bearing TSB (new FR gear oil, Redline 75w-90), engine oil (Toyota 0w-20), UCA lube
- 52k --- New battery (Batteries Plus X2), lower link lube, engine oil (Toyota 0w-20), rotation, rear brake pad replacement (OEM)
- 55k --- Suspension / driveline lube
- 57k --- Engine oil (Toyota 0w-20), air filter (OEM), cabin air filter (Lexus charcoal OEM), FR/RR diff gear oil (Redline 75w-85), transfer case gear oil (OEM 75w)
- 58k --- New tires/alignment, Cooper Discoverer AT3 XLT 285/70R17
- 60k --- Removed Metal Tech lower links, replaced with OEM

Bucket List:

Trip Reports:
- West Camino Cielo Road, Santa Barbara, CA - November 2015
- Crawl to the Top - January 2016
- Big Sur, CA - March 2016
- Hollister Hills SVRA - April 2016
- Big Sur, CA - May 2016
- Stanislaus NF, Highway 4 to 88 Adventure - May 2016
- Rattlesnake Road exploring - June 2016
- Ellis Peak/Tahoe National Forest - June 2016
- Lola Montez/Fordyce Creek - July 2016
- Downieville to Sloat - July 2016
- Slick Rock / Corral Hollow - August 2016
- Bald Mountain OHV - August 2016
- Labor Day Adventures in the Sierras - September 2016
- Niagra Rim/Eagle Peak - October 2016
*NOTE: All new trip reports located HERE*


The day after I bought it:
43386534271_e798fc4cc2_c.jpg


I will be putting it to good use, and trying to keep up with additions and mods here as I can!

More to be added...​

I saw your write up on the Rokblokz Rally Mud Flaps on Trail4runner and I was wondering if they are a lot thinner than the stock mud flaps?
I am planning to get some 285s and I'm currently running 17/8.5 -10 offset.
I know I would have to take off my mud flaps, but wanted to know if these would work or I would need a mud flap delete.

Btw great right up on the mud flaps.
 
That's the legal equivalent of saying "if you don't get caught it's fine."

I wouldn't advocate for this approach, and as a community we ought to set a good example.

OK. In my process of researching fog lights I came across this. I just couldn't help myself. The guy from Portland.... "as a community we ought to set a good example" :lol:
 
I saw your write up on the Rokblokz Rally Mud Flaps on Trail4runner and I was wondering if they are a lot thinner than the stock mud flaps?
I am planning to get some 285s and I'm currently running 17/8.5 -10 offset.
I know I would have to take off my mud flaps, but wanted to know if these would work or I would need a mud flap delete.

Btw great right up on the mud flaps.

I think the best way that I can describe it is that the material is thicker than the stock flaps, but it comes as a flat piece whereas the stock flaps are molded more and stick out more due to their design. Depending on your alignment you might clear these flaps. I do with stock offset and 285s.
 
Hey [MENTION=129593]MTN4RNR[/MENTION] ... like many others this thread is one of my all-time favs, even if it has gone kind of quiet.

Two questions if you are still monitoring.

1) You have a significant set of additional lights on your truck. Ignoring the front-facing lights, I think you have

  • 2 Side Camping Lights
  • 2 Rear Camping Lights
  • Rear Dust Light on the rack
  • Hatch End Light (in handle)
  • 2 Hatch Down Lights (mounted inside the hatch)
  • 6 Rock lights under the vehicle
If you were doing it all over again, would you put them all back on all over again? Seems like the rock lights handle a lot of the "camping" scenarios ... do the ones on the hatch get used much?

2) Are all the lights on the back powered by the same cable? Or are you running multiple power wires to the back to support all those lights on the rear of the truck?

Your work and write ups are all amazing. I know you've impacted a ton of people in a super positive way.
 
Hey [MENTION=129593]MTN4RNR[/MENTION] ... like many others this thread is one of my all-time favs, even if it has gone kind of quiet.

Two questions if you are still monitoring.

1) You have a significant set of additional lights on your truck. Ignoring the front-facing lights, I think you have

  • 2 Side Camping Lights
  • 2 Rear Camping Lights
  • Rear Dust Light on the rack
  • Hatch End Light (in handle)
  • 2 Hatch Down Lights (mounted inside the hatch)
  • 6 Rock lights under the vehicle
If you were doing it all over again, would you put them all back on all over again? Seems like the rock lights handle a lot of the "camping" scenarios ... do the ones on the hatch get used much?

2) Are all the lights on the back powered by the same cable? Or are you running multiple power wires to the back to support all those lights on the rear of the truck?

Your work and write ups are all amazing. I know you've impacted a ton of people in a super positive way.

Hey! I'm still here, although I haven't been for a while...

1. Nailed it. Looking back, some get used more than others but they all have a good purpose. Even the handle S2 gets used now and then when I need to light up the area behind the 4Runner while the hatch is up. It's a pretty minimal but well put together configuration. Enough light to get things done without being excessive.
2. The wiring is based on lighting combinations. So here's what's the wiring situation is:
  • Side lights - wired individually but combined on one output on the Switch Pro
  • Rear lights - One wire from the Switch Pro, split at the rear to the 2 lights
  • Dust light - Single 3 wire from the Switch Pro
  • Hatch lights - Hot wire from the front, into a terminal block in the hatch itself. Everything is switched at the hatch.

I hope that helps, and I am glad that someone dug this thing up! I should go through and update a few things here :thumb3:
 
[MENTION=129593]MTN4RNR[/MENTION] if you are still out there anywhere ... in the last photo in this sequence, you show how you ran a wire under the rear carpet and then down to the rear door sill area.

Any clues on how you pulled it off? I'm trying to take the same route, but so far I've been foiled. Did you go under the carpet? Under the plastic trim on the side of the cargo area? Did you resort to witchcraft and sorcery?

Thanks if you do come and visit!


Seems many people have rear facing lights on their roof racks, which are great for lighting pretty much everything behind you... Unless you have the hatch open. To solve this, I installed a [MENTION=87816]Baja Designs[/MENTION] S2 Pro LED light in the driver side hand hold of the hatch. I first took a look at the specs, and made a paper model of the light to test the theory, and knowing that it was very close, I ordered the light to find out first hand. Considering that the light would be used to illuminate a large area I ordered the flood pattern lens and it works great. The light output is ridiculously awesome. Thankfully, this was a short install and I get it finished just in time for camping this weekend! The S2 does not require a relay, so all I had to do was run a hot wire from the battery to the hatch, and then modify both plastic hand hold pieces to make the light and the switch fit.

Parts used:
DSC09305_zpsil9hmwgf.jpg~original

- Baja Designs S2 Pro Flood/work LED light
- Wiring harness from Baja Designs [/URL]
- Drill of choice
- Milwaukee #9 step drill bit
- Stainless Steel mounting hardware
- Flexo PET wire sheathing
- Shrink wrap
- Heat gun
- Weather resistant butt connectors
- Dielectric grease
- 16 ga. wire
- Electrical tape
- Wire coat hanger
- Standard paint can opener
- 16” thin copper wire
- Zip ties
-Uinta Brewing Detour DIPA

Install:
Start by removing the interior hatch cover. Start with removing the lights, then the center knock out, then the pull strap. Then remove the plastic hand holds on the outside of the hatch. I found the perfect tool to remove these is a standard paint can opener. Insert at the top, then lever up to pop the plastic hand hold out of the hatch.
DSC09309_zpslc6ior6p.jpg~original

DSC09310_zpsiuqsj0ph.jpg~original

DSC09311_zpsdgfkwbsl.jpg~original

DSC09312_zpsfeknkums.jpg~original


Here is the piece (1 of 2) that will house the light and the switch on opposite sides of the hatch.
DSC09314_zpsb93a37kf.jpg~original


Remove the interior hatch panel by using the center “punch out” hole to pull down on the panel, releasing it from it’s plastic clips. The interior window seal at the top requires you to rotate the hatch panel down, and then push towards the interior of the car to release it from the hatch.
DSC09315_zpss87i9gm0.jpg~original


I started running the hot wire from the back because I had more clearance to go through the rubber “grommet” that connects the hatch to the main body of the car unless I wanted to drop the whole head liner out, which I didn’t want to do. I started by pulling the grommet out of the hatch so that the hole was open. I then fed the wire from the hand hold hole up to the top of the hatch using a straightened wire coat hanger to allow me to push it through. Once the wire/hanger was visible, I pulled it through the top of the hatch.
DSC09319_zpsslimobm2.jpg~original

DSC09318_zpssofiibha.jpg~original

DSC09316_zpsoqqwinhw.jpg~original


I then poked a small hole in the rubber grommet, just big enough to fit a small copper wire through as a pull wire. The copper wire was thin enough to get through, but sturdy enough to allow it to be pushed through the grommet. I looped the end to keep it from hanging up on any wiring or the grommet itself.
DSC09321_zpszrq9rw4w.jpg~original

DSC09322_zpsh8pj53yv.jpg~original

[note the tight clearance for the headliner below]
DSC09324_zpscjewvgp4.jpg~original


Once through, I wrapped the hot wire around the copper wire and pulled it through.
DSC09326_zpsmqx2u0yk.jpg~original

DSC09328_zpsszl37kpf.jpg~original


I then pulled enough wiring through the hatch/grommet to get me to the front of the vehicle, and started my way forwards. First, I pulled the weather stripping for the rear door off, and routed the wire down the driver’s side of the rear hatch area to the floor.
DSC09333_zpscnyl6c9m.jpg~original

DSC09331_zpsaxsbywrr.jpg~original

DSC09329_zpszd3s4w6u.jpg~original


Then, up under the floor mat in the cargo area to the back seat.

DSC09341_zpsm365tkte.jpg~original


See 2 of 3 below
 
Nevermind, got it. Went and looked in the light and it turns out to be really easy. For anyone that stumbles on this later - run a coat hanger up from the door sill and it pops out under the carpet in the back. Super straight run - no obstacles or interferance.


5q9gsVu.jpg
 
I do not have a write-up for that. I never did an always on mod with the stock switch. I just upgraded to a Switch Pro and have full flexibility now.

LUCKILY we have [MENTION=65614]Antman[/MENTION] to rely on for a solid write-up, so click on this link and be on your merry modding way!

Antman Independent Fog Light Mod

Good luck!


Favor!
I must be crazy but I cannot find the same fog light feed antman used since I'm a 2014.
On your switch pro does it power the fog lights from the cabin? I'm trying to see how you tapped into your fogs. I've been in cabin for an hr + with a test light trying to find what's powering fogs!
 

Members online

Forum statistics

Threads
278,310
Messages
3,554,080
Members
248,016
Latest member
Advally Service

Trending content

Back
Top