Carlos.ElMotor's build and travel pics thread

carlos.elmotor

New member
I’m finally getting around to kicking off my build thread, three months after buying my new truck and less than 24hours before heading out on a North Carolina > South Dakota, Wyoming, Montana > Maryland road trip. Nothing like a deadline to drive productivity…

This forum has been incredibly helpful to me and most of what I’ve done here was based on the (pretty incredible) work of long-standing community members like [MENTION=68685]Ducmonsta[/MENTION], [MENTION=65614]Antman[/MENTION], @okki, and many others.

Coming from a couple of older land cruisers and other Toyota trucks, I’m a function-over-form guy and view my trucks as tool or platform to enable whatever outside activity I’m up to at the moment: fishing, shooting, wheeling, traveling, etc. Despite being shiny and new, this truck is no different.

Initial objectives for phase 1 of my current build were:
  1. Build out/maintain a dirt, mud, sand, and moderate rock capable vehicle that could still comfortably handle long highway miles in between as my daily driver and road trip platform
  2. Add a secondary power system – initially for fridge/long-term food (read as: beer) storage, future winch support
  3. Add an onboard air system – for airing up tires, air mattress, possible front air locker in the future (rear e-locker already in place from the factory)
  4. Add additional storage – A fridge plus four adults with a week’s worth of gear takes practically all available space in the cabin so I needed to add a rack in phase 1 – as a bonus, the rack doubles as a sleeping platform in bear/rattlesnake country

In the posts that follow, I’ll lay out the approach for my phase 1 build, including the parts used and lessons learned, with plenty of pics.
 

Attachments
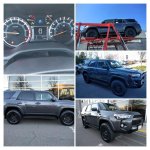
  • IMG_20160329_170951-COLLAGE.jpg
    IMG_20160329_170951-COLLAGE.jpg
    134.5 KB · Views: 649
Last edited:
Register to hide this ad
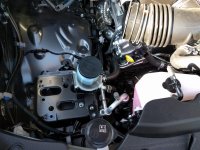
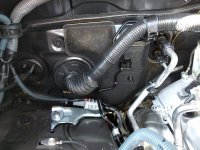
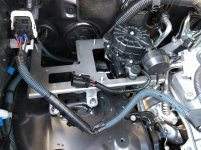
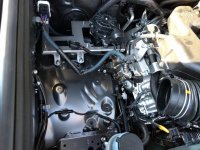
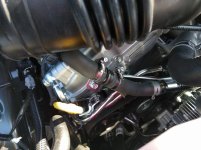
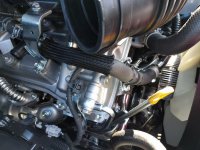
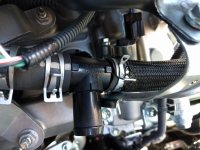
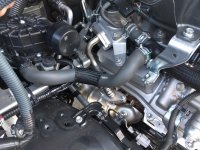
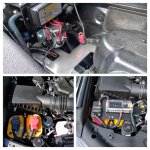
As a first step enabler for secondary power, the poorly-located factory air injection pump (AIP) had to be relocated to the rear of the engine bay by the passenger side firewall. Shrockworks offers a well-made platform with good instructions that made it easy to relocate the AIP and house an optima yellow-top behind the passenger side headlight.

These pics show the relocation of the factory air injection pump, the retrofit of the black Tee. The third pic shows the Shrockworks tray that receives the AIP in its new location. Note the threaded studs on the tray. These are (I believe) used in the FJ Cruiser application to relocate the washer fluid reservoir. I should've cut the studs off, but didn't. You may want to do so for your application if you don't plan on using them.
 

Attachments

  • IMG_20160415_175511.jpg
    IMG_20160415_175511.jpg
    135.7 KB · Views: 631
  • IMG_20160415_175526.jpg
    IMG_20160415_175526.jpg
    137.2 KB · Views: 645
  • IMG_20160415_181700.jpg
    IMG_20160415_181700.jpg
    137.9 KB · Views: 644
  • IMG_20160415_181704.jpg
    IMG_20160415_181704.jpg
    137.6 KB · Views: 647
  • IMG_20160416_093730.jpg
    IMG_20160416_093730.jpg
    127.7 KB · Views: 643
  • IMG_20160416_093739.jpg
    IMG_20160416_093739.jpg
    133.3 KB · Views: 620
  • IMG_20160416_093758.jpg
    IMG_20160416_093758.jpg
    131.4 KB · Views: 657
  • IMG_20160416_101943.jpg
    IMG_20160416_101943.jpg
    137.7 KB · Views: 707
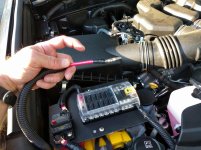
With the air injection pump out of the way it was time to drop in the battery tray and battery, fab up a bracket and wire the National Luna automatic charging relay (ACR) and fab up a secondary fuse block.

Notice that the ACR is on the passenger side near the air injection pump. I had initially put in on the driver's side right behind the factory fuse box, which is a good place, but the (excellent) Slee air compressor bracket needed to go there so I had to move the ACR over to the PS.
 

Attachments

  • IMG_20160627_212238.jpg
    IMG_20160627_212238.jpg
    132.5 KB · Views: 638
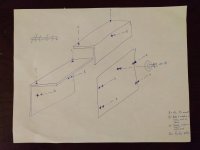
Here's a rough diagram of the bracket for the ACR. I posted detailed instructions here if you'll be building your own.
 

Attachments

  • IMG_20160621_200703.jpg
    IMG_20160621_200703.jpg
    121.6 KB · Views: 583
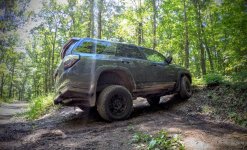
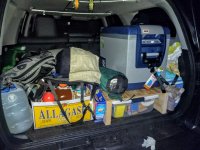
A little bit of this at Green Ridge State Forest in Western Maryland and testing the fridge out on the North Branch of the Potomac River.
 

Attachments

  • GOPR0080.jpg
    GOPR0080.jpg
    137.8 KB · Views: 581
  • IMG_20160602_235623.jpg
    IMG_20160602_235623.jpg
    135.8 KB · Views: 581
Last edited:
Looks like some fly fishing reels there on the ceiling? I'm just getting back from a fly fishing trip in Wyoming :thumb3:
 
Awesome. Hope it helps [MENTION=142086]Yelkceb[/MENTION]. I'm about a month behind on updates and trying to catch up.

Love the Talladega Nights reference [MENTION=142508]Mike Hancho[/MENTION] - I'm headed to WY/MT next Tuesday for more of the same - first road trip in the new rig. Hope the fishing was good for you out there.
 
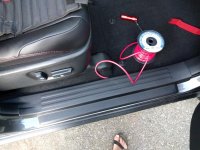
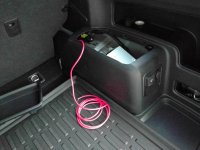
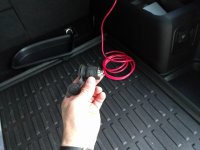
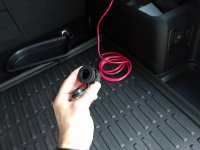
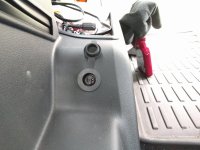
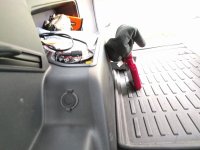
I couldn't find very many pics of the fridge wiring process, but I essentially followed [MENTION=65614]Antman[/MENTION] and [MENTION=68685]Ducmonsta[/MENTION] on the rear wheel storage space and ran an 8 gauge lead from my house-battery fuse block through the PS firewall grommet to the rear ARB socket Here's a good example that I used as a reference.

Looking back at it, I should've run the 8ga power lead to a small fuseblock in the wheel well storage compartment then powered the fridge from that block. Future mod...
 

Attachments

  • IMG_20160507_183924.jpg
    IMG_20160507_183924.jpg
    137 KB · Views: 589
  • IMG_20160507_185531.jpg
    IMG_20160507_185531.jpg
    138 KB · Views: 586
  • IMG_20160507_194055.jpg
    IMG_20160507_194055.jpg
    129.8 KB · Views: 585
  • IMG_20160507_194107.jpg
    IMG_20160507_194107.jpg
    119.3 KB · Views: 573
  • IMG_20160507_194105.jpg
    IMG_20160507_194105.jpg
    120.4 KB · Views: 578
  • IMG_20160701_154237.jpg
    IMG_20160701_154237.jpg
    134.1 KB · Views: 595
  • IMG_20160701_154229.jpg
    IMG_20160701_154229.jpg
    131 KB · Views: 595
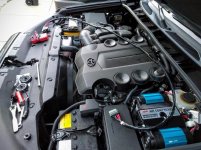
The next step was figuring out where and how to mount my ARB twin (CKMTA12) air compressor. I knew that I wanted it under my hood, but things were starting to get really tight under there. Initially I had hoped to fab up a bracket with some angle aluminum and drop the compressor next to the relocated air injection pump since the Shrockworks platform would provide a nice stable base. Unfortunately the remaining space in the PS firewall was just too tight to make it work, so I started looking for an off-the-shelf solution.

At the time, Slee off-road's website listed a CKMTA12 bracket for "2010-Current" 4runners, but after calling them to double check it didn't fit the 2016's yet. Fortunately after a few weeks (and considerable nagging from me and likely others) Slee cranked out a very high quality bracket for 5th gens that fits like a glove. The only critique I have is that I had to drill two additional holes in the bracket to position the larger CKMTA12 closer to the DS fender, as it was rubbing on a couple of factory hoses. A very minor mod to the bracket and I was ready to install. You can see the sharpie marks where I drilled my additional mounting holes at the bottom of the first pic below.
 

Attachments

  • tapatalk_1465997067182.jpeg
    tapatalk_1465997067182.jpeg
    57.7 KB · Views: 555
  • 1.jpg
    1.jpg
    138.8 KB · Views: 581
It seems like the AIP bracket wastes a lot of space. Its hard to tell from the pictures but it seems like you could have a vertical bracket that would allow something next to it as well.
 
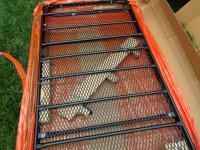
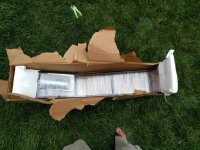
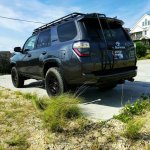
Closing out the end of phase 1 was receipt and installation of my Gobi Stealth rack. I had ordered it in late May, knowing that I had a cross-country road trip scheduled for mid-July. Given the sometimes long waits associated with their builds, plus freight shipping, plus their summer sale (free ladder and fairing) I was a little nervous about receiving the rack in time to install it ahead of my trip. As soon as I had an order number from Trail Duty, I called Alex at Gobi to check in on the actual build time and when I should expect to receive it. The news was not initially good and I was told that the rack would take 8-12 weeks to arrive (despite the 6-8 weeks listed on Trail Duty's website at the time).

Fortunately, Alex at Gobi is an f'ing saint and when I explained my situation w/ the upcoming road trip and the need for the rack, she connected with the guys in the shop and somehow got me my build in time to install and hit the road.

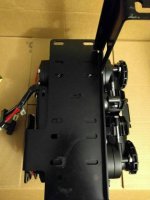
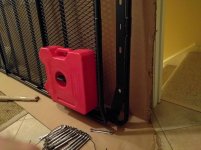
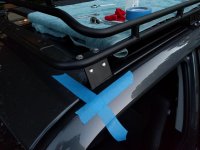
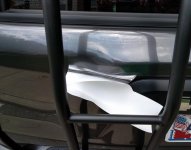
I won't re-tread the already numerous unboxing and installation pics, but I feel compelled to call out [MENTION=59081]W8kbrder[/MENTION]'s thread here and @Okki's heads-up on rotopax mount/install here -- you guys saved me a bunch of time -- awesome threads. I also took a cue from (yet another) [MENTION=65614]Antman[/MENTION] post and added some paint protection film under the fairing and between the ladder and the rear door. Going up and down the ladder to tweak the fairing, I noticed that my shoes were leaving marks on the door. Not a big deal in front of the house, but in muddy boots I could see myself grinding through the paint pretty quickly. Maybe I'm just overly sensitive to a rusty rear hatch because of my fj60...

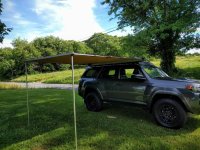
Obligatory awning pic because I put a 2500 on too.

Lessons-learned on the rack install:
  1. You'll almost definitely need a second person (or a pulley) to get the rack on the roof - it's not that the rack is too heavy, the dimensions are just awkward
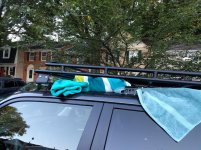
  2. Rolling up a few towels and placing them on either side of the shark fin (just forward of the spoiler), then sliding the rack forward over the feet was the method I used to orient the rack without damaging the roof. Worked well for me.
  3. The most time consuming part was getting the fairing adjusted to where I wanted it from a wind-noise perspective -- I'm admittedly picky, but it's damn near silent now unless there's a cross breeze
 

Attachments

  • IMG_20160628_132225.jpg
    IMG_20160628_132225.jpg
    143.1 KB · Views: 514
  • IMG_20160628_134050.jpg
    IMG_20160628_134050.jpg
    138.1 KB · Views: 567
  • IMG_20160628_214522.jpg
    IMG_20160628_214522.jpg
    131.9 KB · Views: 531
  • IMG_20160629_201333.jpg
    IMG_20160629_201333.jpg
    140.4 KB · Views: 539
  • IMG_20160629_204833.jpg
    IMG_20160629_204833.jpg
    126.8 KB · Views: 551
  • IMG_20160701_141329.jpg
    IMG_20160701_141329.jpg
    130.2 KB · Views: 526
  • IMG_20160701_144325-01.jpg
    IMG_20160701_144325-01.jpg
    138.5 KB · Views: 536
  • IMG_20160702_171044 (1).jpg
    IMG_20160702_171044 (1).jpg
    137.7 KB · Views: 542
It seems like the AIP bracket wastes a lot of space. Its hard to tell from the pictures but it seems like you could have a vertical bracket that would allow something next to it as well.

Yeah. It's well built, but does take up a little space in that back corner. I'm guessing, but suspect that Shrockworks wanted to used existing holes for the mount (vs drilling new ones) and wanted to make one part versus two. (i.e. AIP+washer reservoir relo).
 
That's it for phase 1 - hopefully it's helpful for folks. Phase 2 will likely be some STT pros and a 40" light bar. I'd love to pull the trigger on a BP51 set up, but not sure I can justify it at this stage.

Travel wise:
I'll be heading to Nags Head for the weekend/beginning of next week then Westbound on Tuesday morning. Planning to hit Badlands, Mt. Rushmore, Devil's Tower, Yellowstone, and Glacier. Also fishing the Yellowstone, Madison, Rock Creek, Bitterroot, and possibly Missouri Rivers while in Montana/Wyoming.

Will post pics as data connectivity permits or catch up at some point when I'm back. Check out my Instagram for more timely updates if you want to follow along with the trip.
 
That's it for phase 1 - hopefully it's helpful for folks. Phase 2 will likely be some STT pros and a 40" light bar. I'd love to pull the trigger on a BP51 set up, but not sure I can justify it at this stage.

Travel wise:
I'll be heading to Nags Head for the weekend/beginning of next week then Westbound on Tuesday morning. Planning to hit Badlands, Mt. Rushmore, Devil's Tower, Yellowstone, and Glacier. Also fishing the Yellowstone, Madison, Rock Creek, Bitterroot, and possibly Missouri Rivers while in Montana/Wyoming.

Will post pics as data connectivity permits or catch up at some point when I'm back. Check out my Instagram for more timely updates if you want to follow along with the trip.

Sub'd :bravo:

Living vicariously through this build so far...well done sir, and safe travels!
 
Really appreciate you taking the detailed pictures. Nice work!
Thanks [MENTION=128325]cutty01[/MENTION]. Trying to pay back a little to the community here.

It's been really helpful to see and read the other first hand accounts referenced above vs having to only rely on marketing materials from vendor websites.

Credit to Shrockworks, National Luna, Slee, and Gobi. They've each put forward some great aftermarket parts for our 5th gens.
 
Just hit Nags Head and unloaded.

uploadfromtaptalk1468104082792.jpg

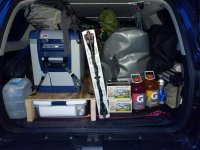
I was initially on the fence about the ARB fridge due to the cost, but there's nothing like pulling an ice cold beer out of the fridge at the end of a 400+ mile day without dealing with a cooler sloshing around.

It's completely a "nice to have," but man is it convenient.
 

Attachments

  • uploadfromtaptalk1468104082792.jpg
    uploadfromtaptalk1468104082792.jpg
    129.8 KB · Views: 261
Last edited:
Members online

Forum statistics

Threads
278,317
Messages
3,554,128
Members
248,016
Latest member
Advally Service

Trending content

Back
Top