Carpet removal and MLV install help request

DreamsOfDirt

New member
I ordered 8 sheets of Luxury Liner Pro (mass loaded vinyl and closed cell foam) and after searching the forum, reading several posts, and watching a few Youtube videos I'm putting in a final call for install tips, tricks, and resource recommendations on:

  • Pulling the carpet (order of operations, watch outs etc)
  • Removing the center console trim (where to start, watch outs, etc)
  • Installing the MLV (How close to go to the edge, fitment, direction of layout, things to avoid, etc)

My plan is to install MLV/CCF in all the doors and on the floor, leveraging Velcro to attach, allowing removal as needed in the future. *note, I've already installed sound skins CDL in the doors and will apply to the floor before putting the the LLP.

While I can pull a door panel in about 6 minutes now, I haven't pulled any other panels in the truck or the carpet and I'd appreciate any suggestions on how to make the job easier. From other posts, including one by LiquidMantis, I basically understand pulling the carpet as: disconnect the battery, pull the seats, console, sill trim, and kick panels. The carpet is held in with some velcro against the firewall and plastic stretchers that clip into retaining clips in the sills. Thoughts on additional steps or watch outs would be great as well.
 
Register to hide this ad
I remember following a few youtube videos and pictures on here when removing the rear carpet to add CDL tiles, but I can't point you to exactly what I used as I don't actually remember.

Just some general tips:
1. Unhook the battery before removing the seats or any other electronic plugs
2. Bag and Tag everything you can within reason.
3. Take reference pictures of stuff with your phone for re-installation (Or making a DIY post here :p )
 
I ordered 8 sheets of Luxury Liner Pro (mass loaded vinyl and closed cell foam) and after searching the forum, reading several posts, and watching a few Youtube videos I'm putting in a final call for install tips, tricks, and resource recommendations on:

  • Pulling the carpet (order of operations, watch outs etc)
  • Removing the center console trim (where to start, watch outs, etc)
  • Installing the MLV (How close to go to the edge, fitment, direction of layout, things to avoid, etc)

My plan is to install MLV/CCF in all the doors and on the floor, leveraging Velcro to attach, allowing removal as needed in the future. *note, I've already installed sound skins CDL in the doors and will apply to the floor before putting the the LLP.

While I can pull a door panel in about 6 minutes now, I haven't pulled any other panels in the truck or the carpet and I'd appreciate any suggestions on how to make the job easier. From other posts, including one by LiquidMantis, I basically understand pulling the carpet as: disconnect the battery, pull the seats, console, sill trim, and kick panels. The carpet is held in with some velcro against the firewall and plastic stretchers that clip into retaining clips in the sills. Thoughts on additional steps or watch outs would be great as well.

Be careful with the thickness of Luxury Liner Pro in the door panels. I ordered enough CDL tiles and Luxury Liner Pro to do all my doors and stopped after one door to think this through a bit more. A couple thoughts after my install... LLP is very thick and you will definitely run into problems with getting the door panel to fit back on there. That DOESN'T mean it won't work because believe me - I made it work. You'll have to cut more away than you'd like, surprisingly so in the middle of the panel where your vapor barrier is. I had to cut a hole (in my LLP) in the middle of the vapor barrier area because I didn't think it was going to push anything too far back into where the window stores when rolled down and I was wrong and put a nice scratch into the window. Get additional clips for the re-installation. As you're test fitting (and even just generally over time) the clips lose their 'bite' and it helps greatly to have some fresh clips, especially given the size of LLP. This is a lot of random advice but feel free to PM with any questions as I just used this product to do the same thing very recently. I want to do my floors as well so I am excited to see your progress and any tips with that aspect of this project I can gleam any info about!
 
How much of an overall noise difference did just the doors make?

Applying the SoundSkins CDL to the doors reduced the rattle in the speakers, improved the sound, and gave the doors a nice solid sound/feel. There was no noise reduction -- that's where the MLV / Luxury Liner comes in. I'll keep you posted.
 
It may be too thick for the floors. I use CCF and Radiant Barrier and couldn't put back any of the covers for the seat bolts.

For the doors, I found that if you lay it it the door panel and cut to fit for that, it is much easier that trying to cut to fit on the actual door itself.
You will want to stay within the boundaries of the panel clips. Going around them may not allow the door panel to go back on.

Take care when removing the rear quarter panels near the back seats. The areas where the reclining mechanism and seat belts are is hard to work around. You may have issues getting those panels back on if you do the wheel wells. I found that it pushed the panels out a bit and made putting in the rear floor pan panels a challenge.

Remove the foam blocks on the back side of the front door panels. You may need to add some padding to those spots, but you will never get the panel back on if you leave them on.
 
It may be too thick for the floors. I use CCF and Radiant Barrier and couldn't put back any of the covers for the seat bolts.

For the doors, I found that if you lay it it the door panel and cut to fit for that, it is much easier that trying to cut to fit on the actual door itself.
You will want to stay within the boundaries of the panel clips. Going around them may not allow the door panel to go back on.

Take care when removing the rear quarter panels near the back seats. The areas where the reclining mechanism and seat belts are is hard to work around. You may have issues getting those panels back on if you do the wheel wells. I found that it pushed the panels out a bit and made putting in the rear floor pan panels a challenge.

Remove the foam blocks on the back side of the front door panels. You may need to add some padding to those spots, but you will never get the panel back on if you leave them on.

Tigger thank you for the specific tips! These are great. I have to admit I had your build thread up last night reading through things.

Thanks again!
 
This is my COVID-19 project while I work from home. Mostly weekends, but a little here and there during the day, when work is light.

I started with the doors and hatch. CLD (Dynamat Xtreme) at 25% coverage, CCF and MLV. I will need to upgrade my hatch struts, but not a huge deal.

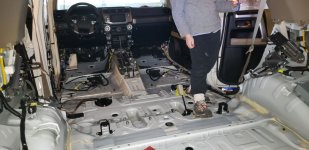
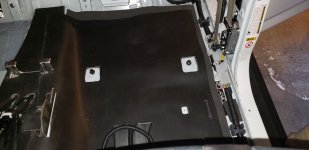
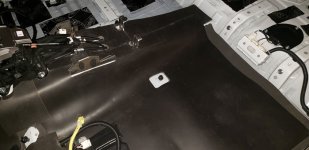
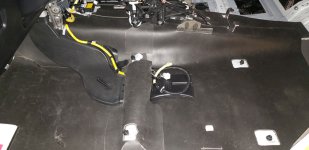
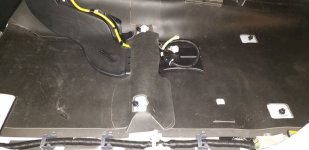
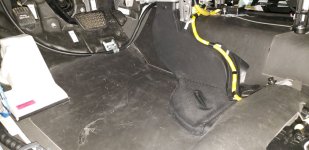
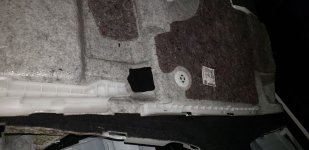
I then removed the entire interior panels, floor, carpet, center console, seats, and finally the headliner.
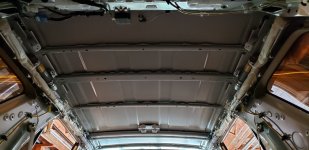
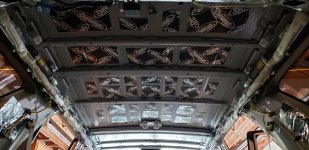
I did CLD (again 25% coverage) and 1" hydrophobic melamine foam on the roof and put the headliner back on.

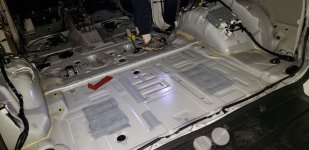
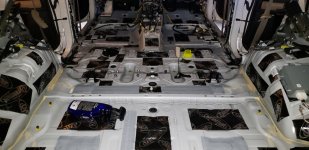
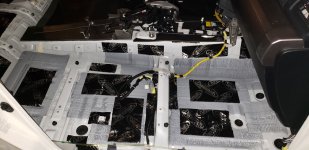
Floors have CLD (again 25% coverage).
Right now, I'm working on the floors starting from the driver side with CCF and MLV.

I can post some pics later if people are interested.
 
This is my COVID-19 project while I work from home. Mostly weekends, but a little here and there during the day, when work is light.

I started with the doors and hatch. CLD (Dynamat Xtreme) at 25% coverage, CCF and MLV. I will need to upgrade my hatch struts, but not a huge deal.

I then removed the entire interior panels, floor, carpet, center console, seats, and finally the headliner.
I did CLD (again 25% coverage) and 1" hydrophobic melamine foam on the roof and put the headliner back on.

Floors have CLD (again 25% coverage).
Right now, I'm working on the floors starting from the driver side with CCF and MLV.

I can post some pics later if people are interested.

That would be great if you could. Any issues you ran into?
 
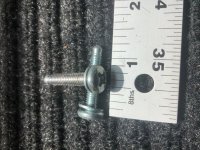
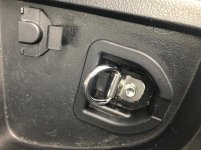
If you run into a couple bolts that look like these in back area would you let me know where they belong? They seem like they were maybe important.
 

Attachments

  • IMG_9323.jpg
    IMG_9323.jpg
    139.7 KB · Views: 817
CDL 25% coverage since it doesn’t necessarily block sound. Can also be added strategically to door panels to give it a more substantial premium feeling. MLV to block sound. Good luck

Another cool product to keep weight down and future repairs accessible is 3M thinsulate (3M™ Thinsulate™ Acoustic Insulation SM600L | 3M United States). It’s used in a lot of vehicles to reduce NVH while maintaining weight reduction/mpg goals. I’ve seen it either glued or sonic bonded to almost any panel.
 
Most of what I'm applying is based on the information gleaned from the Sound Deadener Showdown (SDS) website, which still exists, but no longer selling anything. I had to source everything myself. Not a big deal.

One thing I wrestled with was SDS and other websites say it is a waste of time to put CDLs on top of the factory deadener. I disagree I still followed their formula for 25% coverage and disregarded the omission of CDL on top of factory deadener.

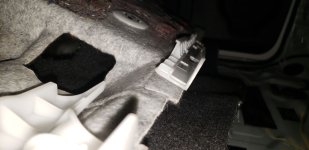
The other part that is kind of a bummer to OCD people like me is that there is no 'perfection' with this process. In fact, there's a lot of give-and-take and mostly compromise. For instance, the carpet has these plastic rails that have supports that extend inward from the sills about an inch from the clips. That meant I would have less coverage than I wanted with the MLV. I had to cut an inch off to allow for proper fitment of the carpet.

Also, you will have to do A LOT of 'test fitting' of your parts with the factory parts if you want it all to go back together again like factory. That means pulling the carpet out, fitting and trimming your CCF/MLF, putting the carpet back, pulling it out, adjusting CCF/MLF again, putting the carpet back again.

For the driver footwell, I had to remove MLV from under the left styrofoam footrest and since the firewall already has factory MLV, adding CCF and MLV on top only made the factory carpet not fit correctly. So I cut out too.

Oh, and I had to make cutouts for the seat mounts, so I just traced the carpet holes so the seats would fit like factory. Test-fitted everything. Over and over.

Again, an exercise in what is 'good enough.'


Some pics here
 

Attachments

  • roof_blank.jpg
    roof_blank.jpg
    102.9 KB · Views: 644
  • roof_cdl.jpg
    roof_cdl.jpg
    95.6 KB · Views: 634
  • floor_blank1.jpg
    floor_blank1.jpg
    104.9 KB · Views: 711
  • floor_blank2.jpg
    floor_blank2.jpg
    100.1 KB · Views: 805
  • floor_cdl.jpg
    floor_cdl.jpg
    116.6 KB · Views: 604
  • passenger_floor_seat.jpg
    passenger_floor_seat.jpg
    114.4 KB · Views: 618
More pics
 

Attachments

  • driver_seat_bottom.jpg
    driver_seat_bottom.jpg
    75.7 KB · Views: 593
  • trans_tunnel_rear.jpg
    trans_tunnel_rear.jpg
    82.7 KB · Views: 584
  • driver_floor_seat_trans_tunnel.jpg
    driver_floor_seat_trans_tunnel.jpg
    85 KB · Views: 590
  • driver_door_sill.jpg
    driver_door_sill.jpg
    79.9 KB · Views: 582
  • driver_floor_pedals.jpg
    driver_floor_pedals.jpg
    102 KB · Views: 647
  • carpet_bottom1.jpg
    carpet_bottom1.jpg
    93.5 KB · Views: 587
  • carpet_track.jpg
    carpet_track.jpg
    76.3 KB · Views: 601
That’s impressive. Looks like a multi day project for sure! Have you put it all back together and seem a big difference in noise?

Multi-day for sure! [Un]fortunately thanks to COVID-19.

No, the pictures depict current status.

I just finished the 2/3rds of the trans tunnel and the driver-side floor. Next are the front passenger and last 1/3rd of the trans tunnel. That way, if I do have to go somewhere, I can at least have all airbags plugged in. The rest can stay disassembled if necessary.

Not sure about the legality of driving with interior parts removed, but I don't believe it would be illegal?
 

Members online

Forum statistics

Threads
278,309
Messages
3,554,066
Members
248,016
Latest member
Advally Service

Trending content

Back
Top