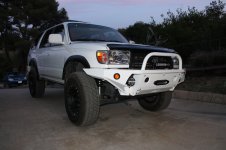
CBI front bumper install?

ARC

New member
Is there a detailed write up for installing a CBI front bumper on a 97-98? I am looking for info on the cutting and welding portion.
 
Register to hide this ad
You might want to contact CBI, if you haven't all ready...they are a super cool group of guys and should be willing to help.

**EDIT: I found this on their site, Bumper instal instructions** Which seems clearly unhelpful in your situation.

If its anything like the ARB you have to cut off the plates on the end of the frame and weld on a cap the size of the frame. It could very well be completely different, but that is what is needed on an ARB.


FYI, you are 9 more posts cooler then me :)
 
Last edited:
Yes their instructions are pretty dismal on the matter. I am sure I can figure it out once I get in there, was hoping someone already documented the experience to save me some grief.
 
Thanks, CBI provided me with plates, but they do not have the custom side plates like yours.

For what its worth, My Dad (the welder) said they were not really needed with a good solid weld. We used them though because they sent them.
 
They sent me the just the front plates as well. Mine were pre drilled unlike txbonds. I got mine within the last couple of months, so obviously they have changed things? One thing I did differently than txbonds was I cut the entire end cap off instead of just grinding down the edges. The holes on the bumper are elongated for some slight front to back adjustment, but on my test fits it was obvious I needed to cut them off. Even now the holes barely line up.

Just make sure you get someone to weld them on who knows what they are doing. Strong welds are key. I also had the weld go all the way around the perimeter of the frame. I'm not sure if txbonds did this or not? His was solid just welding the sides. I am also confident mine is solid as well (not saying either way is right or wrong, just pointing out differences due to circumstances).

I'll try to get some pics since I still havent done the final install of the bumper....Stock suspension doesn't like all that weight :-P
 
Last edited:
Yeah, mine was overkill. We welded up the brackets and then they were welded all the way around the perimeter of the side brackets and the face plates with a 220v arc welder. Those welds were done by someone with 40+ years of experience and will be there long after the 4runner has rusted and gone away. LOL :cowboy:

Oh, and I agree best bet is to probably cut off the factory end cap which is super thin and just weld the new 1/4" plate directly to the frame metal on all 4 sides.


They sent me the just the front plates as well. Mine were pre drilled unlike txbonds. I got mine within the last couple of months, so obviously they have changed things? One thing I did differently than txbonds was I cut the entire end cap off instead of just grinding down the edges. The holes on the bumper are elongated for some slight front to back adjustment, but on my test fits it was obvious I needed to cut them off. Even now the holes barely line up.

Just make sure you get someone to weld them on who knows what they are doing. Strong welds are key. I also had the weld go all the way around the perimeter of the frame. I'm not sure if txbonds did this or not? His was solid just welding the sides. I am also confident mine is solid as well (not saying either way is right or wrong, just pointing out differences due to circumstances).

I'll try to get some pics since I still havent done the final install of the bumper....Stock suspension doesn't like all that weight :-P

 
Last edited:
They sent me the just the front plates as well. Mine were pre drilled unlike txbonds. I got mine within the last couple of months, so obviously they have changed things? One thing I did differently than txbonds was I cut the entire end cap off instead of just grinding down the edges. The holes on the bumper are elongated for some slight front to back adjustment, but on my test fits it was obvious I needed to cut them off. Even now the holes barely line up.

Just make sure you get someone to weld them on who knows what they are doing. Strong welds are key. I also had the weld go all the way around the perimeter of the frame. I'm not sure if txbonds did this or not? His was solid just welding the sides. I am also confident mine is solid as well (not saying either way is right or wrong, just pointing out differences due to circumstances).

I'll try to get some pics since I still havent done the final install of the bumper....Stock suspension doesn't like all that weight :-P

Do you happen to have any pics of the plates mounted to the frame? I am curious about how to know where to align the plates on the frame.
 
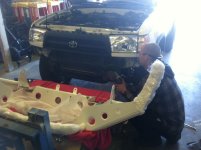
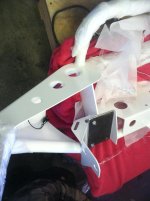
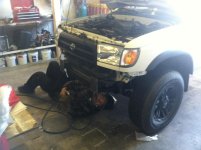
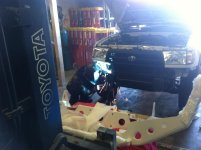
Arc,Heres some of the steps i took when installing the CBI hybrid ,mind you this write up is just for reference purpose on what i did to my personal vehicle ,so what anyone does to their or any other vehicle after reading this is not my responsibility and i accept no way any liability . how you do a bumper install is entirely up to you and also your responsibility .i didn't have the CBI supplied plates or instructions but its pretty straight forward so I went ahead and made my own plates out of 1/4 " . from i understood some of the later model 3 gens didn't need plates (i think if you had the "fat lipped" bumper factory mounts would work )but since mine did here are the steps taken Hopefully my pics will be in order for you to understand the process .first step : initial prep and mock up,for this step you will have needed to remove your factory bumper and expose the areas where the plates will be prepped (paint removed and grind )and then ultimately welded .it wasn't necessary for me to cut the end of the frame i welded my plates right to the end ,but i did end up having to elongate the rear mount hole because of this .it will be at this point when you will also want to mock-up your bumper (test fit).i left the factory shipping material on while doing this step so if you run into any fitment issues it will be during this step , any parts of the bumper you think might make contact or scratch your paint ,should be protected . the most important part of the mock-up process is to go ahead and bolt up the plates before mock-up fitment is done so they can be tack welded to the frame while in place .at this point you are using the side mounts go ahead and bolt up the bumper (this is a two man process) bumper fitment was spot on, and went on pretty smooth as things lined up nicely ,with just a tad of bumper paint grinding to do as well as a slight elongation of the rear holes for mine ,just an FYI of what you might be up against
 

Attachments

  • IMG_2200.jpg
    IMG_2200.jpg
    127.9 KB · Views: 1,330
  • IMG_2202.jpg
    IMG_2202.jpg
    135.1 KB · Views: 1,220
  • IMG_2206.jpg
    IMG_2206.jpg
    133.4 KB · Views: 1,326
Last edited:
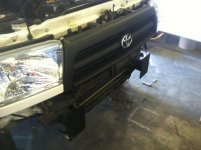
Once mocked-up with the bumper in place its now time to determine if the placement of the welded items or plates are good to be tack welded on. it was at this point when we were looking for the side holes lining up and that the plates sat square to the frame .go ahead and tack weld the plates .after tack welding you will want to remove the bumper and finish welding all the way around your plates making sure they stay square to the frame .
 

Attachments

  • IMG_2208.jpg
    IMG_2208.jpg
    135.3 KB · Views: 1,277
  • IMG_2211.jpg
    IMG_2211.jpg
    133.4 KB · Views: 1,266
  • IMG_2213.jpg
    IMG_2213.jpg
    131.6 KB · Views: 1,270
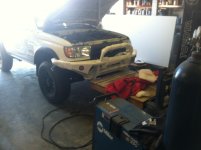
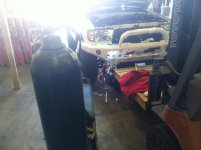
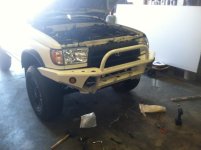
After all welded up and painted you are now ready to do your final install .at this point if you have wiring that needs to be done it should be all finished as its much easier to work on at this point .Now its time for the time for the final bumper placement,this will be your final step. Bolt it up and Enjoy !
 

Attachments

  • IMG_2216.jpg
    IMG_2216.jpg
    134.5 KB · Views: 1,260
  • IMG_2218.jpg
    IMG_2218.jpg
    132.4 KB · Views: 2,853
  • IMG_6434.jpg
    IMG_6434.jpg
    128.3 KB · Views: 5,003
rubbertoe's process is almost exaclty how I did mine as well. I cut the end caps off, then test fit the bumper with the plates bolted on. I don't own a welder, so at this point instead of tacking the plates on (which I would have preferred to do) I drew an outline of the frame with a sharpie. Took the bumper off and waited until my buddy had time to weld them on. Tacked them on, made sure everything was square and then did the final welds. I went home and immediately did another test fit and luckily everything lined right up.
 

Members online

Forum statistics

Threads
278,307
Messages
3,554,056
Members
248,016
Latest member
Advally Service

Trending content

Back
Top