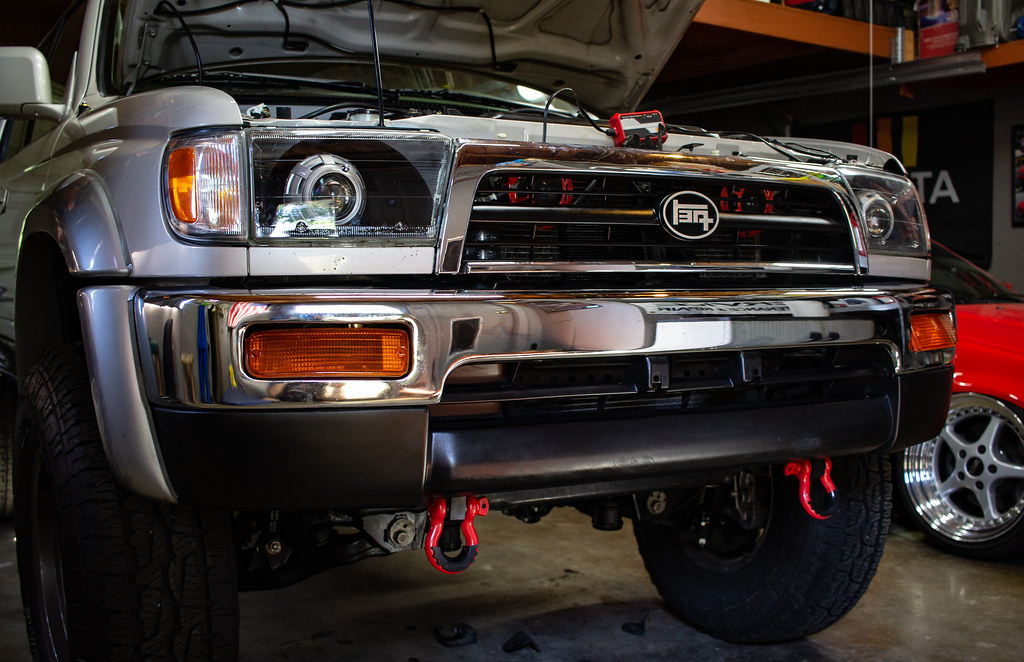
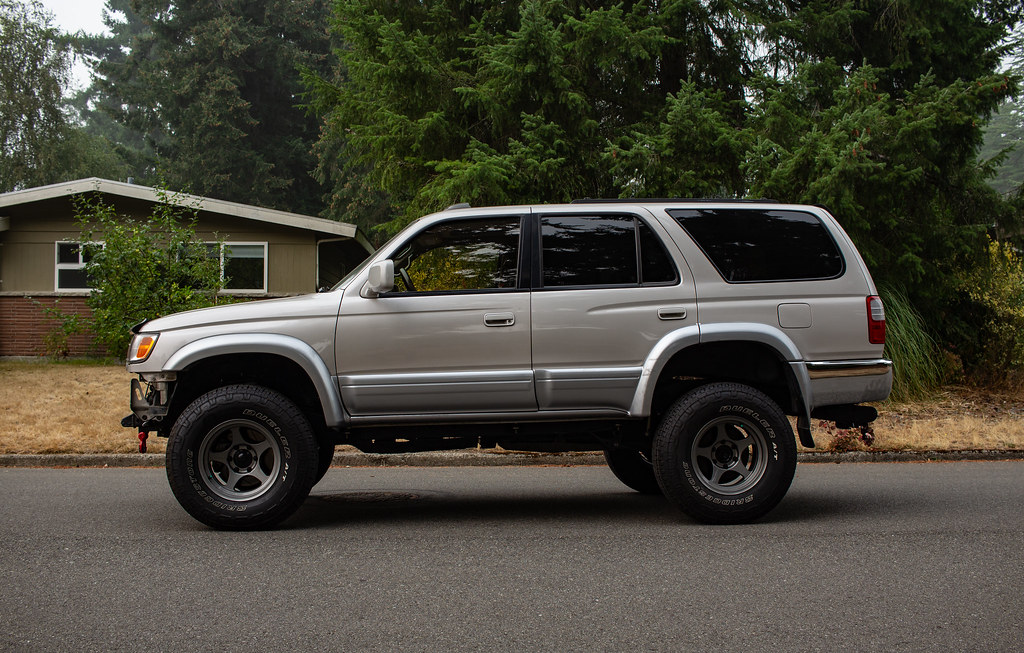
CBlock's 98 Limited Build/Maintenance Thread

Mind giving the make and model of the ozone machine? I've been considering buying one of these but can never trust the reviews on amazon so I'd like to pick one up that I know someone else has used successfully in the past. We live on the gulf coast and my truck definitely gets a little rank after some trips to the beach with the boys :D
 
:dancin::dancin::dancin::dancin::dancin::dancin::dancin::dancin::dancin:
Looks good.

Thanks, almost there! I'm getting tired of it taking up space and wife wants her garage spot back, so I'm motivated to get it done.

Mind giving the make and model of the ozone machine? I've been considering buying one of these but can never trust the reviews on amazon so I'd like to pick one up that I know someone else has used successfully in the past. We live on the gulf coast and my truck definitely gets a little rank after some trips to the beach with the boys :D

This is the one. A word of caution, these Ozone machine's have their own unique smell that takes some time to dissipate.

Amazon.com: Enerzen Commercial Ozone Generator Industrial O3 Air Purifier Deodorizer Sterilizer, 6, 000mg - Silver: Kitchen & Dining
 
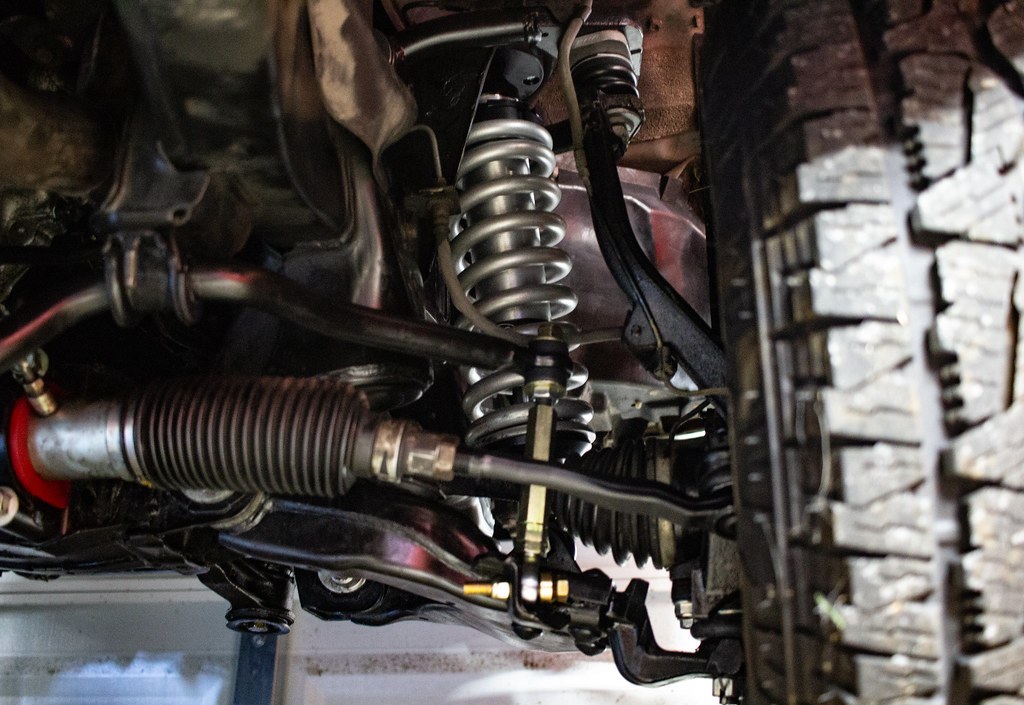
I got my front end completely finished this weekend. I had the tie rods and sway bar left to install. Also went through and did a final torque of everything and greased the UBJ's.

So in this picture I have all of the following installed:
-SPC upper control arms and bushings
-SPC upper ball joints
-Whiteline LCA bushings
-OEM LBJ's and new bolts
-OEM OTR's
-Energy Suspension steering rack bushings
-Energy Suspension sway bar bushings
-Mstudt extended sway bar end links
-Radflo 2.5 coilovers

I'm not 100% confident I installed the sway bar end links correct. If [MENTION=98153]MStudt[/MENTION] happens to see this, or anyone else that knows more than me, mind letting me know if they look correct? I feel like the bottom should be spaced out more.

50157850007_b49cb2934e_b.jpg


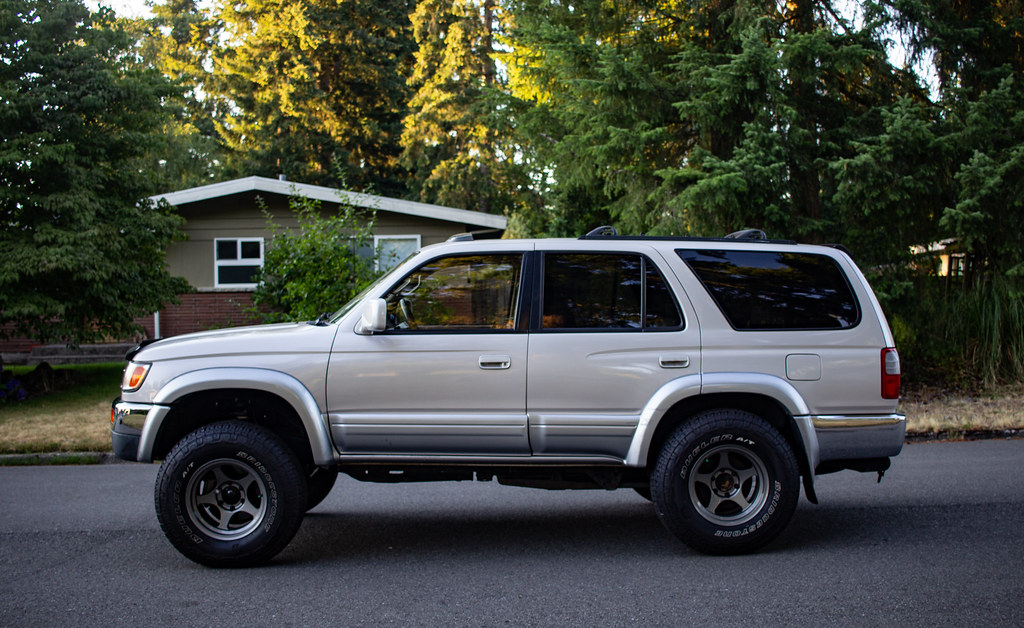
I think the coilovers are cranked pretty high. I haven't messed with the height but I will when the rear is finished. The "Cali Lean" look.

50157060873_626703025b_b.jpg


50157849102_a6c10603a8_b.jpg


And flipped it around in the garage last night and I am going to start the rear install this week.

50157847442_ef5c3cebbe_b.jpg
 
Last edited:
I got my front end completely finished this weekend. I had the tie rods and sway bar left to install. Also went through and did a final torque of everything and greased the UBJ's.

I'm not 100% confident I installed the sway bar end links correct. If [MENTION=98153]MStudt[/MENTION] happens to see this, or anyone else that knows more than me, mind letting me know if they look correct? I feel like the bottom should be spaced out more.

The yellow cone spacer needs to be placed between the LCA and the heim joint. Other than that they look good.

Mike
 
Okay, so I've dove into the rear end and am getting fairly close to wrapping this suspension all up.

I'll start with a "before" picture:

50188260773_9cc6949da4_b.jpg


Pressed out all 8 of the rear control arm bushings. These all looked pretty worn and tired.

50188260643_fe76e2ddc7_b.jpg


Repainted everything and got the new bushings in:

50187633048_c8f3c0ebc6_b.jpg


I've been cleaning up all of my bolts I'm reusing on my bench grinder. Remembered to snap a pic this time.

Before:

50188176916_a001ef83b3_b.jpg


Not quite new but definitely better:

50188177726_4a81984436_b.jpg


I took the opportunity to give the frame and rear end housing a good scrub down and clean, and proceeded to paint them with some POR 15. Extended bump stops also installed.

50188432817_2290b4e012_b.jpg


50188432222_75cc2cc46d_b.jpg


Next up is installing the 4 link so I can finally swap the springs and shocks. Then panhard bar, sway bar bushings and endlinks, diff breather, parking brake bracket, and extended brake line. Then done?!? I think. :)
 
Last edited:
I was out of town last weekend but made some progress this weekend.

Got my 4 links installed, the extended rear brake line and the E-brake relocation bracket in. Also got my rear shocks out. After about 5 minutes of screwing around and realizing it was going to be a PIA, I cut them out with my angle grinder and had both sides out in under 10 minutes lol

50234982826_a5811448f5_b.jpg


I would have had the springs and shocks in but I realized I did not have the rear shock mount bushings and I din't want to reuse the old crusty ones. Next weekend I will have this project finished and out of my garage.

I grabbed a pic of all the old suspension and parts that will not be getting re-installed. (minus the brake line and panhard bar)

50234328848_49d85d4499_b.jpg


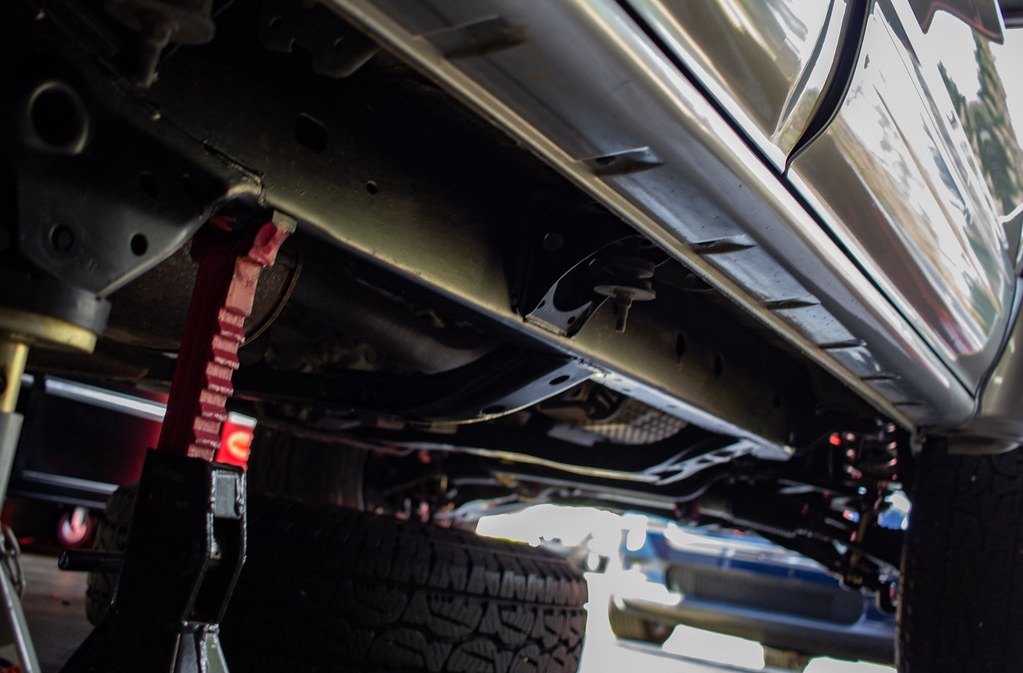
I've been using a 1.5 ton jack for about the last 10 years and it's served me well. After screwing around with too many wood blocks I couldn't get the 4runner as high as I wanted so upgrade time. This extended 3 ton jack is awesome, should have bought one a long time ago.

50234983601_4cd969b24d_b.jpg


I also ordered the EIMKeith panhard correction brackets and 4x4 Innovation rock sliders. Will have that welded up and then it will be alignment time. Pretty sure I will be ordering new tires too. These 265/75's aren't going to cut it. I'm looking at Nitto Terra Graplers in either 285 or 295's as they are the only D load tire I can find in the sizes I want. Anyone have experience with them?
 
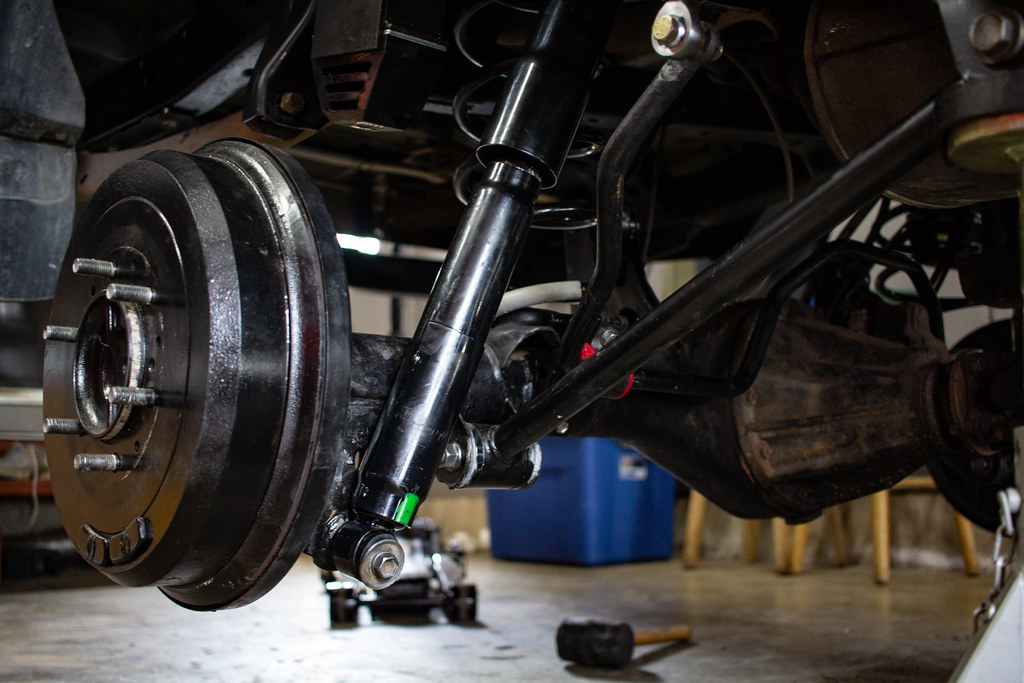
This weekend I just about finished the back. Installed the following:

-Rear sway bar extension brackets
-New sway bar bushings
-@mstudt extended sway bar end links
-Rear shocks
-Rear springs
-Rear shock bushings
-extended diff breather

I have an EIM Keith pan hard correction kit, and also an adjustable pan hard bar. I need to read more, but does anyone recommend using one or the other, or both? I'm leaning towards doing both.

50261144862_f7083930ce_b.jpg


50260952761_b7fb273cb0_b.jpg


Finally pulled it out of the garage, drove it around the block a few times, and snapped a few pictures. I need to mess around and try and level it out some, or pull the trigger on a new rear bumper and add some weight.

50260296833_c4fb5b20f9_b.jpg


50260295568_92e6b0f9b0_b.jpg


50261145527_033e6bd5be_b.jpg


50260955346_01890f2c2f_b.jpg
 
Last edited:
You shouldn’t need the adjustable panhard bar with the PCK. In my opinion it would add more complexity than its worth unless you set the bar to stock length for better bushing quality alone.
 
Last edited:
I'm trying to take advantage of my garage time with the 4runner. This weekend I did the big three and built a platform for a Seabus accessory fuse holder. Nothing fancy but it works and clears the hood fine.

50288241107_c9dce0bee5_b.jpg


Both of my bumpers were dented and looking pretty shabby so I swapped those out as well. Will hold me over until I get to the point of adding some plated bumpers. Don't mind the fitment, I'll sort that out after I get my 1" body lift. I also added some shackle mounts and shackles as well.

50287413293_68290ae4d8_b.jpg


And finally, painted the emblems black and got rid of the last of the gold. Also put in a new backup camera/plate frame.

50287413828_a0f131263b_b.jpg


Sliders should get here this week. Once I get the body lift on I'll get those mounted, then it will be alignment time so I can drive this damn thing!
 
Last edited:
Sliders came today! I went with the DOM w/kickout from 4x4 Innovations.

Savage skids get here Friday.

I decided to do a 1" body lift and I bought new poly body mounts to throw in at the same time. Unfortunately the body lift won't be here until after this next weekend...that's okay. I need a weekend off from this thing. Getting close tho!

50299951711_0f7868a423_b.jpg


50300106292_cda39119f7_b.jpg


I'm pretty sure I'm going to coat them in black Steel-It...but not totally decided.

 
I finished up my wiring project with some new batter terminals from SDHQ Offroad. It took me a while to find a post with a top terminal and these are really nice. Here is a link if anyone is looking:

Terminals

50326831536_c30dca1025_b.jpg


50326169693_634e82d24f_b.jpg


The Savage skid plates finally arrived after about an 8 week lead time. Now to decide on what to paint them with...

50324687633_d8733de0bf_b.jpg


Finally, I am getting my pck and sliders welded on the 30th. In the mean time I will be installing a 1" body lift and all new body mounts. Cheers.
 
Sliders came today! I went with the DOM w/kickout from 4x4 Innovations.

Savage skids get here Friday.

I decided to do a 1" body lift and I bought new poly body mounts to throw in at the same time. Unfortunately the body lift won't be here until after this next weekend...that's okay. I need a weekend off from this thing. Getting close tho!

50299951711_0f7868a423_b.jpg


50300106292_cda39119f7_b.jpg


I'm pretty sure I'm going to coat them in black Steel-It...but not totally decided.

I’m definitely using steel-it from now on, worked really nice on my diy roof rack. It’s a bit expensive but you save on primer/clear coat plus it dries super fast.
 
I’m definitely using steel-it from now on, worked really nice on my diy roof rack. It’s a bit expensive but you save on primer/clear coat plus it dries super fast.

Good to hear, thanks for the head's up! You are the first person I've heard from with actual experience using it. I've been curious about it for a while. Killer job on the roof rack btw!
 
Good to hear, thanks for the head's up! You are the first person I've heard from with actual experience using it. I've been curious about it for a while. Killer job on the roof rack btw!

Thanks man. After seeing and talking to a few pro offroad racing guys using it I was pretty much sold.
 
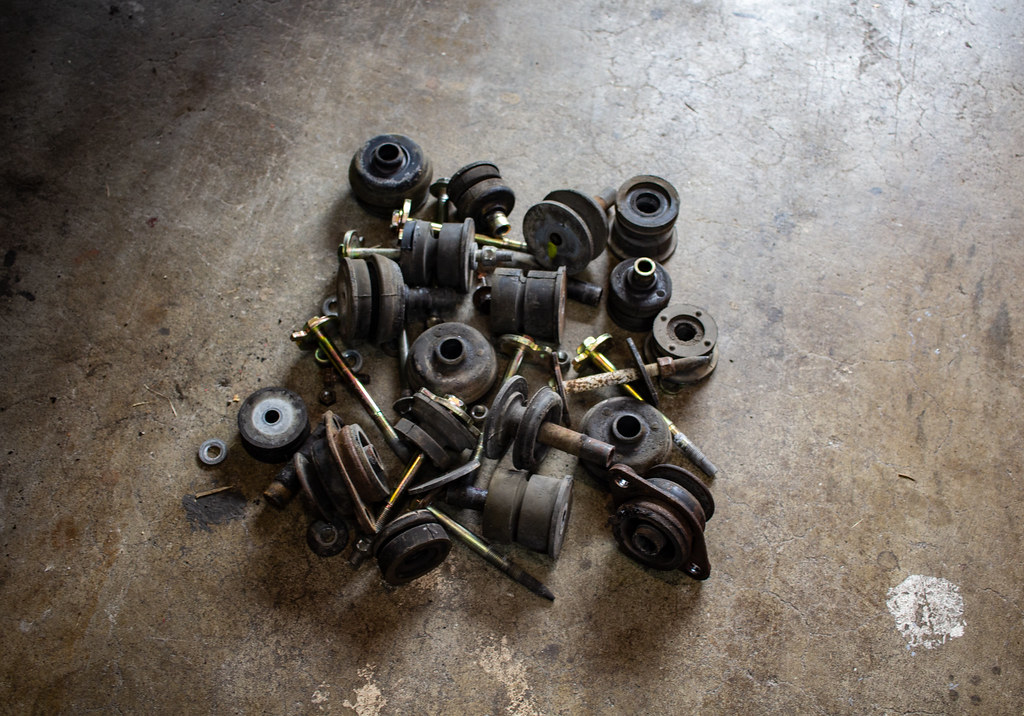
This weekend I got the 1" body lift installed and Energy Suspension poly body mount bushings.

Everything went mostly smooth, except I stripped one of the rear position 5 mounting bolts. Its tough to get any leverage or a socket up there, and stripped it with a 12 point wrench :( So I spent a couple hours screwing around and drilling it out.
Also, my steering is really heavy and my gear indicator is messed up. Luckily, they sound like easy adjustments to fix.

All the old bushings:

50338957063_03fcdc4837_b.jpg


Nice and fesh:

50339647756_ea09c563ff_b.jpg


Pulled it out of the garage for the second time since June lol

50338957593_95d05139ed_b.jpg


And this rake will need to be addressed. I like some rake but it's a bit too much for me.

50339646611_e9f869c22f_b.jpg


Next will be getting the front bumper adjusted and mounted.

50339165353_09b05507a0_b.jpg
 
Last edited:
This weekend I got the 1" body lift installed and Energy Suspension poly body mount bushings.

Looking good! Sorry to hear about your bad luck, but at least you were able to drill it out. I've been considering doing the same to mine, but haven't found any good reviews/comparisons between oem body mount bushings and energy suspensions. I'd really appreciate your thoughts once you get some miles on them
 
Looking good! Sorry to hear about your bad luck, but at least you were able to drill it out. I've been considering doing the same to mine, but haven't found any good reviews/comparisons between oem body mount bushings and energy suspensions. I'd really appreciate your thoughts once you get some miles on them

Thanks Bad Luck, and will do! I probably wouldn't have gone through the trouble if I wasn't doing the body lift, but it's a good "while you are in there" thing to do at the same time.
 

Members online

Forum statistics

Threads
278,310
Messages
3,554,080
Members
248,016
Latest member
Advally Service

Trending content

Back
Top