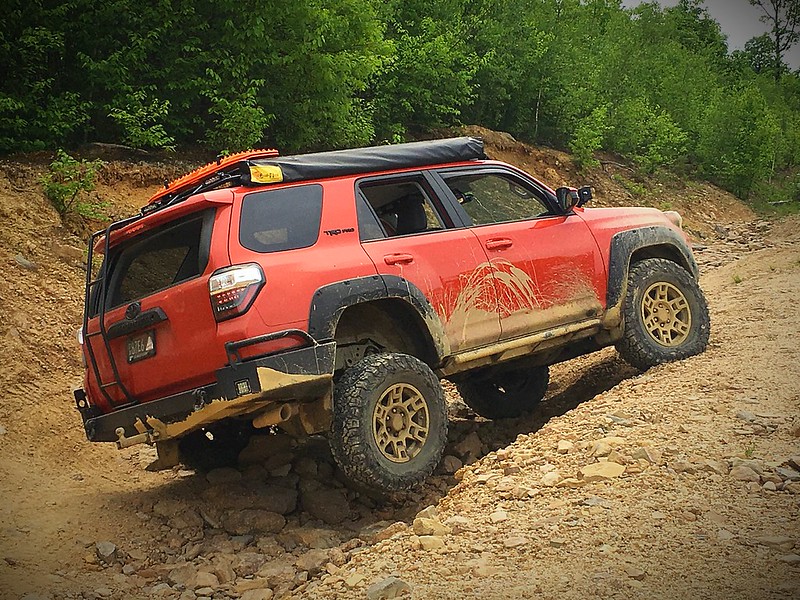
Chudiddy- Inferno TRD PRO Build

Do you have a picture of how and where you fed the wiring for the roof rack light bars, I am trying to get an idea before purchasing the Gobi rack what is involved in doing so.

The Gobi roof rack comes pre-wired on each side with openings at the 4 corners for you to tap into. For the LED light bar in the front, I ran it down the drivers side under the windshield molding. I cut the weatherstripping away from the wires and ran those down the channel. Makes for a nice, clean install. The rear lights are run through the wire loom that feeds into the rear hatch area. I believe I posted some pics a few pages back in this thread.

Here is a pic of the wires running down the drivers side windshield.
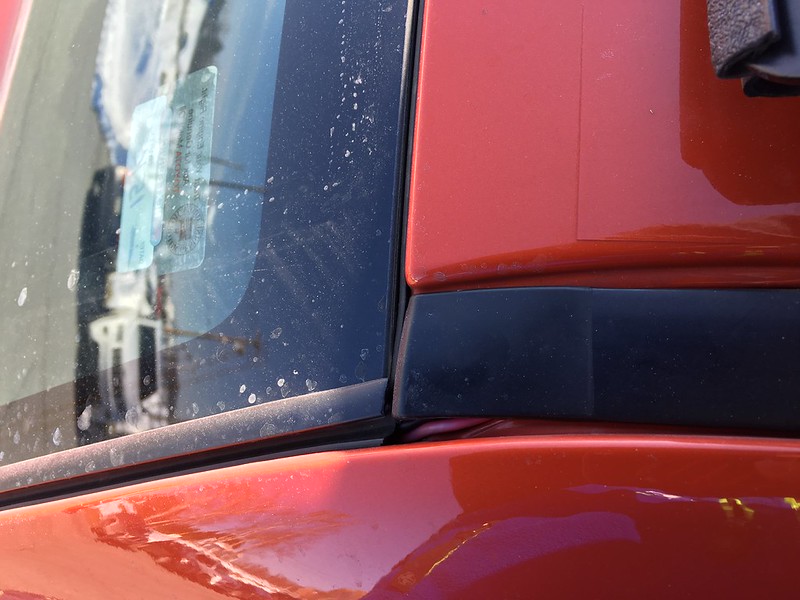
24304947909_bdf2d4216d_c.jpg
 
----------------------------------------------------------------------------------
1 Pair of Rigid Industries D Series Midnight Edition Spot- Used for about 3 weeks. Comes in original box with brand new harness- SOLD

Link: D-Series Midnight Edition Pair Surface White Black | Rigid Industries
----------------------------------------------------------------------------------

What was your reasoning for selling these? I kinda want to get them for my foglight replacements but im worried about how bright they will be and not being able to use them while driving without blinding everyone else. I cant find anything out there on how bright these midnight spots are.
 
What was your reasoning for selling these? I kinda want to get them for my foglight replacements but im worried about how bright they will be and not being able to use them while driving without blinding everyone else. I cant find anything out there on how bright these midnight spots are.

For my application they were useless. The beam was so concentrated, it did nothing as reverse lights. These are spots so the beam will be long and narrow. If you are wanting fog lights then I suggest driving or wide pattern. See diagram above.


The Gobi roof rack comes pre-wired on each side with openings at the 4 corners for you to tap into. For the LED light bar in the front, I ran it down the drivers side under the windshield molding. I cut the weatherstripping away from the wires and ran those down the channel. Makes for a nice, clean install. The rear lights are run through the wire loom that feeds into the rear hatch area. I believe I posted some pics a few pages back in this thread.


Here is a pic of the wires running down the drivers side windshield.


24304947909_bdf2d4216d_c.jpg


Just added a 40" Rigid Radiance to my Gobi and you saved me a hell of a lot of wiring with this little tip. Not having to go all the way to the back of the rack just to have it come all the way back to the hood would have sucked. I got a 14g wire tucked in there and luckily I'm getting a good ground off the rack so I'm up and running.

Gorgeous build by the way, by far one of my favorite builds and great write ups!!
 
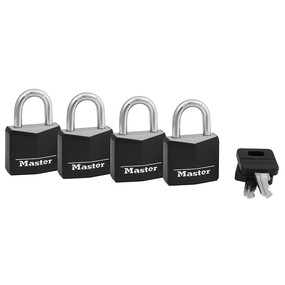
A coil style bike lock works really well and if it's a combo style you don't need to deal with unlocking 4 locks. Especially in a pinch on the trail.
 

<center>Did this require any DRASTIC cutting to fit or was it simply plug and play?

I'll retract my comment, ended up going through the last 30 pages to find a more descriptive write up. Great work, looking forward to seeing future adventures with this beautiful truck.<center/>
 
Last edited:
Ok so since the most common question regarding my truck has been the 3 Amber Lights in my grill, I thought I would do a quick, simple write up on what was used, how they're mounted, and how they're wired. Its actually more simple then what people think.

First off these are the Amber Marker lights I chose:


Amazon.com: Grand General 77650 Amber Thin Line 6-LED Marker and Clearance Sealed Light: Automotive

The next part pertains to installs for the TRD Pro grill: What we ended up doing was trimming the plastic ribs that extended off the main body of each marker light. That way they fit in each opening of the TRD PRO grill. A bench grinder was used to do this although i'm sure a dremel would work as well.

Ok next is the hardest part:


The marker lights are simply attached to the grill using zip ties. Simple, yet effective. That's it!!

As far as wiring goes, the marker lights are wired in parallel. Take all the red (positive +) from each marker lights and wire them together. Do the same thing with all the black (negative -) wires and wire them together. Then take each red and black wire and tap in to the corresponding (+) and (-) parking light wires. Solder them up, wrap them in electrical tape, and VOILA...you're done.

You do not want to wire these LED's in series, there will be a drop in voltage if you do this and won't be as bright.

Enjoy!![/CENTER]

Really wanted to do this, but realized that the Limited grill has the Toyota emblem in the way that would impede adding 3 lights....ugh
 
**5/26/2016 Update**

Gonna finally get this rig into action this weekend at Rausch Creek. Headed there Sunday to hit up some trails. Expect some cool pictures and videos. Nothing else to report other than I'm excited to hit the trails.​
 
Scroll... Scroll... Scroll... See your rig... Damn!!! Good lookin ride Chuddidy


Sent from my iPhone using Tapatalk
 
Chu,

Love this build! Read through it so many times and it has much of the mods that i would like!

Curious about the D2 fogs. Been on the fence about the Amber/White for a while and cant pull the trigger. do you have a pic that you could post? Would be appreciated.

Have you seen the white D2's and compared? Just curious from a projection standpoint. I'm doing the marker mod for sure, and think this color schema would fit nicely with it, but don't want to make decision based on this
 
Chu,

Love this build! Read through it so many times and it has much of the mods that i would like!

Curious about the D2 fogs. Been on the fence about the Amber/White for a while and cant pull the trigger. do you have a pic that you could post? Would be appreciated.

Have you seen the white D2's and compared? Just curious from a projection standpoint. I'm doing the marker mod for sure, and think this color schema would fit nicely with it, but don't want to make decision based on this

Thanks for the comments. I went with the Amber fogs because my truck is orange and it matches quite nicely with the amber turn signals and marker lights in the grill. Plus I like the contrast of the orange rather than the white. For fog purposes, the amber cuts through it better then the white does. Hope that helps.

Ill try and find a pic for you and post it up.
 
Thanks for the comments. I went with the Amber fogs because my truck is orange and it matches quite nicely with the amber turn signals and marker lights in the grill. Plus I like the contrast of the orange rather than the white. For fog purposes, the amber cuts through it better then the white does. Hope that helps.

Ill try and find a pic for you and post it up.

Appreciate you digging out a pic. One last Question. For your D2's did you run a relay?

I show the factory bulb as an Osram H16 @12V,19W thats about 1.58A, The specs on the D2's look to be 2.5A a delta of about 1A im guessing you went the relay? I wanted to do something quick and easy like a direct wire but doesn't look like circuitry was designed for it. Any thoughts on this?
 
HAHA, def the best truck I've ever owned but my S6 is my absolute favorite car that I have ever owned. I get this ear to ear grin every time I get in that car.

Yea my buddy just picked up a Sepang Blue one like yours and it is a great car. Compliments his 9 sec. GT-R nicely...
 
Got the Marker's in!

Got the markers in today! thanks for the write-up on those. I tried running them on the outside at first, but the way you had it setup on the inside was much cleaner. Went and got a dremel and really happy with the flush look! Great idea and thanks again.

Just ran them to battery for a quick test. Waiting to finish the install after these come in: http://www.amazon.com/Posi-tap-Conn...dp/B00389R8KU?ie=UTF8&*Version*=1&*entries*=0

and i get my RIGID D2'S in(bumper cover will need to come off). For others wanting to do this mod. It looks like you can access the parking lights by pushing back on the rubber weather stripping gasket(where the hood meets the body) and you will see the connector for
]
 
Last edited:
Curious

Chu,

Im curious, if someone walked into your toyota dealership and said I have to have that inferno TRDP outside.. How much $ would it take to part ways lol?
 

Members online

No members online now.

Forum statistics

Threads
278,316
Messages
3,554,120
Members
248,016
Latest member
Advally Service

Trending content

Back
Top