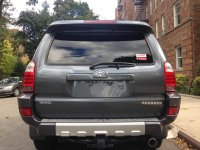
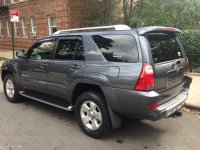
CityBullies 4th Gen Build Out

amartin4410

New member
The Basics:

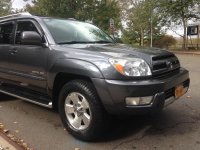
2004 Limited Edition V8
Bought Bone Stock with 125K

Plans:

Originally I bought this 4runner to replace my 2012 AEV JK350 as a cheaper alternative to an offroad vehicle. The only thing cheaper though was the price. The vehicle is fantastic in every way: quite, powerful, luxurious, and a great DD and weekend warrior. I had planned to sell the 4runner and move into a 5th gen but I have put that on hold for awhile and decided to built it up instead. Below is a list of the completed mods, planned mods, and future ideas.

Maintenance
Rear Diff Mobil 1 Synthetic
Transfer Case Mobil 1 Synthetic
Front Diff Mobil 1 Synthetic
Transmission Flush
Mobil 1 Synthetic Motor Oil
Front Calipers, Rotors, Pads
Rear Rotors, Pads
Spark Plugs Replaced OEM Original

Completed Mods:

LED Tail Lights
PFRAN Interior LED Kit
HydroCarbon Filter Delete
AFE Pro Dry S Filter
Weathertech Floor Mats 1st & 2nd Row
Fumoto Qwik Valve
Upgraded Hi/Low Beam Bulbs
Canine Cover for Rear Seat
National Luna Dual Battery Setup
Odyssey PC1500 Main Battery
Odyseey PC 1400 Secondary Battery
Dirty Parts Dual Battery Tray
Blue Sea Fuse Block Install in Rear Cargo Area
Blue Sea Dual USB Outlet's (1 in Front, 1 in Rear Cargo
Quickfist Flashlight Mounting

Audio Upgrades

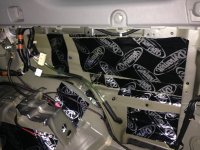
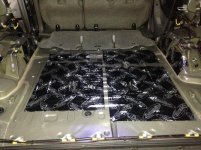
Dynamat Rear Cargo Area
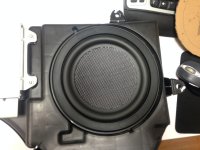
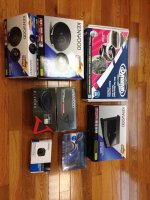
Kenwood KFC-XW800 Subwoofer
Kenwood KFC 1695 6.5" Rear Doors
Kenwood KFC 6995 6"x9" Front Doors
Kenwood KAC-7005PS 5 Channel Amp
Clarion CC510 Rear View Camera
Head Unit? Haven't decided yet
Metra ASWC-1 Steering Wheel Control Interface
KnuKoncept Wiring, RCA Cables, Power Cable
 

Attachments
  • IMG_2437.jpg
    IMG_2437.jpg
    136.4 KB · Views: 1,126
  • IMG_2443.jpg
    IMG_2443.jpg
    135.9 KB · Views: 1,104
  • IMG_2444.jpg
    IMG_2444.jpg
    136.9 KB · Views: 1,132
Last edited:
Register to hide this ad
Some of the items I completed myself and some I had the dealer do as it was peace of mind for me. They changed the spark plugs and did the transmission flush. The diffs I was able to do with the help of my brother on his lift (more on this later).

The first changes I made were to the Air Box: the hydrocarbon filter removal and the AFE Pro Dry S installed. This is super easy, I didn't take photos or anything just dropped it in.

The Weathertech floor mats went in on Day 5. I love these as they protect the carpet and are an excellent fit. The Rear canine cover I brought from a forum member here and it does a great job if you have a dog. I think this is one of the most underrated mods to do. It contours to the rear seat like a glove and provides additional padding and support. Captures all the hair and dirt and looks good too. Love this mod.

The rear diff and transfer case were super easy. I got new washers from the dealership but I probably could have used the old ones as they didn't look too bad. Some people say to flip it around some say it needs to be changed. I am a preventative guy so I just swapped em out. The front diff was a nightmare. I couldnt get to it on the ground so I waited until I went to my brothers shop. Once on the lift we found the drain plug to be seized. PB blaster and an impact wouldn't work. Thank god he's a mechanic and a good one too. An Air chisel right on the edge was the trick. Its a little scary though b/c you need to be spot on with your placement of the chisel. It basically bites into the bolt edge and then shock loads it like an impact. F*&king awesome watching him work I forgot to get pics.

Anyways onward to the better stuff.
 
Dual Battery Setup.

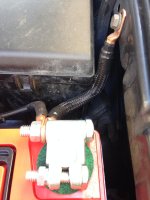
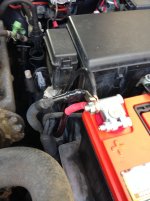
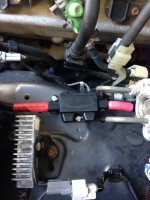
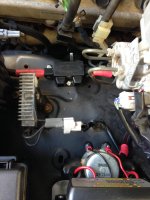
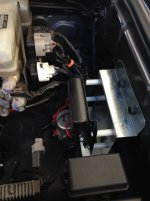
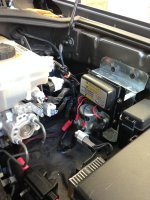
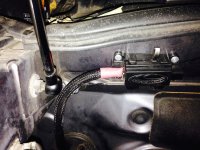
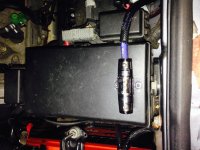
This was the first mod I did myself that was a bit of a project. I spent about a week figuring out where to mount the solenoid that comes with the Kit. I knew the 2nd battery was going to go in the rear passenger side with the Dirty Parts dual Battery Tray. I put the solenoid on the driver side fender where existing threaded holes are present to prevent having to drill new holes. All the wiring was ran in Techflex sleeving for protection (I hate using split loom as it gunks up over time and gets nasty) with Ancor Marine Grade Electrical Adhesive Lined Shrink Tube colored red to denote the hot side of the system.

Parts List

National Luna Dual Battery Kit
Techflex sleeving 3/8's
Ancor Marine Grade Electrical Adhesive
Noco Marine Grade Lead Free Zinc Battery Terminals
Pico Terminal Ends 3/8" & 1/4"
2 M8 x 1.25 SS Bolts 10MM
1 M8 x 1.25 SS Bolt 18MM Long
Zinc Coated 16 Gauge Bracket

I started by making a template out of cardboard for the bracket where I wanted to mount the solenoid. Once I had that I was able to take it to my sheetmetal guy and get it made out of 16 gauge zinc coated aluminum. This is plenty strong and lighter than 1/8 steel which is overkill for this application. Plus it will never rust, does not need to be painted, will never chip. It's an easy maintenance free item that anyone can make, I just happen to use the sheetmetal guy b/c he was making other items for me for our company. Saved me an hour worth of work.

Once it was completed I drilled the holes to mount the solenoid. I spaced it off the bracket so it would clear the hood strut on the way down using plastic 1" spacers, SS screws, and nylock nuts.

The bracket mounts to existing threaded holes using the ss bolts listed above. the longer one is for the bottom hole b/c my bracket was about a 1/4" short of touching the bottom part of the fender. If you stick it right on the fender then you need 3 of the 10mm ones.

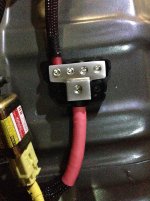
The national luna fuse between the starting battery and the solenoid is also mounted to existing threaded holes that are M6x1.0 10mm screws. I had to drill out the holes in the national luna bracket to fit that screw but they threaded holes in the fender are spaced perfectly for the bracket. It fits like a glove.
 

Attachments

  • IMG_2376.jpg
    IMG_2376.jpg
    132.6 KB · Views: 1,094
  • IMG_2401.jpg
    IMG_2401.jpg
    130.1 KB · Views: 1,071
  • IMG_2402.jpg
    IMG_2402.jpg
    135.3 KB · Views: 1,074
  • IMG_2403.jpg
    IMG_2403.jpg
    126.3 KB · Views: 1,079
  • IMG_2404.jpg
    IMG_2404.jpg
    130.6 KB · Views: 1,087
more pics of Dual Battery Setup

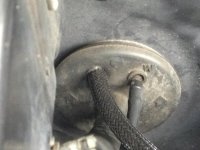
The wiring leaves the solenoid and runs along the firewall towards the passenger side. The only hole I had to drill was for the 2nd fuse that goes right before the 2nd battery.

I"m just waiting on the Dirty Parts tray to come in before I can install the 2nd battery and run the negative cable back to the starting battery. Then I'll install the controller in the glove box on a bracket and the system will be complete.
 

Attachments

  • IMG_2405.jpg
    IMG_2405.jpg
    129.2 KB · Views: 1,050
  • IMG_2406.jpg
    IMG_2406.jpg
    114.4 KB · Views: 1,072
  • IMG_2407.jpg
    IMG_2407.jpg
    131.7 KB · Views: 1,049
  • IMG_2977.jpg
    IMG_2977.jpg
    138 KB · Views: 1,037
  • IMG_2979.jpg
    IMG_2979.jpg
    131.8 KB · Views: 1,045
Currently I'm in the process of finishing up my Auxiliary fuse block in the rear compartment, Blue Sea Dual USB Outlets, and my power distribution block (more on this later).

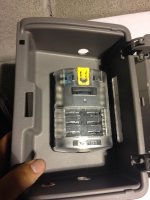
Once I had the dual battery system in place and pretty much complete I started figuring out where to add my auxiliary fuse block. The stock 12 volt outlets in our 4th gens does not put out enough juice to charge the iphone while using so I decided to add the Blue Sea 2.1 amp usb outlets. I placed the fuse block in the rear cargo area in the small receptacle on the passenger side. this way it would be easy to access while still hidden from view and not in the way.

Parts List

National Luna Fuse Holder & 100 amp fuse
KnuKoncepts 4 guage power cable
NVX XDBU4 Power distribution Block
Blue Sea 5025 6 Circuit Fuse Block
2 Blue Sea 2.1 Amp Dual USB outlet
Techflex Sleeving 3/8"s
Pico Terminal Ends

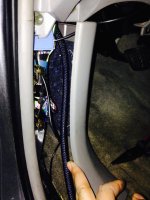
I ran a 4 gauge power wire through the passenger side grommet, through the door sill chase, back to the rear cargo area. It goes to a NVX distribution block. Then a 4 gauge power wire runs to the fuse block. I plan on running my USB outlets, ARB fridge, Baja Designs rear floods and my CB off of this fuse block. Its more than adequate and and sized so that if plans change I can run whatever without having to run new power wire.

The secondary part of this install will be my ARB twin compressor. I used 4 gauge with a distribution block for this reason as I can run my 8 gauge wire into the block without having to run the ARB power source all the way to the front. This is not yet installed as I'm currently working on my audio setup. Everything in the rear is interconnected (fuse block install, rear arb setup, fridge, audio upgrades) so they all kind of meld into 1 big project.

on to pics
 

Attachments

  • IMG_2483.jpg
    IMG_2483.jpg
    128.1 KB · Views: 1,073
  • IMG_2981.jpg
    IMG_2981.jpg
    137.2 KB · Views: 1,054
  • IMG_2906.jpg
    IMG_2906.jpg
    132.4 KB · Views: 1,058
  • IMG_2431.jpg
    IMG_2431.jpg
    127.9 KB · Views: 1,051
In the compartment where I mounted the fuse block I drilled 1 hole in each end for my 4 gauge power and ground to run through. I cut out a rectangle along the back side to allow for the power and ground wires to come through for each circuit.

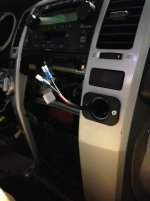
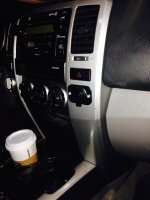
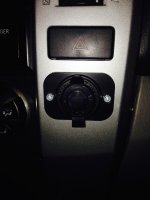
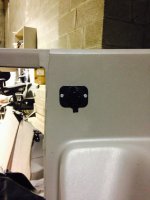
the usb outlets were wired using 16 gauge wire run in techflex sleeving for protection. The front outlet is placed right below the hazard button and the rear is placed on the driver side rear panel above the wheelwell. This way i can charge items and place them in the driver side rear compartment while driving or while parked. Currently the rear driver side panel is out of the car for stereo install purposes but you can see the placement of the outlet.

This was pretty simple to install. I ran the wires for the front while doing the power wire. The front is a bit tricky b/c there is bracing in this area. I didnt know this when I first drilled it out so I had to dremel away some material on the inside brace to get the lock collar for the outlet to tighten down enough. If I had moved it over 1/4" this wouldn't have happened but then you wouldn't have it centered which is what I wanted. The rear outlet power and ground run along the chase that is below the trim piece by the rear hatch. really simple to pop it up and zip tie the wires to the existing.
 

Attachments

  • IMG_2326.jpg
    IMG_2326.jpg
    128.1 KB · Views: 1,047
  • IMG_2328.jpg
    IMG_2328.jpg
    118.7 KB · Views: 1,035
  • IMG_2984.jpg
    IMG_2984.jpg
    122.5 KB · Views: 1,043
  • IMG_2985.jpg
    IMG_2985.jpg
    139.3 KB · Views: 1,029
  • IMG_2986.jpg
    IMG_2986.jpg
    134.6 KB · Views: 1,028
Rear fuse block setup and wiring

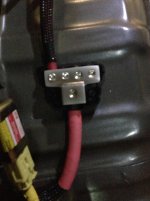
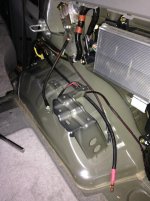
The entire rear fuse block is run off a 4 gauge power wire from the second battery. It runs into a distribution block and then onto the fuse block. The distribution block accepts 1/4 gauge input and has Four 4/8 gauge outputs. This will work perfectly for my compressor and fuse block that will tied together through the distribution block.

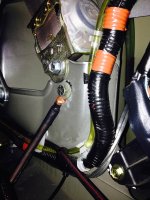
The ground for the fuse block runs through a 4 gauge wire and goes to an empty bolt hole on the passenger side compartment. I ran a 5/16th bolt through the hole after scraping the paint off and it is a perfect spot out of the way.

the 2 sets of wires coming into the rear are for the blue sea outlets, 1 in the front and 1 in the rear compartment.
Pics.
 

Attachments

  • IMG_2907.jpg
    IMG_2907.jpg
    136.1 KB · Views: 940
  • IMG_2592.jpg
    IMG_2592.jpg
    131.3 KB · Views: 926
  • IMG_3038.jpg
    IMG_3038.jpg
    136.9 KB · Views: 928
Complete Audio Overhaul.

Living in NYC bluetooth is essential as is navigation for my work (client and architect meetings all over the 5 boroughs). I read tons of threads and info regarding the factory sound system and i decided that to get the results I needed/wanted I had to bypass the entire setup and run a complete new system. This is not as daunting as it looks/seems. I've never had any experience with sound systems but I read a ton and started slowly.

Parts List

Kenwood KAC 5 channel amp. (I wanted the x900.5 but was too expensive)
Kenwood 6 1/2 rear speakers
Kenwood 6x9 front speakers
Kenwood KFC 8" sub (drops right in)
Clarion 510 rearview camera
TacoTunes Front adapter plates
Metra ASWC-1 steering wheel control harness
Dynamat Bulk Pack
Knukoncept 4 gauge power wire
Knukoncept 12 gauge speaker wire
Knukoncept RCA cables

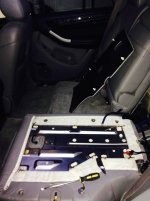
I decided on mounting my new amp to the rear 40 section seat back. I planned on mounting my fridge there and it would nicely protect the amp once bolted in place and keep hidden from view. Running the wiring is the most involved aspect of the install as I wanted clean lines and routing of the cables. I also had to remove the doors to dynamat them so it wasn't that much more work to run new speaker wire.

I didn't post info on how to remove interior panels, plenty of info on that already. This is a great link to remove rear door panels:

Couple quick tips:
1. run your longest speaker wiring first (save you headache with small sections that are no good later
2. remove the rear seats. Easy to do for the seat bottom part. On the seat back start with the driver side first, easier to get that bolt out. Be careful as there are lock washers that go with the bolt and washer as well. Do not lose those, make sure they go back in from the outside part of the bracket when putting the bolt back through.
3. remove the carpet at the rear all the way to the back of the front seats. The black plastic tabs are easily release by pulling towards the center of the vehicle and then pushing the white tab in with a screwdriver.
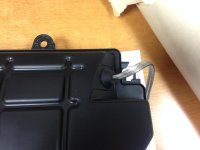
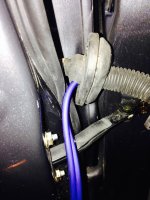
5. Run new wiring for sub through grommet in sub box. Push the grommet into the box instead of trying to pry it out, much easier to get it removed as its larger on the inside than the outside.
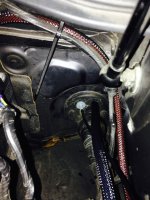
6. Run your power wire through the passenger side engine grommet if you can. Easier to work with. Snip off the nipple and then stick a long allen wrench or screwdriver into the hole. Pull back at an angle. You need to pull the inner part out (like reversing a sock) as the opening gets smaller on the inside of the grommet than it is on the outside. This is only necessary if you are running 4 gauge or larger cable.


On to pics.
 

Attachments

  • IMG_2899.jpg
    IMG_2899.jpg
    135.4 KB · Views: 914
  • IMG_2903.jpg
    IMG_2903.jpg
    133.8 KB · Views: 917
  • IMG_2953.jpg
    IMG_2953.jpg
    133.2 KB · Views: 908
  • IMG_2945.jpg
    IMG_2945.jpg
    137.4 KB · Views: 905
  • IMG_2949.jpg
    IMG_2949.jpg
    127.9 KB · Views: 919
  • IMG_2952.jpg
    IMG_2952.jpg
    123.8 KB · Views: 956
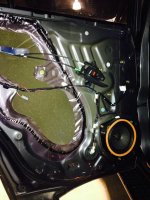
The Bulk dynamat package got me the rear trunk hatch, rear floor and subwoofer area, rear sides and beneath the rear seats, rear doors and front doors. I did not go overboard and stick on every sq. inch of surface area. 30-40% is all you really need and this is not a competition system. On the rear doors I cut the plastic back, cleaned the outer door skin and concentrated there most. The interior door skin I just did the areas above the speaker. I could have made new plates to cover the large opening but I decided against it. It would have taken quite a bit of work to remove the sealant holding the plastic on, measuring and making new patch panels and then installing them for the benefit IMO.

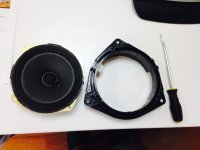
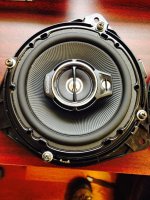
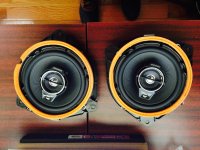
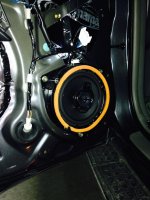
The rear door speakers I was able to reuse the brackets. CAREFULLY pry off the orange trim ring. You will reuse this later. Carefully separate the speaker from the bracket and then mount your new speaker. The holes almost lined up perfectly but I used washers to ensure good connection between the new speaker mounting ears and the screws.

I gorilla glued the orange trim rings to the new speaker and reinstalled in the door.

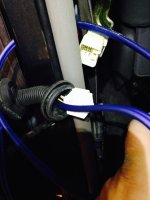
Running the new speaker wire through the door can be done like this link on TacoTunes

Unclip the connector that is inside the door and pull the grommet out towards you. Very easy to then run the speaker wire through the door and then through the grommet.
 

Attachments

  • IMG_2988.jpg
    IMG_2988.jpg
    134.5 KB · Views: 936
  • IMG_2994.jpg
    IMG_2994.jpg
    115 KB · Views: 938
  • IMG_2995.jpg
    IMG_2995.jpg
    138.4 KB · Views: 909
  • IMG_2999.jpg
    IMG_2999.jpg
    125.9 KB · Views: 937
  • IMG_3001.jpg
    IMG_3001.jpg
    131.4 KB · Views: 909
  • IMG_3017.jpg
    IMG_3017.jpg
    136.3 KB · Views: 929
  • IMG_3018.jpg
    IMG_3018.jpg
    130.5 KB · Views: 909
Wow man its a really well documented build.

I've been debating about a dual battery setup but I have so many things on my "to do to the 4runner" list that I can't commit to it just yet.
 
Thanks for the compliments. Dual battery setup is one of my favorite mods to do in all my vehicles. I plan on running a fridge in the rear so I definitely wanted a secondary battery to power that while camping.

I finally got an update on my battery tray from DirtyDog, should be here by the end of the week. Then I'll finally be able to install the 2nd battery and have functioning outlets in my 4runner.
 
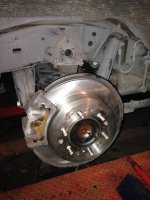
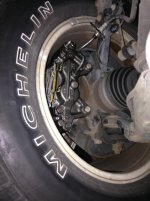
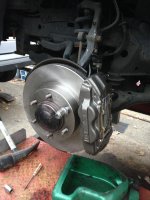
Got around to fixing the annoying squeal from the front driver side brakes. Decided to replace the entire system with new calipers, rotors, pads in the front and new rotors and pads in the rear.

Had my brother (mechanic) pick up all the parts from his store. I did not use OEM original equipment for this, I though about it but decided to save a few dollars and he assured me that the aftermarket was quite reliable in terms of brake pads, calipers, and rotors.

This was the first real maintenance project I did myself. Was nice throwing it up on the lift and having him walk me through/instruct me on how the system was designed and the steps required to do a complete brake overhaul. Amazing the little details that make a big difference (like anti seize on bolts and on hub faces to prevent wheels from sticking and make future disassemble easier). To get the wheels off I had to whack the crap out of them with a dead blow hammer.

Brakes feel much much better. Originals were changed at 70K so it was time to get them done again at 140K. All in took about 3 hours and that included down time for brews and setting the car up on the lift. 1-2 hours is more like it with a good mechanic.

anyway on to pics
 

Attachments

  • IMG_2774.jpg
    IMG_2774.jpg
    130.5 KB · Views: 832
  • IMG_2786.jpg
    IMG_2786.jpg
    132.4 KB · Views: 815
  • IMG_2791.jpg
    IMG_2791.jpg
    133 KB · Views: 799
  • IMG_2793.jpg
    IMG_2793.jpg
    124.1 KB · Views: 823
Audio Overhaul continued

So I ran my power wire down through the drivers side grommet as I already have a 4 gauge power wire running through the passenger side for my rear fuse block, fridge, and compressor. Getting the 4 gauge through this grommet was a bit trickier than the passenger side due to space constraints.

The fuse for the amp is a waterproof one from knukoncepts. I mounted it on top of my fuse box. The wiring is easily run through the chase to the rear. My RCA cables ran through the center console underneath the carpet to the rear. This was a bit difficult but not that bad. I mounted my amp on the rear passenger 40 section seat back. The panel pops off and you can see the seat back has metal sections for sheet metal screws. The amp is secure and tight.
 

Attachments

  • IMG_2961.jpg
    IMG_2961.jpg
    129.7 KB · Views: 754
  • IMG_2964.jpg
    IMG_2964.jpg
    129.7 KB · Views: 781
  • IMG_2975.jpg
    IMG_2975.jpg
    136.1 KB · Views: 743
  • IMG_3020.jpg
    IMG_3020.jpg
    126.4 KB · Views: 764
Dirty Parts Dual Battery Tray

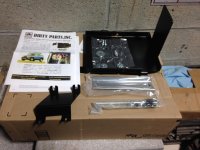
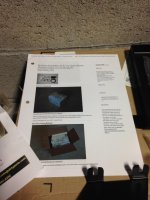
Finally got my Dirty Parts Dual Battery Tray in for 03-09 4runners. It is incredible well made and fits like a glove. For instructions I found someone who did the install online and printed out their directions to go along with the ones that come with the kit.

Couple of quick notes

The tray fits up to a group 34/78 battery. Originally I was going to install a Odyssey PC1500 in that spot but once installed I could not close the hood without the hood strut contacting the battery. I could have moved the tray over another 3/4" but then it was dangerously close to the AC hard lines and the dipstick for the oil. If you do move it over you can screw down the front mounting tab to the bolt that holds the stock air box assembly. Using that bolt will get you a bit more clearance than the stock M6 threaded hole that the kit calls for.

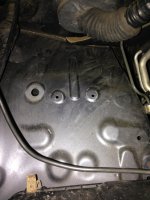
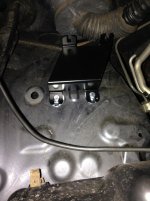
Install is super easy, you have to drill 3 holes total and then use the M6 threaded hole that is there from the factory. Once its all installed dropping the battery in becomes a breeze. I did not remove the air box or anything. Now I just have to go buy my battery and put it in. I believe an Odyssey PC1400 will fit just fine as would optima's
 

Attachments

  • IMG_3078.jpg
    IMG_3078.jpg
    126.3 KB · Views: 709
  • IMG_3080.jpg
    IMG_3080.jpg
    129.3 KB · Views: 716
  • IMG_3081.jpg
    IMG_3081.jpg
    135.3 KB · Views: 668
  • IMG_3082.jpg
    IMG_3082.jpg
    128.6 KB · Views: 701
Last edited:
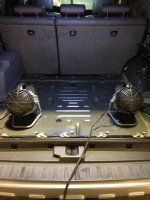
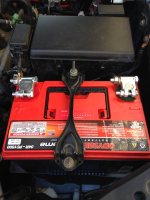
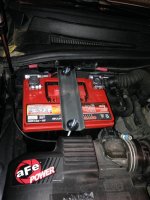
Dual battery tray mounted. Odyssey pc1400 fit perfectly. Taller than a 1500 but but not as wide. Allows clearance for hood and hood strut.
 

Attachments

  • image.jpg
    image.jpg
    133.5 KB · Views: 404
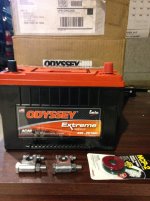
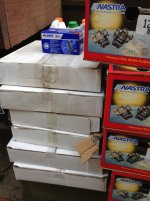
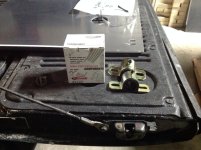
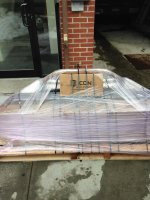
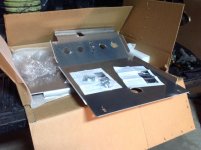
This showed up last week. :dancin::dancin::party:Big thanks to Demello offroad. Exceptionally well packaged
 

Attachments

  • image.jpg
    image.jpg
    134.8 KB · Views: 404
Finally got around to installing my RCI skid plates that have been sitting in my warehouse for the past 2 months. I got the aluminum versions to save weight and not deal with rust issues going forward.

Front skid and transmission skid went together super smooth. No issues at all. Still have to put the transfer case skid in
 

Attachments

  • image.jpg
    image.jpg
    130.9 KB · Views: 352
Also went ahead and did some maintenance while the skids were going in. Oil change, greased zerks, and instLled new front swaybar bushings. Went with grease-able ones from prothane. V8 front takes a 29mm version of the bushing.
 

Attachments

  • image.jpg
    image.jpg
    136.4 KB · Views: 352
thought about flipping the second battery around? i never like the idea of the positive side being so close to the body.
 

Members online

Forum statistics

Threads
278,316
Messages
3,554,120
Members
248,016
Latest member
Advally Service

Trending content

Back
Top